4
En
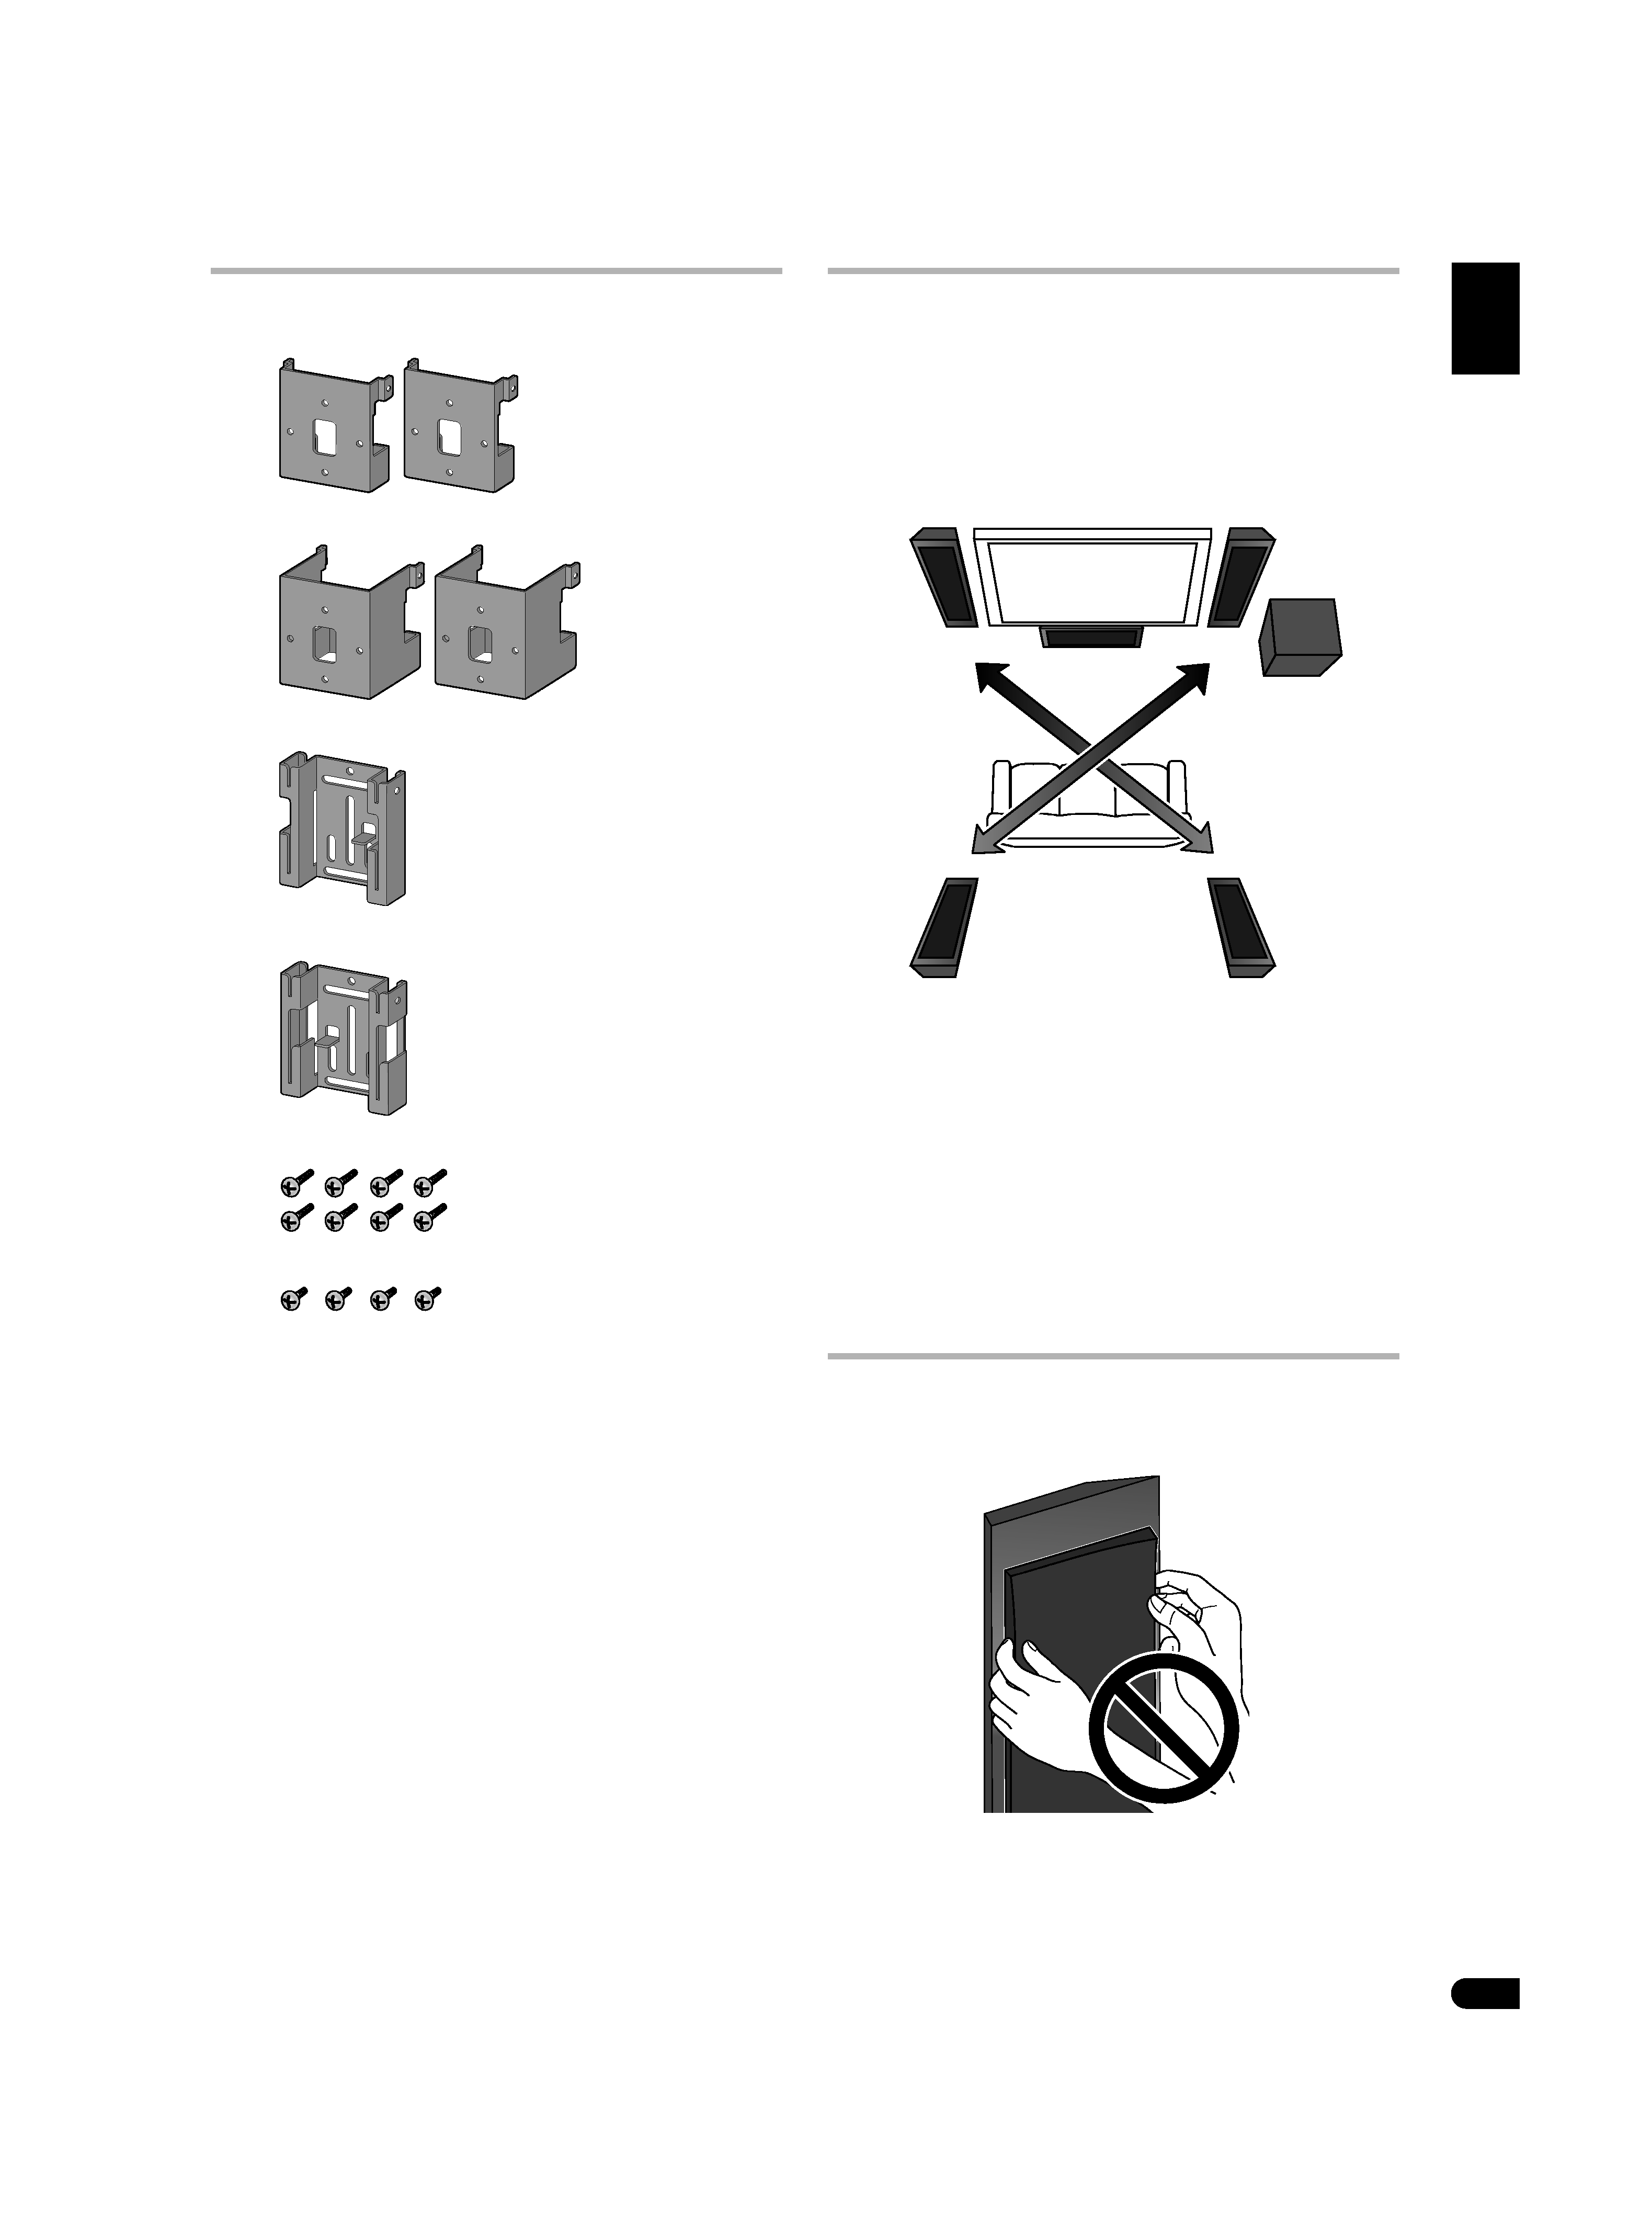
Installing the speakers
This speaker system cannot be placed directly on the surface of
floors or shelves. Always attach to a wall using the supplied
brackets, or use speaker stand CP-LX70 (floor stand) (sold
separately) or CP-LX70TS (tabletop stand) (sold separately) when
placing on the surface of floors or shelves.
· This speaker system is magnetically shielded. However,
depending on the installation location, color distortion may
occur if the speaker system is installed extremely close to the
screen of a television set. If this happens, turn the power switch
of the television set OFF, and turn it ON after 15 to 30 minutes.
If the problem persists, place the speaker system away from the
television set.
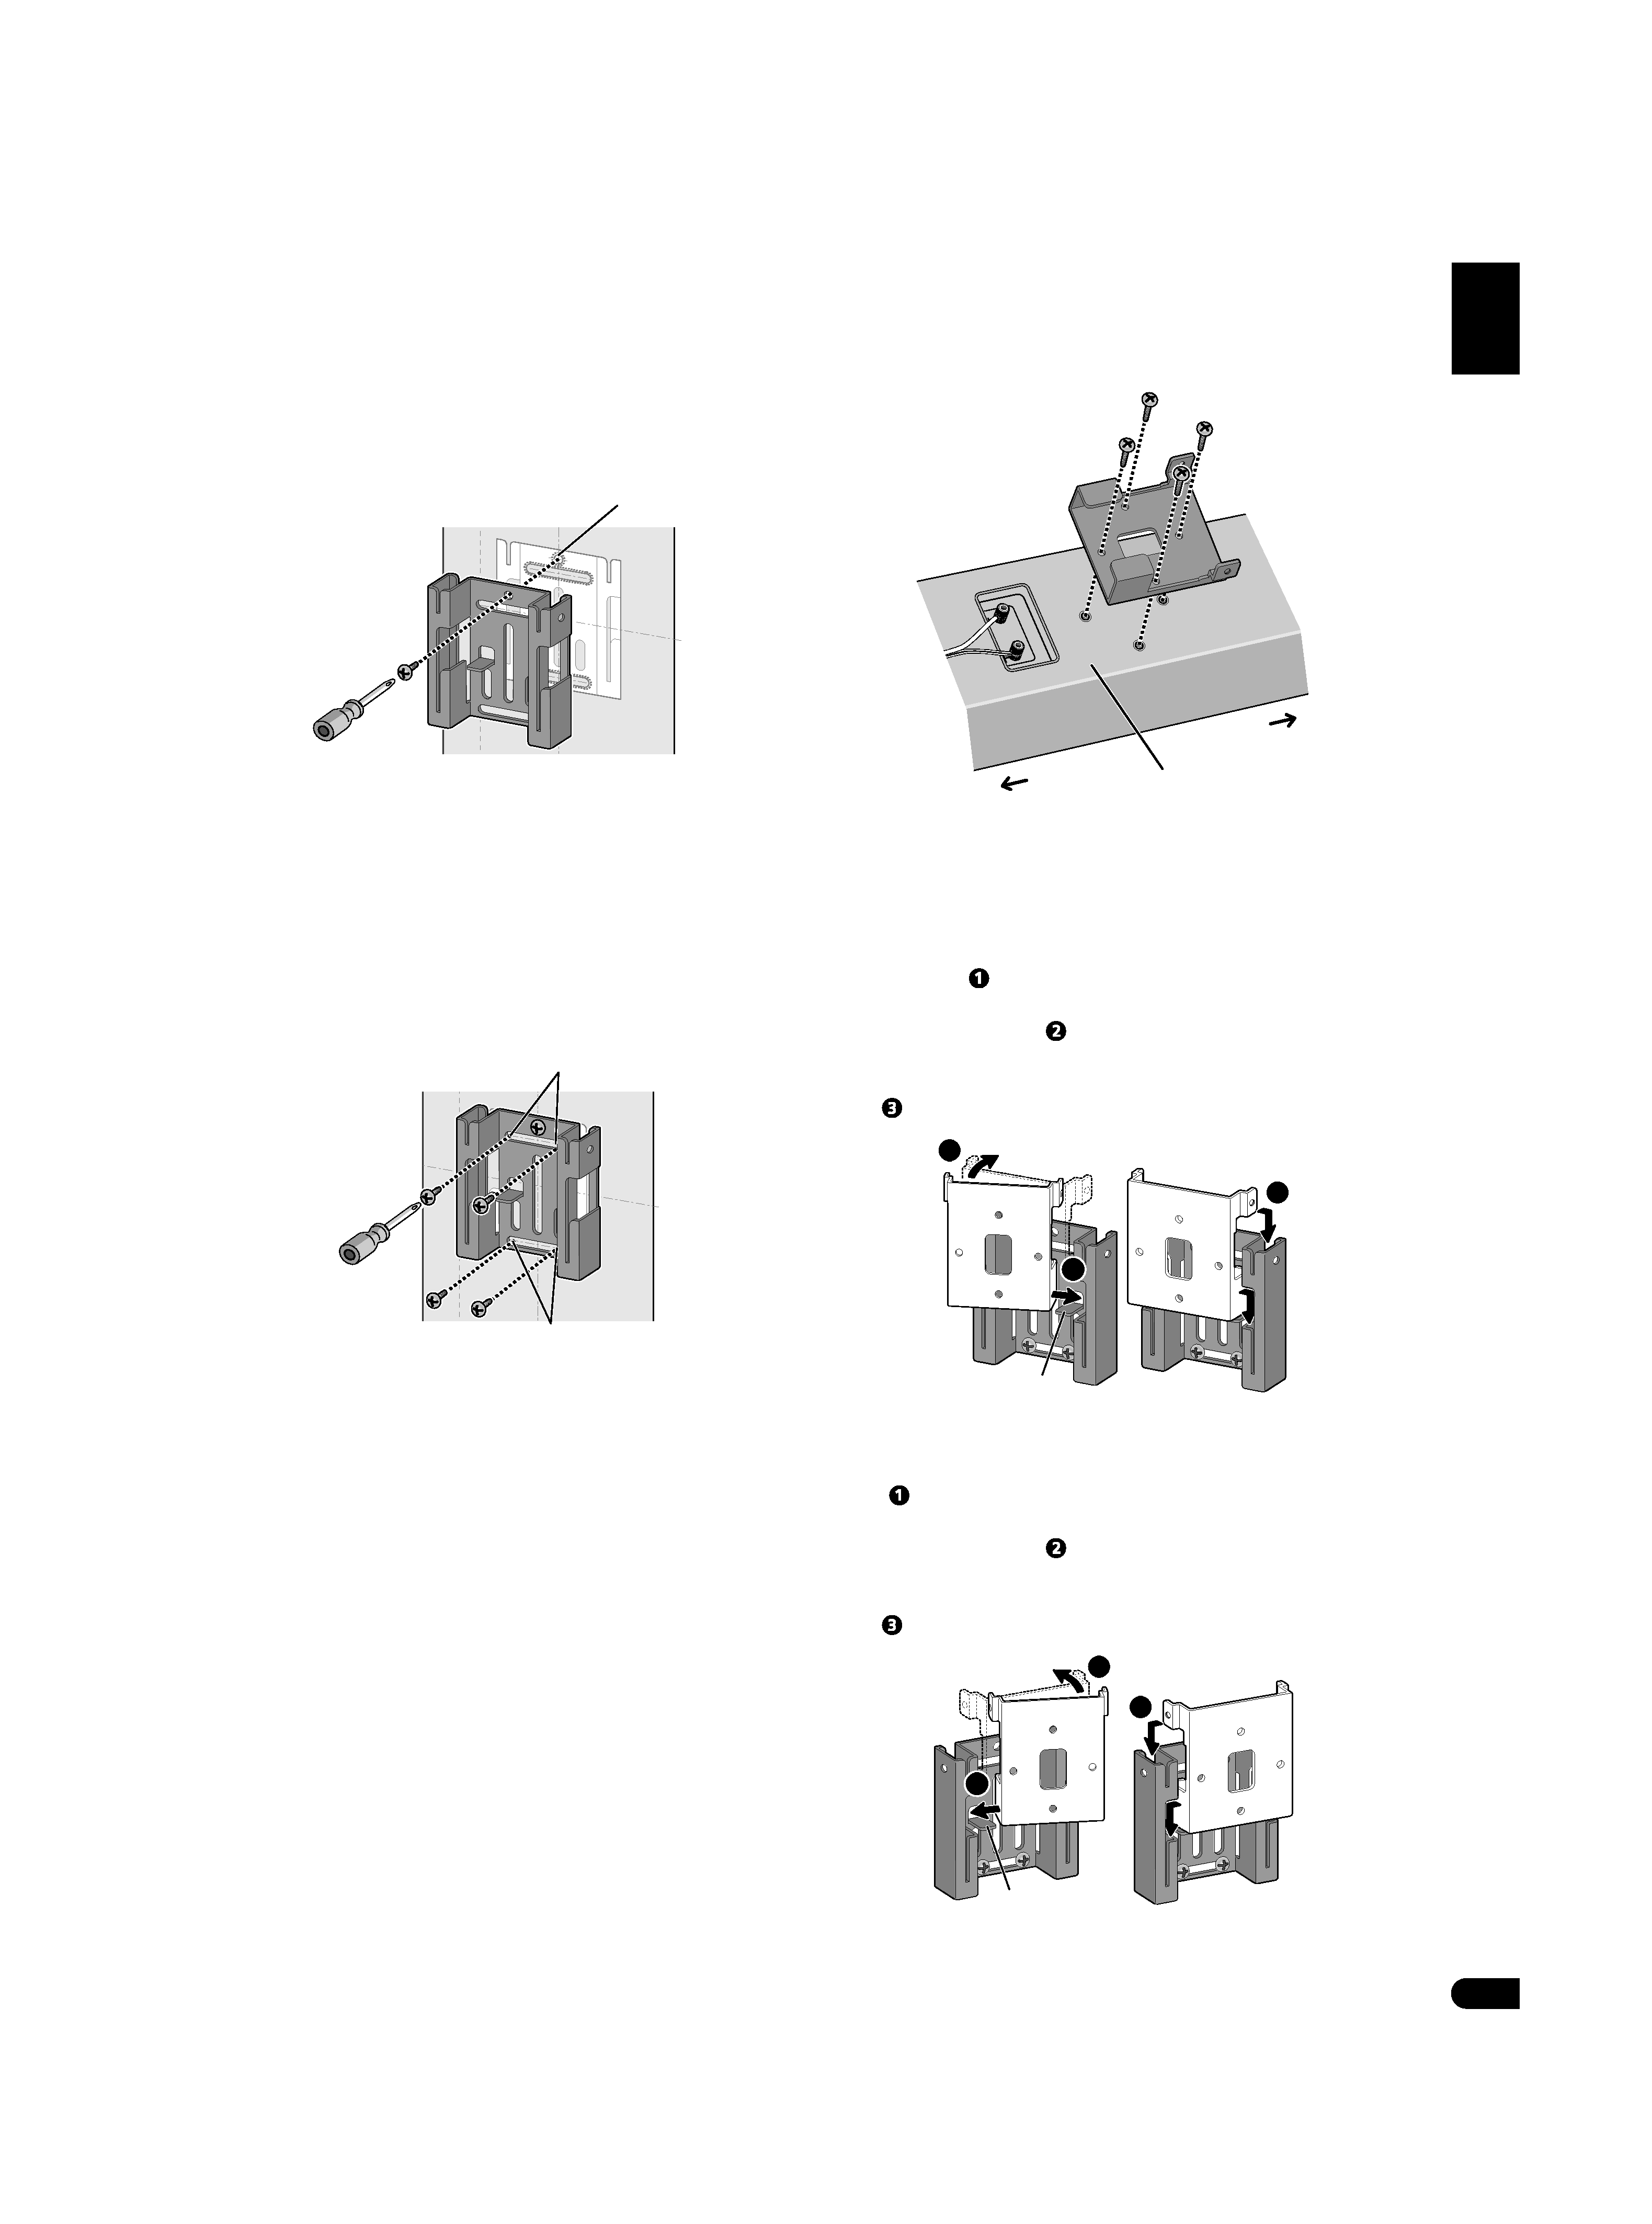
Mounting on walls
Once decided on the location of installation (such as the wall space
to the left and right of the TV), attach the speakers following the next
procedures.
Two types of brackets (for speakers) are supplied. When using
alongside with a Pioneer plasma display, use the L-type brackets.
When attaching flush against the wall, use the S-type brackets.
The left and right wall brackets are shaped differently. Be sure to
install the correct bracket on each side.
1
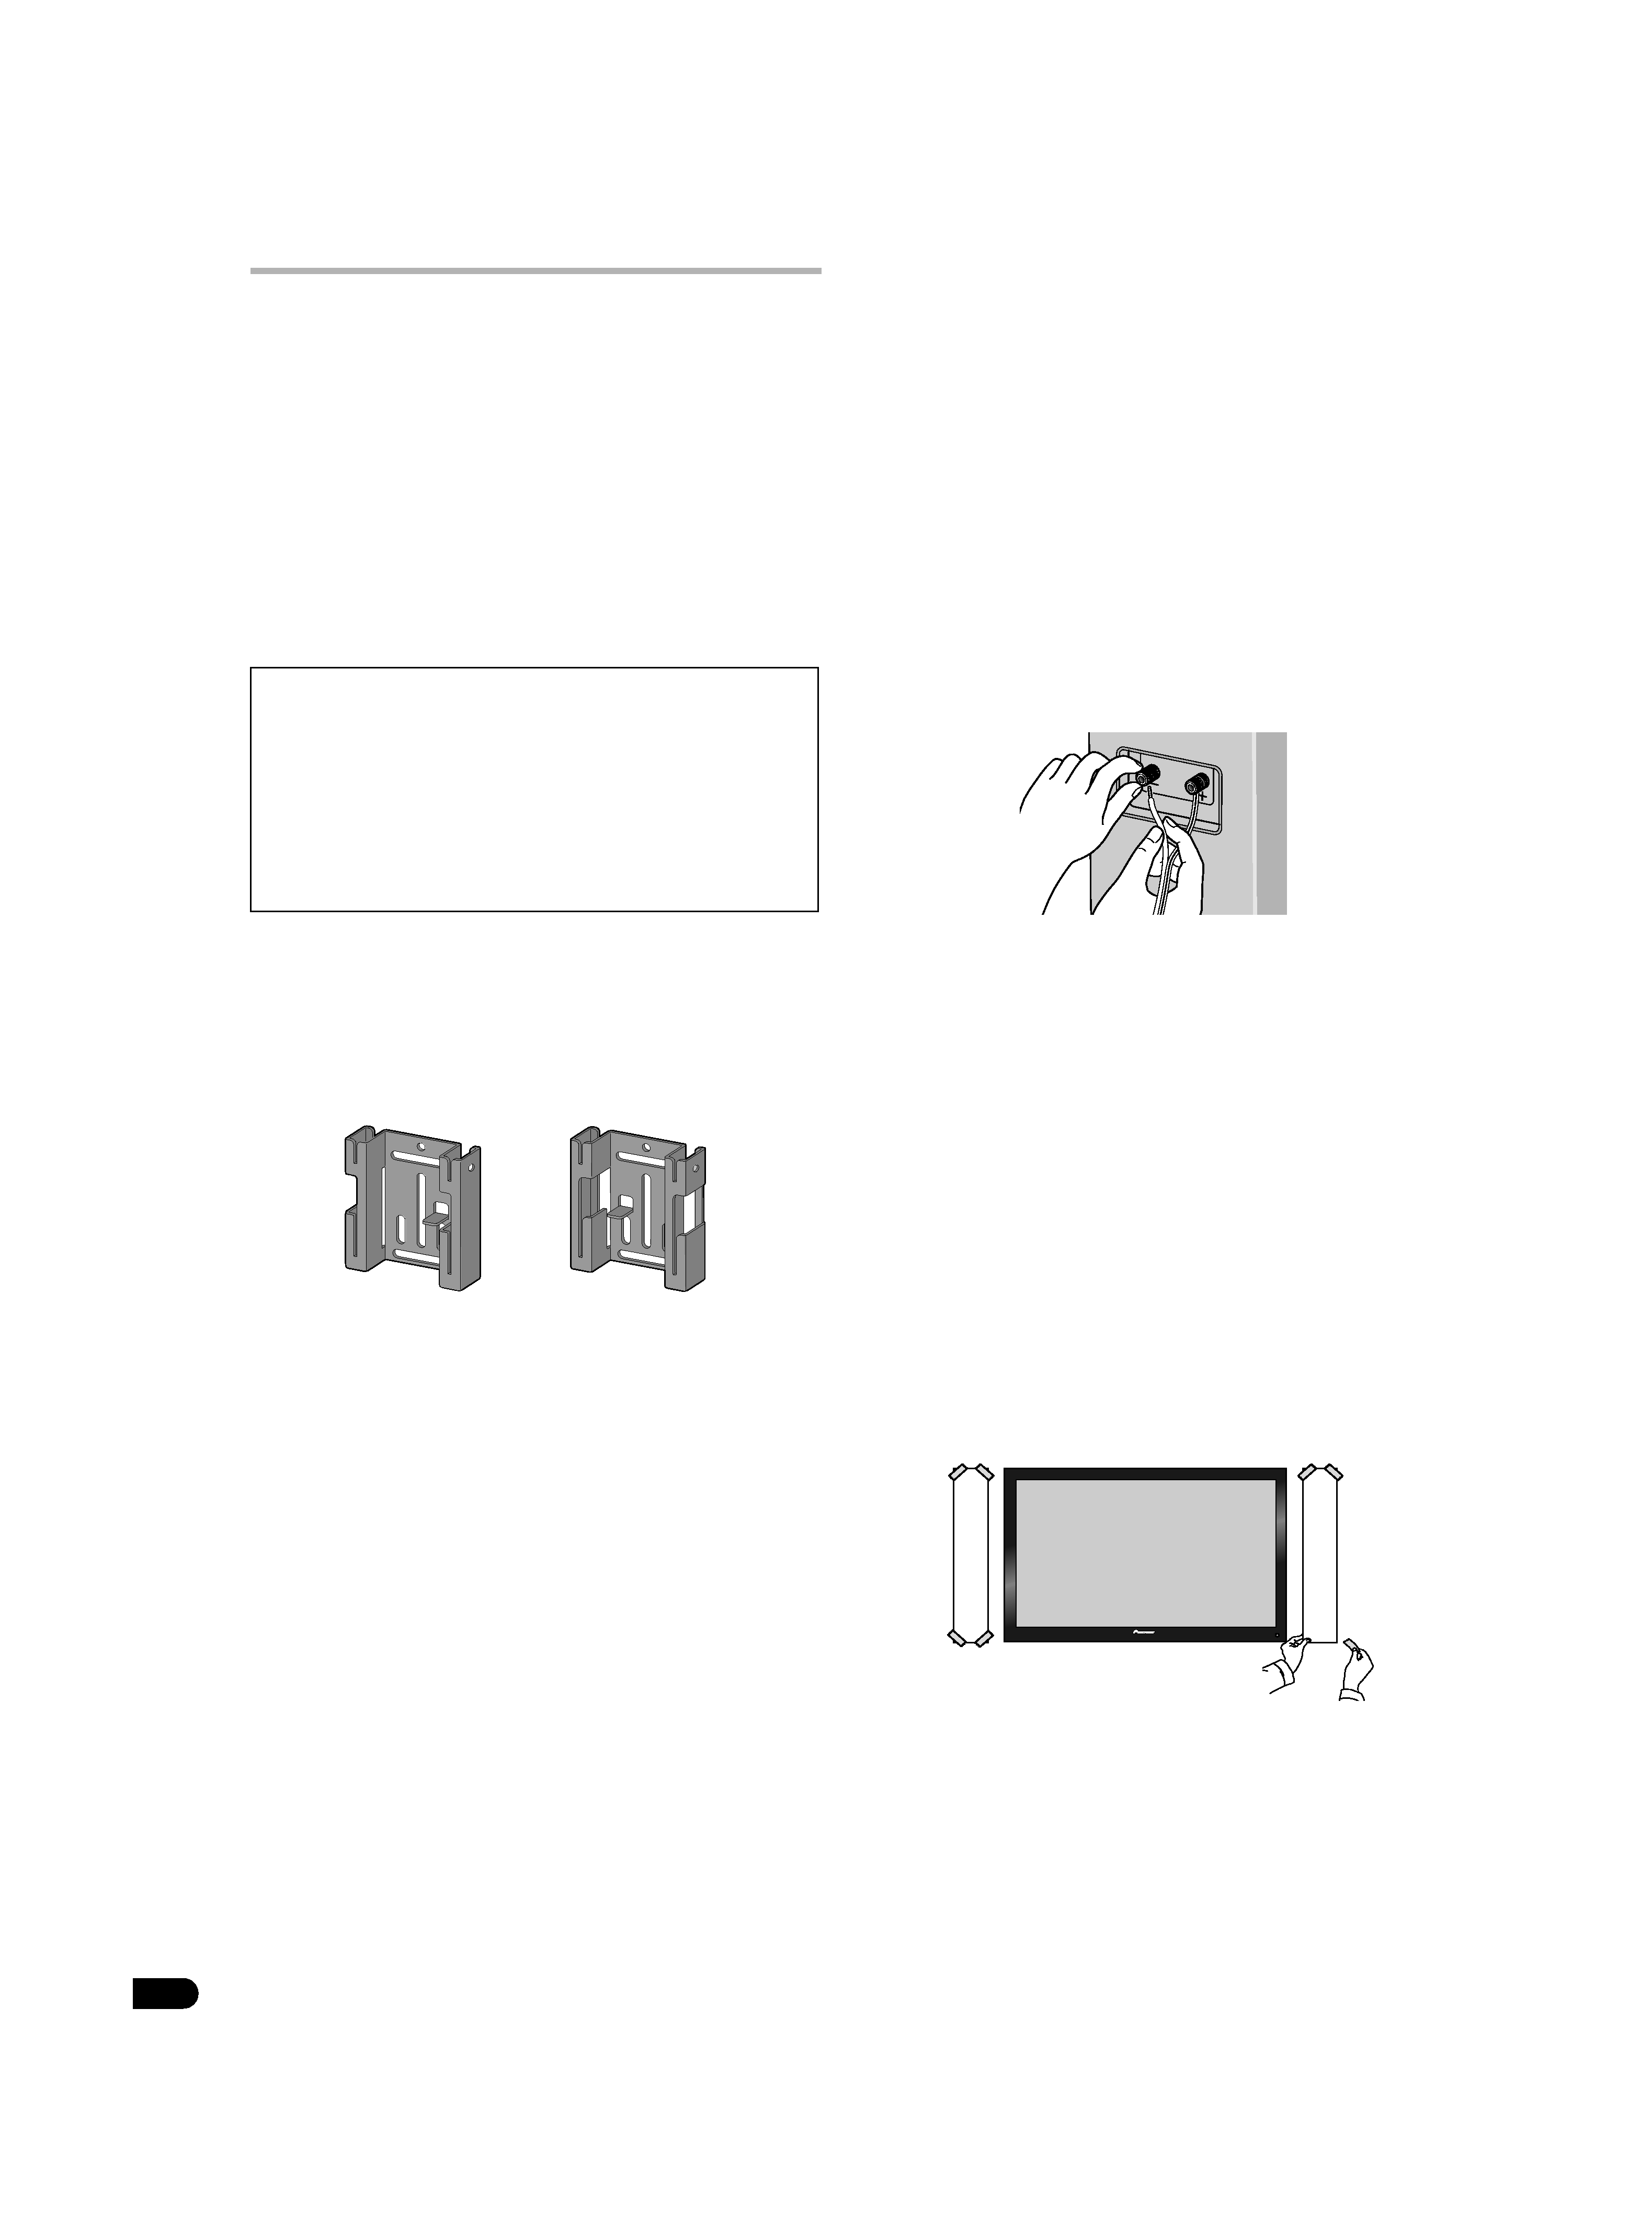
Connect speaker cables.
· Speaker cables are not included with this speaker system.
This speaker does not include speaker cables used for connecting
to an amplifier. Take the following factors into consideration when
choosing speaker cables so that you can get the most from your
speaker system:
· Use heavy-gauge speaker cable if possible, and keep the cables
to the minimum necessary length.
· If the length of cable required for left and right speakers differs,
use cables of the same length, matched to the longer distance.
· Cables have differing characteristics. Keep this in mind when
using any cable.
· Connections at speaker and amplifier terminals should be
made as tight and secure as possible to help reduce contact
resistance.
When mounting the speakers onto walls using the brackets,
connect the speaker cables before attaching speakers onto the
brackets.
· If the cables' wires happen to be pushed out of the terminals,
allowing the wires to come into contact with each other, it
places an excessive additional load on the amp. This may cause
the amp to stop functioning, and may even damage the amp.
· After connecting the plugs, pull lightly on the cables to make
sure that the ends of the cables are securely connected to the
terminals. Poor connections can create noise and interruptions
in the sound.
· When using a set of speakers connected to an amplifier, you
won't be able to obtain the normal stereo effect if the polarity
(
+ , ) of one of the speakers (left or right) is reversed.
2
Paste the supplied wall mounting template on the area of
installation.
· The left and right wall mounting templates are shaped
differently.
Attach the template level to the ground using an adhesive such as
tape. Make sure the template is straight to avoid mounting the
speaker crookedly. Pasting the template too close to the TV may
cause the TV to get in the way of the speaker when installing. Make
sure the template and TV do not overlap.
· Make sure that the wall you intend to mount the speakers on
is strong enough to support them.
· Remember that the speaker system is heavy. Improper
installation of the speakers could cause them to fall and
cause damage or injuries to persons nearby.
· Mounting screws are not supplied. Use screws suitable for
the wall material and support the weight of the speaker.
If you are unsure of the qualities and strength of the walls,
consult a professional for advice.
Bracket (for wall/Left)
Bracket (for wall/Right)
Template (Left)
Template (Right)
S_LX70-LR_En.book 4