4
English
CABINET MAINTENANCE
÷ Use a polishing cloth or dry cloth to wipe off dust and
dirt.
÷ When the cabinet is very dirty, wipe with a soft cloth
moistened with water-diluted cleanser; then wipe again
with a dry cloth. Do not use furniture wax or cleaners.
They may damage the surface of the cabinet.
÷ Never use thinner, benzine, insecticide sprays and other
chemicals on or near the cabinets, since these will cor-
rode the surfaces.
÷ When a chemical cloth is used, read the cautions for the
chemical cloth carefully.
÷ After connection to the terminals, pull lightly on the cable
to confirm that the tips of the cable are connected posi-
tively to the terminals. An imperfect connection can cause
sound interruptions and noise.
÷ When cable cores stick out and ª and · lines are short-
circuited, an excessive load will be applied to the plasma
display and the operation will stop or trouble will be
caused.
÷ When the polarity is reversed for one speaker (left or right)
at the time of connection to the plasma display, the bass
reproduction will be reduced, the sound positioning will
be lost, and a correct stereo effect will not be obtained.
SPECIFICATIONS
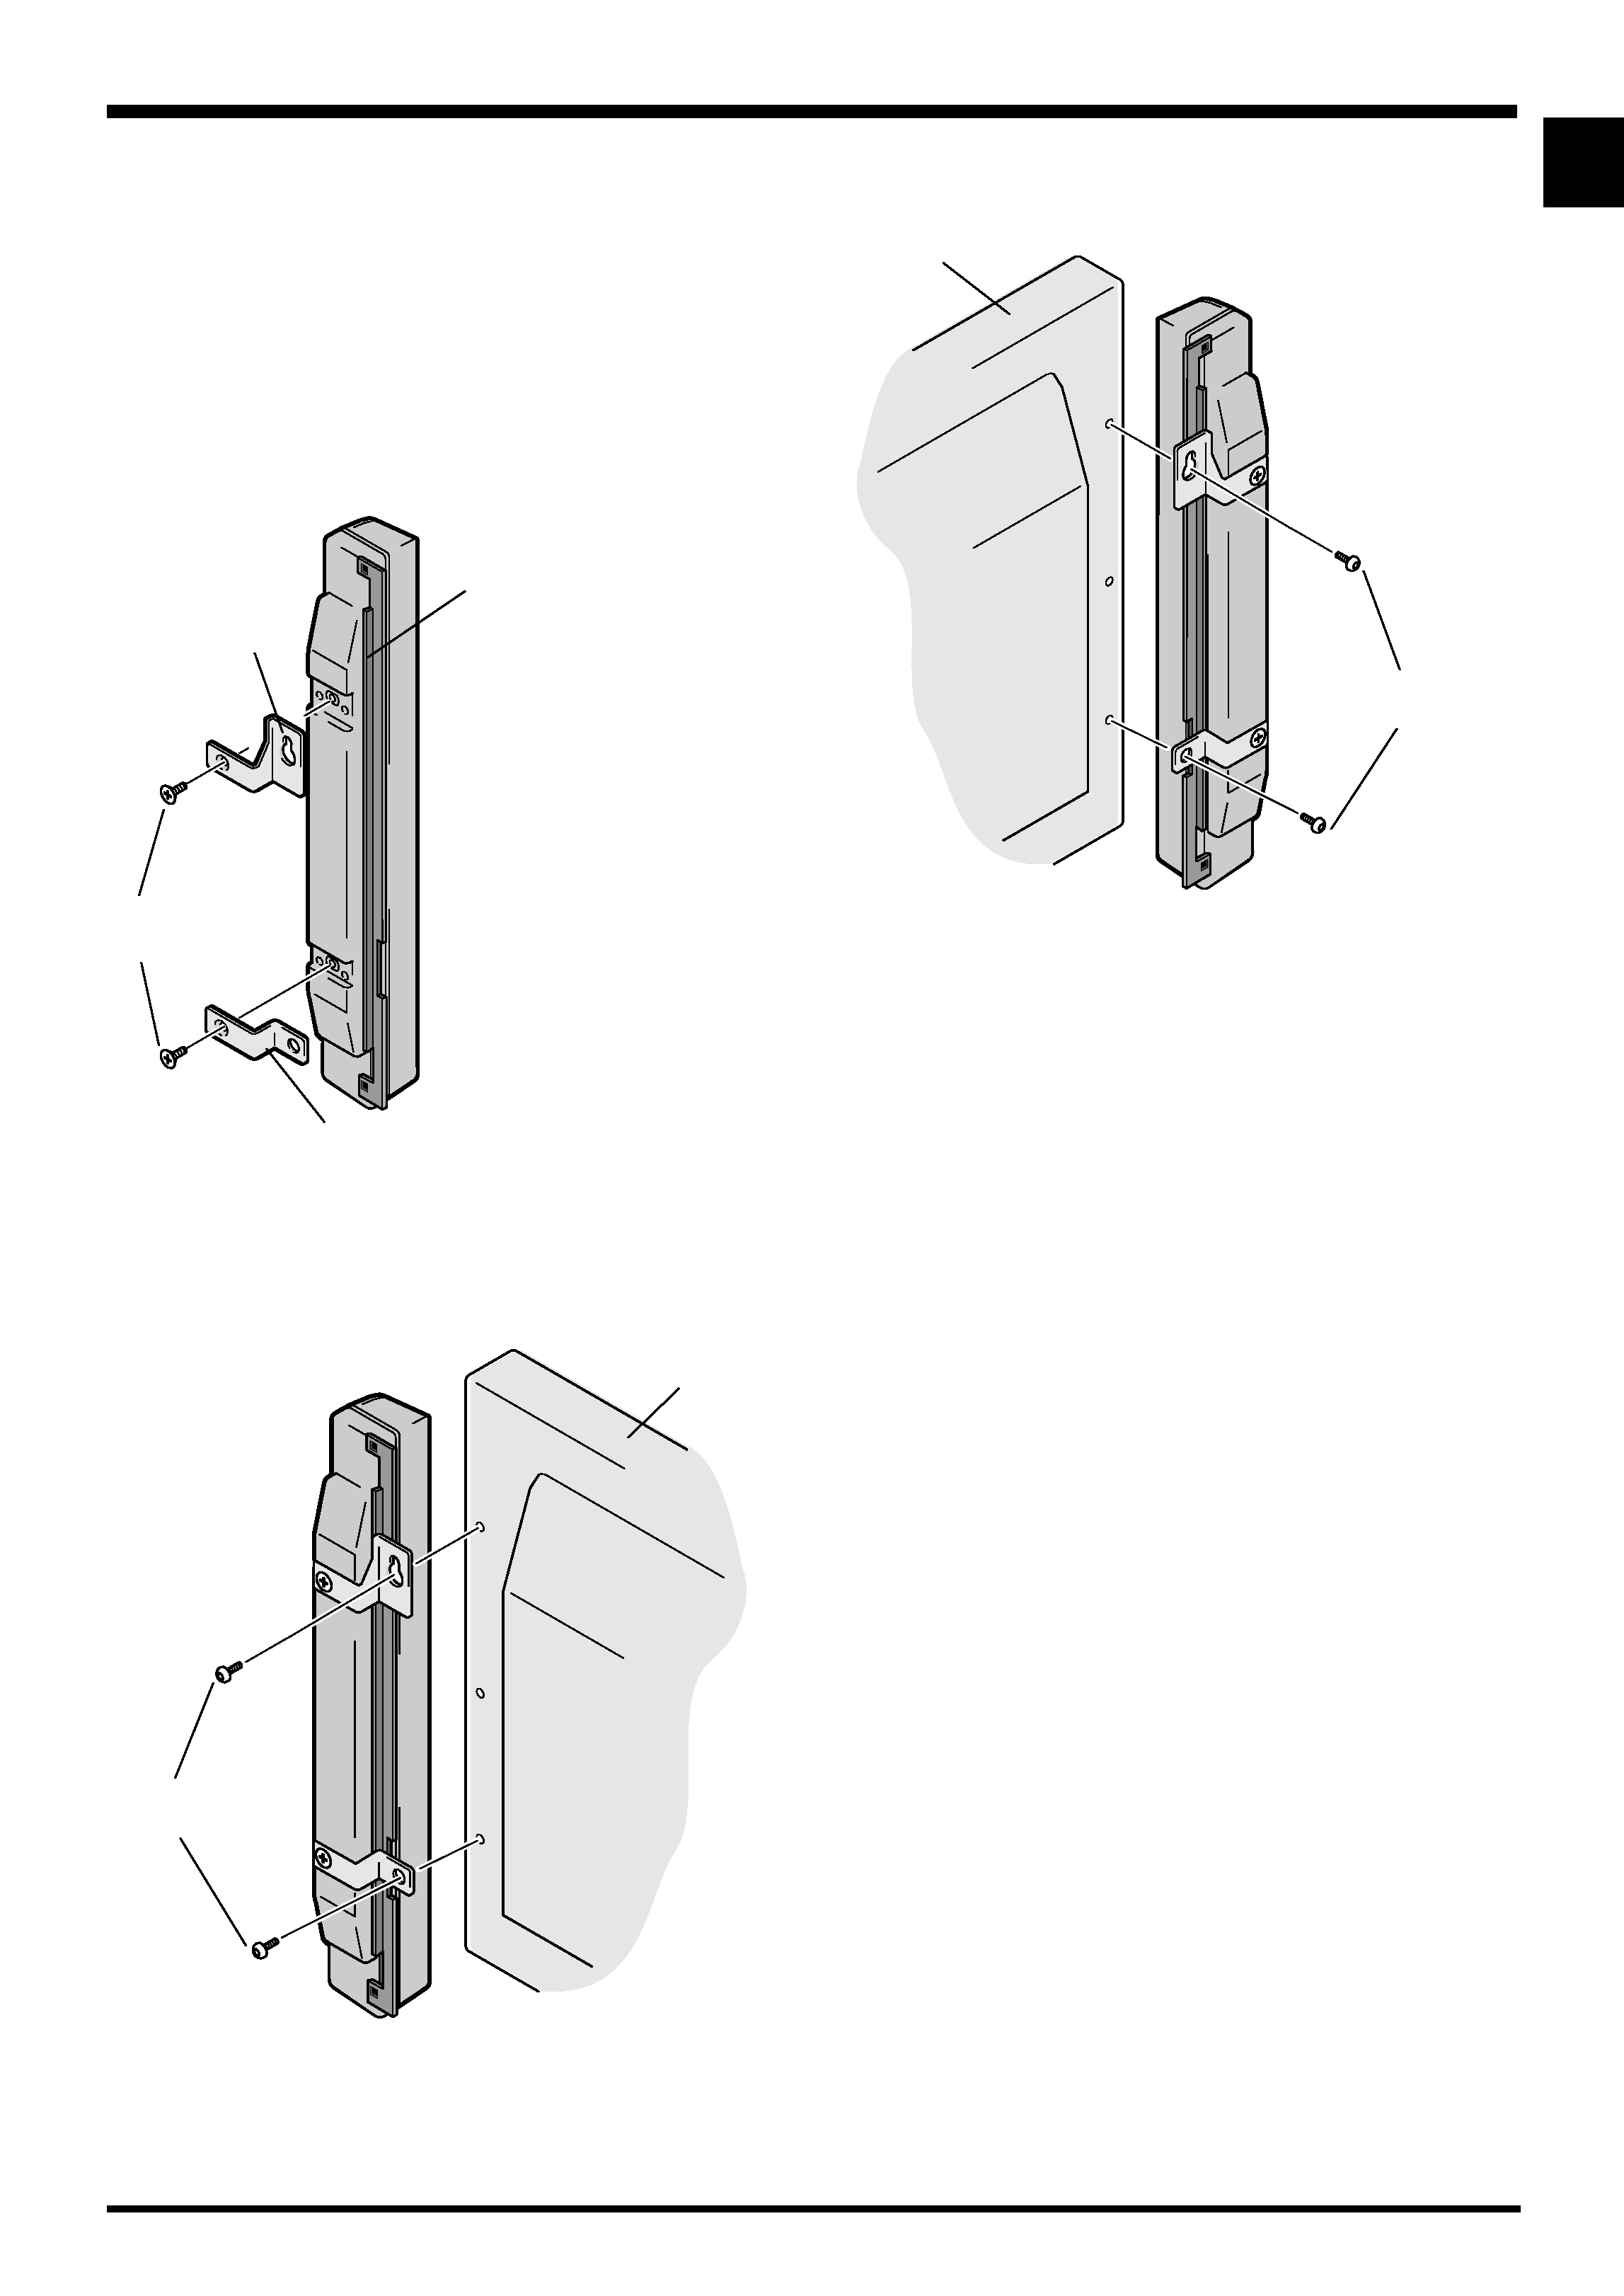
CONNECTION TO A PLASMA
DISPLAY
1 Switch off the power of the plasma display.
2 Connect the input terminals of the speaker system and
the speaker output terminals of the plasma display with
the accessory speaker cable. The polarity of the input
terminals is plus
ª for the red terminal (the terminal on
the right side in the following figure) and minus
· for
the black terminal (the terminal on the left side in the
following figure).
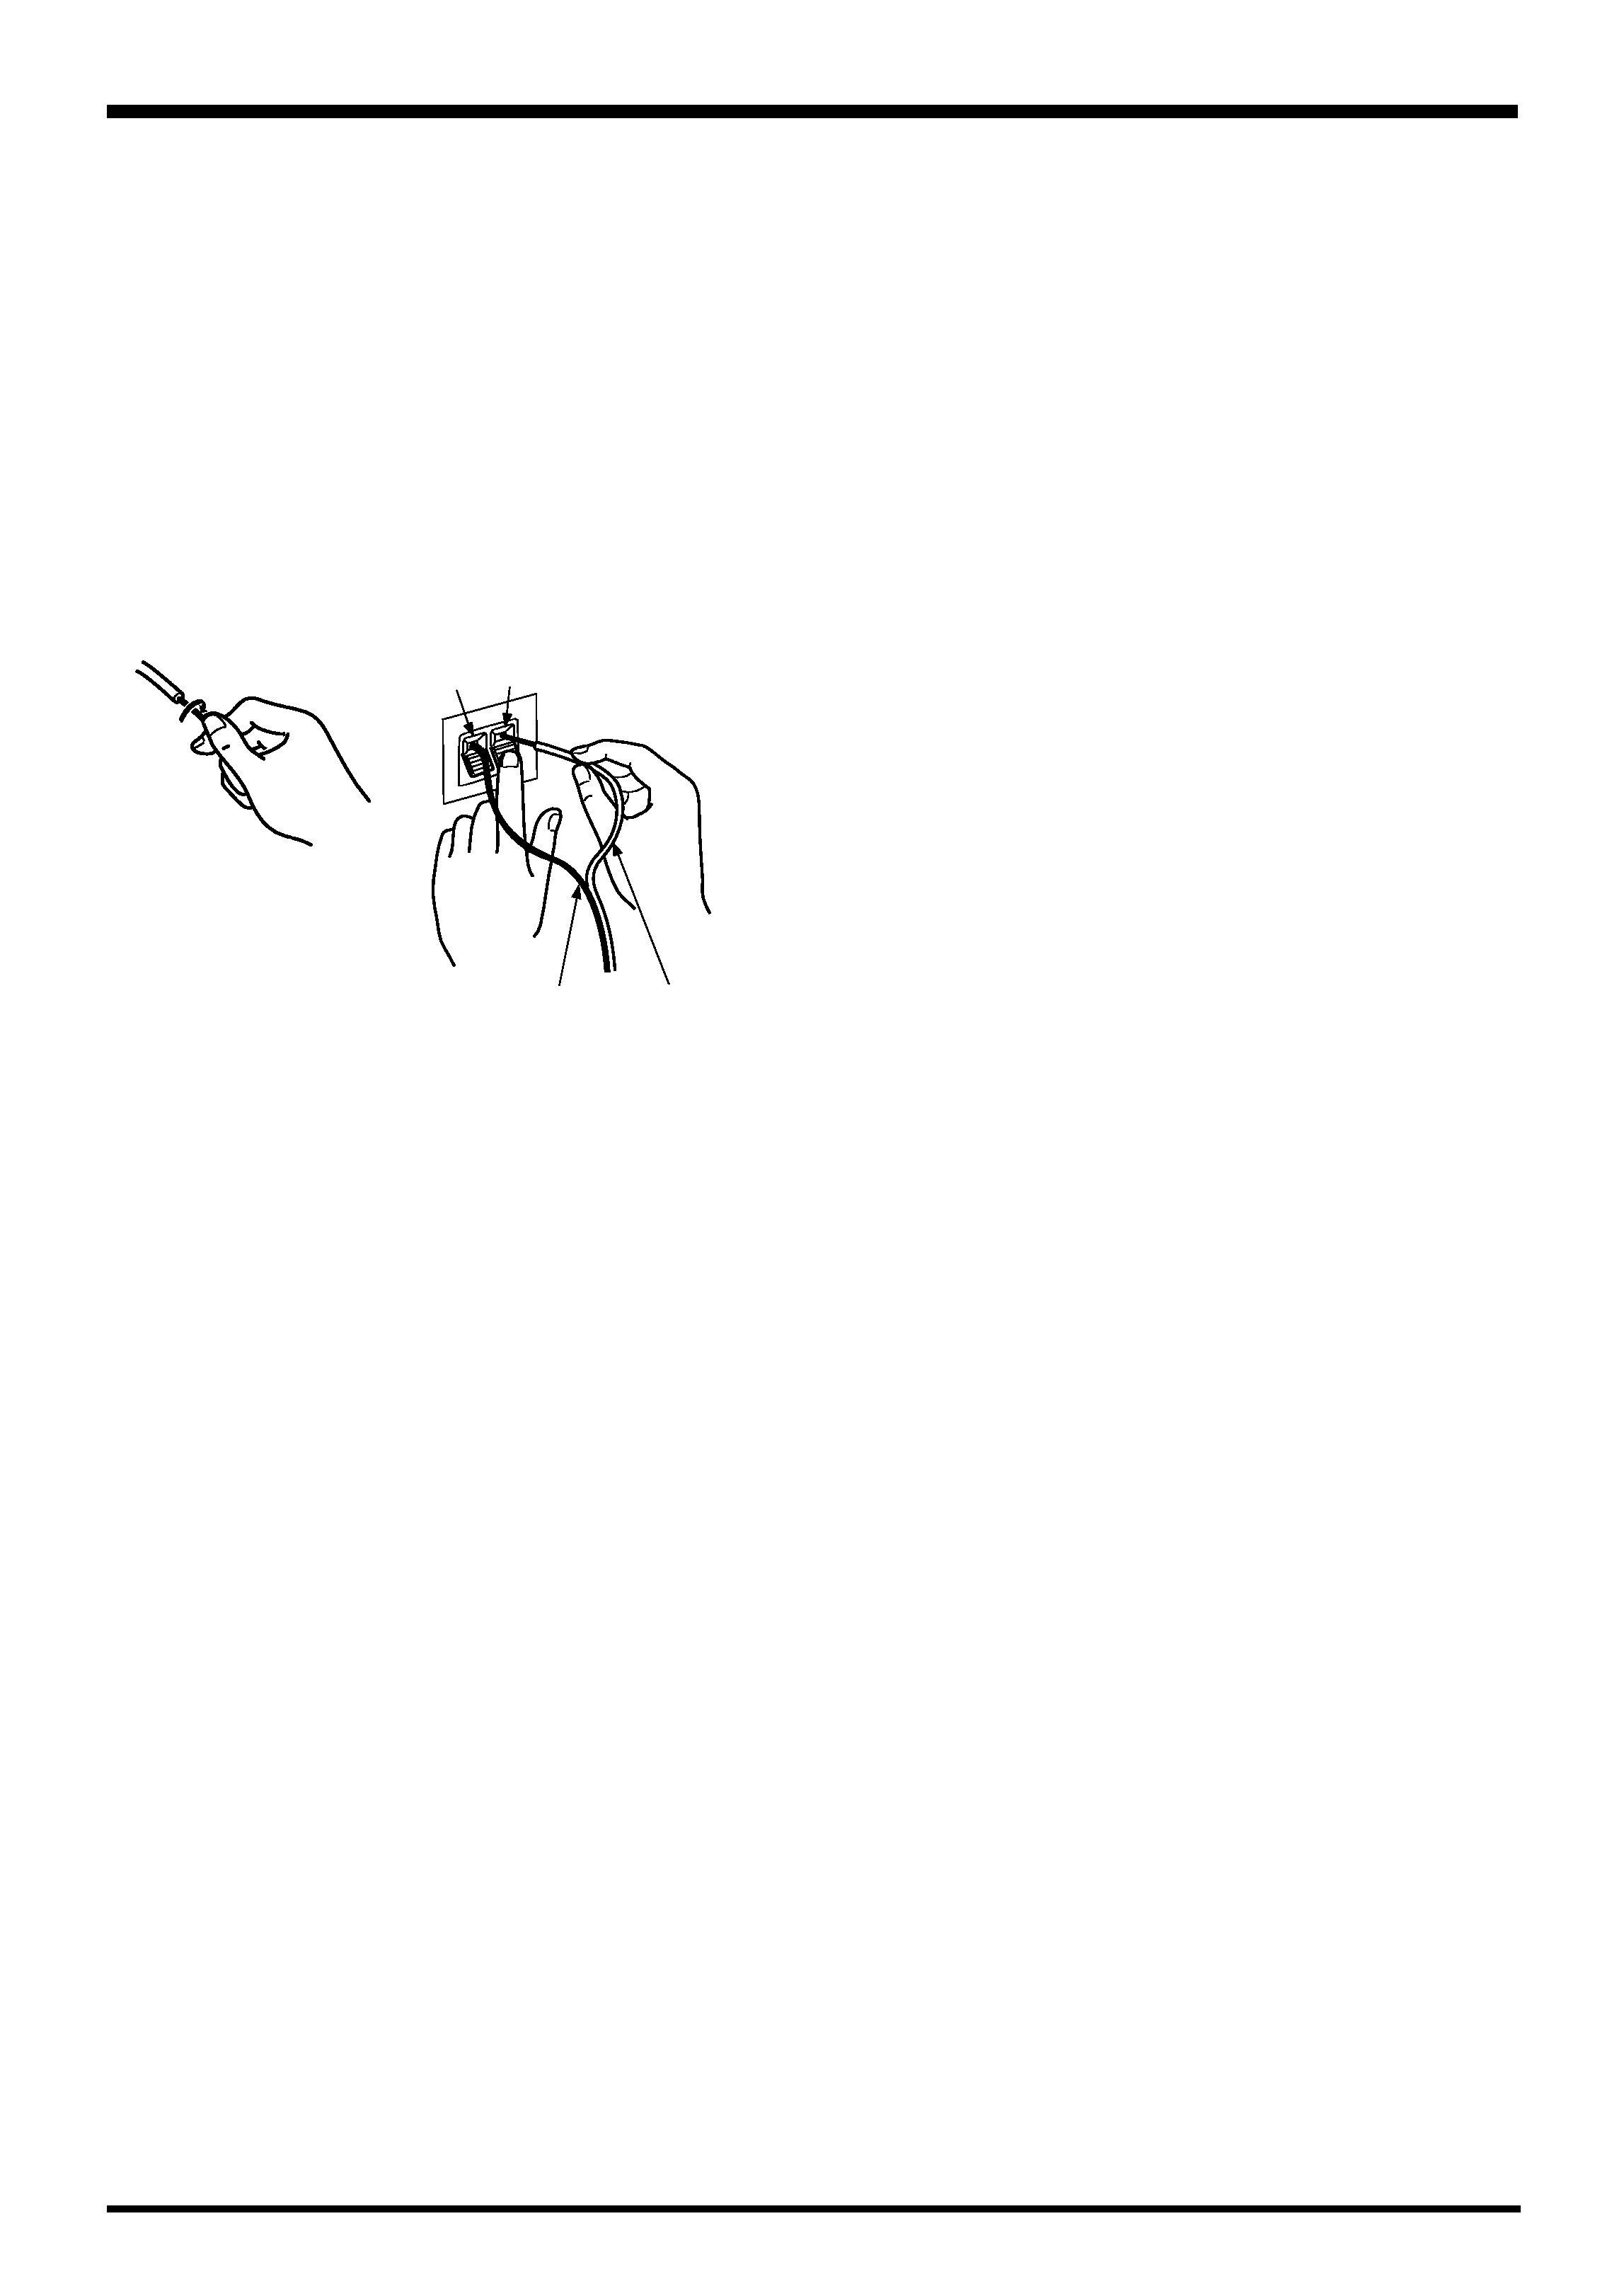
To the
· terminal
To the
ª terminal
(Speaker output terminals of the plasma display)
· terminal
2. Push the lever, insert the
cable into the hole, and
release the lever.
1. Remove the insulation
and twist the core ends
together.
ª terminal
Published by Pioneer Corporation.
Copyright © 2001 Pioneer Corporation.
All rights reserved.
NOTE:
Specifications and design subject to possible modification
without notice, due to improvements.
Cabinet : Enclosed type, antimagnetic design
Used speakers (two-way system) :
Woofer (for low tones) .............................. Oval cone type
Tweeter (for high tones) ...................... 2.5 cm dome type
Nominal impedance ..................................................... 8
Frequency Range ..................................... 50 to 20,000 Hz
Sensitivity ................................ 82 dB/W (at 1 m distance)
Permissible input :
Max. input ................................................................. 12 W
Rated input ................................................................ 4 W
Crossover frequency ................................................ 3 kHz
External Dimensions ....... 74 (W) x 714 (H) x 101 (D) mm
Weight ..................................................................... 1.7 kg
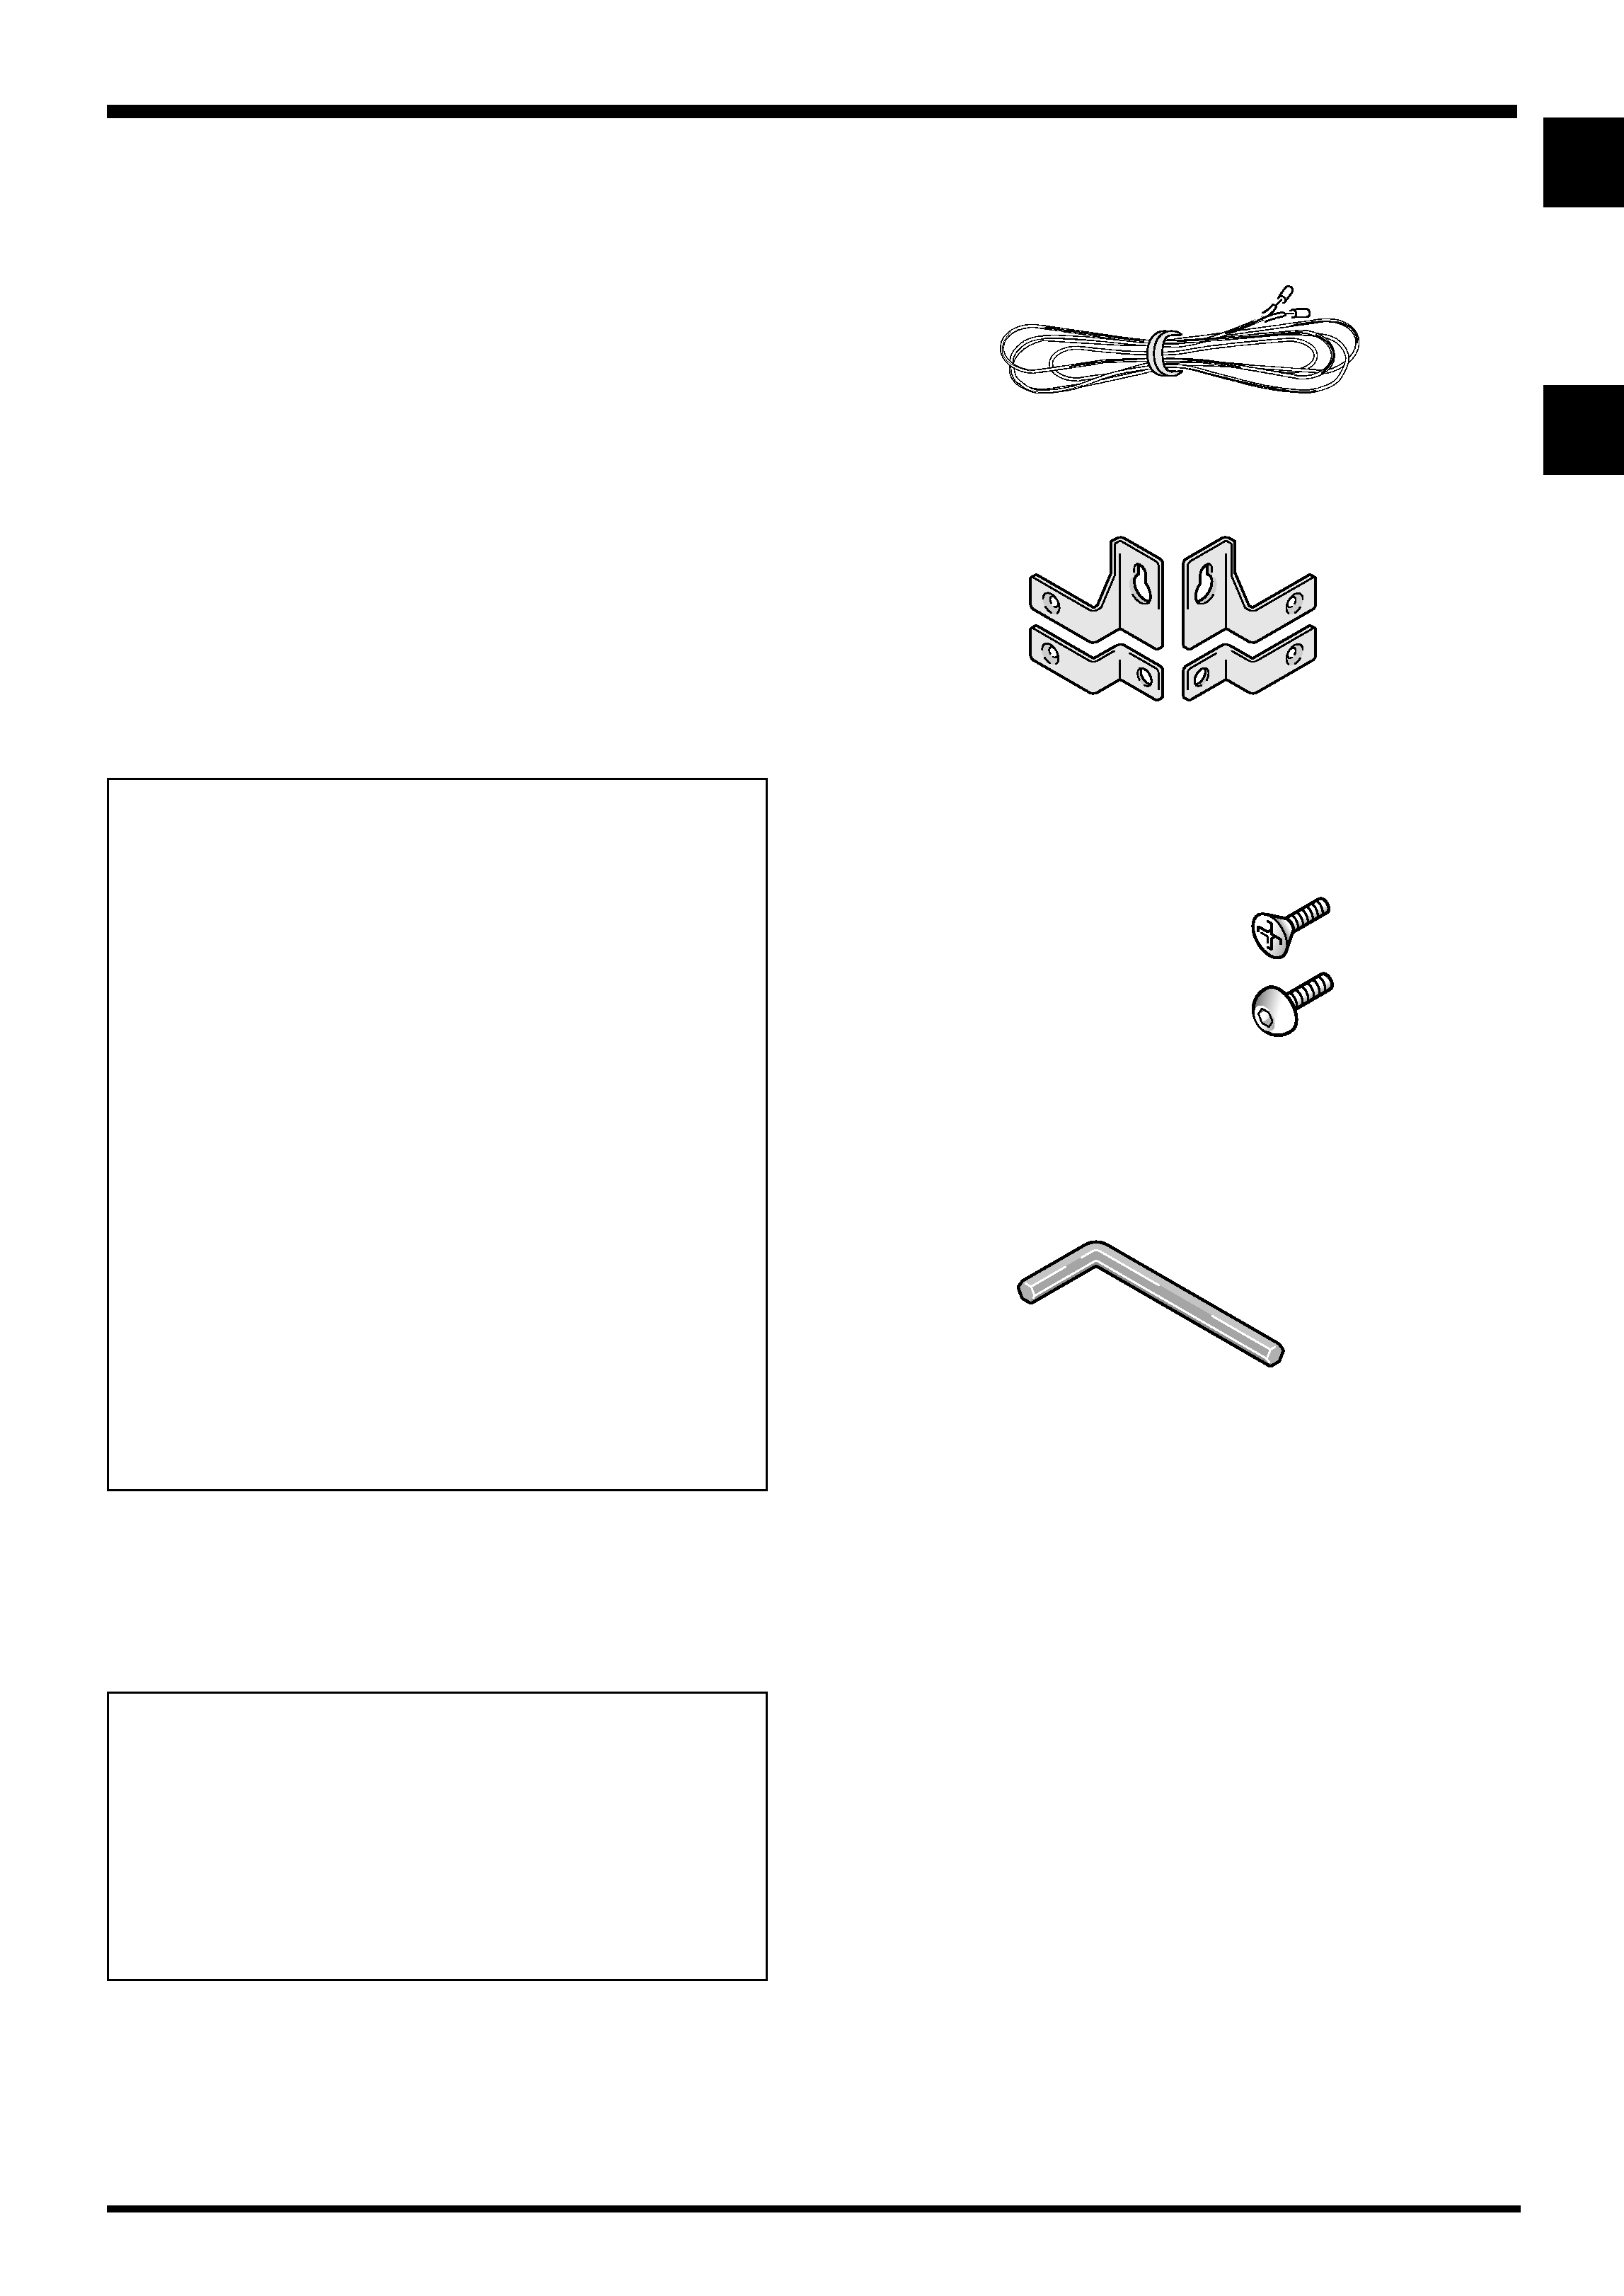
Accessory parts (for 2 speakers)
.............................................................. Speaker cable x 2
...................................... Flat countersunk head screw x 4
....................................... Hexagon socket head screw x 4
.............................................................. Mounting tool x 1
............... Speaker mounting fittings (for top left side) x 1
............. Speaker mounting fittings (for top right side) x 1
....................... Speaker mounting fittings (for bottom) x 2
................................................ Operating Instructions x 1