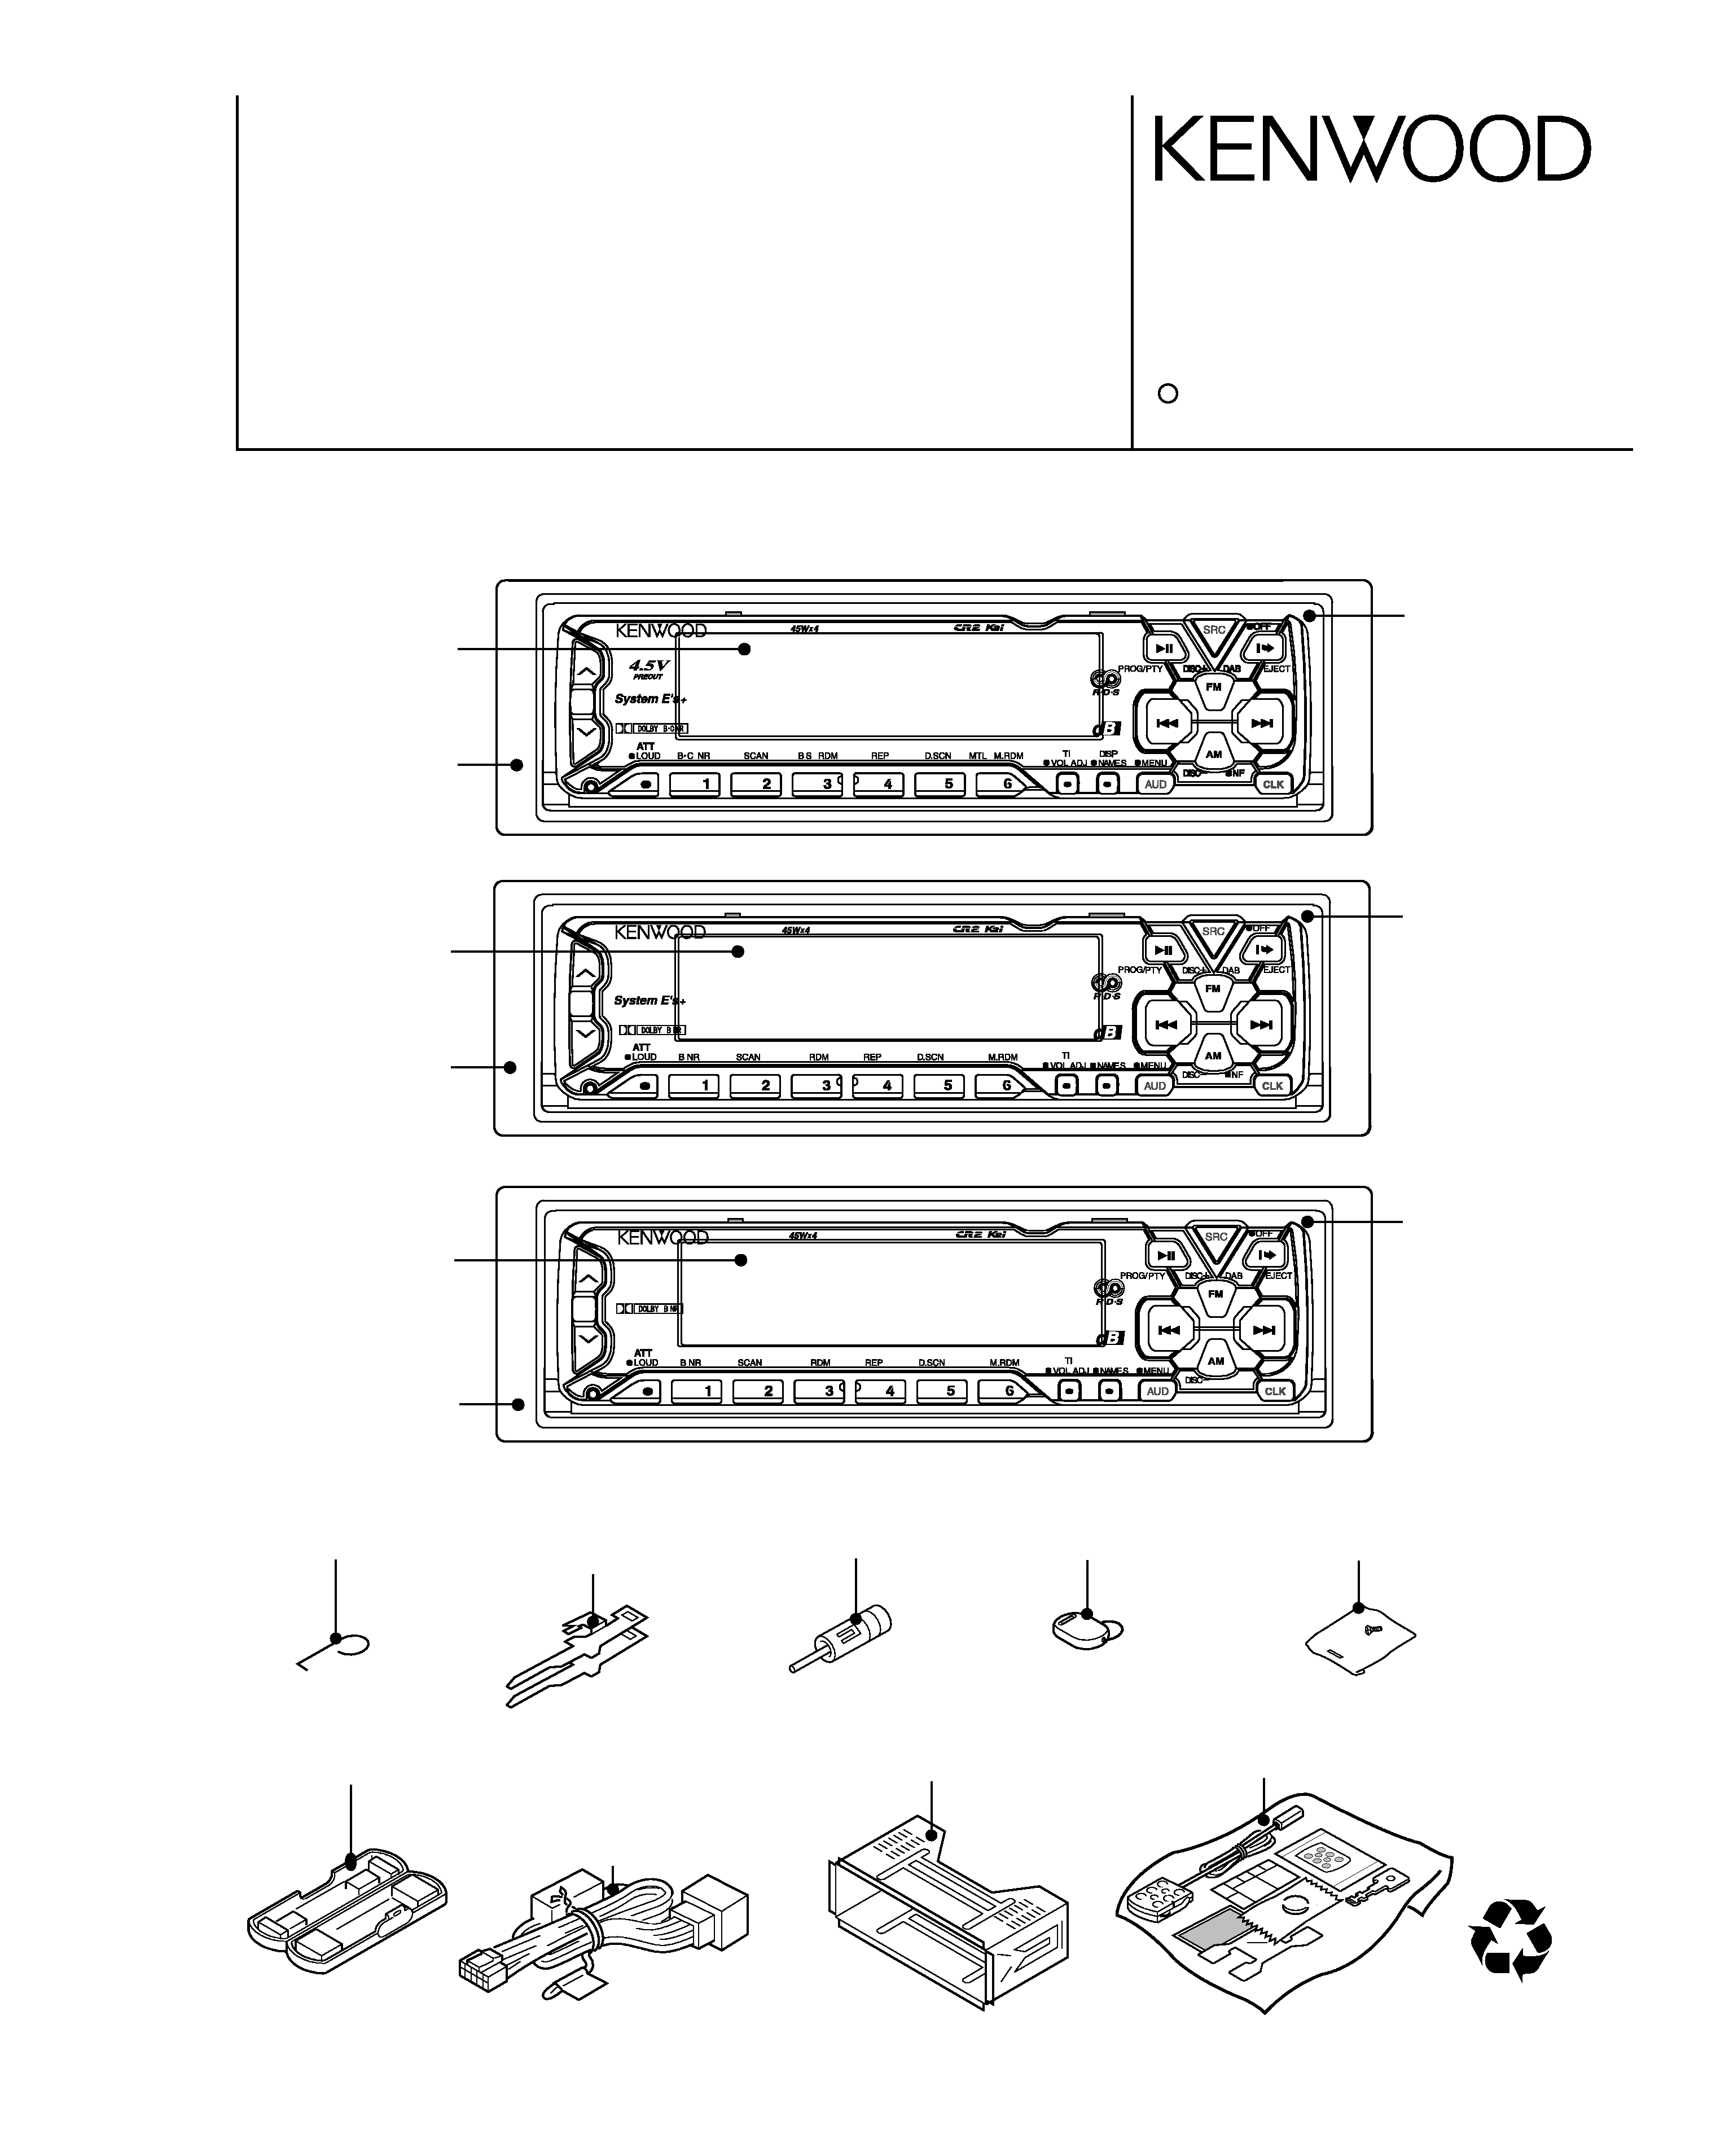
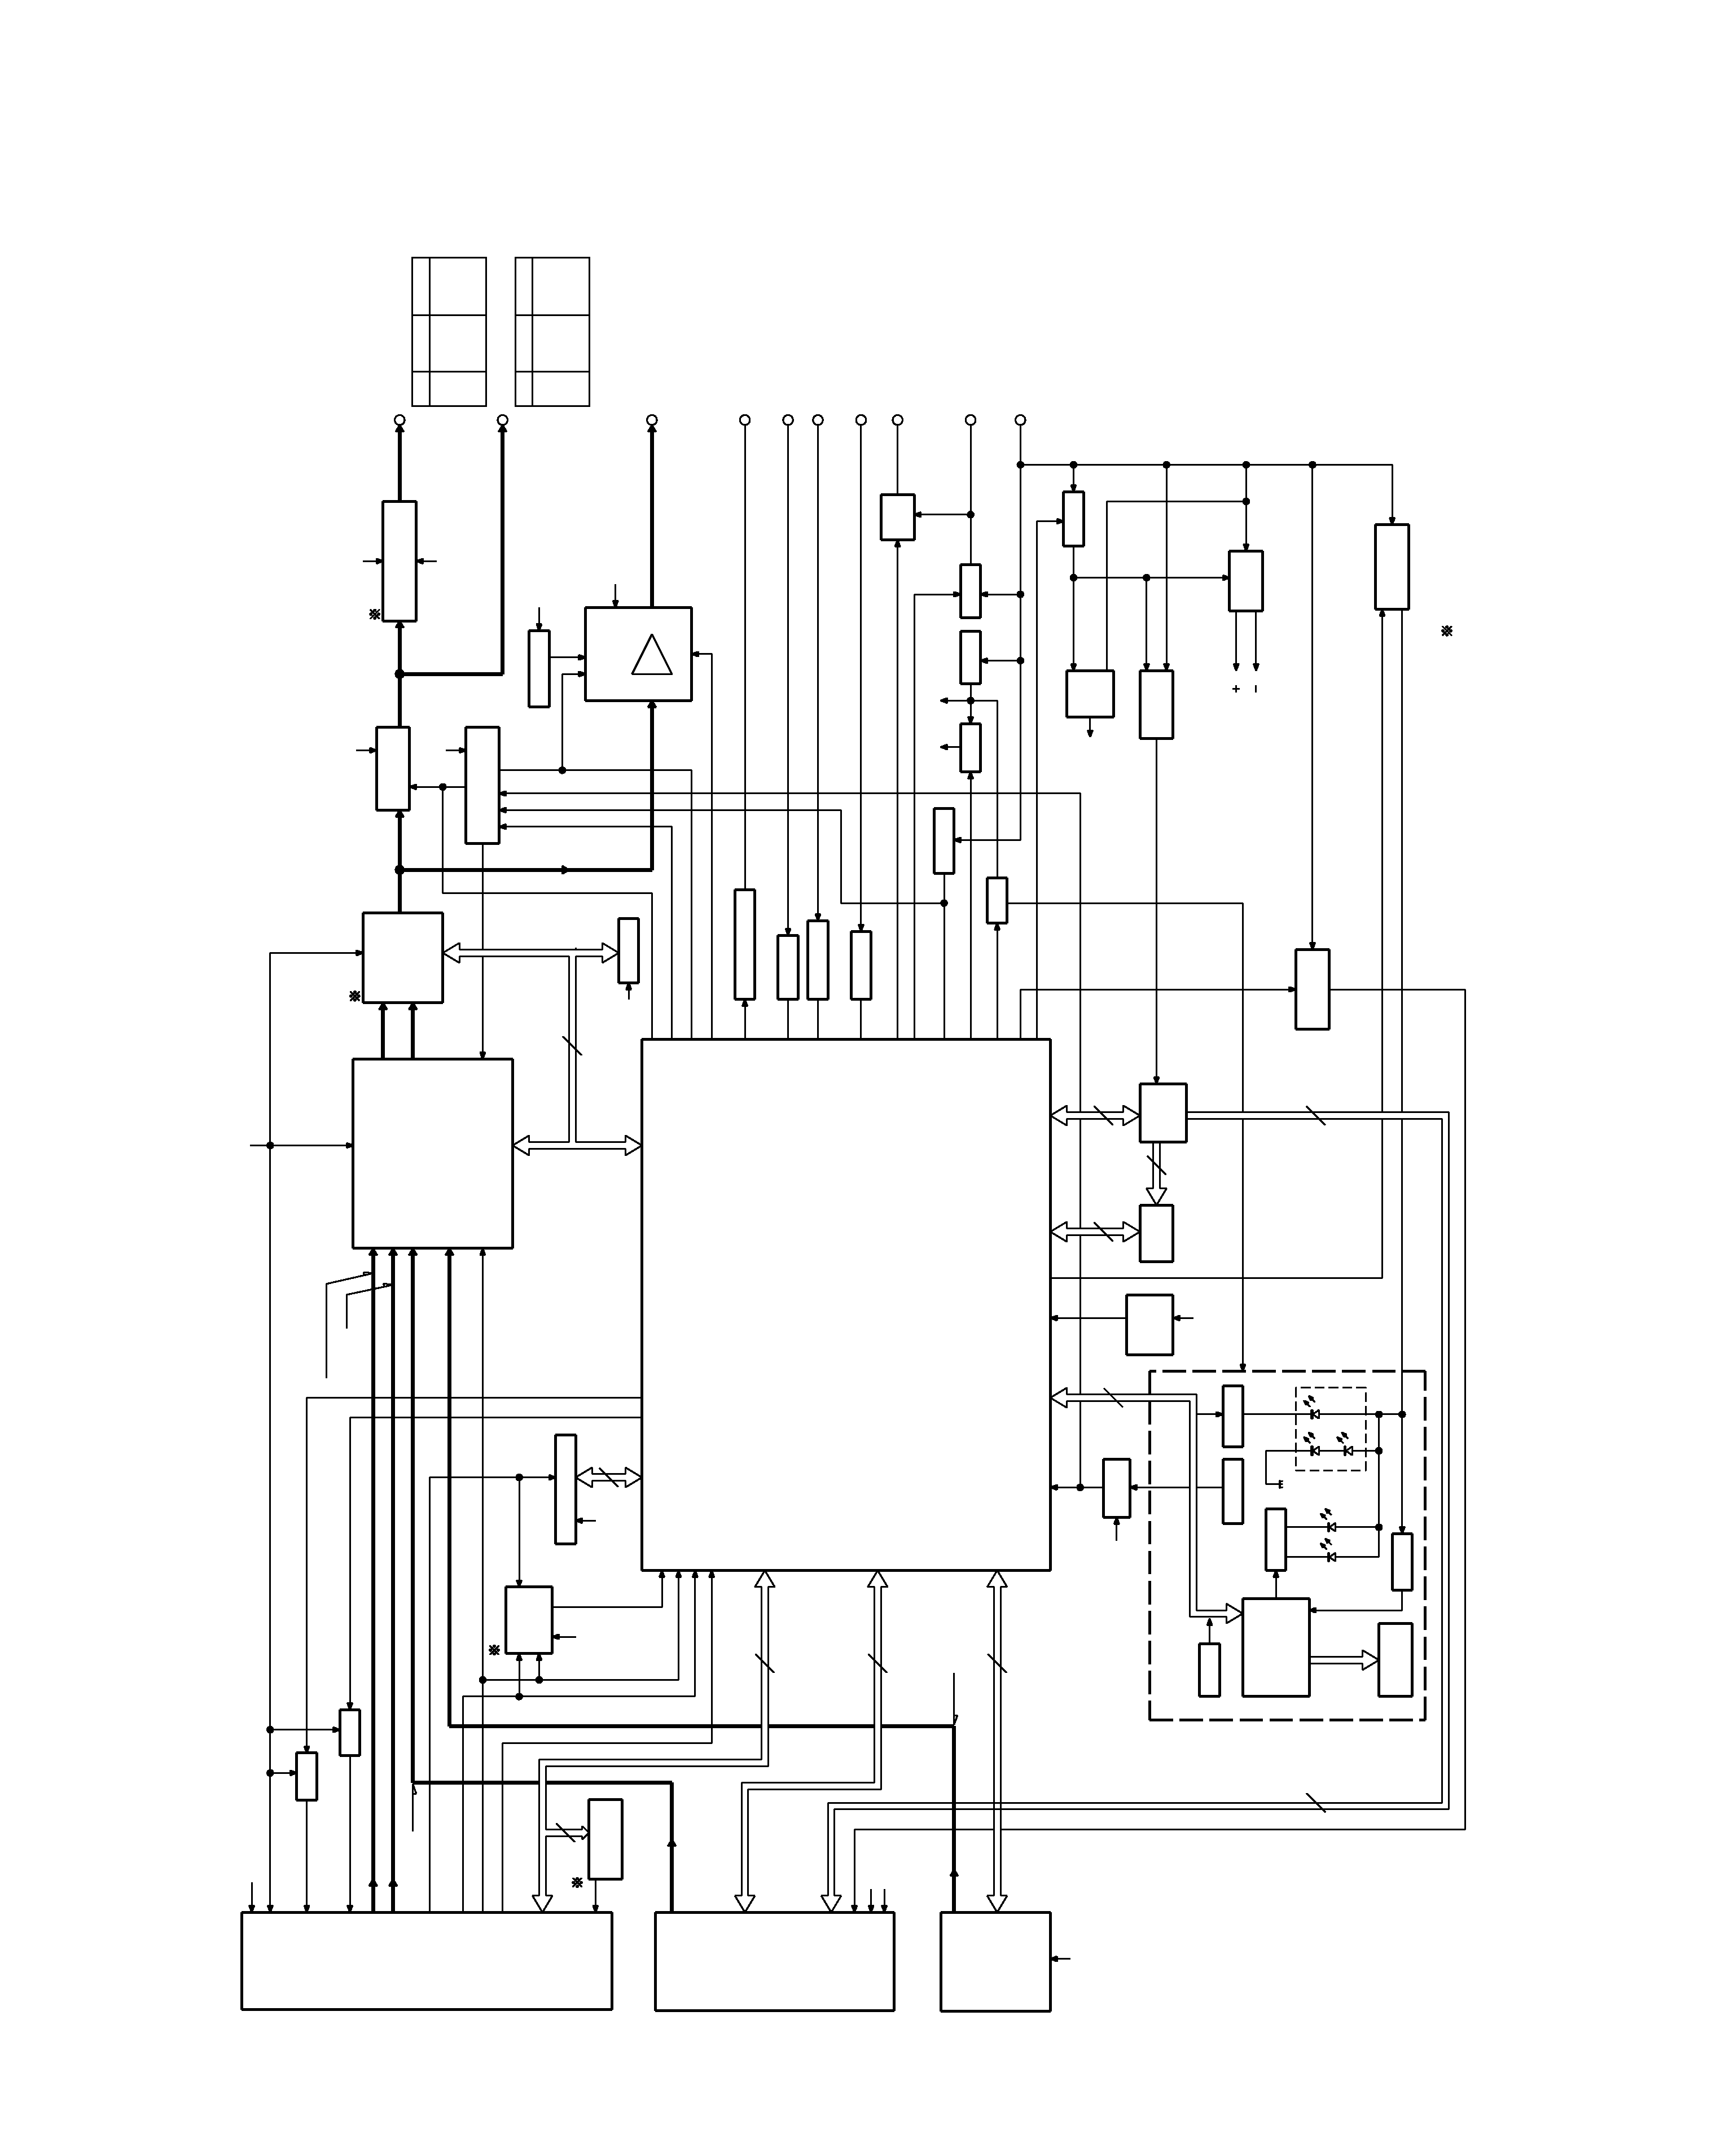
KRC-778R/RV/RY/RYV,878R,PS978R
5
TEST MODE
2000 MODEL
(1) How to enter the test mode
Reset the set while holding the FM and preset 6 keys
depressed.
All indications light up at the moment the test mode
starts.
(2) How to exit from the test mode
Reset the set while holding the preset 6 key.
(Note) The test mode is not canceled by turning Acc OFF,
turning power OFF or causing momentary power down.
(3) FM S meter voltage adjustment
1. Enter the test mode.
2. While holding the preset 1 key depressed, press and
hold the preset 6 key.
3. "ADJ OK" is displayed when the result is OK or "ADJ
NG" is displayed when it is No Good.
(4) AM SD voltage write
1. Enter the test mode.
2. While holding the preset 1 key depressed, press and
hold the preset 6 key to write the SD voltage data.
(5) Forced Auto/Manual switching of K2I
Press and hold the TI key in the TUNER mode to switch
between AUTO and MANUAL.
The initial status is MANUAL, which is indicated by the
lighting of the TI dots.
(6) Forced Narrow/Wide switching of K2I
Press the preset 6 key in the TUNER mode to switch
between Forced Narrow and Wide.
The initial status is Wide, which is indicated by the light-
ing of the NEWS dot.
(7) TAPE test mode specification
o The blank skip function is initially turned off.
(8) Audio adjustments
o The volume should be set to -10 dB (displayed as "30").
o The bass/treble and balance/fader controls are set to
full boost/full cut and full front/full rear respectively by
single press of the UP/DOWN key.
o The high-pass filter is set to Through/100 Hz/200 Hz by
each press of the UP key, or to 200 Hz/100
Hz/Through by each press of the DOWN key.
(9) Back-up current measurement
When the set is reset while Acc is off (i.e. when the back-
up power is on) or when Acc is turned off in the middle of
test mode, the MUTE pin turns ON in 2 seconds instead
of 15 seconds. (The panel/CD/C/MD mechanism is not
activated at this time.)
(10) Procedure for security code registration after
the E2PROM replacement during servicing
(KRC-888 only)
1. Enter the test mode (see "(1) How to enter the test
mode").
2. Press the SRC key to select ALL OFF.
3. Press and hold the AUDIO key for 1 second to enter the
menu mode.
4. Press the FM/AM key to select "SECURITY".
5. Press and hold the Track UP/DOWN key for 2 seconds.
6. Enter the security code by pressing the preset 1, 2, 3
and 4 keys.
Example: To enter "3510"
- Press preset key "1" 4 times.
- Press preset key "2" 6 times.
- Press preset key "3" 2 times.
- Press preset key "4" 1 time.
7. Press and hold the DISP key for 3 seconds so that
"APPROVED" is displayed.
8. Exit from the test mode (see "(2) How to exit from the
test mode").
(11) Simplified security code clear procedure
(KRC-X858, KRC-708)
1. During the code request mode, while holding the DISP
key depressed, press and hold the Volume UP key for
3 seconds (so that "----" disappears).
2. Enter "KCAR" from the remote control unit. (Same oper-
ation as with the '98 models)
- Press numeric key "5" 2 times and press the Track UP
key (to enter "K").
- Press numeric key "2" 3 times and press the Track UP
key (to enter "C").
- Press numeric key "2" 1 time and press the Track UP
key (to enter "A").
- Press numeric key "7" 2 times and press the Track UP
key (to enter "R").
3. The security is canceled and the set enters the TUNER
mode.
(12.1) MASK key write procedure in production line
(when the E2PROM is in the initial status)
1. While holding the FM and preset 6 keys depressed,
press RESET to enter the test mode.
2. Press and hold the AUDIO key for 1 second to enter
the menu mode.
3. Press the FM or AM key to select "Mask key".
4. Press the Track UP/DOWN key shortly so that
"TRANSMIT1" is displayed.
5. Point the MASK key to the light sensor and press and
hold the key for more than 0.5 second.
6. When "TRANSMIT2" is displayed, press and hold the
MASK key again for more than 0.5 second. Note that
the first and second counter codes are not compared
at this time.
7. The write operation is complete when "APPROVED" is
displayed. At this time, the demonstration mode is set
and the test mode is canceled.
(Note) Similarly to the '98 models, leaving the set for more
than 30 minutes without writing the code causes an
error and turns power off.