KENWOOD DPX-MP7090U Owner's Manual

Cover page of KENWOOD DPX-MP7090U Owner's Manual

Owner's Manual for KENWOOD DPX-MP7090U, downloadable as a PDF file.

Manual details

  • Immediate download after payment.
  • Delivered as a PDF file.
  • The manual has 44 pages
  • File size: 0.74 MB
  • Available language versions: English
  • Different language versions may vary sligthly in file size and page count.

We guarantee that...

  • our manuals are complete,
  • our manuals are checked with antivirus,
  • We'll issue refund if the manual is damaged, incomplete or unreadable (our refund policy)

Sample pages

Thumbnail of page 1Thumbnail of page 2Thumbnail of page 3Thumbnail of page 4
Thumbnail of page 5Thumbnail of page 6Thumbnail of page 7Thumbnail of page 8
Thumbnail of page 9
background image
DUAL DIN SIZED CD RECEIVER
DPX-MP7090U
INSTRUCTION MANUAL
© B64-3399-00/00 (MW)
background image
DUAL DIN SIZED CD RECEIVER
DPX-MP7090U
INSTRUCTION MANUAL
© B64-3399-00/00 (MW)
background image
2 | English
Contents
Safety precautions
4
Notes
5
About CDs
6
About USB device
7
About AAC, MP3 and WMA
8
General features
10
Power
Selecting the Source
Volume
Attenuator
System Q
Audio Control
Adjusting the detail of Audio Control
Audio Setup
Speaker Setting
Subwoofer Output
TEL Mute
Display Type Selection
Graphic part/ Spectrum Analyzer Display
Switching
Wallpaper selecting
Text Selection for Display
Text Display Switching
Font Color Select
Tuner/TV control features
19
Tuning
Tuning Mode
Direct Access Tuning
Station Preset Memory
Auto Memory Entry
Preset Tuning
Frequency Step Setting
TV Tuning
TV channel Preset Memory
Preset TV Tuning
Direct TV Tuning
CD/USB device/Audio file/External
disc control features
22
Playing CD & Audio file
Playing USB device
Playing External Disc
Fast Forwarding and Reversing
Track/File Search
Disc Search/Folder Search
Direct Track/File Search
Direct Disc Search
Track/File/Disc/Folder Repeat
Scan Play
Random Play
Magazine Random Play
All Random Play
Select mode
File Select mode
Folder Select 1 mode
Folder Select 2 mode
Switching the Play mode
Letter Seek
Text/Title Scroll
Menu system
28
Menu System
Activating Security Code
Deactivating Security Code
Touch Sensor Tone
Manual Clock Adjustment
Date Adjustment
Date Mode
Indirect Lighting
Display Illumination Control
Dimmer
Built-in Amp Setting
Dual Zone System Setting
B.M.S. (Bass Management System)
B.M.S. Frequency Offset
AMP Control
CRSC (Clean Reception System Circuit)
Station/Disc Naming (SNPS/DNPS)
Auxiliary Input Display Setting
Text Scroll
Built-in Auxiliary input Setting
CD Read Setting
Voice Index
ACDrive firmware version display
Unique ID display
Audio Preset Memory
Audio Preset Recall
background image
English
|
3
Basic Operations of remote control 35
Accessories/ Installation Procedure 37
Connecting Wires to Terminals
38
Installation
39
Troubleshooting Guide
40
Specifications
44
The "AAC" logo is trademark of Dolby
Laboratories.
background image
4 | English
Safety precautions
Do Not Load 8 cm (3 in.) CDs in the CD
slot
If you try to load a 8 cm (3 in.) CD with its adapter
into the unit, the adapter might separate from the
CD and damage the unit.
About CD players/disc changers
connected to this unit
Kenwood disc changers/ CD players released in
1998 or later can be connected to this unit.
Refer to the catalog or consult your Kenwood
dealer for connectable models of disc changers/
CD players.
Note that any Kenwood disc changers/ CD players
released in 1997 or earlier and disc changers made
by other makers cannot be connected to this unit.
Unsupported connection may result in damage.
Set the "O-N" Switch to the "N" position for the
applicable Kenwood disc changers/ CD players.
The functions you can use and the information
that can be displayed may differ depending on the
models being connected.
· You can damage both your unit and the CD changer if
you connect them incorrectly.
Lens Fogging
When you turn on the car heater in cold weather,
dew or condensation may form on the lens in the
CD player of the unit. Called lens fogging, this
condensation on the lens may not allow CDs to
play. In such a situation, remove the disc and wait
for the condensation to evaporate. If the unit still
does not operate normally after a while, consult
your Kenwood dealer.
The marking of products using lasers
(Except for some areas)
The label is attached to the chassis/case and says
that the component uses laser beams that have
been classified as Class 1. It means that the unit
is utilizing laser beams that are of a weaker class.
There is no danger of hazardous radiation outside
the unit.
2WARNING
To prevent injury or fire, take the
following precautions:
· To prevent a short circuit, never put or leave any
metallic objects (such as coins or metal tools)
inside the unit.
· Do not watch or fix your eyes on the unit's display
when you are driving for any extended period.
· Mounting and wiring this product requires
skills and experience. For safety's sake, leave the
mounting and wiring work to professionals.
2CAUTION
To prevent damage to the machine, take
the following precautions:
· Make sure to ground the unit to a negative 12V
DC power supply.
· Do not install the unit in a spot exposed to direct
sunlight or excessive heat or humidity. Also avoid
places with too much dust or the possibility of
water splashing.
· When replacing a fuse, only use a new one with
the prescribed rating. Using a fuse with the wrong
rating may cause your unit to malfunction.
· Do not use your own screws. Use only the screws
provided. If you use the wrong screws, you could
damage the unit.
background image
English
|
5
Notes
· No USB device comes with this unit. You need to
purchase a commercially available USB device. For
the types of available USB devices, refer to <About
USB device> (page 7).
· If you experience problems during installation,
consult your Kenwood dealer.
· When you purchase optional accessories, check
with your Kenwood dealer to make sure that they
work with your model and in your area.
· We recommend the use of <Activating Security
Code> (page 29) to prevent theft.
· The characters conforming to ISO 8859-1
character set can be displayed.
· There are places in this manual where lit
indicators are described; however, the only time
an indicator will light is in the following settings.
When Indicator is selected as mentioned in <Text
Display Switching> (page 16).
· The illustrations of the display and the panel
appearing in this manual are examples used to
explain more clearly how the controls are used.
Therefore, what appears on the display in the
illustrations may differ from what appears on the
display on the actual equipment, and some of the
illustrations on the display may be inapplicable.
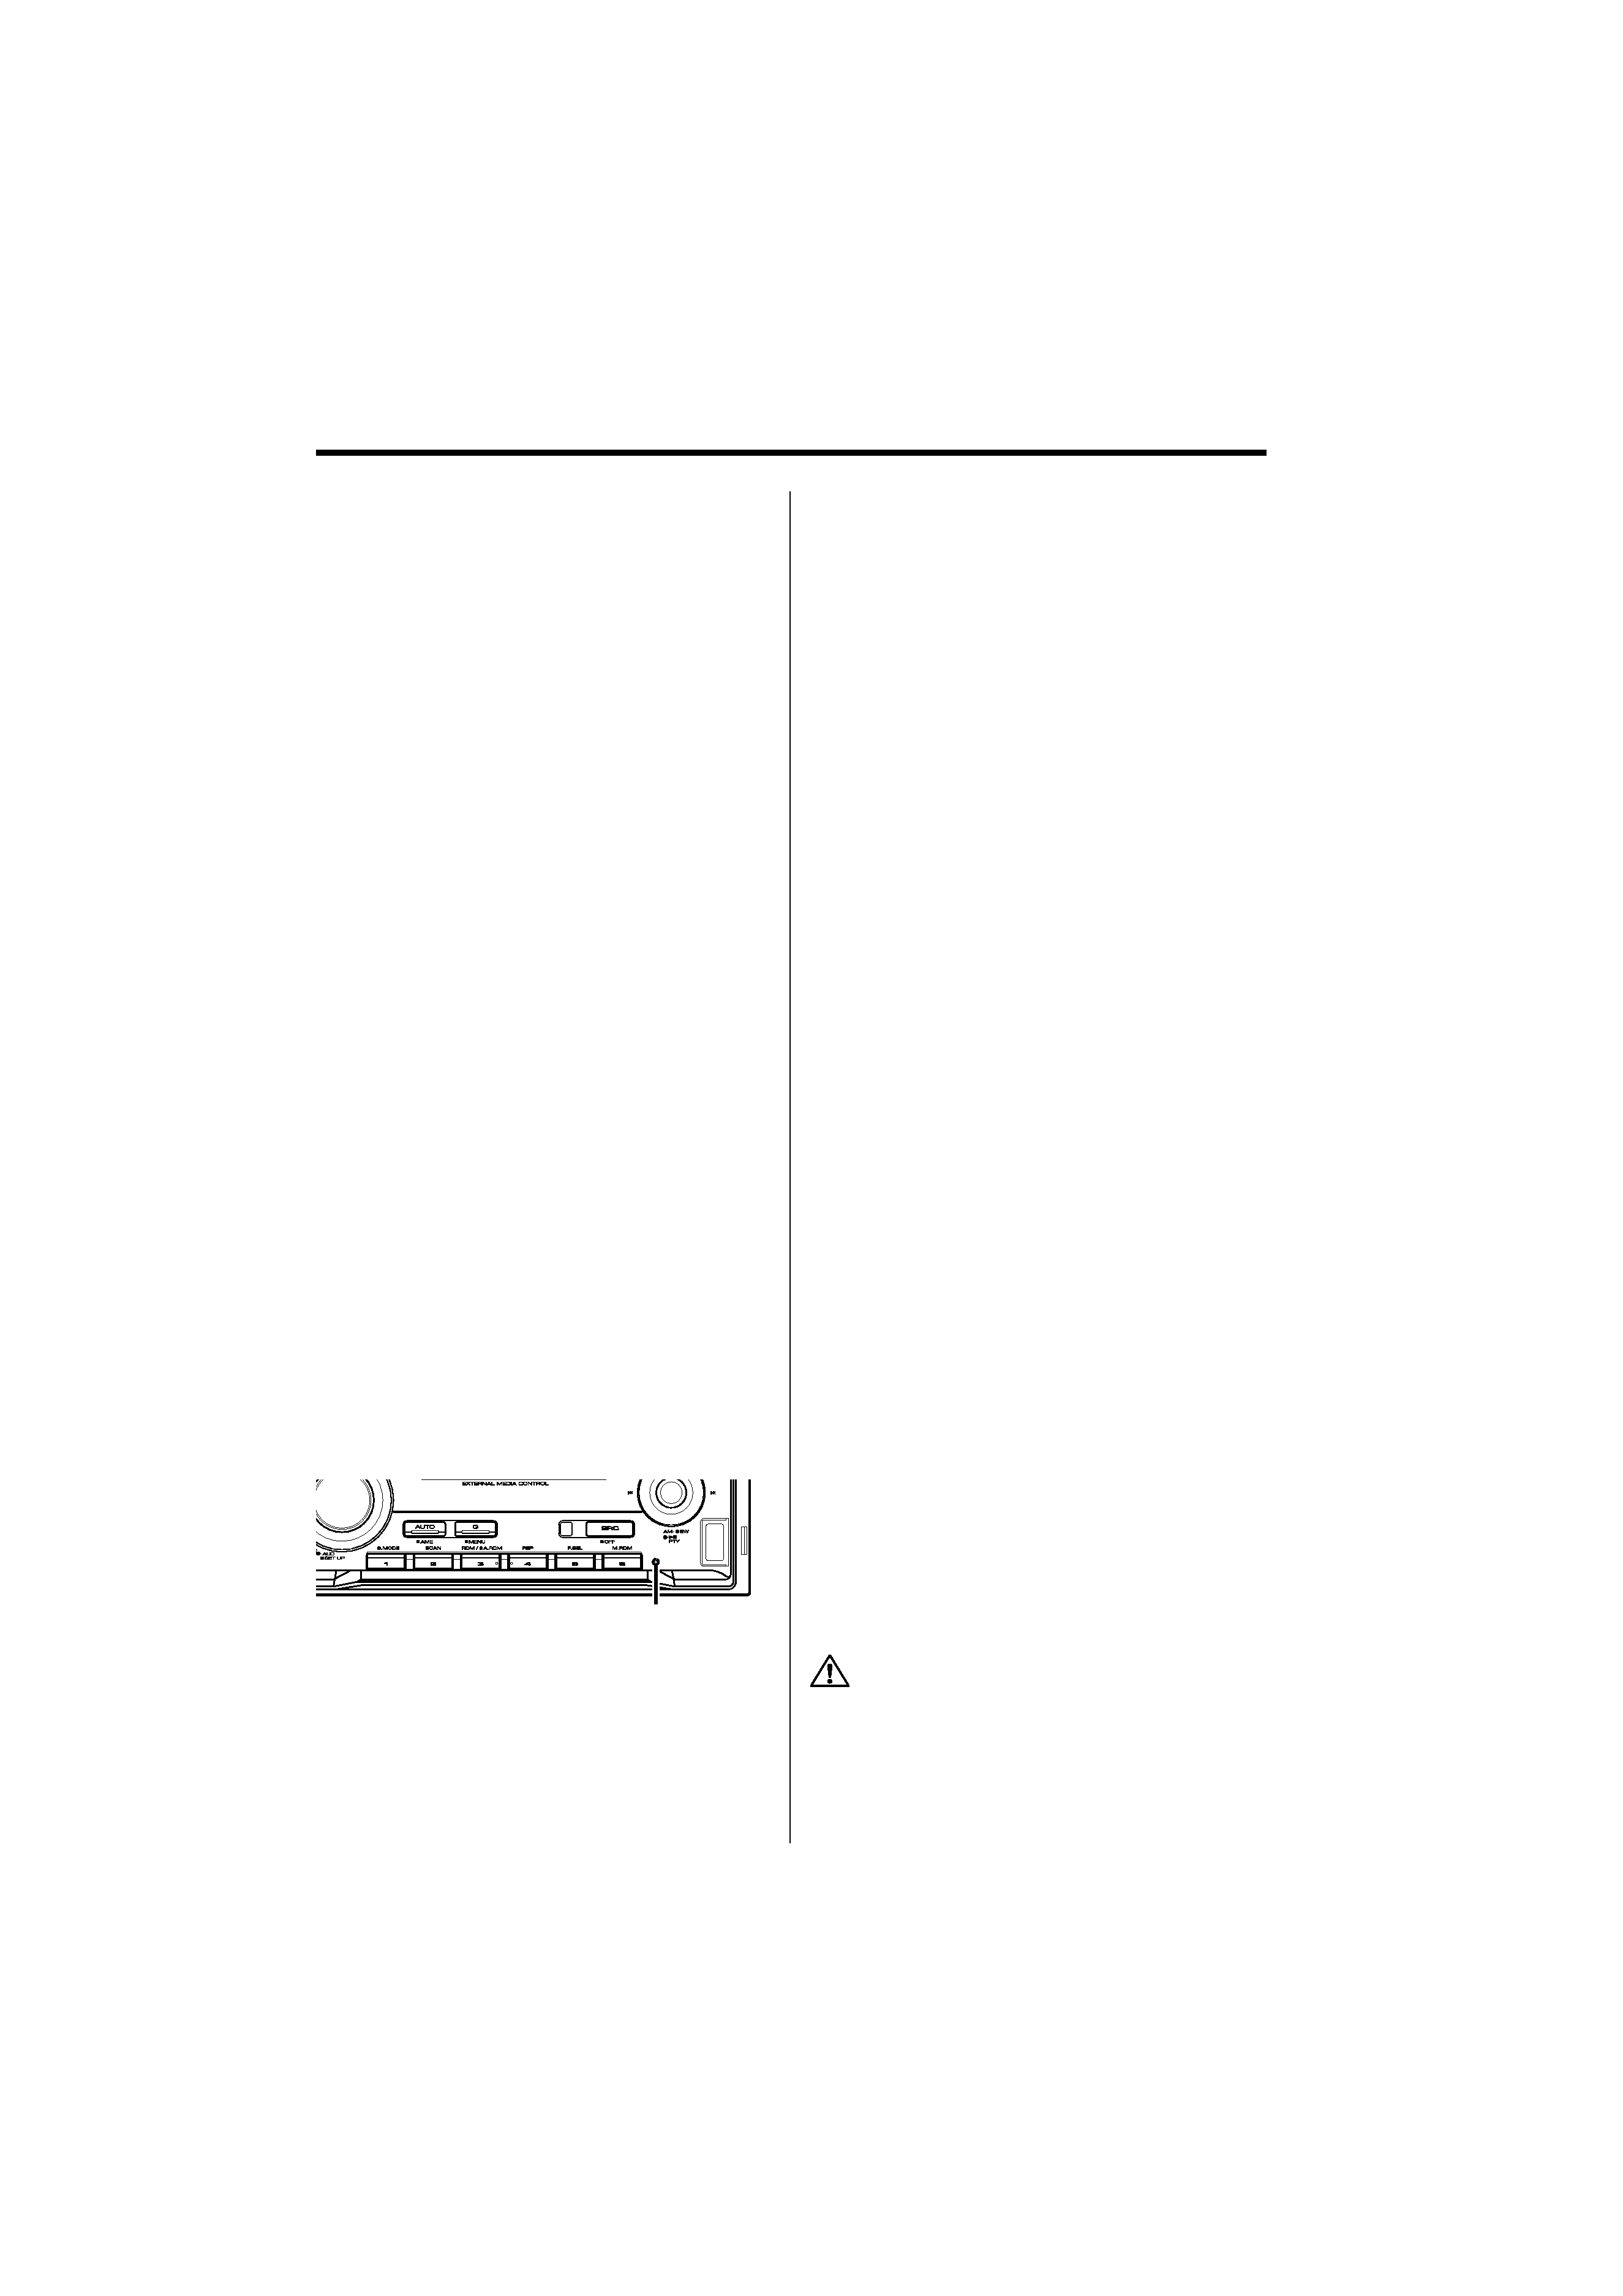
How to reset your unit
· If the unit fails to operate properly, press the Reset
button. The unit returns to factory settings when
the Reset button is pressed.
· Remove the USB device before pressing the Reset
button. Pressing the Reset button with the USB
device installed can damage the data contained
in the USB device. For how to remove the USB
device, refer to <Playing USB device> (page 23).
· Press the Reset button if the disc auto changer
fails to operate correctly. Normal operation should
be restored.
About DAB Tuner control
Refer to
A group on the Instruction manual of DAB
Tuner KTC-9090DAB (optional accessory) for the
control method of DAB Tuner function.
However, the following control methods of the
function for this unit may be different from the
Instruction manual; therefore, refer to the following
supplemental instruction.
<Auto Ensemble Memory Entry>
1. Select the preset band for Auto Ensemble
Memory Entry.
2. Press the [AME] button for at least 2 seconds.
Open Auto Ensemble Memory Entry.
After memory storage is finished, the number of
the pre-set buttons and the ensemble label are
displayed.
<Searching by programme type and language>
and <Languages to be displayed> in
<Programme Type (PTY) Function>
At the operation to press [DISP] button, use [AUTO]
button instead.
About "Media Manager" of PC application
attached to DPX-MP7090U
· "Media Manager" is recorded in the CD-ROM
attached to this unit.
· Refer to the attached installation manual for the
installation method of "Media Manager".
· Refer to the user's manual recorded in the
installation CD-ROM and Help of "Media Manager"
for the operation method of "Media Manager".
· The unit can play CD/ USB device (hereafter called
"ACDrive media") created by "Media Manager".
· Refer to the following site for the updated
information of "Media Manager".
http://www.kenwood.mediamanager.jp
· Contact Kenwood for the function and operation
of the "Media Manager".
· "Media Manager" is a product of PhatNoise.
Cleaning the Unit
If the faceplate of this unit is stained, wipe it with a
dry soft cloth such as a silicon cloth.
If the faceplate is stained badly, wipe the stain off
with a cloth moistened with neutral cleaner, then
wipe it again with a clean soft dry cloth.
· Applying spray cleaner directly to the unit may affect its
mechanical parts. Wiping the faceplate with a hard cloth
or using a volatile liquid such as thinner or alcohol may
scratch the surface or erase characters.
Reset button

Reviews

There are no reviews of this manual yet.