2
Connection
IMPORTANT !
< Make sure to set all the speakers to "SMALL", in
the speaker setting of your AV amplifier.
How to connect
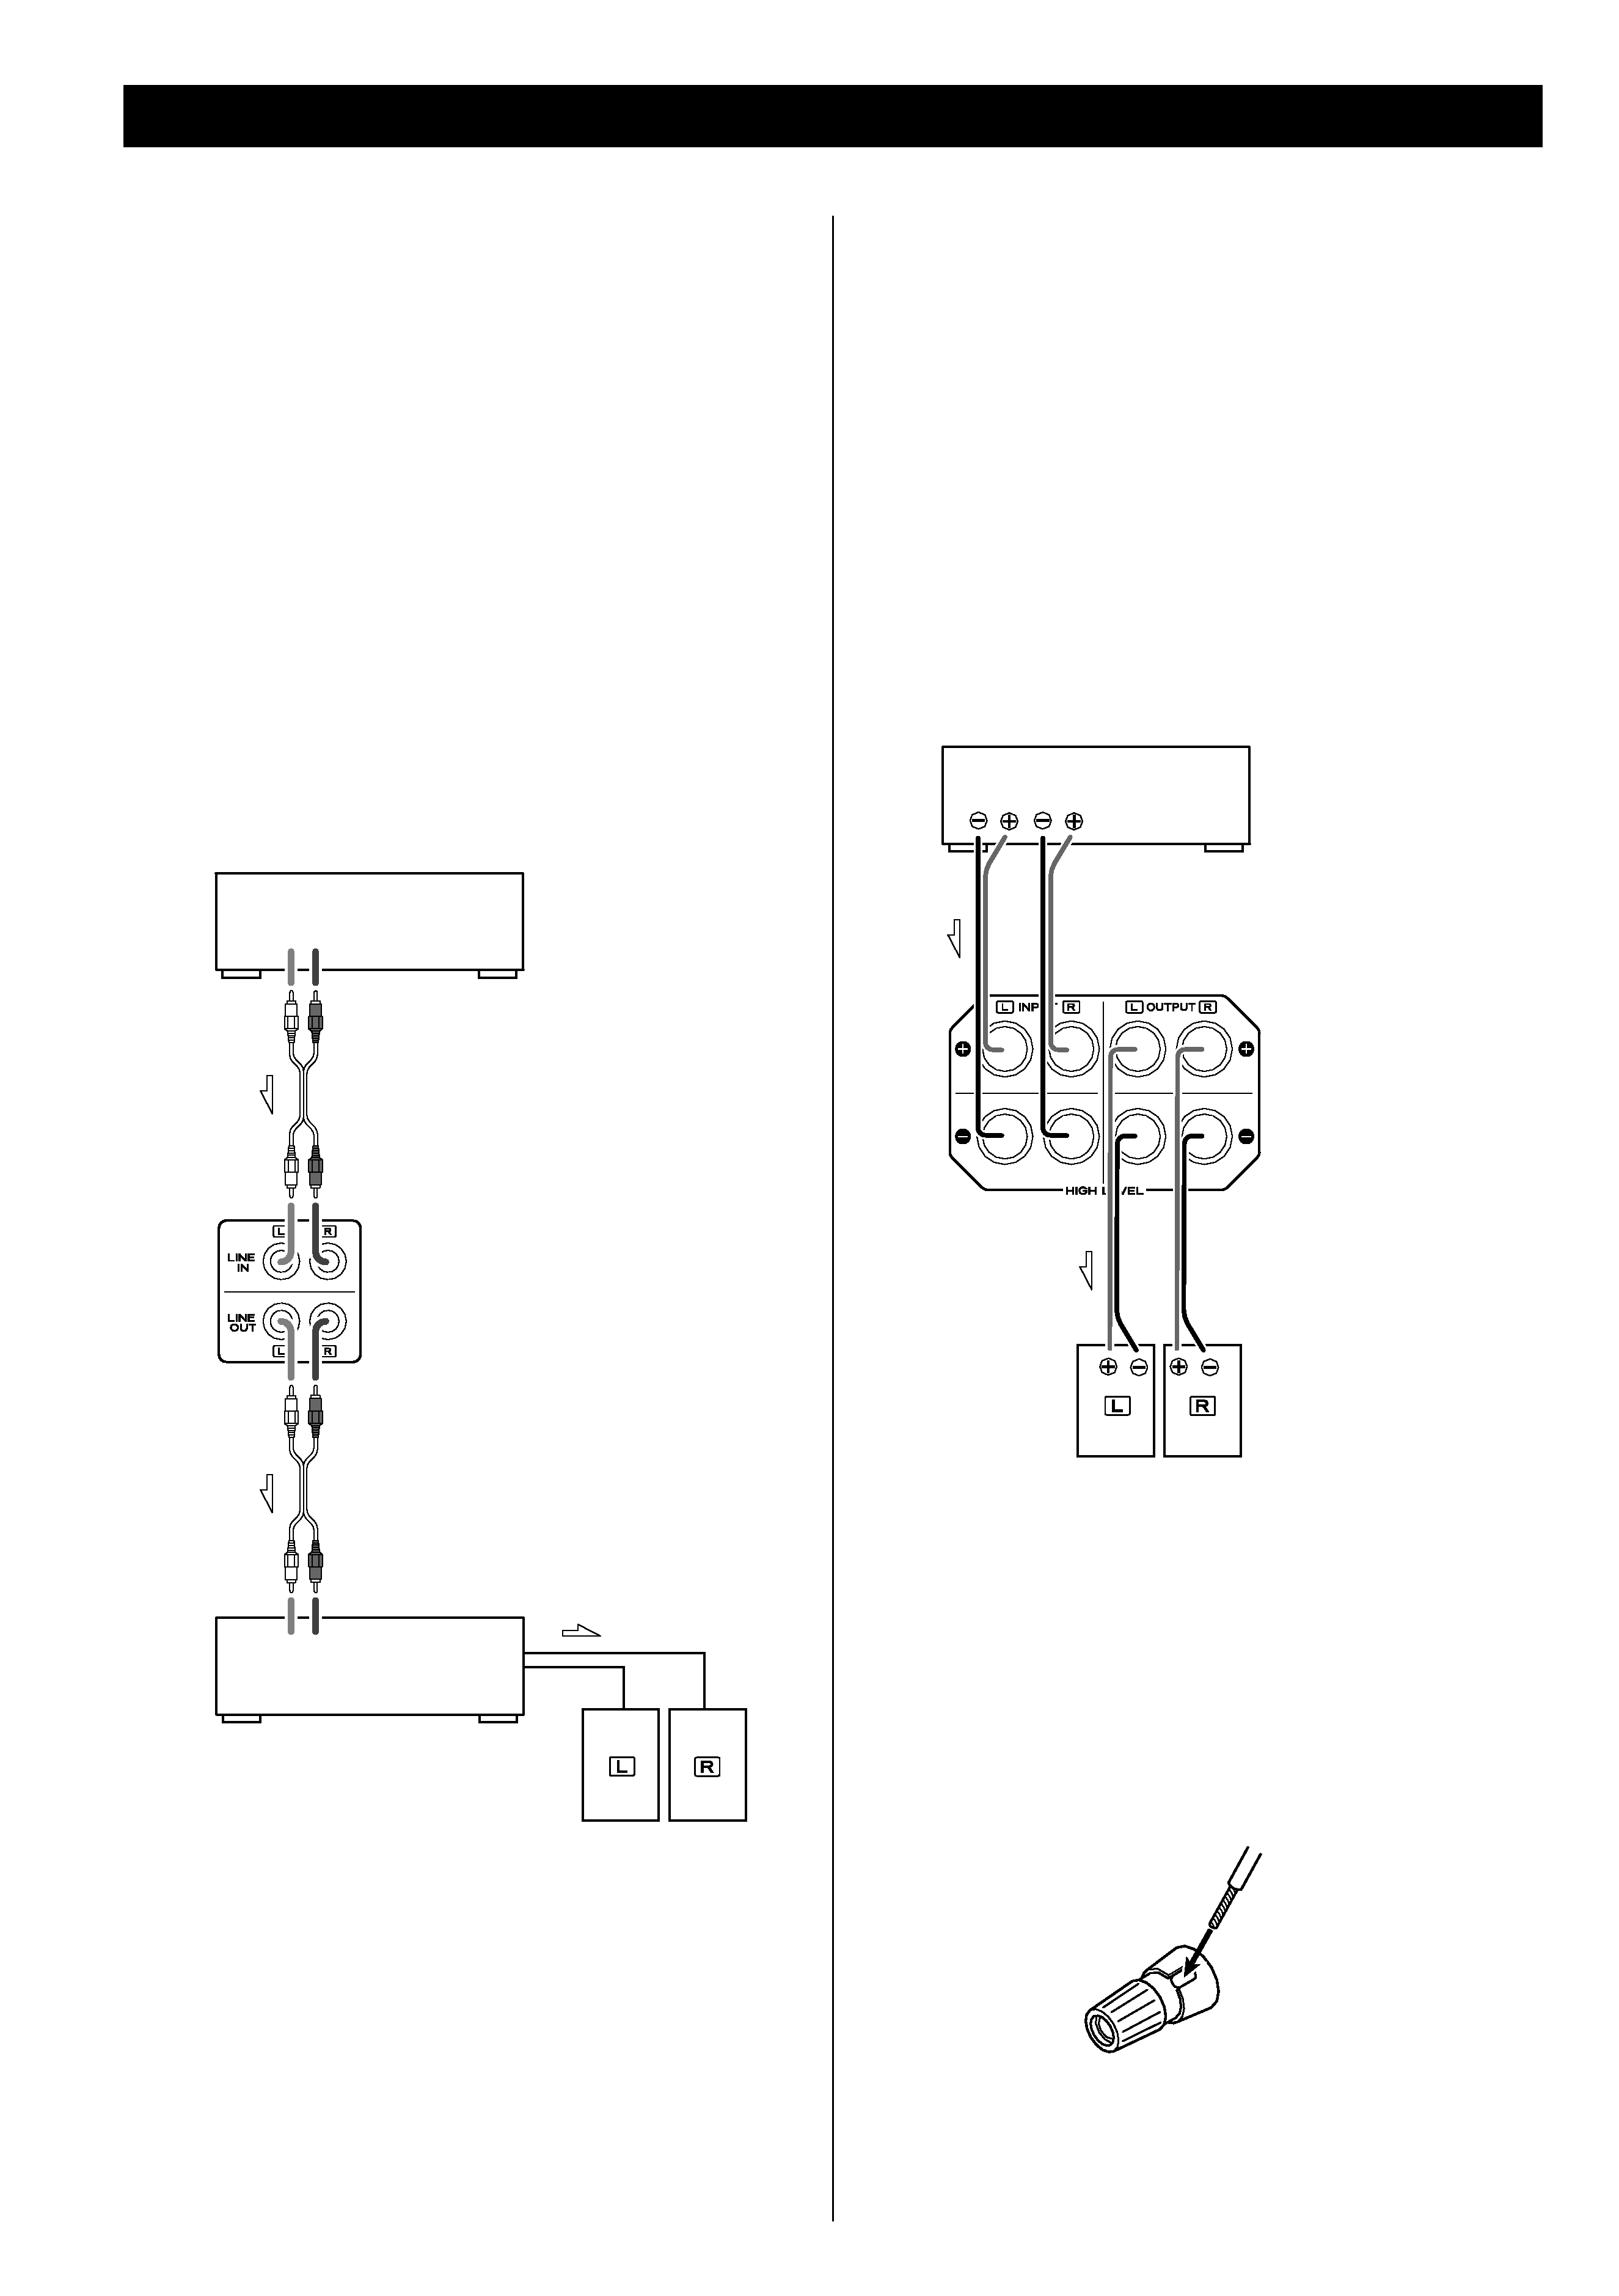
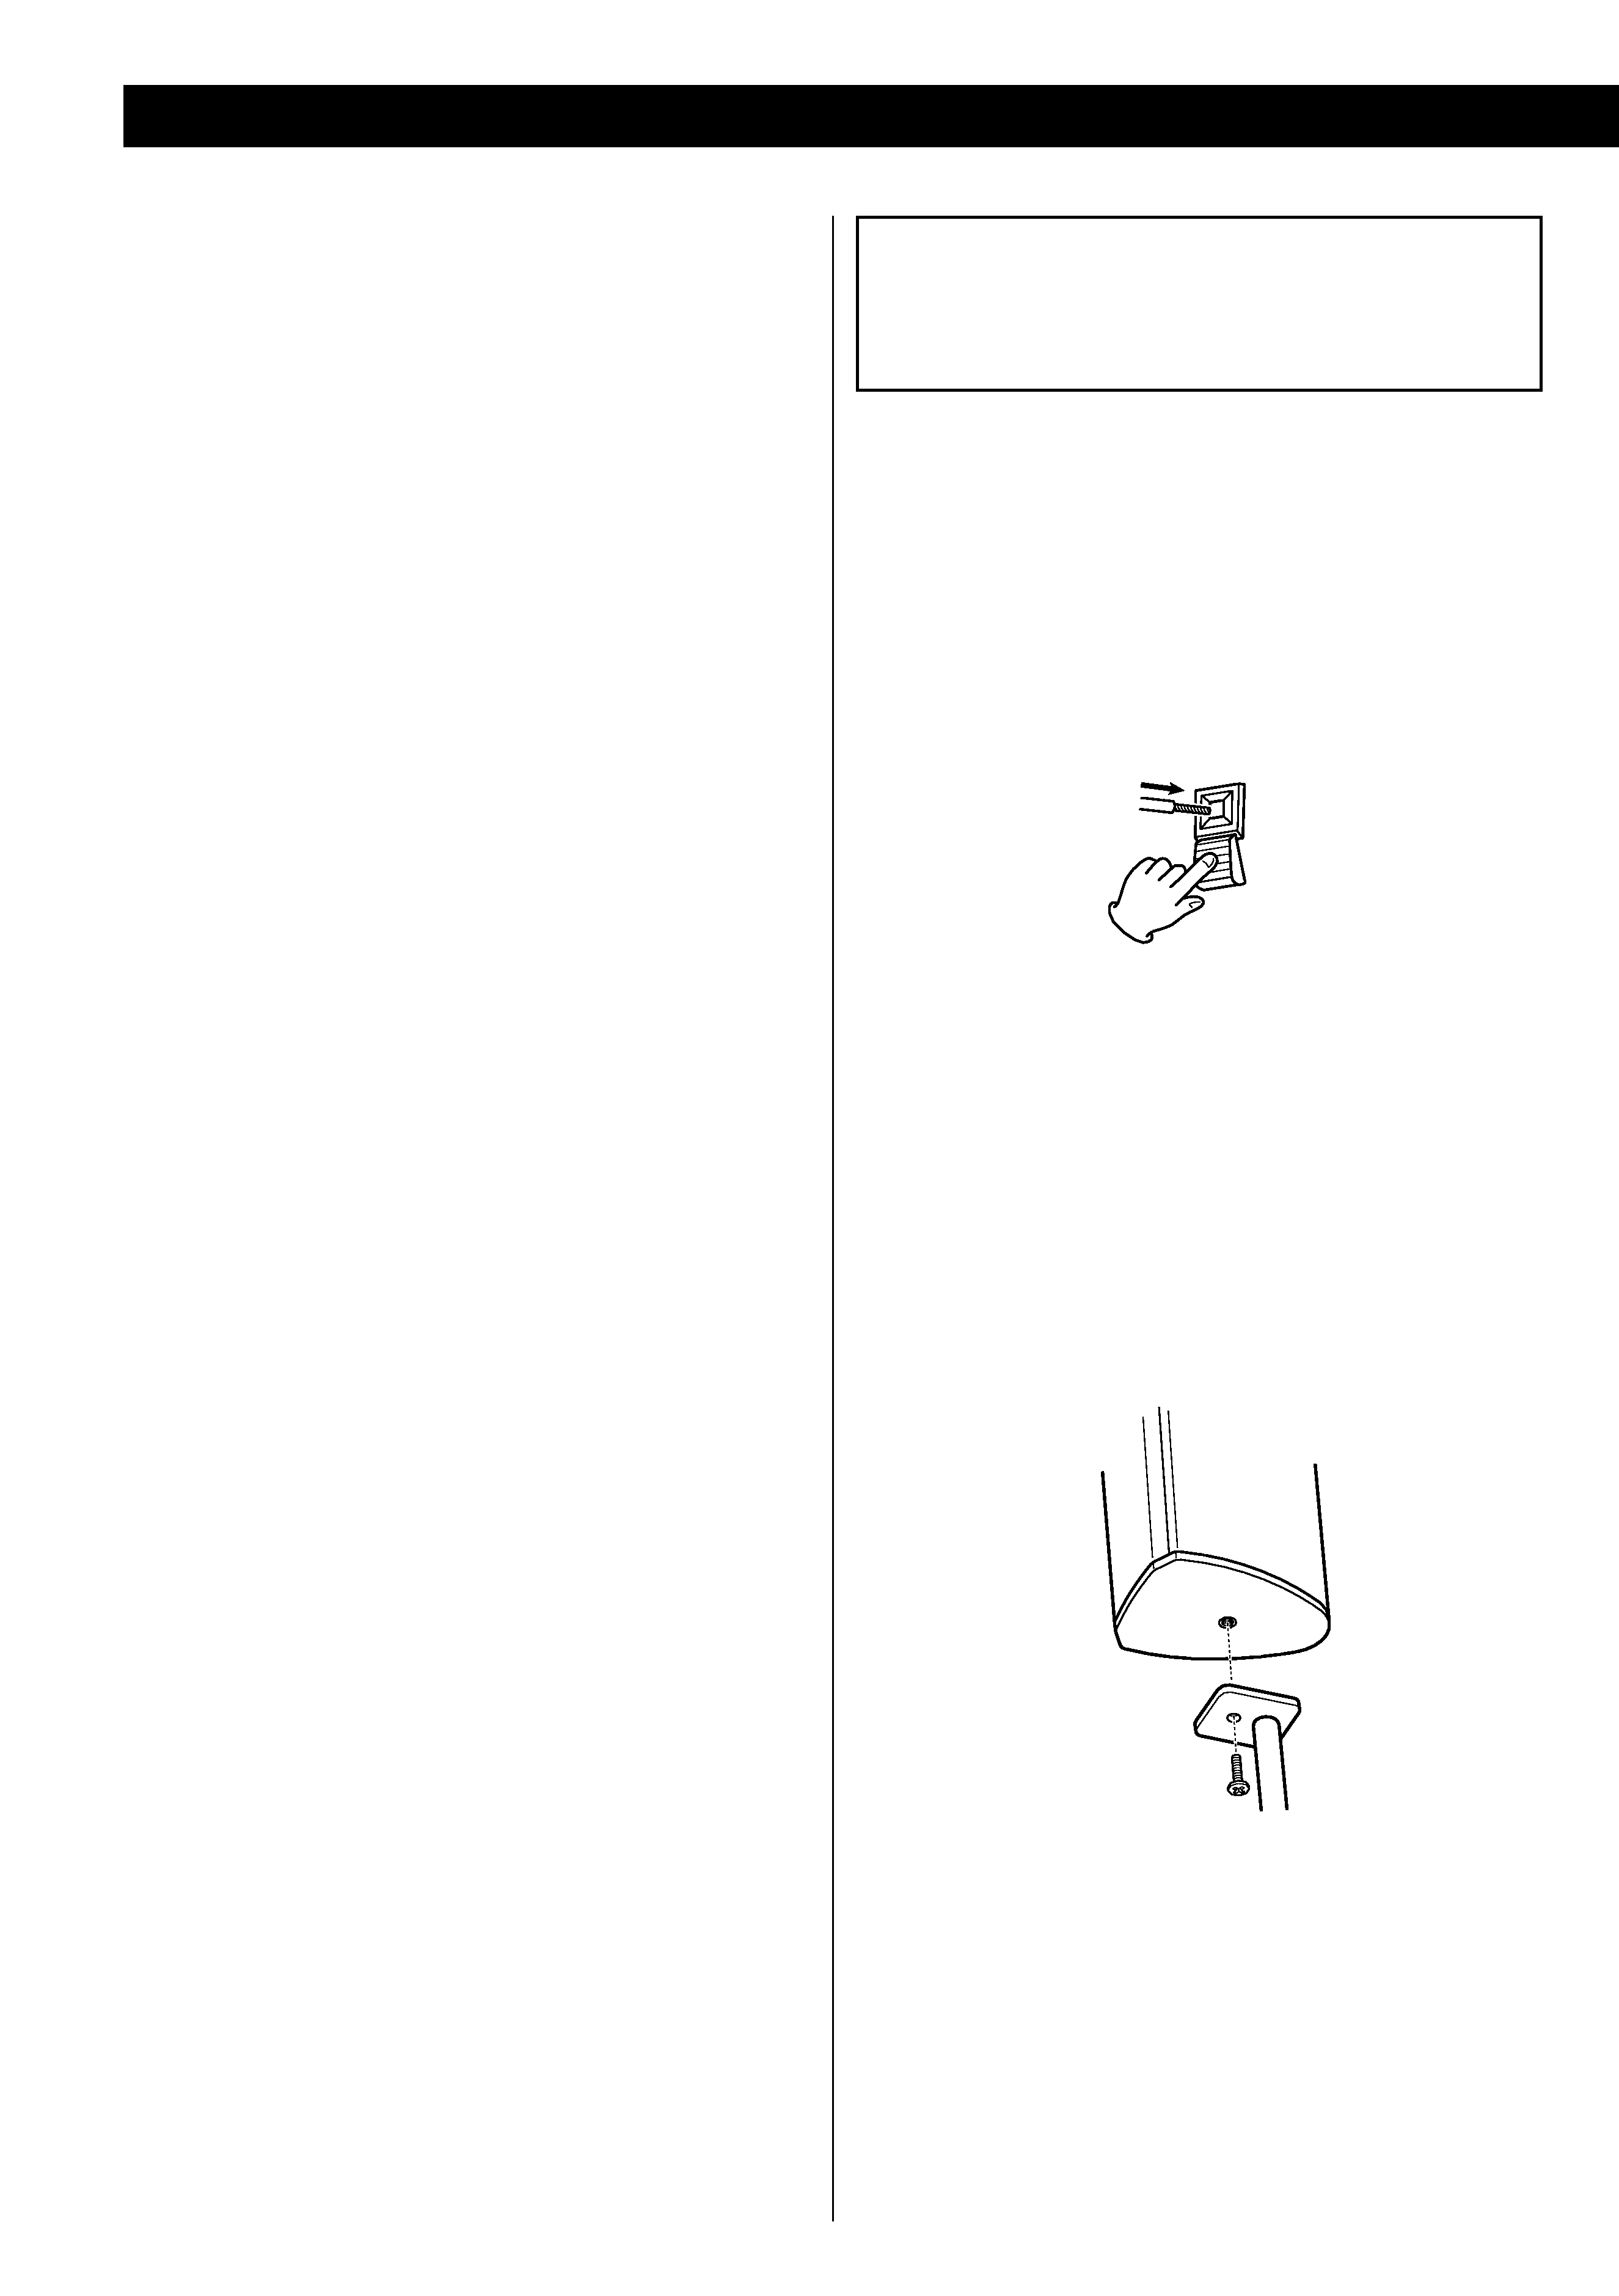
Press the lever, insert the stripped end of the cord, then
release the lever.
Make sure it is fastened securely by pulling the cord lightly.
Satellite speakers can be mounted on the appropriate stand or
wall mounting bracket. (LS-F6000, LS-S8000)
< Prior to use, ensure that mounted places like the wall or
ceiling are strong enough to withstand the weight of the
speaker and attachment.
Before Use
Please confirm that the following units are in the box when you
open it.
LS-A5000:
Front Speaker (LS-F6000) x 2
Center Speker (LS-C8000) x1
Surround Speaker (LS-S8000) x 2
Powered Subwoofer (LS-A8000) x1
LS-A6000:
Front Speaker (LS-F6000) x 2
Center Speker (LS-C8000) x1
Surround Speaker (LS-S8000) x 2
Surround Back Speaker (LS-S8000) x 1
Powered Subwoofer (LS-A8000) x1
LS-A8000:
Front Speaker (LS-F8000) x 2
Center Speker (LS-C8000) x1
Surround Speaker (LS-S8000) x 2
Powered Subwoofer (LS-A8000) x1
LS-A9000:
Front Speaker (LS-F8000) x 2
Center Speker (LS-C8000) x1
Surround Speaker (LS-S8000) x 2
Surround Back Speaker (LS-S8000) x 1
Powered Subwoofer (LS-A8000) x1
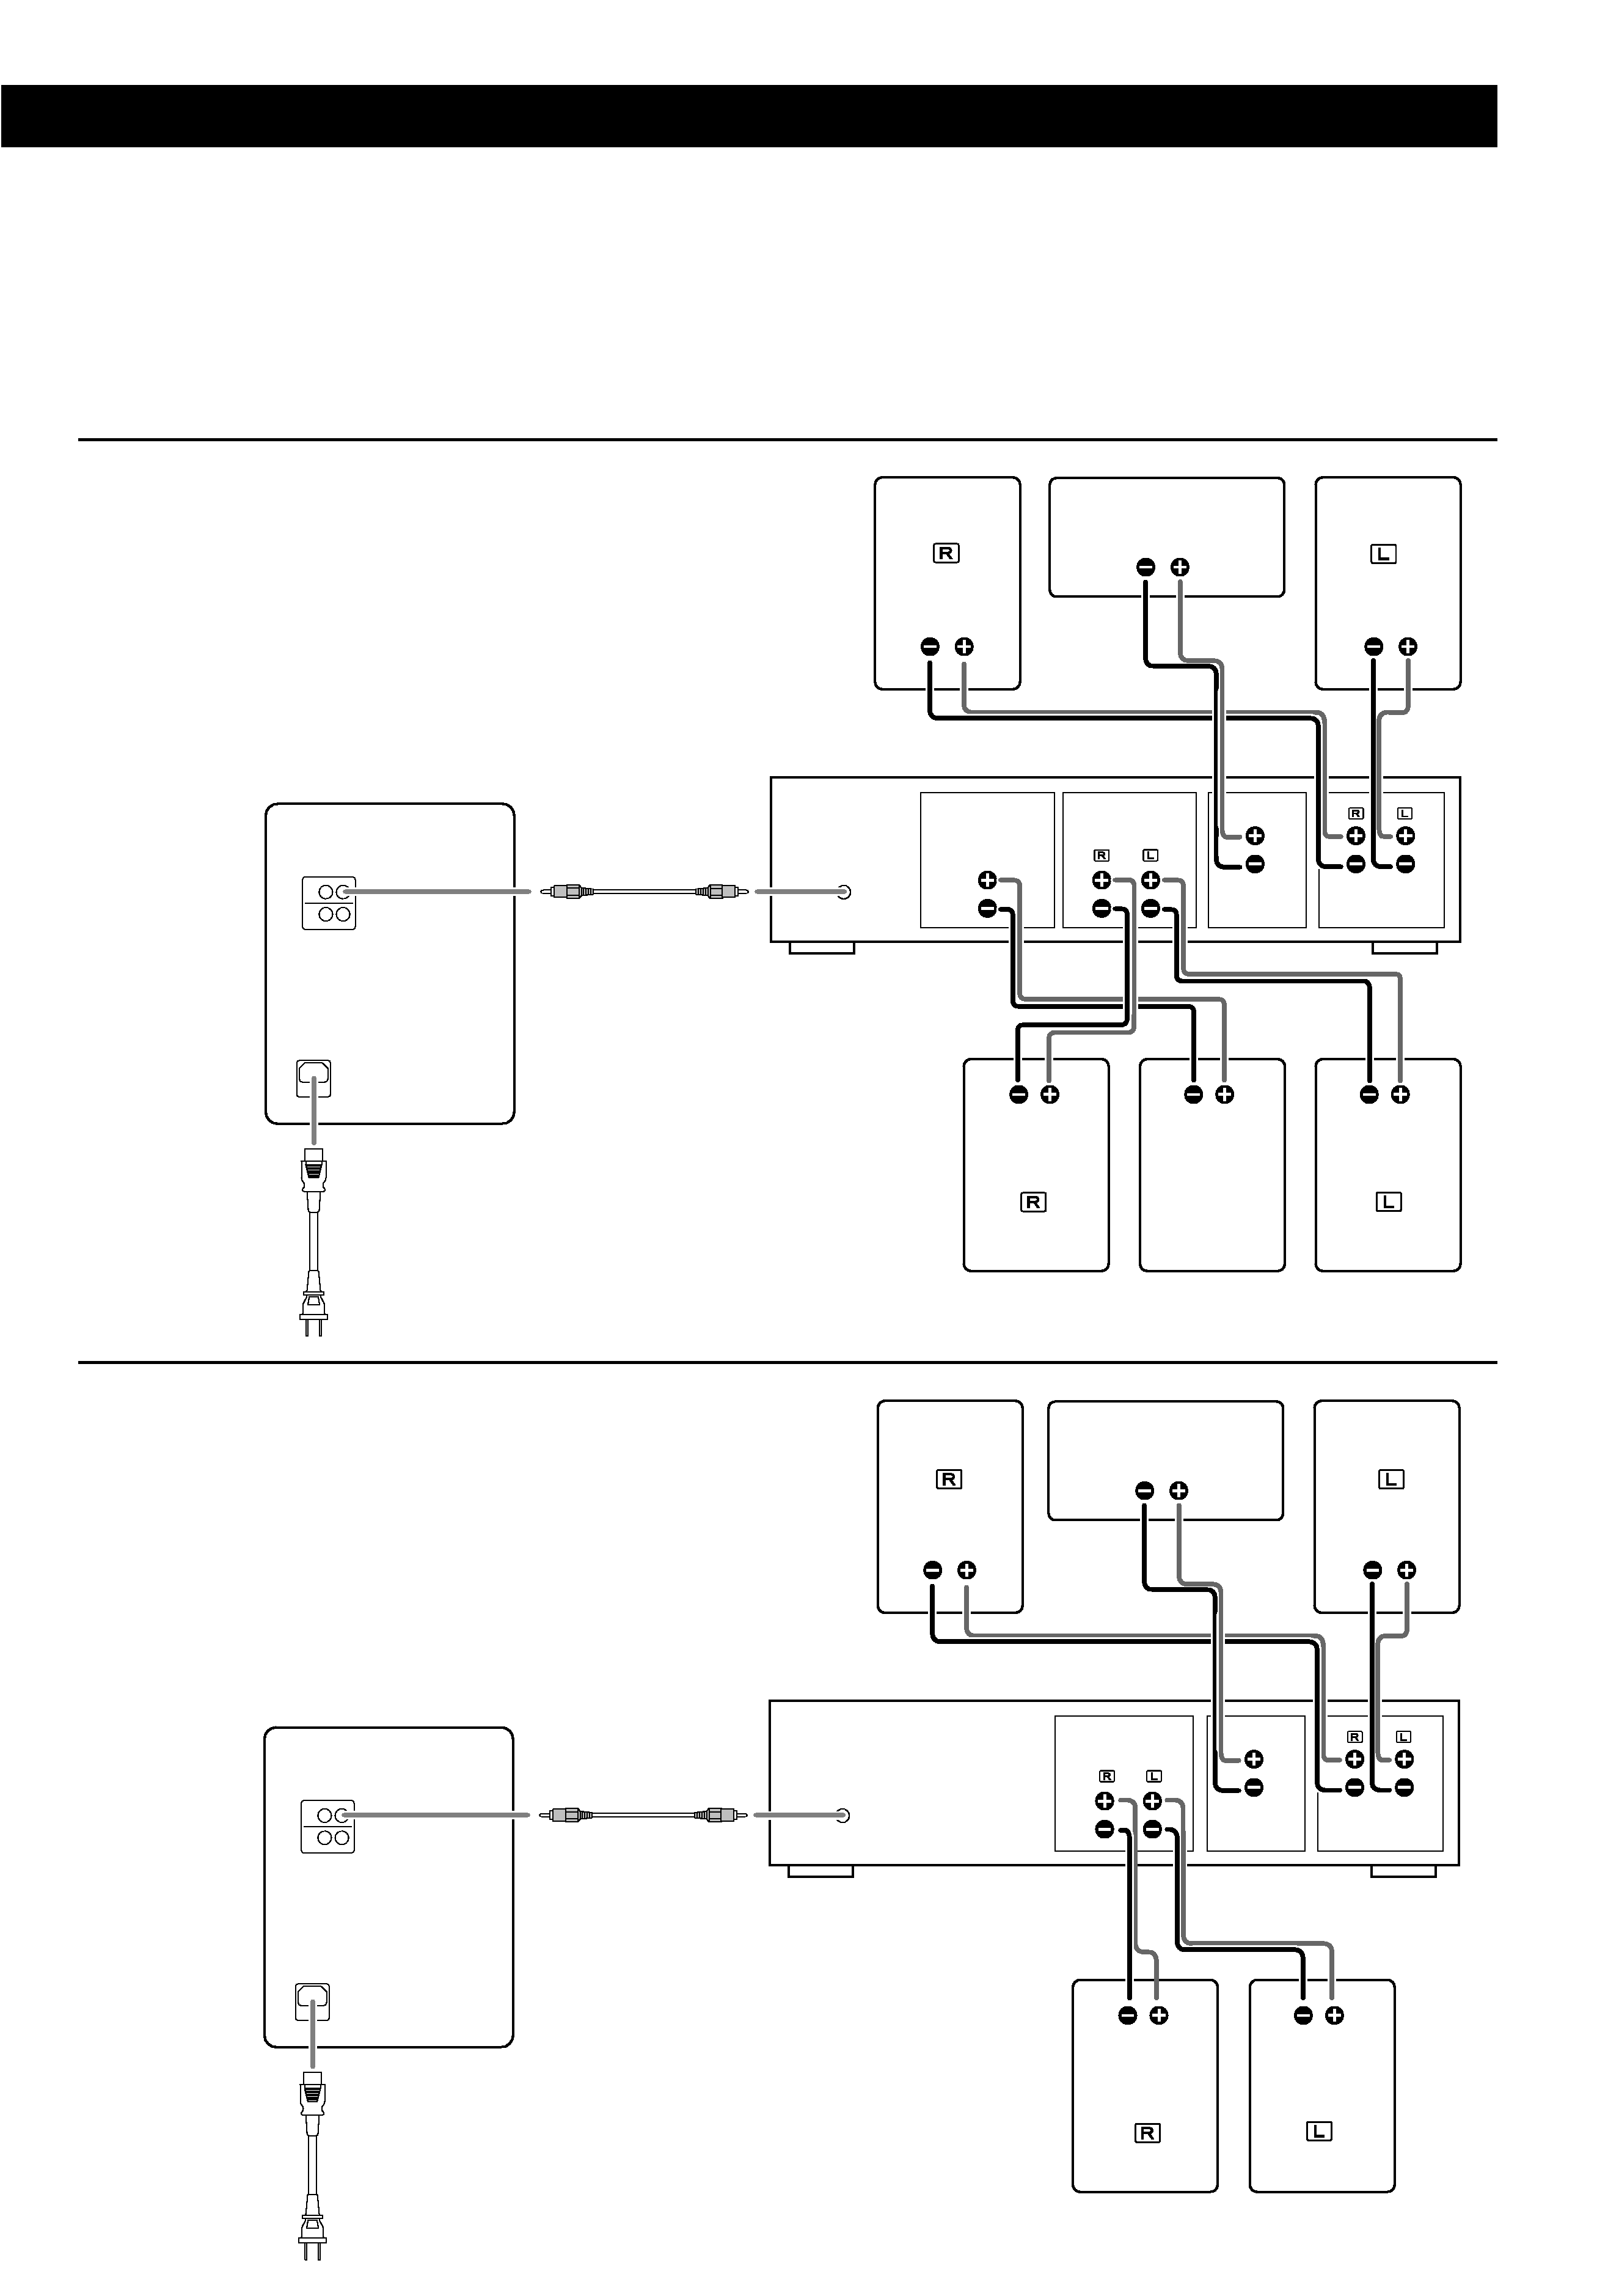
CAUTION
< Be sure to read the instruction manual of the amplifier
carefully and switch the power off before connecting the
speaker.
< Connect the provided speaker cables (or other suitable cables)
from the speaker terminals to the terminals of the amplifier.
< Be sure that the positive + terminal of the speaker is
connected to the corresponding + terminal of the amplifier,
and that negative _ matches _.
< When connecting to an amplifier having an output higher than
the maximum rated input of the speaker, be careful not to
exceed the speaker's maximum input, otherwise it will damage
the speaker.
< Be sure to connect the power cord to an AC outlet which
supplies the correct voltage.
< Hold the power plug when plugging or unplugging the power
cord.
< When the cord is plugged in, a small amount of current
continues to flow to the unit, even when the power is turned
off. Unplug the power cord from the AC outlet when the unit
isn't in use for some time.
Use unified screws.
(6 mm)