TEAC AG15D Owner's Manual

Cover page of TEAC AG15D Owner's Manual

Owner's Manual for TEAC AG15D, downloadable as a PDF file.

We also have service manual to this model.

Manual details

  • Immediate download after payment.
  • Delivered as a PDF file.
  • The manual has 120 pages
  • File size: 2.22 MB
  • Available language versions: French, English, Spanish, Dutch, German, Italian
  • Different language versions may vary sligthly in file size and page count.

We guarantee that...

  • our manuals are complete,
  • our manuals are checked with antivirus,
  • We'll issue refund if the manual is damaged, incomplete or unreadable (our refund policy)

Sample pages

Thumbnail of page 1Thumbnail of page 2Thumbnail of page 3Thumbnail of page 4
Thumbnail of page 5Thumbnail of page 6Thumbnail of page 7Thumbnail of page 8
Thumbnail of page 9
background image
OWNER'S MANUAL
MANUEL DU PROPRIÉTAIRE
MANUAL DEL USUARIO
9A10066900
AG-15D
AV Digital Home Theater Receiver
Z
background image
OWNER'S MANUAL
MANUEL DU PROPRIÉTAIRE
MANUAL DEL USUARIO
9A10066900
AG-15D
AV Digital Home Theater Receiver
Z
background image
ENGLISH
Contents
2
CAUTION Regarding Placement
To maintain proper ventilation, be sure to leave a space
around the unit (from the largest outer dimensions including
projections) equal to, or greater than, shown below.
Left and Right Panels : 10 cm
Rear Panel
: 10 cm
Top Panel
: 50 cm
Thank you for choosing TEAC. Read this manual carefully
to get the best performance from this unit.
"DTS", "DTS-ES", "DTS 96/24" and "Neo:6" are trademarks
of Digital Theater Systems, Inc.
Manufactured under license from Dolby Laboratories.
"Dolby", "Pro Logic" and the double-D symbol are
trademarks of Dolby Laboratories.
"DTS", "DTS-ES", "DTS 96/24" et "Neo:6" sont des marques
déposées de Digital Theater Systems, Inc.
Fabriquer sous license par Dolby Laboratories. "Dolby", "Pro
Logic" et le symbol double D sont des marques déposées de
Dolby Laboratories.
"DTS", "DTS-ES", "DTS 96/24" y "Neo:6" son marcas
registradas de Digital Theater Systems, Inc.
Fabricado con licencia de Dolby Laboratories. "Dolby", "Pro
Logic" y el símbolo de la doble D son marcas registradas de
Dolby Laboratories.
CAUTION
The product shall not be exposed to dripping or splashing and
that no object filled with liquids, such as vases, shall be placed
on the product.
Do not install this equipment in a confined space such as a
book case or similar unit.
Contents . . . . . . . . . . . . . . . . . . . . . . . . . . . . . . . . . . . . . . . . . 2
Before Use . . . . . . . . . . . . . . . . . . . . . . . . . . . . . . . . . . . . . . . . 4
How to Reset the Settings to the FACTORY DEFAULTS . . . . . . . 4
Connection (FM antenna) . . . . . . . . . . . . . . . . . . . . . . . . . . . . . 6
Connection (AM antenna). . . . . . . . . . . . . . . . . . . . . . . . . . . . . 8
Connection. . . . . . . . . . . . . . . . . . . . . . . . . . . . . . . . . . . . . . . 10
Speaker Connections . . . . . . . . . . . . . . . . . . . . . . . . . . . . . . . 16
Positioning of the Speakers . . . . . . . . . . . . . . . . . . . . . . . . . . . 18
Names of Each Control . . . . . . . . . . . . . . . . . . . . . . . . . . . . . . 20
Battery Installation . . . . . . . . . . . . . . . . . . . . . . . . . . . . . . . . . 23
Remote Control Unit. . . . . . . . . . . . . . . . . . . . . . . . . . . . . . . . 32
Speaker Configuration . . . . . . . . . . . . . . . . . . . . . . . . . . . . . . 40
Basic Operation. . . . . . . . . . . . . . . . . . . . . . . . . . . . . . . . . . . . 54
Dubbing the audio and video signals separately . . . . . . . . . . . 62
Dubbing from VIDEO 2 or 3 to VIDEO 1 . . . . . . . . . . . . . . . . . 62
Surround Mode . . . . . . . . . . . . . . . . . . . . . . . . . . . . . . . . . . . 64
DOLBY PRO LOGIC IIx MUSIC parameters . . . . . . . . . . . . . . 76
Speaker Layouts for Dolby Virtual Speaker . . . . . . . . . . . . . 78
Dynamic Range Compression . . . . . . . . . . . . . . . . . . . . . . . . . 80
Tuner . . . . . . . . . . . . . . . . . . . . . . . . . . . . . . . . . . . . . . . . . . . 82
Preset Tuning . . . . . . . . . . . . . . . . . . . . . . . . . . . . . . . . . . . . . 84
RDS . . . . . . . . . . . . . . . . . . . . . . . . . . . . . . . . . . . . . . . . . . . . 86
RDS Search . . . . . . . . . . . . . . . . . . . . . . . . . . . . . . . . . . . . . . . 88
RDS (EON PTY/EON TA). . . . . . . . . . . . . . . . . . . . . . . . . . . . . . 90
PTY Programs . . . . . . . . . . . . . . . . . . . . . . . . . . . . . . . . . . . . 92
OSD (On-Screen Display) . . . . . . . . . . . . . . . . . . . . . . . . . . . . . 94
Speaker Setup (Auto) . . . . . . . . . . . . . . . . . . . . . . . . . . . . . . 100
Troubleshooting . . . . . . . . . . . . . . . . . . . . . . . . . . . . . . . . . . 104
Specifications . . . . . . . . . . . . . . . . . . . . . . . . . . . . . . . . . . . . 108
Code List . . . . . . . . . . . . . . . . . . . . . . . . . . . . . . . . . . . . . . . 111
Function Table . . . . . . . . . . . . . . . . . . . . . . . . . . . . . . . . . . . 118
background image
FRANÇAIS
ESPAÑOL
Sommaire
Indice
3
ATTENTION
Ne pas exposer l'appareil à l'humidité ou aux projections
d'eau; ne pas poser d'objets contenant de l'eau, tels qu'un
vase, ou un liquide quelconque, sur l'appareil.
Ne pas installer l'appareil dans un endroit clos tel qu'une
bibliothèque ou un meuble fermé.
PRECAUCIÓN
El producto no deberá quedar expuesto a goteos o
salpicaduras, ni servir de base para objetos que contengan
líquido (jarrones, etc.).
No instale este equipo en espacios cerrados tales como
estantes de libros o similares.
Nous vous remercions pour l'achat d'un appareil TEAC. Lire
ce manuel avec attention pour obtenir les meilleures
performances possibles de cet appareil.
Enhorabuena por la adquisición de un TEAC. Lea
detenidamente este manual a fin de obtener el mejor
rendimiento de esta unidad.
Sommaire . . . . . . . . . . . . . . . . . . . . . . . . . . . . . . . . . . . . . . . . . 3
Avant utilisation . . . . . . . . . . . . . . . . . . . . . . . . . . . . . . . . . . . . 5
Comment réinitialiser les VALEURS PAR DEFAUT REGLES EN
USINE . . . . . . . . . . . . . . . . . . . . . . . . . . . . . . . . . . . . . . . . . . . . 5
Raccordement des antennes (FM) . . . . . . . . . . . . . . . . . . . . . . . 7
Raccordement des antennes (AM). . . . . . . . . . . . . . . . . . . . . . . 9
Raccordements . . . . . . . . . . . . . . . . . . . . . . . . . . . . . . . . . . . . 11
Raccordement des enceintes . . . . . . . . . . . . . . . . . . . . . . . . . . 17
Emplazamiento de los altavoces . . . . . . . . . . . . . . . . . . . . . . . 19
Noms des commandes . . . . . . . . . . . . . . . . . . . . . . . . . . . . . . 24
Mise en place des piles . . . . . . . . . . . . . . . . . . . . . . . . . . . . . . 27
Télécommande . . . . . . . . . . . . . . . . . . . . . . . . . . . . . . . . . . . . 33
Configuration des enceintes . . . . . . . . . . . . . . . . . . . . . . . . . . 41
Fonctionnement de base. . . . . . . . . . . . . . . . . . . . . . . . . . . . . 55
Copie séparée de signaux audio et vidéo. . . . . . . . . . . . . . . . . 63
Copie de VIDEO 2 ou 3 à VIDEO 1 . . . . . . . . . . . . . . . . . . . . . 63
Mode Surround . . . . . . . . . . . . . . . . . . . . . . . . . . . . . . . . . . . 65
Paramètres DOLBY PRO LOGIC IIx MUSIC . . . . . . . . . . . . . . 77
Configurations des enceintes en mode Dolby Virtual Speaker . 79
Compression de la gamme dynamique . . . . . . . . . . . . . . . . . . 81
Syntoniseur. . . . . . . . . . . . . . . . . . . . . . . . . . . . . . . . . . . . . . . 83
Syntonisation préréglée. . . . . . . . . . . . . . . . . . . . . . . . . . . . . . 85
RDS . . . . . . . . . . . . . . . . . . . . . . . . . . . . . . . . . . . . . . . . . . . . 87
Recherche de RDS. . . . . . . . . . . . . . . . . . . . . . . . . . . . . . . . . . 89
RDS (EON PTY/EON TA). . . . . . . . . . . . . . . . . . . . . . . . . . . . . . 91
Programmes PTY. . . . . . . . . . . . . . . . . . . . . . . . . . . . . . . . . . . 93
OSD (Affichage sur écran) . . . . . . . . . . . . . . . . . . . . . . . . . . . . 95
Configuration des enceintes (Automatique) . . . . . . . . . . . . . 101
Dépannage . . . . . . . . . . . . . . . . . . . . . . . . . . . . . . . . . . . . . . 105
Caractéristiques techniques. . . . . . . . . . . . . . . . . . . . . . . . . . 109
Code de réglage . . . . . . . . . . . . . . . . . . . . . . . . . . . . . . . . . . 111
Tableau de fonctions. . . . . . . . . . . . . . . . . . . . . . . . . . . . . . . 118
Indice . . . . . . . . . . . . . . . . . . . . . . . . . . . . . . . . . . . . . . . . . . . . 3
Antes de comenzar . . . . . . . . . . . . . . . . . . . . . . . . . . . . . . . . . . 5
Para restablecer los ajustes originales de fábrica . . . . . . . . . . . . 5
Conexión (Antena de FM) . . . . . . . . . . . . . . . . . . . . . . . . . . . . . 7
Conexión (Antena de AM) . . . . . . . . . . . . . . . . . . . . . . . . . . . . 9
Conexión . . . . . . . . . . . . . . . . . . . . . . . . . . . . . . . . . . . . . . . . 11
Conexiones de altavoz . . . . . . . . . . . . . . . . . . . . . . . . . . . . . . 17
Mise en place des enceintes . . . . . . . . . . . . . . . . . . . . . . . . . . 19
Nombres de los controles . . . . . . . . . . . . . . . . . . . . . . . . . . . . 28
Instalación de las pilas. . . . . . . . . . . . . . . . . . . . . . . . . . . . . . . 31
Mando a distancia . . . . . . . . . . . . . . . . . . . . . . . . . . . . . . . . . 33
Configuración de altavoces . . . . . . . . . . . . . . . . . . . . . . . . . . . 41
Funcionamiento básico . . . . . . . . . . . . . . . . . . . . . . . . . . . . . . 55
Copia de las señales de audio y vídeo por separado . . . . . . . . 63
Copia de VIDEO 2 ó 3 a VIDEO 1 . . . . . . . . . . . . . . . . . . . . . . 63
Modo envolvente . . . . . . . . . . . . . . . . . . . . . . . . . . . . . . . . . . 65
Parámetros DOLBY PRO LOGIC IIx MUSIC . . . . . . . . . . . . . . 77
Distribución de los altavoces con Dolby Virtual Speaker . . . 79
Compresión del margen dinámico. . . . . . . . . . . . . . . . . . . . . . 81
Sintonizador . . . . . . . . . . . . . . . . . . . . . . . . . . . . . . . . . . . . . . 83
Presintonías . . . . . . . . . . . . . . . . . . . . . . . . . . . . . . . . . . . . . . 85
RDS . . . . . . . . . . . . . . . . . . . . . . . . . . . . . . . . . . . . . . . . . . . . 87
Búsqueda RDS . . . . . . . . . . . . . . . . . . . . . . . . . . . . . . . . . . . . 89
RDS (EON PTY/EON TA). . . . . . . . . . . . . . . . . . . . . . . . . . . . . . 91
Programas PTY (por tipo) . . . . . . . . . . . . . . . . . . . . . . . . . . . . 93
OSD (menús de pantalla). . . . . . . . . . . . . . . . . . . . . . . . . . . . . 95
Configuración de los altavoces (Automática) . . . . . . . . . . . . . 101
Solución de problemas . . . . . . . . . . . . . . . . . . . . . . . . . . . . . 105
Especificaciones . . . . . . . . . . . . . . . . . . . . . . . . . . . . . . . . . . 110
Código de configuración. . . . . . . . . . . . . . . . . . . . . . . . . . . . 111
Tabla de funciones . . . . . . . . . . . . . . . . . . . . . . . . . . . . . . . . 118
background image
ENGLISH
Before Use
4
Read this before operation
<
As the unit may become warm during operation, always leave
sufficient space around the unit for ventilation.
The ventilation holes should not be covered. Make sure there
is at least 50 cm of space above and at least 10 cm of space
on each side of the unit. Do NOT place anything on top of the
unit.
<
The voltage supplied to the unit should match the voltage as
printed on the rear panel. If you are in any doubt regarding
this matter, consult an electrician.
<
Choose the installation location of your unit carefully. Avoid
placing it in direct sunlight or close to a source of heat. Also
avoid locations subject to vibrations and excessive dust, heat,
cold or moisture.
<
Do not place the unit on the amplifier/receiver.
<
Do not open the cabinet as this might result in damage to the
circuitry or electrical shock. If a foreign object should get into
the unit, contact your dealer or service company.
<
When removing the power plug from the wall outlet, always
pull directly on the plug, never yank the cord.
<
Do not attempt to clean the unit with chemical solvents as
this might damage the finish. Use a clean, dry or slightly
damp cloth.
<
Keep this manual in a safe place for future reference.
How to Reset the Settings to the FACTORY DEFAULTS
Memory Backup
If the power supply is interrupted for 14 days or longer, the
settings kept in memory (such as preset stations and speaker
settings) will be erased.
Restoring factory settings
If you have made a lot of changes to the setup, and want to
restart from a known set of options, restore the unit to the
factory settings as follows:
1. With the unit in the standby mode, briefly press the
STANDBY/ON switch while holding down the MEMORY
button.
· Release the MEMORY button immediately after pressing the
STANDBY/ON switch.
The model name, etc. appears on the display.
2. Press the MEMORY button.
The unit turns standby.
3. Press the POWER switch to turn the unit off.
All memories are erased, and the unit returns to the factory
settings.
background image
FRANÇAIS
ESPAÑOL
5
Avant utilisation
Comment réinitialiser les VALEURS PAR DEFAUT REGLES EN USINE
Lire les consignes suivantes avant toute utilisation
<
L'appareil pouvant dégager de la chaleur lorsqu'il fonctionne,
laissez un espace suffisant autour de l'appareil afin de
permettre une ventilation naturelle.
Ne pas obstruer les orifices de ventilation. Laissez au moins 50
cm de libre au-dessus et au moins 10 cm de chaque côté de
l'appareil.
Ne placez RIEN au-dessus de l'appareil.
<
La tension d'alimentation utilisée doit être identique à la
tension indiquée sur la plaque à l'arrière de l'appareil. En cas
de doute, n'hésitez pas à consulter un électricien.
<
Choisissez soigneusement l'endroit où vous installerez
l'appareil. Evitez de le placer dans un endroit exposé
directement aux rayons solaires ou à proximité d'une source
de chaleur. Evitez également les endroits soumis à des
vibrations ou exposés à la poussière, à la chaleur, au froid et à
l'humidité.
<
Ne placez pas l'appareil sur l'amplificateur ou le récepteur.
<
N'ouvrez jamais l'appareil pour ne pas endommager les
circuits ou vous exposer à un risque d'électrocution. Au cas
où un objet tomberait par inadvertance dans l'appareil,
contactez votre revendeur ou la société chargée de la
maintenance.
<
Pour débrancher le cordon d'alimentation de la prise murale,
tirez directement sur la prise, ne tirez jamais sur le cordon.
<
N'essayez pas de nettoyer l'appareil avec un détergent
chimique, vous risqueriez d'abîmer la finition du revêtement.
Utilisez toujours un chiffon propre et sec.
<
Conservez soigneusement ce manuel pour pouvoir vous y
référer ultérieurement.
Mémoire de secours
Si l'alimentation est interrompue pendant 14 jours ou plus, les
réglages conservés en mémoire (tels que, par exemple les
stations préréglées, les réglages des enceintes) seront effacés.
Restauration des réglages d'origine
Si vous avez modifiés les réglages d'origine et que vous
souhaitez repartir d'une série d'options connues, restaurer les
paramètres d'origine, réglés en usine en procédant de la
façon suivante :
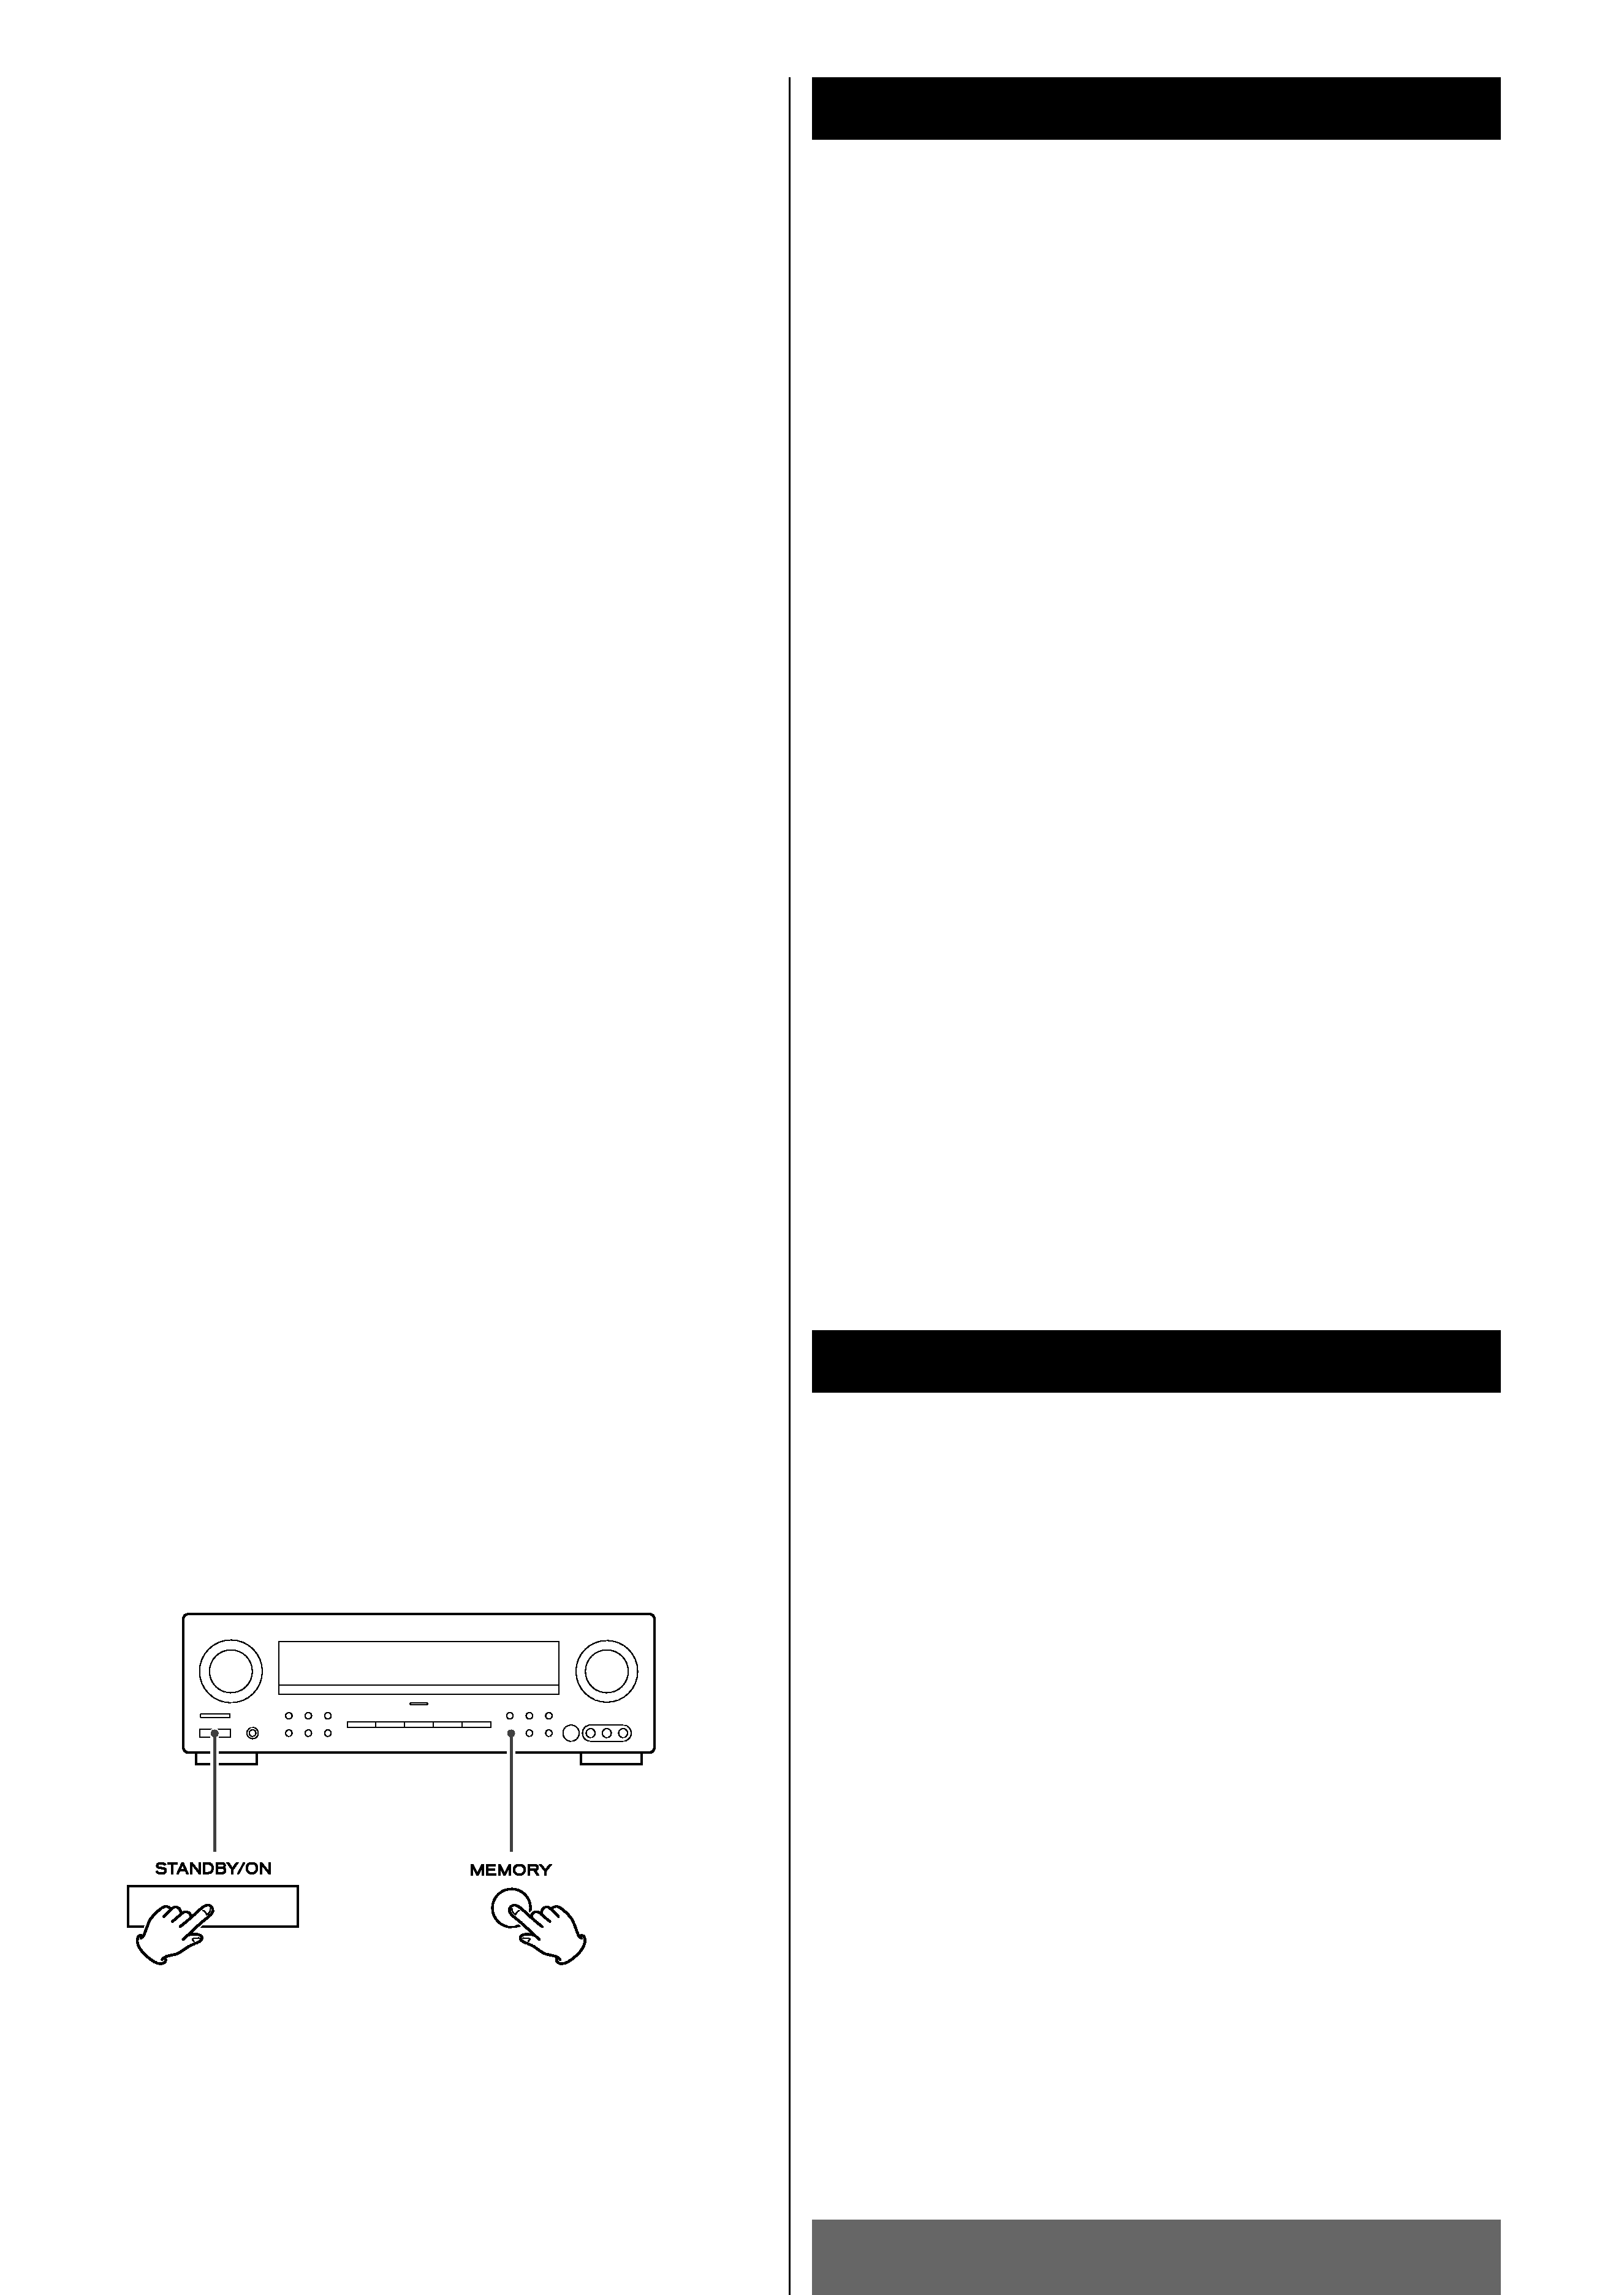
1. L'appareil est en mode veille, appuyer brièvement sur la
touche STANDBY/ON tout en maintenant le bouton MEMORY
enfoncé.
· Relâcher le bouton MEMORY immédiatement après avoir
appuyé sur la touche STANDBY/ON.
Le nom du modèle, etc. apparaît sur l'afficheur.
2. Appuyez sur la touche MEMORY.
L'appareil se met en veille.
3. Appuyez sur la touche POWER pour éteindre l'appareil.
Toutes les mémoires sont effacées et l'appareil reprend
l'ensemble des réglages effectuées en usine.
Antes de comenzar
Para restablecer los ajustes originales de fábrica
Léase antes de continuar
<
La unidad puede calentarse durante su funcionamiento, por
lo que habrá que dejar espacio suficiente alrededor para su
ventilación.
Los orificios de ventilación no deberán obstruirse. Deje al
menos 50 cm de espacio libre encima de cada unidad y 10 cm
en los laterales.
NO coloque ningún objeto encima de la unidad.
<
La tensión suministrada a la unidad deberá coincidir con el
valor indicado en el panel posterior. En caso de duda,
consulte a un electricista.
<
Elija cuidadosamente el emplazamiento de la unidad. No
coloque la unidad a la luz solar directa ni cerca de fuentes de
calor. Evite también los lugares expuestos a vibraciones o a un
exceso de suciedad, frío, calor o humedad.
<
No coloque la unidad encima del amplificador/receptor.
<
No abra la carcasa de la unidad, ya que podrían dañarse los
circuitos o producirse descargas eléctricas. Si entra algún
cuerpo extraño en la unidad, póngase en contacto con su
distribuidor o empresa de servicios.
<
Cuando desconecte el cable de la toma mural, sostenga
únicamente el conector y nunca el propio cable.
<
No intente limpiar la unidad con disolventes químicos, ya que
podrían dañar el acabado. Utilice un paño limpio y seco.
<
Conserve el manual en un lugar seguro para futuras
consultas.
Memoria de seguridad
Si el suministro de corriente se interrumpe durante dos semanas
o más, se borrarán los ajustes almacenados en la memoria (por
ejemplo, presintonías, configuración de altavoces).
Recuperación de los ajustes de fábrica
Si ha realizado muchos cambios de configuración y desea
reiniciar los valores, puede restablecer los ajustes de fábrica
siguiendo este procedimiento:
1. Con la unidad en el modo de espera, pulse brevemente el
interruptor STANDBY/ON mientras mantiene pulsado el botón
MEMORY.
· Libere el botón MEMORY inmediatamente después de
presionar el interruptor STANDBY/ON.
En la pantalla aparecerá el nombre del modelo, etc.
2. Pulse el botón MEMORY.
La unidad entrará en el modo de espera.
3. Pulse el interruptor POWER para apagar la unidad.
Todos los ajustes de la memoria se borrarán, y la unidad
restablecerá los valores de fábrica.

Reviews

There are no reviews of this manual yet.