QUICK START GUIDE
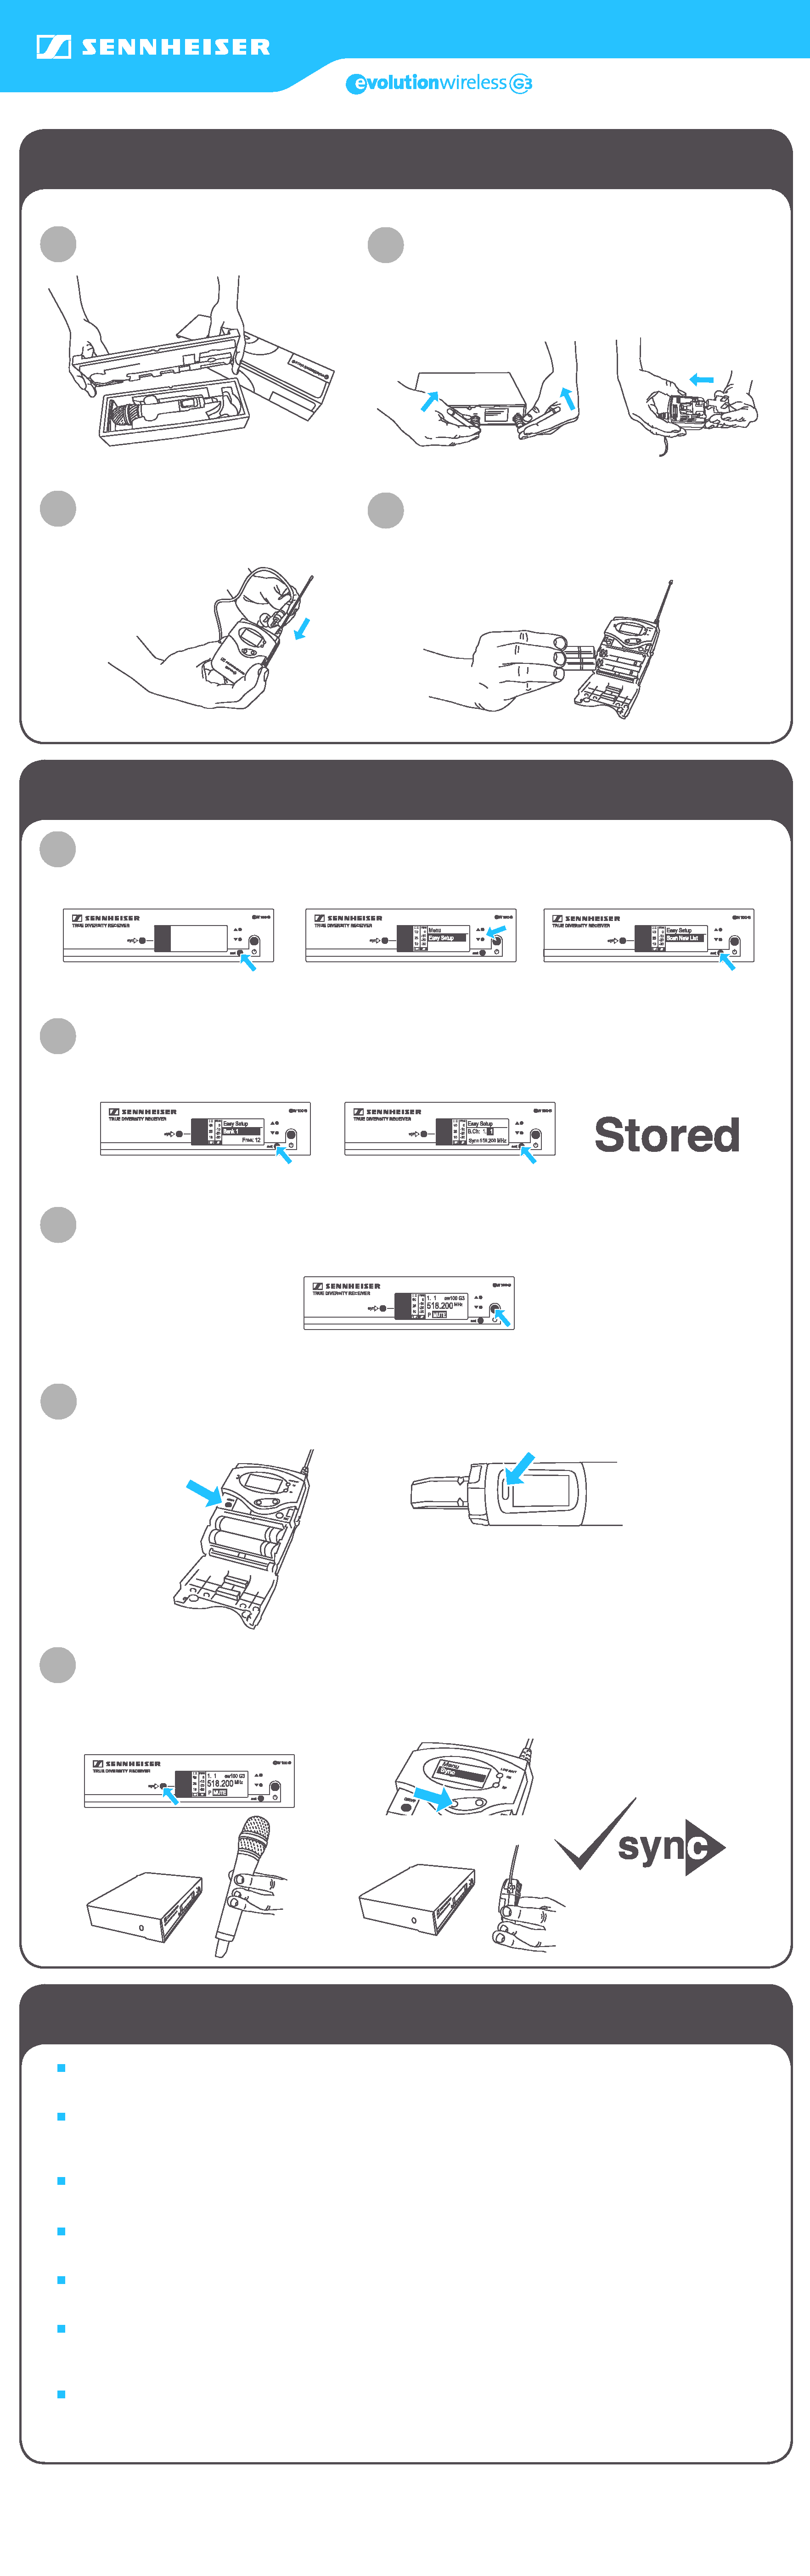
Unpack items from carton
(This step for EM units only) Attach antennas and
place in a "V" shape. Insert country tip into AC
adapter, it will slide in and make a positive "click".
Insert yellow plug into back of EM receiver unit.
Plug in lavalier microphone, headset mic,
or guitar cable into bodypack transmitter
and secure by gently tightening the
locking ring (if applicable)
Insert 2 x AA (UM3) batteries into the transmitter
(bodypack or handheld), observing polarity.
(Camera sets only): Insert 2 x AA batteries into
receiver bodypack (EK100G3). Connect either the
1/8" (3.5mm) or XLR camera output cable
1.
2.
3.
4.
PREPARING DEVICE FOR USE
FREQUENCY SCAN
Power on the receiver (EM or EK unit) by pressing the ON/OFF button. On the receiver, press SET to activate
the menu. Press up/down buttons to select "Easy Setup". Press SET and choose "Scan New List." Press SET
once more to start scan.
After the scan is completed (about 60 seconds) the receiver will suggest a BANK to choose with the most
free channels by placing the cursor over it. Press SET to confirm this BANK. Now select a channel using the
up/down arrows and press SET to confirm. The receiver will now say "STORED."
Tap ON/OFF to exit the menu. The frequency chosen will be displayed. You should see zero
RF/AF activity on the meter (indicating you are on a free channel).
1.
2.
3.
1.
3.
2.
1.
2.
3.
1a.
1.
4.
5.
Power up the transmitter (SK, SKM) you wish to pair with the receiver. Become familiar where the
infrared (IR) window is located. On a G3 handheld transmitter, the window is located on the LCD display.
On a bodypack transmitter, it is located under the battery door just to the right of the ON/OFF button
under a purple colored plastic.
Enter SYNC mode by pressing "SYNC" button (EM receivers) or selecting SYNC option from menu
(EK receiver). Once the SYNC logo displays, hold the handheld or bodypack infrared window facing
the left side of the receiver display about 6" away. When SYNC is successful, you will see a check
mark briefly next to the SYNC logo on the receiver screen. If you see an "X" next to the SYNC logo,
it indicates the sync failed and you should repeat the SYNC process.
2.
3.
FINAL SET-UP & TIPS
It is suggested that you adjust the receiver (EM or EK) AF OUT setting to around 0dB for most situations.
The AF OUT setting is your master ouput voume.
The
SENSITIVITY setting (SK and SKM transmitters only) should be adjusted so that in your loudest
passages, the
AF PEAK indicator briefly illuminates. As the SENSITIVITY settings move closer to "0 dB" they
become louder.
If setting up multiple systems in the same frequency range (A/B/G), you can repeat the
"EASY SETUP/SCAN NEW LIST/SYNC" process for each system.
Be sure to choose the same
BANK number (but a different channel number) for units in the same frequency
range in order to ensure trouble-free operation.
It is suggested you perform the
EASY SETUP/SCAN NEW LIST function whenever you use your unit in a
different area (at a gig etc.) Open frequencies vary from one location to another.
On the receiver: The
RF and AF meter bars indicate status. RF (Radio Frequency) meter is akin to "bars of
reception" on your cellphone. The AF (Audio Frequency) meter moves moves whenever audio
is transmitted through the system.
On portable camera sets the receiver will clip onto the included
CA2 camera shoe mount.
Sennheiser Electronic Corporation
One Enterprise Drive, Old Lyme, CT 06371
Tel: (860) 434-9190 · Fax: (860) 434-1759
www.sennheiserusa.com
2a.
1b.
2b.


