PIONEER XR-A100-K/KUXJ Owner's Manual

Cover page of PIONEER XR-A100-K/KUXJ Owner's Manual

Owner's Manual for PIONEER XR-A100-K/KUXJ, downloadable as a PDF file.

Manual details

  • Immediate download after payment.
  • Delivered as a PDF file.
  • The manual has 56 pages
  • File size: 1.21 MB
  • Available language versions: French, English, Spanish
  • Different language versions may vary sligthly in file size and page count.

We guarantee that...

  • our manuals are complete,
  • our manuals are checked with antivirus,
  • We'll issue refund if the manual is damaged, incomplete or unreadable (our refund policy)

Sample pages

Thumbnail of page 1Thumbnail of page 2Thumbnail of page 3Thumbnail of page 4
Thumbnail of page 5Thumbnail of page 6Thumbnail of page 7Thumbnail of page 8
Thumbnail of page 9
background image
English
Español
Français
'
DEMO FUNCTION
The Demo mode starts automatically when the power cord is
plugged into the power outlet.
Also, when the P.BASS (DEMO) button is pressed for three
seconds in the STANDBY mode, the Demo mode is activated.
In the Demo mode, various functions of this system appear on
the display.
÷ The Demo mode can be cancelled by pressing the POWER
switch or Function button.
÷ If you continue pressing the P.BASS (DEMO) button for three
seconds or more when in the Demo mode, the Demo mode is
canceled. While the Demo mode is canceled, it will not operate
even if you connect the power cord to a wall socket. To
reactivate the Demo mode, press the P.BASS (DEMO) button
for three seconds or more when in the STANDBY mode.
WARNING: TO PREVENT FIRE OR SHOCK HAZARD, DO
NOT EXPOSE THIS APPLIANCE TO RAIN OR MOISTURE.
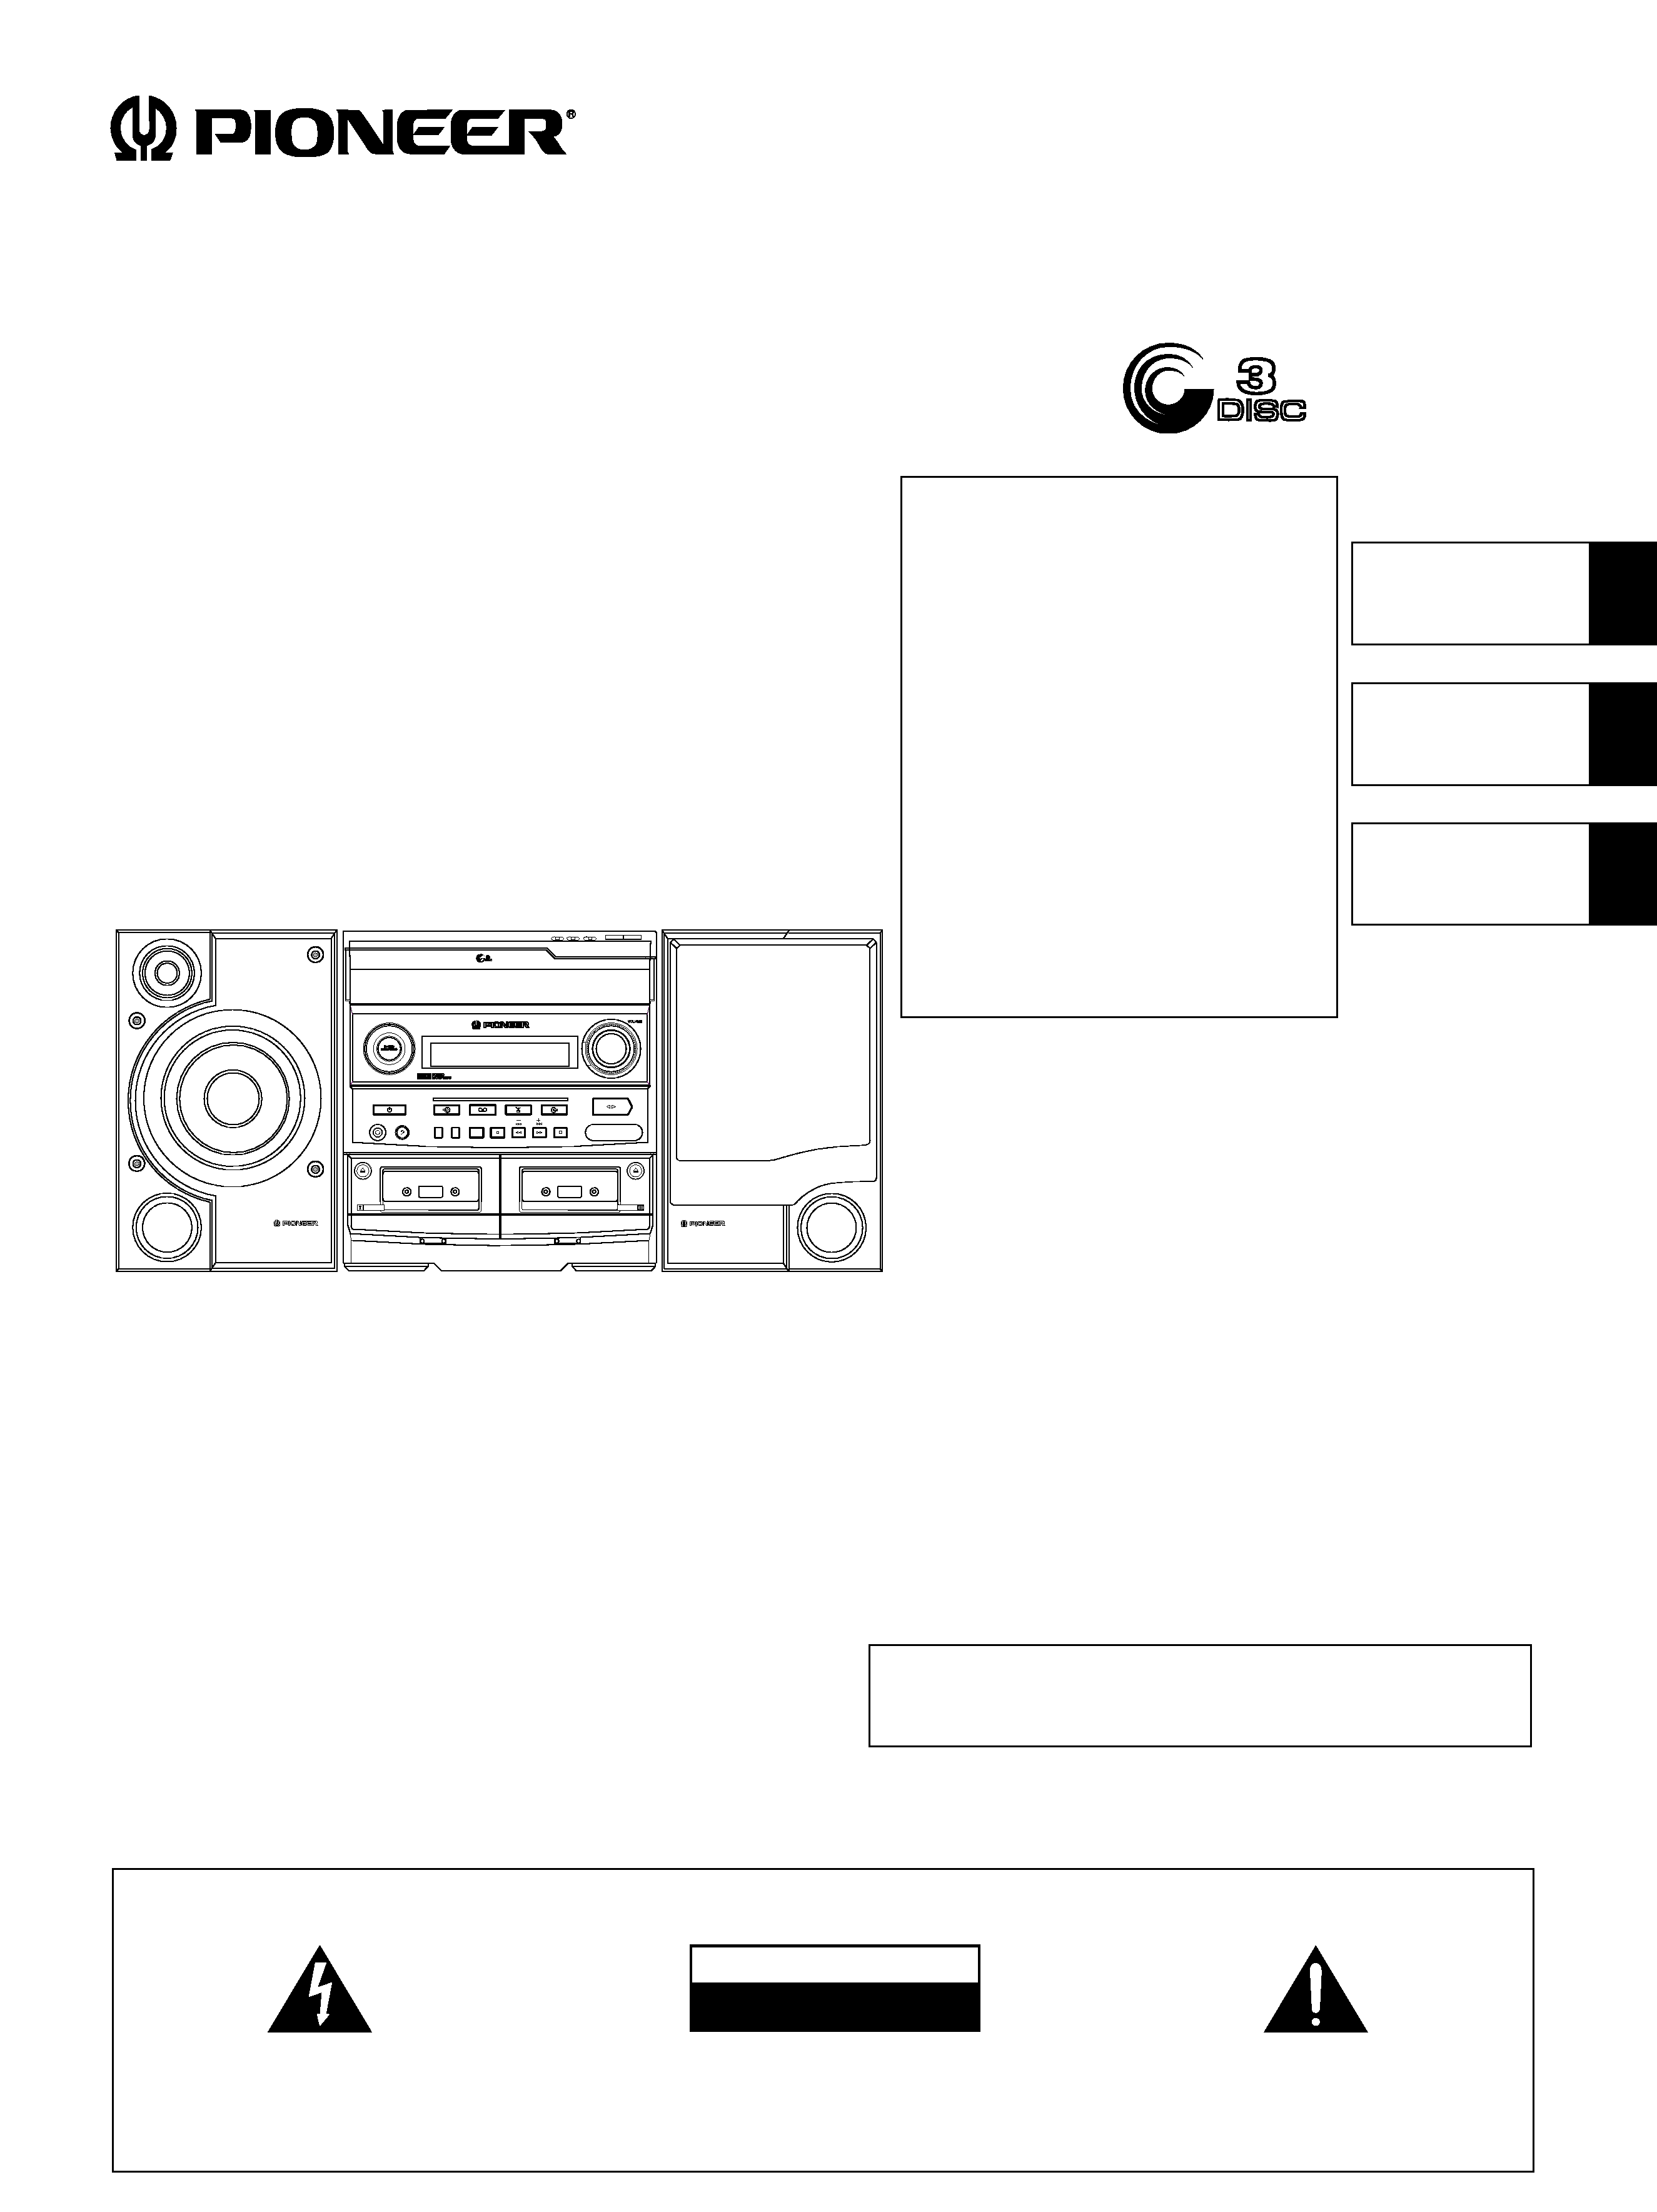
÷ This illustration shows model X-A100.
÷ Esta ilustración muestra el modelo X-A100.
÷ Cette illustration représente le modèle X-A100.
STEREO CD CASSETTE DECK RECEIVER
REPRODUCTOR DE DISCOS COMPACTOS/PLATINA/RECEPTOR ESTEREO
AMPLI-TUNER/LECTEUR CD/DOUBLE PLATINE A CASSETTE
XR-A100
XR-A100-K
XR-A200
SPEAKER SYSTEM
SISTEMA DE ALTAVOCES
ENCEINTES ACOUSTIQUES
S-A100
S-A100-K
S-A200
TIMER/
WAKE­UP
DISPLAY/
CLOCK ADJ
CD
TUNER / BAND
TAPE I/II
AUX
STOP
START/STOP
ASES/
COPY
1-bit DIRECT LINEAR CONVERSION
STANDBY/ON
DOWN
UP
TUNING
CD-PLAY/PAUSE TAPE-PLAY/DIR
6-M
ODE PRESE
T
M
OD
E SELEC
T
REC
(DEMO)
P.BASS
PHONES
MEMORY
FULL LOGIC AUTO REVERSE DECK
AUTO SYNCHRO EDITING SYSTEM
3-DISC CD PLAYER
STEREO CD CASSETTE DECK RECEIVER XR-A100
'
PLAYBACK
REC/PLAY
SPEAKER SYSTEM S-A100
The model numbers X-A100, X-A100-K and
X-A200 are the model numbers for the com-
bined set of receiver and speaker system.
X-A100
: XR-A100 and S-A100
X-A100-K : XR-A100-K and S-A100-K
X-A200
: XR-A200 and S-A200
Los números de modelo X-A100, X-A100-K
y X-A200 son los números de modelo para
el ajuste combinado del sistema de altavoz
y receptor.
X-A100
: XR-A100 y S-A100
X-A100-K : XR-A100-K y S-A100-K
X-A200
: XR-A200 y S-A200
Le numéro de modèle figurant sur la face
avant de chaque récepteur, à savoir X-A100,
X-A100-K et X-A200, représente la référence
de l'ensemble récepteur et enceintes
acoustiques.
X-A100
: XR-A100 et S-A100
X-A100-K : XR-A100-K et S-A100-K
X-A200
: XR-A200 et S-A200
CAUTION
RISK OF ELECTRIC SHOCK
DO NOT OPEN
IMPORTANT
The lightning flash with arrowhead symbol, within an
equilateral triangle, is intended to alert the user to the
presence of uninsulated "dangerous voltage" within the
product's enclosure that may be of sufficient magnitude
to constitute a risk of electric shock to persons.
CAUTION:
TO PREVENT THE RISK OF ELECTRIC SHOCK, DO
NOT REMOVE COVER (OR BACK). NO USER-
SERVICEABLE PARTS INSIDE. REFER SERVICING
TO QUALIFIED SERVICE PERSONNEL.
The exclamation point within an equilateral triangle is
intended to alert the user to the presence of important
operating and maintenance (servicing) instructions in
the literature accompanying the appliance.
Operating Instructions
Manual de instrucciones
Mode d'emploi
Thank you for buying this Pioneer product.
Please read through these operating instructions so you will
know how to operate your model properly. After you have
finished reading the instructions, put them away in a safe place
for future reference.
In some countries or regions, the shape of the power plug and
power outlet may sometimes differ from that shown in the
explanatory drawings. However, the method of connecting and
operating the unit is the same.
THE POWER SWITCH IS SECONDARY CONNECTED AND
THEREFORE DOES NOT SEPARATE THE UNIT FROM MAINS
POWER IN STANDBY POSITION.
X-A100 and X-A200 models are not sold in U.S.
X-A100 model is not sold in Canada.
X-A100-K model is not sold in Australia.
Los modelos X-A100 y X-A200 no se venden en EE.UU.
El modelo X-A100 no se vende en Canadá.
El modelo X-A100-K no se vende en Australia.
Les modèles X-A100 et X-A200 ne sont pas commercialisés aux
Etats-Unis.
Le modèle X-A100 n'est pas commercialisé au Canada.
Le modèle X-A100-K n'est pas commercialisé en Australie.
background image
<XRE3005>
En
2
IMPORTANT NOTICE
The serial number for this equipment is located on the rear panel.
Please write this serial number on your enclosed warranty card
and keep it in a secure area. This is for your security.
REMARQUE IMPORTANTE
Le numéro de série de cet appareil se trouve sur son panneau
arrière. Pour s'y référer en cas de besoin, prière d'inscrire ce
numéro sur la carte de garantie inclue et de la conserver dans un
endroit sûr.
[For Canadian model]
This Class B digital apparatus meets all requirements of the
Canadian Interference-Causing Equipment Regulations.
[Pour le modèle Canadien]
Cet appareil numérique de la Classe B respecte toutes les exigences
du Règlement sur le matériel brouilleur du Canada.
[For Canadian model]
CAUTION: TO PREVENT ELECTRIC SHOCK DO NOT USE
THIS (POLARIZED) PLUG WITH AN EXTENSION CORD,
RECEPTACLE OR OTHER OUTLET UNLESS THE BLADES CAN BE
FULLY INSERTED TO PREVENT BLADE EXPOSURE.
ATTENTION:POUR PREVENIR LES CHOCS ELECTRIQUES
NE PAS UTILISER CETTE FICHE POLARISEE AVEC UN
PROLONGATEUR UNE PRISE DE COURANT OU UNE AUTRE
SORTIE DE COURANT, SAUF SI LES LAMES PEUVENT ETRE
INSEREES A FOND SANS EN LAISSER AUCUNE PARTIE A
DECOUVERT.
READ INSTRUCTIONS -- All the safety and operating
instructions should be read before the product is
operated.
RETAIN INSTRUCTIONS -- The safety and operating
instructions should be retained for future reference.
HEED WARNINGS -- All warnings on the product and
in the operating instructions should be adhered to.
FOLLOW INSTRUCTIONS -- All operating and use
instructions should be followed.
CLEANING -- The product should be cleaned only with
a polishing cloth or a soft dry cloth. Never clean with
furniture wax, benzine, insecticides or other volatile
liquids since they may corrode the cabinet.
ATTACHMENTS -- Do not use attachments not
recommended by the product manufacturer as they
may cause hazards.
WATER AND MOISTURE -- Do not use this product
near water -- for example, near a bathtub, wash
bowl, kitchen sink, or laundry tub; in a wet basement;
or near a swimming pool; and the like.
ACCESSORIES -- Do not place this product on an
unstable cart, stand, tripod, bracket, or table. The
product may fall, causing serious injury to a child or
adult, and serious damage to the product. Use only
with a cart, stand, tripod, bracket, or table
recommended by the manufacturer, or sold with
the product. Any mounting of the product should
follow the manufacturer's instructions, and should
use a mounting accessory recommended by the
manufacturer.
CART -- A product and cart combination should be
moved with care. Quick stops, excessive force, and
uneven surfaces may cause the product and cart
combination to overturn.
VENTILATION -- Slots and openings in the cabinet are
provided for ventilation and to ensure reliable
operation of the product and to protect it from
overheating, and these openings must not be
blocked or covered. The openings should never be
blocked by placing the product on a bed, sofa, rug,
or other similar surface. This product should not be
placed in a built-in installation such as a bookcase or
rack unless proper ventilation is provided or the
manufacturer's instructions have been adhered to.
POWER SOURCES -- This product should be operated
only from the type of power source indicated on the
marking label. If you are not sure of the type of
power supply to your home, consult your product
dealer or local power company.
LOCATION ­ The appliance should be installed in a
stable location.
NONUSE PERIODS ­ The power cord of the appliance
should be unplugged from the outlet when left un-
used for a long period of time.
GROUNDING OR POLARIZATION
÷
If this product is equipped with a polarized alternating
current line plug (a plug having one blade wider than
the other), it will fit into the outlet only one way. This
is a safety feature. If you are unable to insert the plug
fully into the outlet, try reversing the plug. If the plug
should still fail to fit, contact your electrician to
replace your obsolete outlet. Do not defeat the
safety purpose of the polarized plug.
÷
If this product is equipped with a three-wire
grounding type plug, a plug having a third (grounding)
pin, it will only fit into a grounding type power outlet.
This is a safety feature. If you are unable to insert the
plug into the outlet, contact your electrician to
replace your obsolete outlet. Do not defeat the
safety purpose of the grounding type plug.
POWER-CORD PROTECTION -- Power-supply cords
should be routed so that they are not likely to be
walked on or pinched by items placed upon or
against them, paying particular attention to cords at
plugs, convenience receptacles, and the point where
they exit from the product.
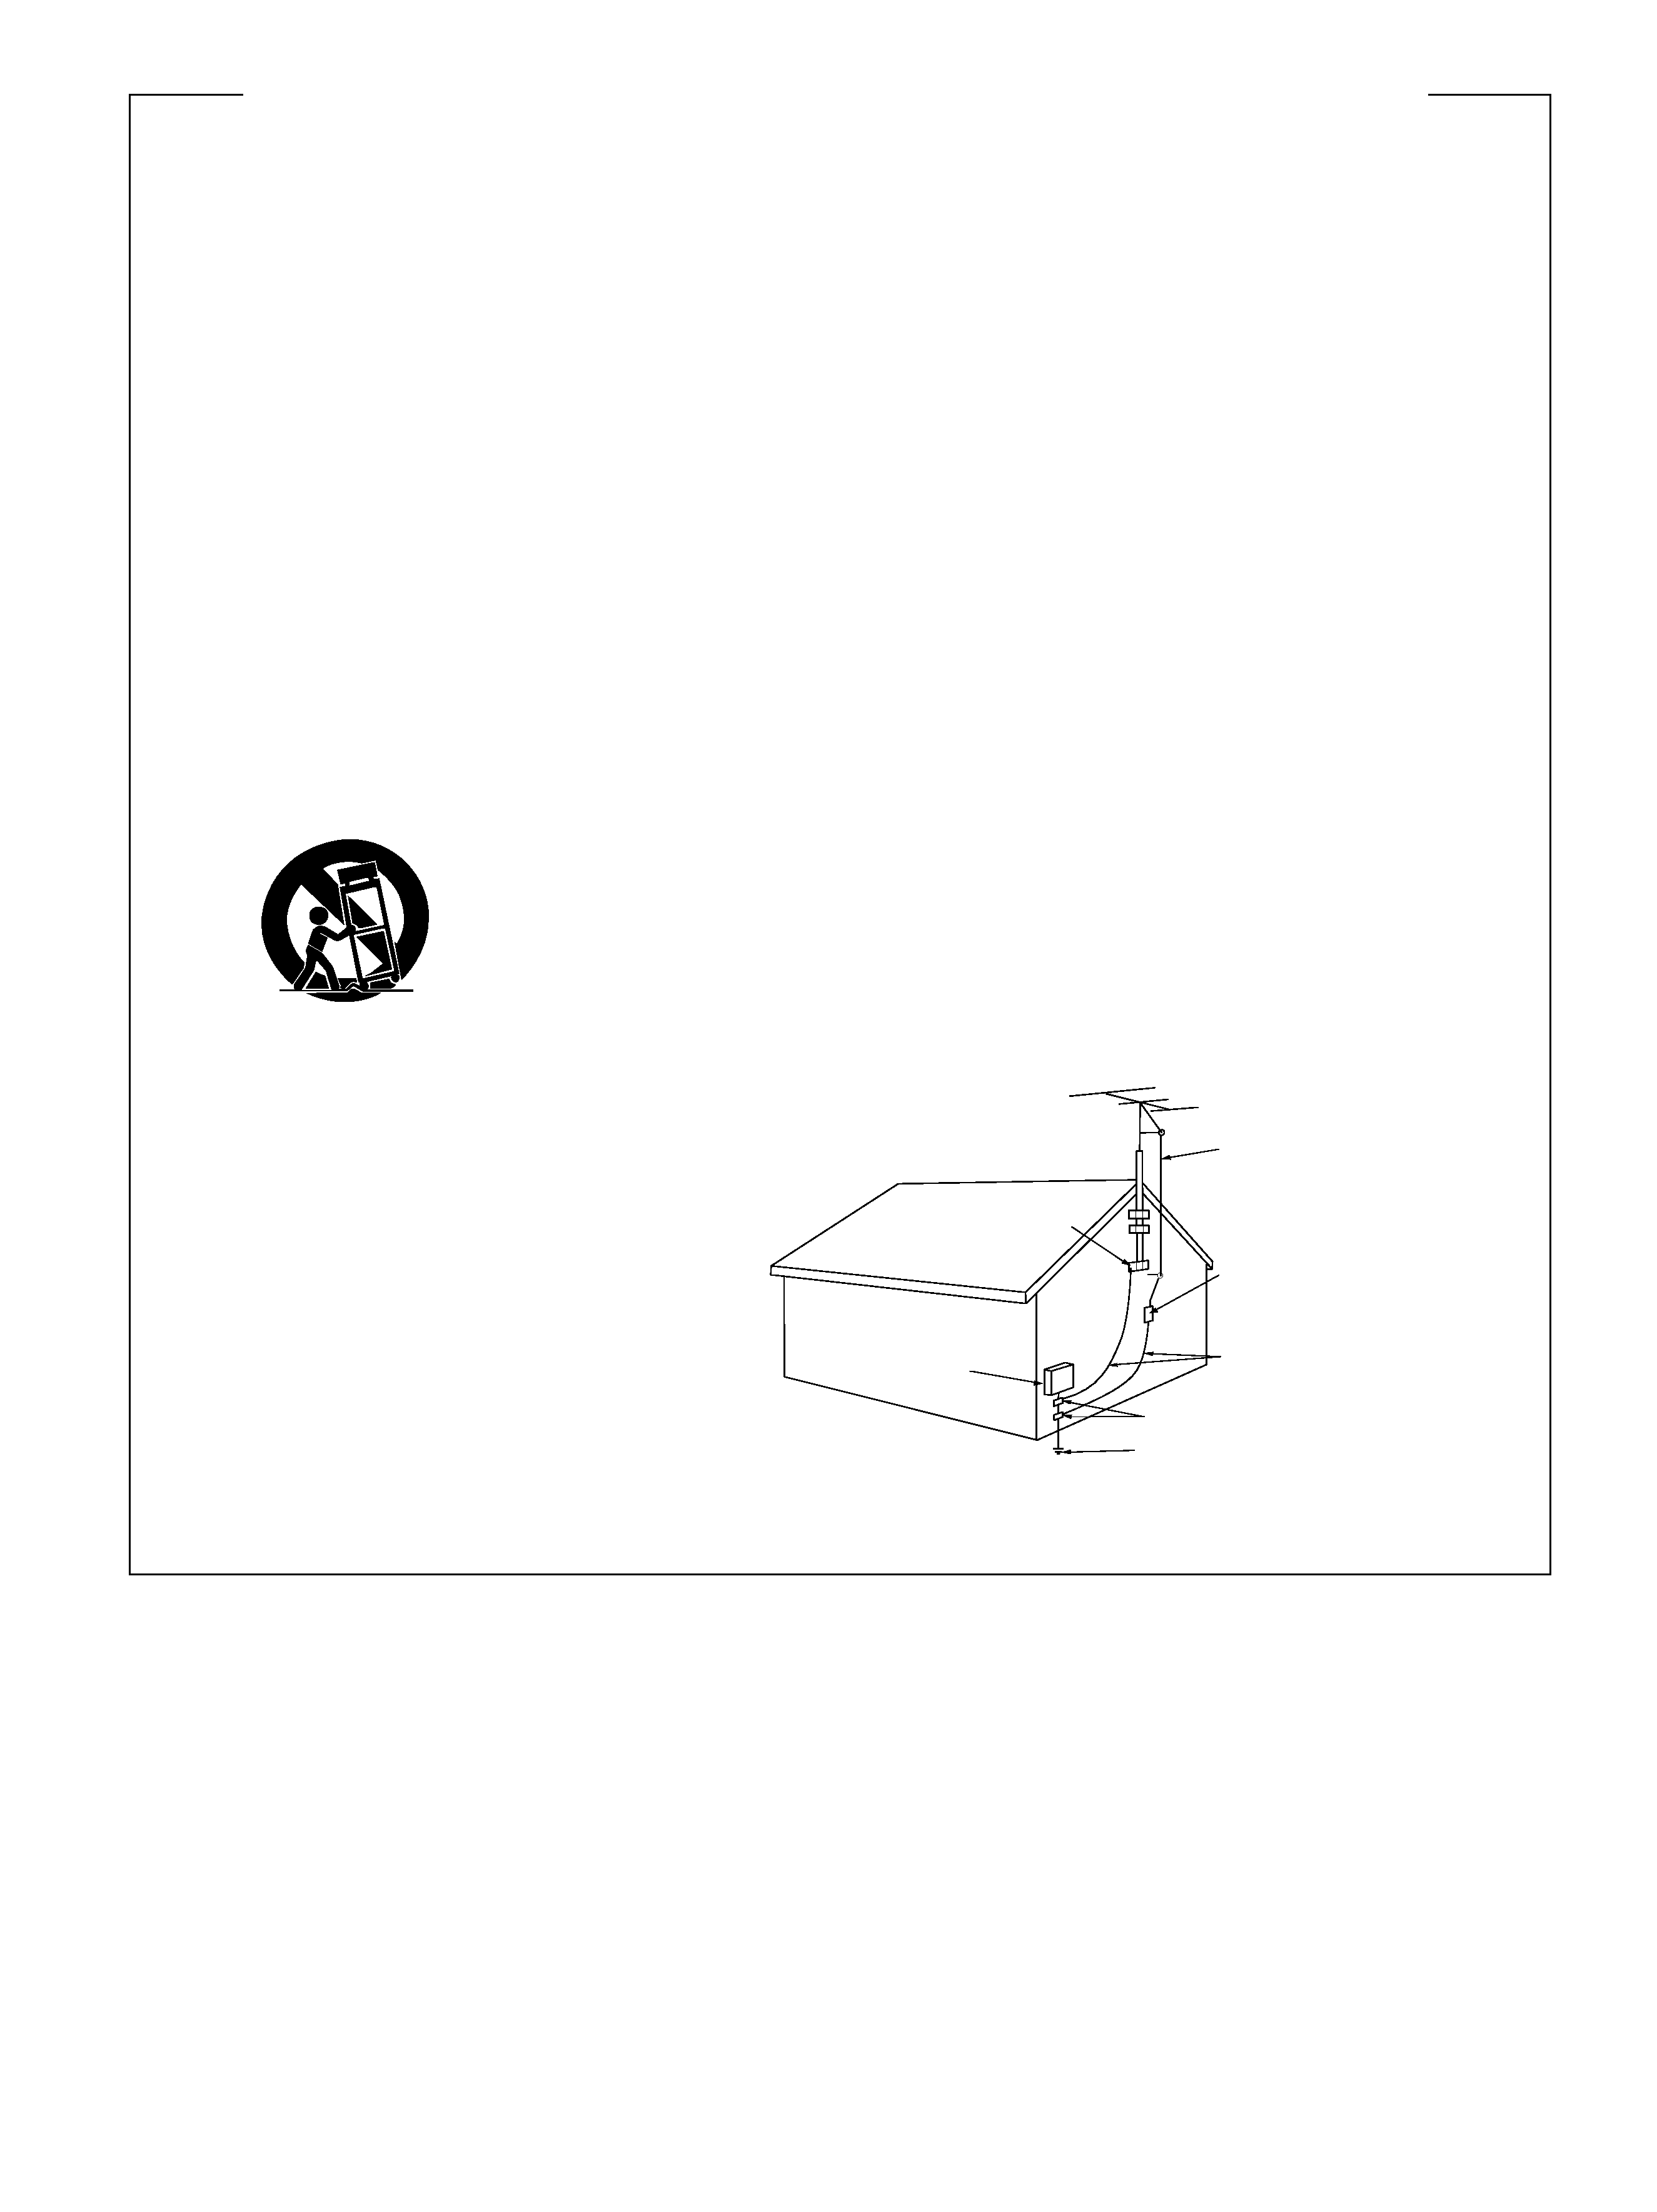
OUTDOOR ANTENNA GROUNDING -- If an outside
antenna or cable system is connected to the product,
be sure the antenna or cable system is grounded so
as to provide some protection against voltage surges
and built-up static charges. Article 810 of the National
Electrical Code, ANSI/NFPA 70, provides information
with regard to proper grounding of the mast and
supporting structure, grounding of the lead-in wire
to an antenna discharge unit, size of grounding
conductors, location of antenna-discharge unit,
connection to grounding electrodes, and
requirements for the grounding electrode. See Figure
A.
LIGHTNING -- For added protection for this product
during a lightning storm, or when it is left unattended
and unused for long periods of time, unplug it from
the wall outlet and disconnect the antenna or cable
system. This will prevent damage to the product
due to lightning and power-line surges.
POWER LINES -- An outside antenna system should
not be located in the vicinity of overhead power lines
or other electric light or power circuits, or where it
can fall into such power lines or circuits. When
installing an outside antenna system, extreme care
should be taken to keep from touching such power
lines or circuits as contact with them might be fatal.
OVERLOADING -- Do not overload wall outlets,
extension cords, or integral convenience receptacles
as this can result in a risk of fire or electric shock.
OBJECT AND LIQUID ENTRY -- Never push objects of
any kind into this product through openings as they
may touch dangerous voltage points or short-out
parts that could result in a fire or electric shock.
Never spill liquid of any kind on the product.
SERVICING -- Do not attempt to service this product
yourself as opening or removing covers may expose
you to dangerous voltage or other hazards. Refer all
servicing to qualified service personnel.
DAMAGE REQUIRING SERVICE -- Unplug this product
from the wall outlet and refer servicing to qualified
service personnel under the following conditions:
÷
When the power-supply cord or plug is damaged.
÷
If liquid has been spilled, or objects have fallen into
the product.
÷
If the product has been exposed to rain or water.
÷
If the product does not operate normally by following
the operating instructions. Adjust only those controls
that are covered by the operating instructions as an
improper adjustment of other controls may result in
damage and will often require extensive work by a
qualified technician to restore the product to its
normal operation.
÷
If the product has been dropped or damaged in any
way.
÷
When the product exhibits a distinct change in
performance -- this indicates a need for service.
REPLACEMENT PARTS -- When replacement parts
are required, be sure the service technician has used
replacement parts specified by the manufacturer or
have the same characteristics as the original part.
Unauthorized substitutions may result in fire, electric
shock, or other hazards.
SAFETY CHECK -- Upon completion of any service or
repairs to this product, ask the service technician to
perform safety checks to determine that the product
is in proper operating condition.
WALL OR CEILING MOUNTING -- The product should
not be mounted to a wall or ceiling.
HEAT -- The product should be situated away from heat
sources such as radiators, heat registers, stoves, or
other products (including amplifiers) that produce
heat.
IMPORTANT SAFETY INSTRUCTIONS
GROUND
CLAMP
ANTENNA
DISCHARGE UNIT
(NEC SECTION 810-20)
GROUNDING CONDUCTORS
(NEC SECTION 810-21)
GROUND CLAMPS
POWER SERVICE GROUNDING
ELECTRODE SYSTEM
(NEC ART 250, PART H)
ELECTRIC
SERVICE
EQUIPMENT
Fig. A
ANTENNA
LEAD IN
WIRE
NEC -- NATIONAL ELECTRICAL CODE
background image
<XRE3005>
Sp/Fr
3
Information to User
Alteration or modifications carried out without appropriate authorization may invalidate the user's right to operate the equipment.
This equipment has been tested and found to comply with the limits for a Class B digital device, pursuant to Part 15 of the FCC Rules.
These limits are designed to provide reasonable protection against harmful interference in a residential installation. This equipment
generates, uses, and can radiate radio frequency energy and, if not installed and used in accordance with the instructions, may cause
harmful interference to radio communications. However, there is no guarantee that interference will not occur in a particular installation.
If this equipment does cause harmful interference to radio or television reception, which can be determined by turning the equipment
off and on, the user is encouraged to try to correct the interference by one or more of the following measures:
-- Reorient or relocate the receiving antenna.
-- Increase the separation between the equipment and receiver.
-- Connect the equipment into an outlet on a circuit different from that to which the receiver is connected.
-- Consult the dealer or an experienced radio/TV technician for help.
CAUTION
÷ Use of controls or adjustments or performance of procedures other than those specified herein may result in hazardous radiation
exposure.
÷ The use of optical instruments with this product will increase eye hazard.
The following caution label appears on your unit.
Location: rear of the unit.
CLASS 1
LASER PRODUCT
[FOR U.K. AND EUROPEAN MODELS]
CAUTION
This product contains a laser diode of higher class than 1. To
ensure continued safety, do not remove any covers or at-
tempt to gain access to the inside of the product.
Refer all servicing to qualified personnel.
En
Selecting fine audio equipment such as the unit you've just
purchased is only the start of your musical enjoyment. Now it's
time to consider how you can maximize the fun and excitement
your equipment offers. This manufacturer and the Electronic
Industries Association's Consumer Electronics Group want you
to get the most out of your equipment by playing it at a safe
level. One that lets the sound come through loud and clear
without annoying blaring or distortion--and, most importantly,
without affecting your sensitive hearing.
Sound can be deceiving. Over time your hearing "comfort
level" adapts to higher volumes of sound. So what sounds
"normal" can actually be loud and harmful to your hearing.
Guard against this by setting your equipment at a safe level
BEFORE your hearing adapts.
To establish a safe level:
÷ Start your volume control at a low setting.
÷ Slowly increase the sound until you can hear it comfortably
and clearly, and without distortion.
Once you have established a comfortable sound level:
÷ Set the dial and leave it there.
Taking a minute to do this now will help to prevent hearing
damage or loss in the future. After all, we want you listening for
a lifetime.
We
Want You
LISTENING
For A Lifetime
We Want You Listening For A Lifetime
Used wisely, your new sound equipment will provide a
lifetime of fun and enjoyment. Since hearing damage from loud
noise is often undetectable until it is too late, this manufacturer
and the Electronic Industries Association's Consumer Electronics
Group recommend you avoid prolonged exposure to excessive
noise. This list of sound levels is included for your protection.
Decibel
Level
Example
30
Quiet library, soft whispers
40
Living room, refrigerator, bedroom away from traffic
50
Light traffic, normal conversation, quiet office
60
Air conditioner at 20 feet, sewing machine
70
Vacuum cleaner, hair dryer, noisy restaurant
80
Average city traffic, garbage disposals, alarm clock
at two feet.
THE FOLLOWING NOISES CAN BE DANGEROUS
UNDER CONSTANT EXPOSURE
90
Subway, motorcycle, truck traffic, lawn mower
100
Garbage truck, chain saw, pneumatic drill
120
Rock band concert in front of speakers, thunderclap
140
Gunshot blast, jet plane
180
Rocket launching pad
Information courtesy of the Deafness Research Foundation.
We
Want You
LISTENING
For A Lifetime
EST 1924
EIA
E
L
E
C
T
R
O
N I
C
I ND
U
S
T
R
IE
S
·
A
S
S O
C I A T
I O
N
·
EST 1924
EIA
E
L
E
C
T
R
O
N I
C
I ND
U
S
T
R
IE
S
·
A
S
S O
C I A T
I O
N
·
background image
<XRE3005>
En
4
FUNCION DE DEMOSTRACION
El modo de demostración comienza automáticamente cuando
el cable de alimentación se enchufa al tomacorriente.
También, cuando se presiona el botón P.BASS (DEMO) durante
tres segundos en el modo STANDBY, se activa el modo de
demostración.
En el modo de demostración, aparecen varias funciones de este
sistema.
÷ El modo de demostración puede ser cancelado presionando el
interruptor POWER o botón de función.
÷ Si continúa presionando el botón P.BASS (DEMO) durante
tres o más tiempo en el modo de demostración, el modo de
demostración se cancela. Mientras el modo de demostración
se encuentra cancelado, no operará aun si conecta el cable de
alimentación a un tomacorriente de pared. Para reactivar el
modo de demostración, presione el botón P.BASS (DEMO)
durante tres segundos o más cuando se encuentra en el modo
de espera (STANDBY).
Gracias por la adquisición de este producto Pioneer.
Para saber cómo utilizar correctamente su modelo, lea
cuidadosamente este manual de instrucciones. Después de
haber finalizado su lectura, guárdelo en un lugar seguro para
futuras referencias.
En algunos países o regiones, la forma de la clavija de
alimentación y de la toma de corriente pueden ser diferentes a
la indicada en las ilustraciones explicatorias, sin embargo el
método de conexión y operación de la unidad es idéntico.
ADVERTENCIA: PARA EVITAR INCENDIOS Y
DESCARGAS ELÉCTRICAS, NO EXPONGA ESTE APARATO A
LA LLUVIA NI A LA HUMEDAD.
EL INTERRUPTOR DE LA ALIMENTACION ESTA CONECTADO
EN SECUNDARIO Y POR LO TANTO NO DESCONECTA AL
APARATO DE LA RED DE ALIMENTACION CUANDO ESTA
EN LA POSICION DE ALERTA (STANDBY).
FONCTION DE DEMONSTRATION
Dès que vous branchez la fiche du cordon d'alimentation dans
une prise secteur, l'ensemble est mis sous tension et la
démonstration de ses possibilités commence.
Pareillement, si vous appuyez sur la touche P.BASS (DEMO)
pendant plus de trois secondes alors que l'ensemble est en
veille (STANDBY), il se met en service et adopte de lui-même le
mode de démonstration.
Ce mode permet la présentation sur l'afficheur des diverses
fonctions de l'ensemble.
÷ Vous pouvez abandonner la démonstration en appuyant sur
l'interrupteur POWER ou une touche de fonction.
÷ Par ailleurs, si vous maintenez la pression d'un doigt sur la
touche P.BASS (DEMO) pendant au moins trois secondes
alors que la démonstration des possibilités est en cours, cette
démonstration est abandonnée. Après abandon du mode de
démonstration, la reprise de celle-ci ne s'obtient pas
simplement en branchant la fiche du cordon d'alimentation
sur une prise secteur; pour revenir en mode de démonstration,
il faut en effet, appuyer sur la touche P.BASS (DEMO) pendant
au moins trois secondes alors que l'ensemble est en veille.
Nous vous remercions pour cet achat d'un produit Pioneer.
Nous vous demandons de lire soigneusement ce mode d'emploi;
vous serez ainsi à même de faire fonctionner l'appareil
correctement. Après avoir bien lu le mode d'emploi, le ranger
dans un endroit sûr pour pouvoir s'y référer ultérieurement.
Dans certains pays ou certaines régions, la forme de la fiche
d'alimentation et de la prise d'alimentation peut différer de celle
qui figure sur les schémas, mais les branchements et le
fonctionnement de l'appareil restent les mêmes.
ATTENTION: AFIN DE PREVENIR TOUS RISQUES DE
CHOC ELECTRIQUE OU DE DEBUT D'INCENDIE, NE PAS
EXPOSER CET APPAREIL A L'HUMIDITE OU A LA PLUIE.
L'INTERRUPTEUR D'ALIMENTATION EST RACCORDE
SECONDAIREMENT ET PAR CONSEQUENT NE SEPARE PAS
L'APPAREIL DE L'ALIMENTATION SECTEUR SUR LA
POSITION D'ATTENTE.
Sp/Fr
background image
<XRE3005>
Sp/Fr
5
CONTENTS
CAUTIONS REGARDING HANDLING ....................................... 5
CONFIRM SUPPLIED ACCESSORIES ........................................ 8
LOADING BATTERIES INTO THE REMOTE CONTROL UNIT .... 8
REMOTE CONTROL OPERATIONS ........................................... 8
CONNECTIONS ........................................................................... 8
FRONT PANEL FACILITIES ...................................................... 12
CAUTIONS REGARDING COMPACT DISC HANDLING ........ 16
HOW TO HANDLE CASSETTE TAPES .................................... 16
SETTING THE CLOCK ............................................................... 18
TURNING ON THE POWER ...................................................... 18
Direct power on ...................................................................... 18
LISTENING TO CDs ................................................................... 20
Listening to tracks in order from the first track .................. 20
To stop playback .................................................................... 20
Taking discs from the tray .................................................... 20
LISTENING TO RADIO BROADCASTS .................................... 22
Try to receive a broadcast ..................................................... 22
Beat cut function .................................................................... 22
To change the frequency step .............................................. 22
LISTENING TO CASSETTE TAPES .......................................... 24
Basic Operation ...................................................................... 24
Music search, fast forward and rewind ............................... 24
TAPE RECORDING .................................................................... 26
Recording radio broadcasts .................................................. 26
Tape copying .......................................................................... 26
Recording CDs ........................................................................ 28
EASY TUNING ........................................................................... 30
Memorizing broadcast stations ............................................ 30
Station call .............................................................................. 30
CONVENIENT CD FUNCTIONS ............................................... 32
CD track selection ................................................................... 32
Repeat play ............................................................................. 32
Disc change ............................................................................. 34
Random play ........................................................................... 34
Changing displays .................................................................. 34
Program play .......................................................................... 36
Recording during program play ........................................... 36
CD AUTOMATIC EDITING RECORDING (A.S.E.S.) ................ 38
What does CD A.S.E.S. do? ................................................... 38
SOUND MORPHING ................................................................. 40
P.BASS .................................................................................... 42
FUN WITH THE KARAOKE FUNCTIONS
(Australian model only) ........................................................... 42
Karaoke ................................................................................... 42
USING THE TIMER .................................................................... 44
Wake-up timer ........................................................................ 44
Record timer ........................................................................... 46
Sleep timer .............................................................................. 48
MAINTENANCE ......................................................................... 48
TROUBLESHOOTING ............................................................... 50
SPECIFICATIONS ...................................................................... 53
CAUTIONS REGARDING HANDLING
Location
Install the unit in a well-ventilated location where it will not be
exposed to high temperatures or humidity.
÷ Do not install the unit in a location which is exposed to direct
rays of the sun, or near hot appliances or radiators. Excessive
heat can adversely affect the cabinet and internal components.
÷ Installation of the unit in a damp or dusty environment may
result in a malfunction or accident. (Also avoid installation
near cookers, etc., where the unit may be exposed to smoke
from oil, steam, or heat.)
÷ Please place this unit on a level surface.
÷ Placing and using the unit for long periods on heat-generating
sources will affect performance.
÷ Install the unit as far away as possible from your TV. Installation
in close proximity to such equipment may cause noise or
degradation of the picture.
Condensation
When this unit is brought into a warm room from previously
cold surroundings or when the room temperature rises sharply,
condensation may form inside and the unit may not be able to
attain its full performance. To prevent this, allow the unit to
stand for about an hour before switching it on or raise the room
temperature gradually.
Ventilation
When installing this unit, make sure to leave space around the
unit for ventilation to improve heat radiation (at least 30 cm at
the top, 15 cm at the rear, and 15 cm at each side). If not enough
space is provided between the unit and walls or other equipment,
heat will build up inside, interfering with performance or causing
malfunctions.
Discs you can play on this unit
You can play CDs bearing the mark shown below.
Discs other than this cannot be played. Playing any other kinds
of disc may result in damage to the unit.
En
CD

Reviews

There are no reviews of this manual yet.