PIONEER VSX-D409-G/BXJI Owner's Manual

Cover page of PIONEER VSX-D409-G/BXJI Owner's Manual

Owner's Manual for PIONEER VSX-D409-G/BXJI, downloadable as a PDF file.

We also have service manual to this model.

Manual details

  • Immediate download after payment.
  • Delivered as a PDF file.
  • The manual has 110 pages
  • File size: 2.91 MB
  • Available language versions: English, Spanish, Chinese Traditional
  • Different language versions may vary sligthly in file size and page count.

We guarantee that...

  • our manuals are complete,
  • our manuals are checked with antivirus,
  • We'll issue refund if the manual is damaged, incomplete or unreadable (our refund policy)

Sample pages

Thumbnail of page 1Thumbnail of page 2Thumbnail of page 3Thumbnail of page 4
Thumbnail of page 5Thumbnail of page 6Thumbnail of page 7Thumbnail of page 8
Thumbnail of page 9
background image
VSX-D409
VSX-D409-G
VSX-D509S
VSX-D509S-G
background image
VSX-D409
VSX-D409-G
VSX-D509S
VSX-D509S-G
background image
2
En
Thank you for buying this Pioneer product.
Please read through these operating instructions
so you will know how to operate your model
properly. After you have finished reading the
instructions, put them away in a safe place for
future reference.
In some countries or regions, the shape of the
power plug and power outlet may sometimes
differ from that shown in the explanatory
drawings. However the method of connecting and
operating the unit is the same.
WARNING: TO PREVENT FIRE OR SHOCK HAZ-
ARD, DO NOT EXPOSE THIS APPLIANCE TO RAIN OR
MOISTURE.
THE STANDBY/ON BUTTON IS SECONDARY
CONNECTED AND THEREFORE DOES NOT
SEPARATE THE UNIT FROM MAINS POWER IN
STANDBY POSITION.
IMPORTANT
The lightning flash with arrowhead symbol,
within an equilateral triangle, is intended to
alert the user to the presence of uninsulated
"dangerous voltage" within the product's
enclosure that may be of sufficient magnitude
to constitute a risk of electric shock to persons.
The exclamation point within an equilateral
triangle is intended to alert the user to the
presence
of
important
operating
and
maintenance (servicing) instructions in the
literature accompanying the appliance.
CAUTION:
TO PREVENT THE RISK OF ELECTRIC SHOCK,
DO NOT REMOVE COVER (OR BACK).
NO
USER-SERVICEABLE PARTS INSIDE.
REFER
SERVICING
TO
QUALIFIED
SERVICE
PERSONNEL.
RISK OF ELECTRIC SHOCK
DO NOT OPEN
CAUTION
This equipment has been tested and found to comply with the limits for a Class B digital device, pursuant to Part
15 of the FCC Rules. These limits are designed to provide reasonable protection against harmful interference in
a residential installation. This equipment generates, uses, and can radiate radio frequency energy and, if not
installed and used in accordance with the instructions, may cause harmful interference to radio communica-
tions. However, there is no guarantee that interference will not occur in a particular installation. If this equip-
ment does cause harmful interference to radio or television reception, which can be determined by turning the
equipment off and on, the user is encouraged to try to correct the interference by one or more of the following
measures:
­ Reorient or relocate the receiving antenna.
­ Increase the separation between the equipment and receiver.
­ Connect the equipment into an outlet on a circuit different from that to which the receiver is connected.
­ Consult the dealer or an experienced radio/TV technician for help.
VENTILATION
· When installing this unit, make sure to leave space
around the unit for ventilation to improve heat radiation
(at least 20 cm at top, 15 cm at rear, and 15 cm at each
side). If not enough space is provided between the unit
and walls or other equipment, heat will build up inside,
interfering with performance or causing malfunctions.
· Do not place on a thick carpet, bed, sofa, or fabric having
a thck pile. Do not cover with fabric or covering.
Anything that blocks ventilation will cause intenal
tempture to rise, which may lead to breakdown or fire
hazard.
Information to User
Alteration or modifications carried out without
appropriate authorization may invalidate the user's
right to operate the equipment.
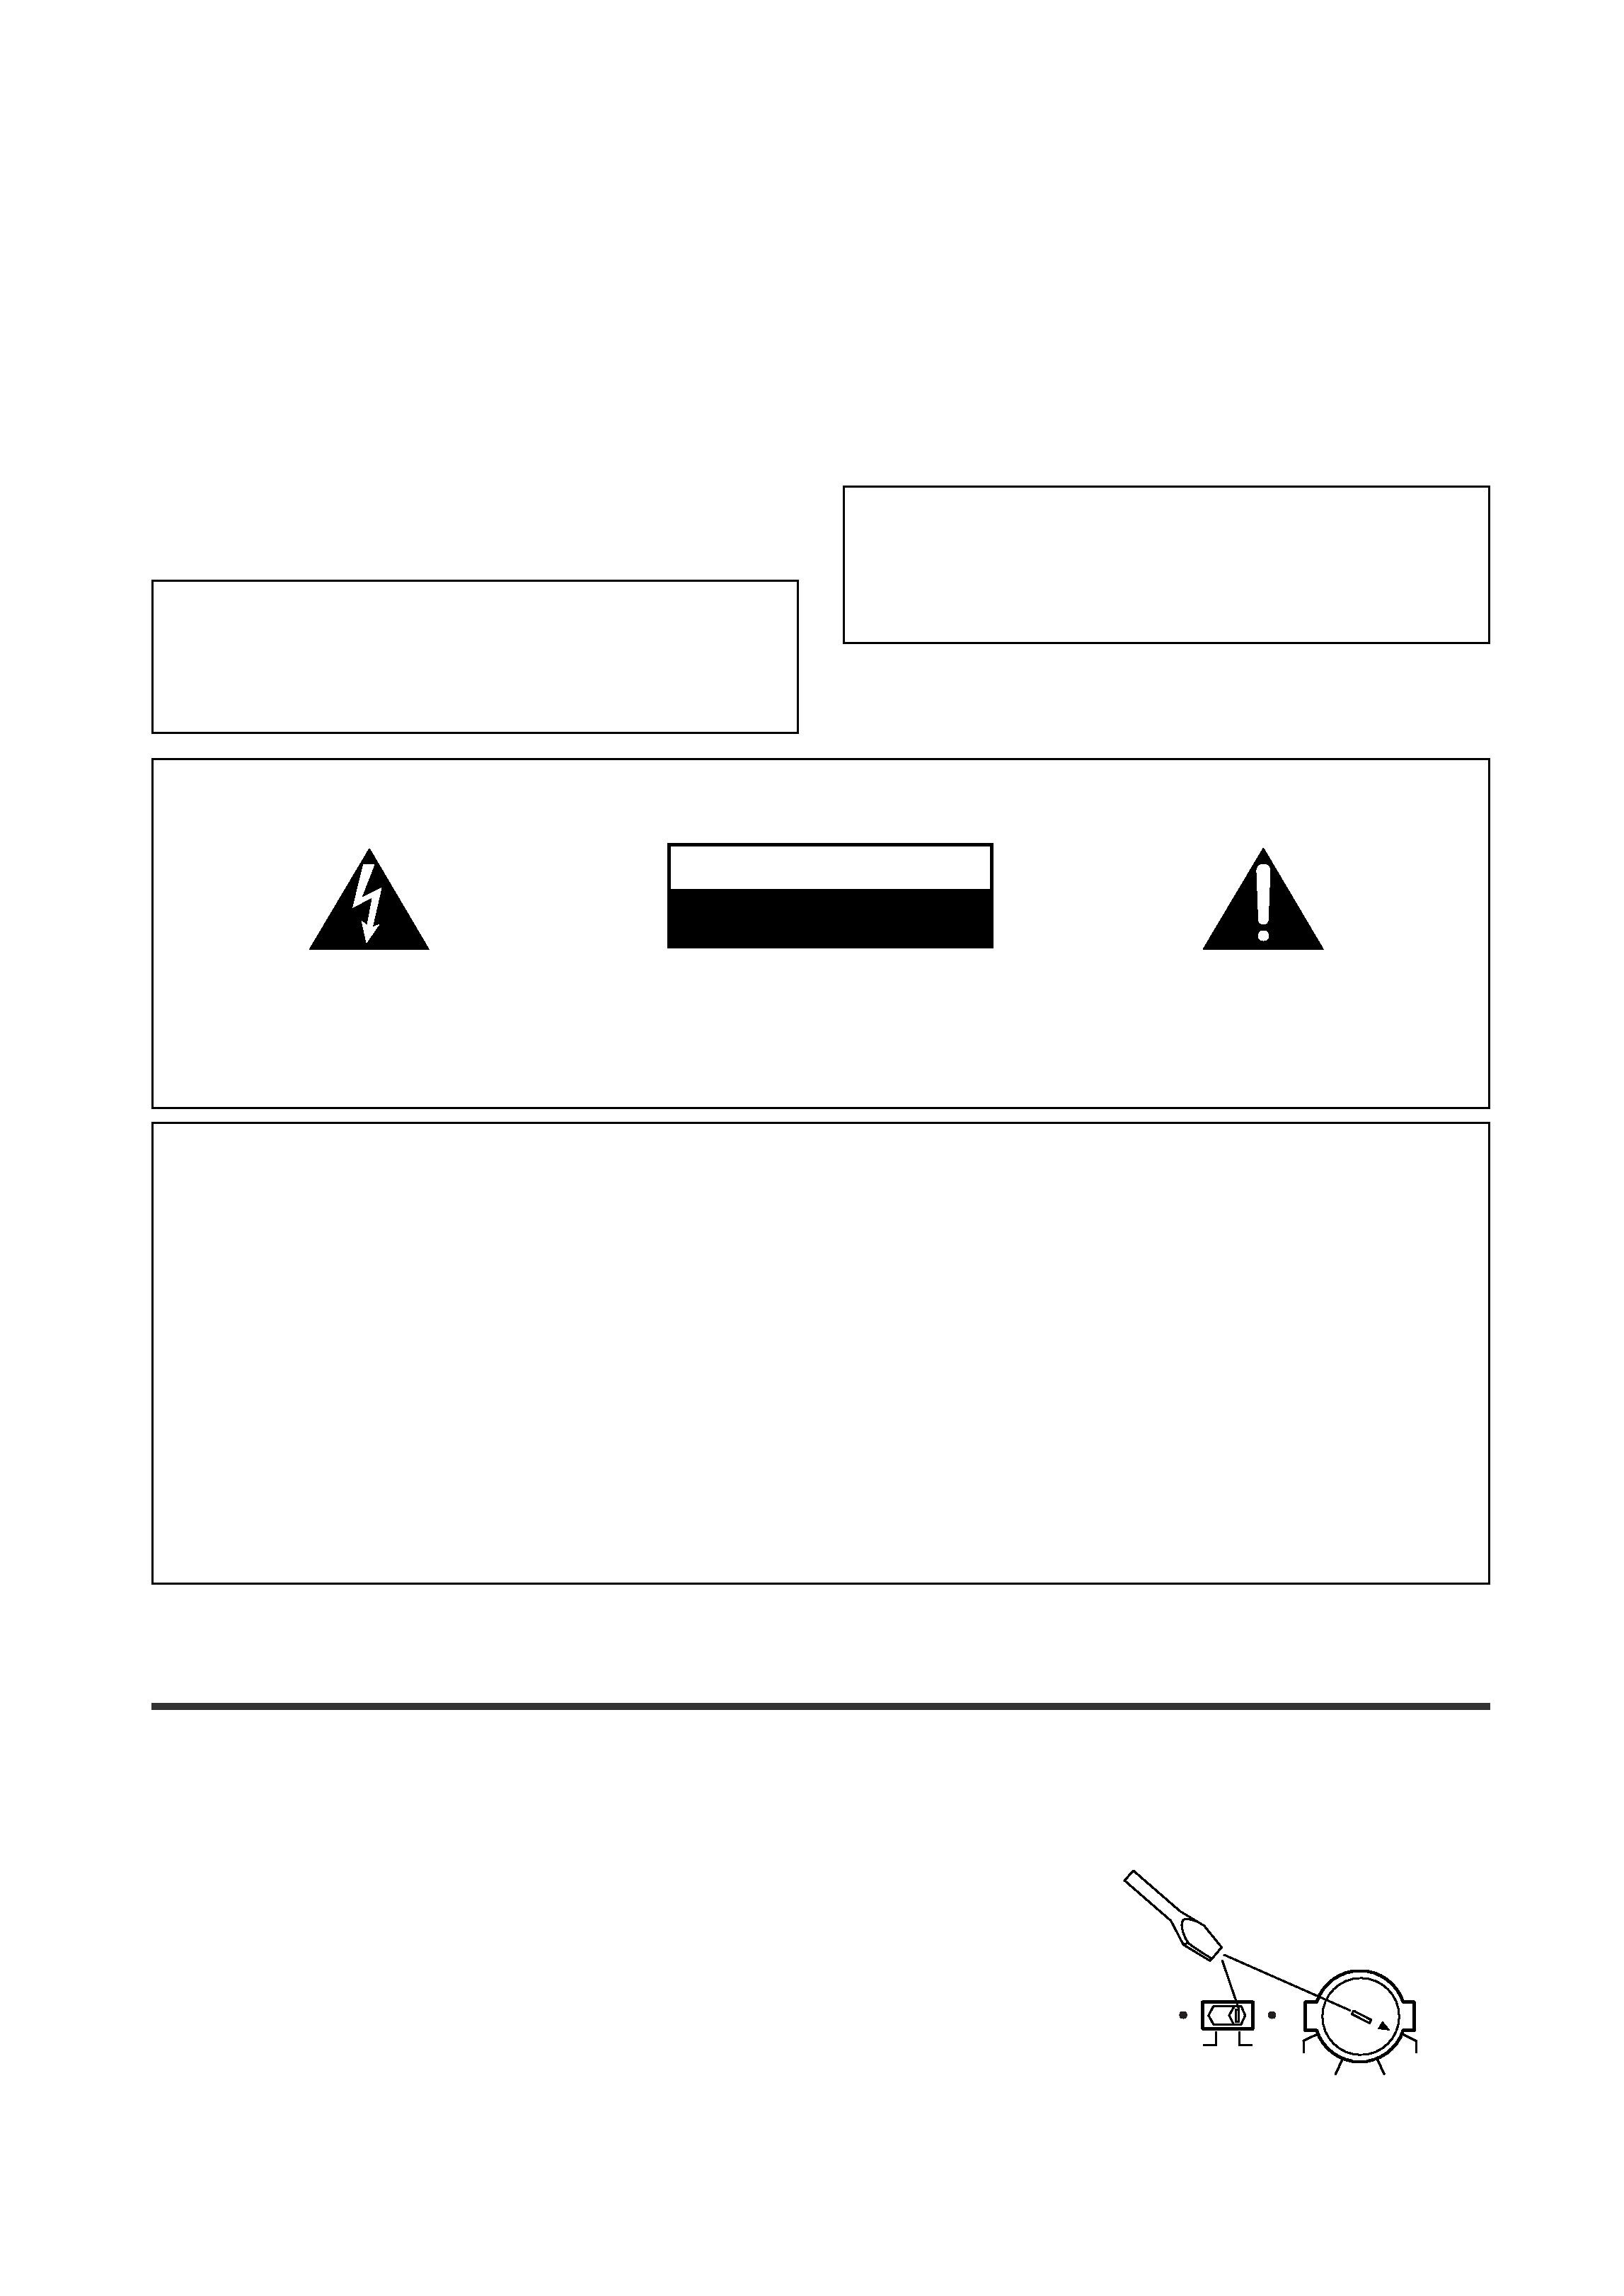
TWO VOLTAGE SELECTOR SWITCHES (multi-voltage model only)
Only multi-voltage model is provided with these switches. Mains
voltages in Saudi Arabia are 127 V and 220 V only. Never use this
model with the 110 V setting in Saudi Arabia.
The line voltage selector switches are on the rear panel. Check that they are
set properly before plugging the power cord into the household wall socket.
If the voltage is not properly set or if you move to an area where the voltage
requirements differ, adjust the selector switches as follows.
1. Use a medium-size screwdriver.
2. First, insert the screwdriver in the groove of the voltage selector at the
right, and adjust so that the tip of the groove points to the voltage value of
your area.
3. Next, insert the screwdriver in the groove of the voltage selector at the
left and adjust until the voltage is the same as at the right.
220V
240V
110V 120V-127V
TWO VOLTAGE SELECTORS
110V
120-127V
220V
240V
Medium-size screwdriver
background image
3
En
Set
up
Set
up
Operation
Table of Contents
Features ................................................................................... 4
Introductory Information ....................................................... 5
Checking the Supplied Accessories .............................................................................. 5
Using this Manual .......................................................................................................... 5
Installing the Receiver ................................................................................................... 5
When Making Cable Connections ................................................................................. 5
Preparing the Remote Control ....................................................................................... 6
Channel Step Setting ..................................................................................................... 7
Connecting Your Equipment ................................................. 8
Connecting Audio Components ..................................................................................... 8
Connecting Video Components ..................................................................................... 9
Connecting Digital Components .................................................................................. 10
Connecting DVD 5.1 Channel Components ................................................................ 11
Connecting Antennas .................................................................................................. 12
Connecting Speakers ................................................................................................... 13
Preparations .......................................................................... 15
Setting Up for Surround Sound ................................................................................... 15
Setting the Volume Level of Each Channel ................................................................. 21
Setting Up the Remote Control ................................................................................... 22
Clearing One of the Remote Control Settings (VSX-D509S/D509S-G) ........................ 26
Clearing All the Remote Control Settings .................................................................... 26
Direct Function ............................................................................................................ 27
Programming a Different Component into
the MULTI CONTROL button (VSX-D509S/D509S-G) ...................................................... 28
Checking Preset Code (VSX-D509S/D509S-G) ............................................................ 28
Displays & Controls .............................................................. 29
Front Panel .................................................................................................................. 29
Remote Control (VSX-D509S/D509S-G) ...................................................................... 30
Remote Control (VSX-D409/D409-G) ........................................................................... 32
Display .........................................................................................................................34
Sound Modes ....................................................................... 35
Learning about the Sound Modes ............................................................................... 35
Switching ANALOG/DIGITAL Signal Input ................................................................... 36
Playing Sources with Dolby Digital or DTS Sound ....................................................... 37
Selecting a Sound Mode ............................................................................................. 38
Using in MIDNIGHT Listening Mode ........................................................................... 39
ADVANCED THEATER mode ( Dolby/DTS mode) ........................................................ 40
Playing a Source .......................................................................................................... 40
Using the Tuner .................................................................... 41
Finding a Station .......................................................................................................... 41
Tuning Directly to a Station .......................................................................................... 42
Memorizing Stations .................................................................................................... 42
Recalling Memorized Stations ..................................................................................... 43
Making a Recording ............................................................. 44
Making an Audio or a Video Recording ........................................................................ 44
Controlling the Rest of Your System .................................. 45
CD/MD/CD-R/VCR/LD Player Controls ......................................................................... 45
Cassette Deck Controls ............................................................................................... 46
DVD/DVR Player Controls ............................................................................................ 47
DTV Controls ............................................................................................................... 48
Cable TV/Satellite TV/TV Controls ................................................................................ 49
Additional Information ......................................................... 50
Troubleshooting ........................................................................................................... 50
Specifications .............................................................................................................. 52
Preset Code List (at the end of this manual)
Preset Code List (VSX-D509S/D509S-G) ......................................................................... i
Preset Code List (VSX-D409/D409-G) ............................................................................. v
Operation
background image
4
En
Features
DTS* (Digital Theater Systems) decoder equipped
R
DTS is a digital sound system introduced in theaters. Playback of DVD, LD, and CD recorded in
DTS audio creates the environment of a theater or the sensation of a concert hall in your home.
Dolby** Digital and Dolby Pro Logic
No need to worry about program formats! When playing Dolby Digital or Dolby Surround soft-
ware in the 2 (Dolby) Surround mode, decoding switches automatically according to the input
signal. All you have to do is sit back and enjoy! (When connecting a DVD/LD player or LD player
using the 2 RF output, a commercially available RF demodulator (RFD-1) is required.)
ADVANCED THEATER modes
Four sound modes that enhance DTS and Dolby Surround performance by simulating the envi-
ronment of a movie theater (DRAMA, ACTION), or the ambience of a concert hall (MUSICAL).
With EXPANDED THEATER, you can enjoy Dolby Surround encoded software in simulated Dolby
Digital.
Various Surround Effects (DSP)
The DSP (Digital Signal Processing) surround mode allows you to transform your living room
into six different sonic environments when listening to music or watching movies.
Midnight Listening Mode
When late night hours or other factors require that the volume be kept low, the surround effects
may tend to become less than satisfactory. When the midnight listening mode is on, you can
enjoy the effects of quality surround sound even at low volumes.
DVD 5.1 channel input
A special 5.1 Channel input makes the VSX­D409/D409-G/D509S/D509S-G fully compatible with
Dolby Digital decoders and DVD players with 5.1 channel outputs.
The Energy-saving Design
This unit is designed to use 1 W of energy when this unit is in standby mode.
Remote Control of Other Components
The supplied remote control can be used to operate a variety of other components simply by
recalling the appropriate preset codes. In addition, the multi-operation functions allow you to
perform a variety of operations automatically.
** Manufactured under license from Dolby
Laboratories. "Dolby", "Pro Logic" and the double-D
symbol are trademarks of Dolby Laboratories.
Confidential unpublished works. © 1992-1997 Dolby
Laboratories. All rights reserved.
* Manufactured under license from Digital
Theater Systems, Inc. US Pat. No. 5,451,942
and other worldwide patents issues and
pending. "DTS" and "DTS Digital Surround"
are trademarks of Digital Theater Systems,
Inc. © 1996 Digital Theater Systems, Inc. All
rights reserved.
background image
5
En
Set
up
Set
up
Operation
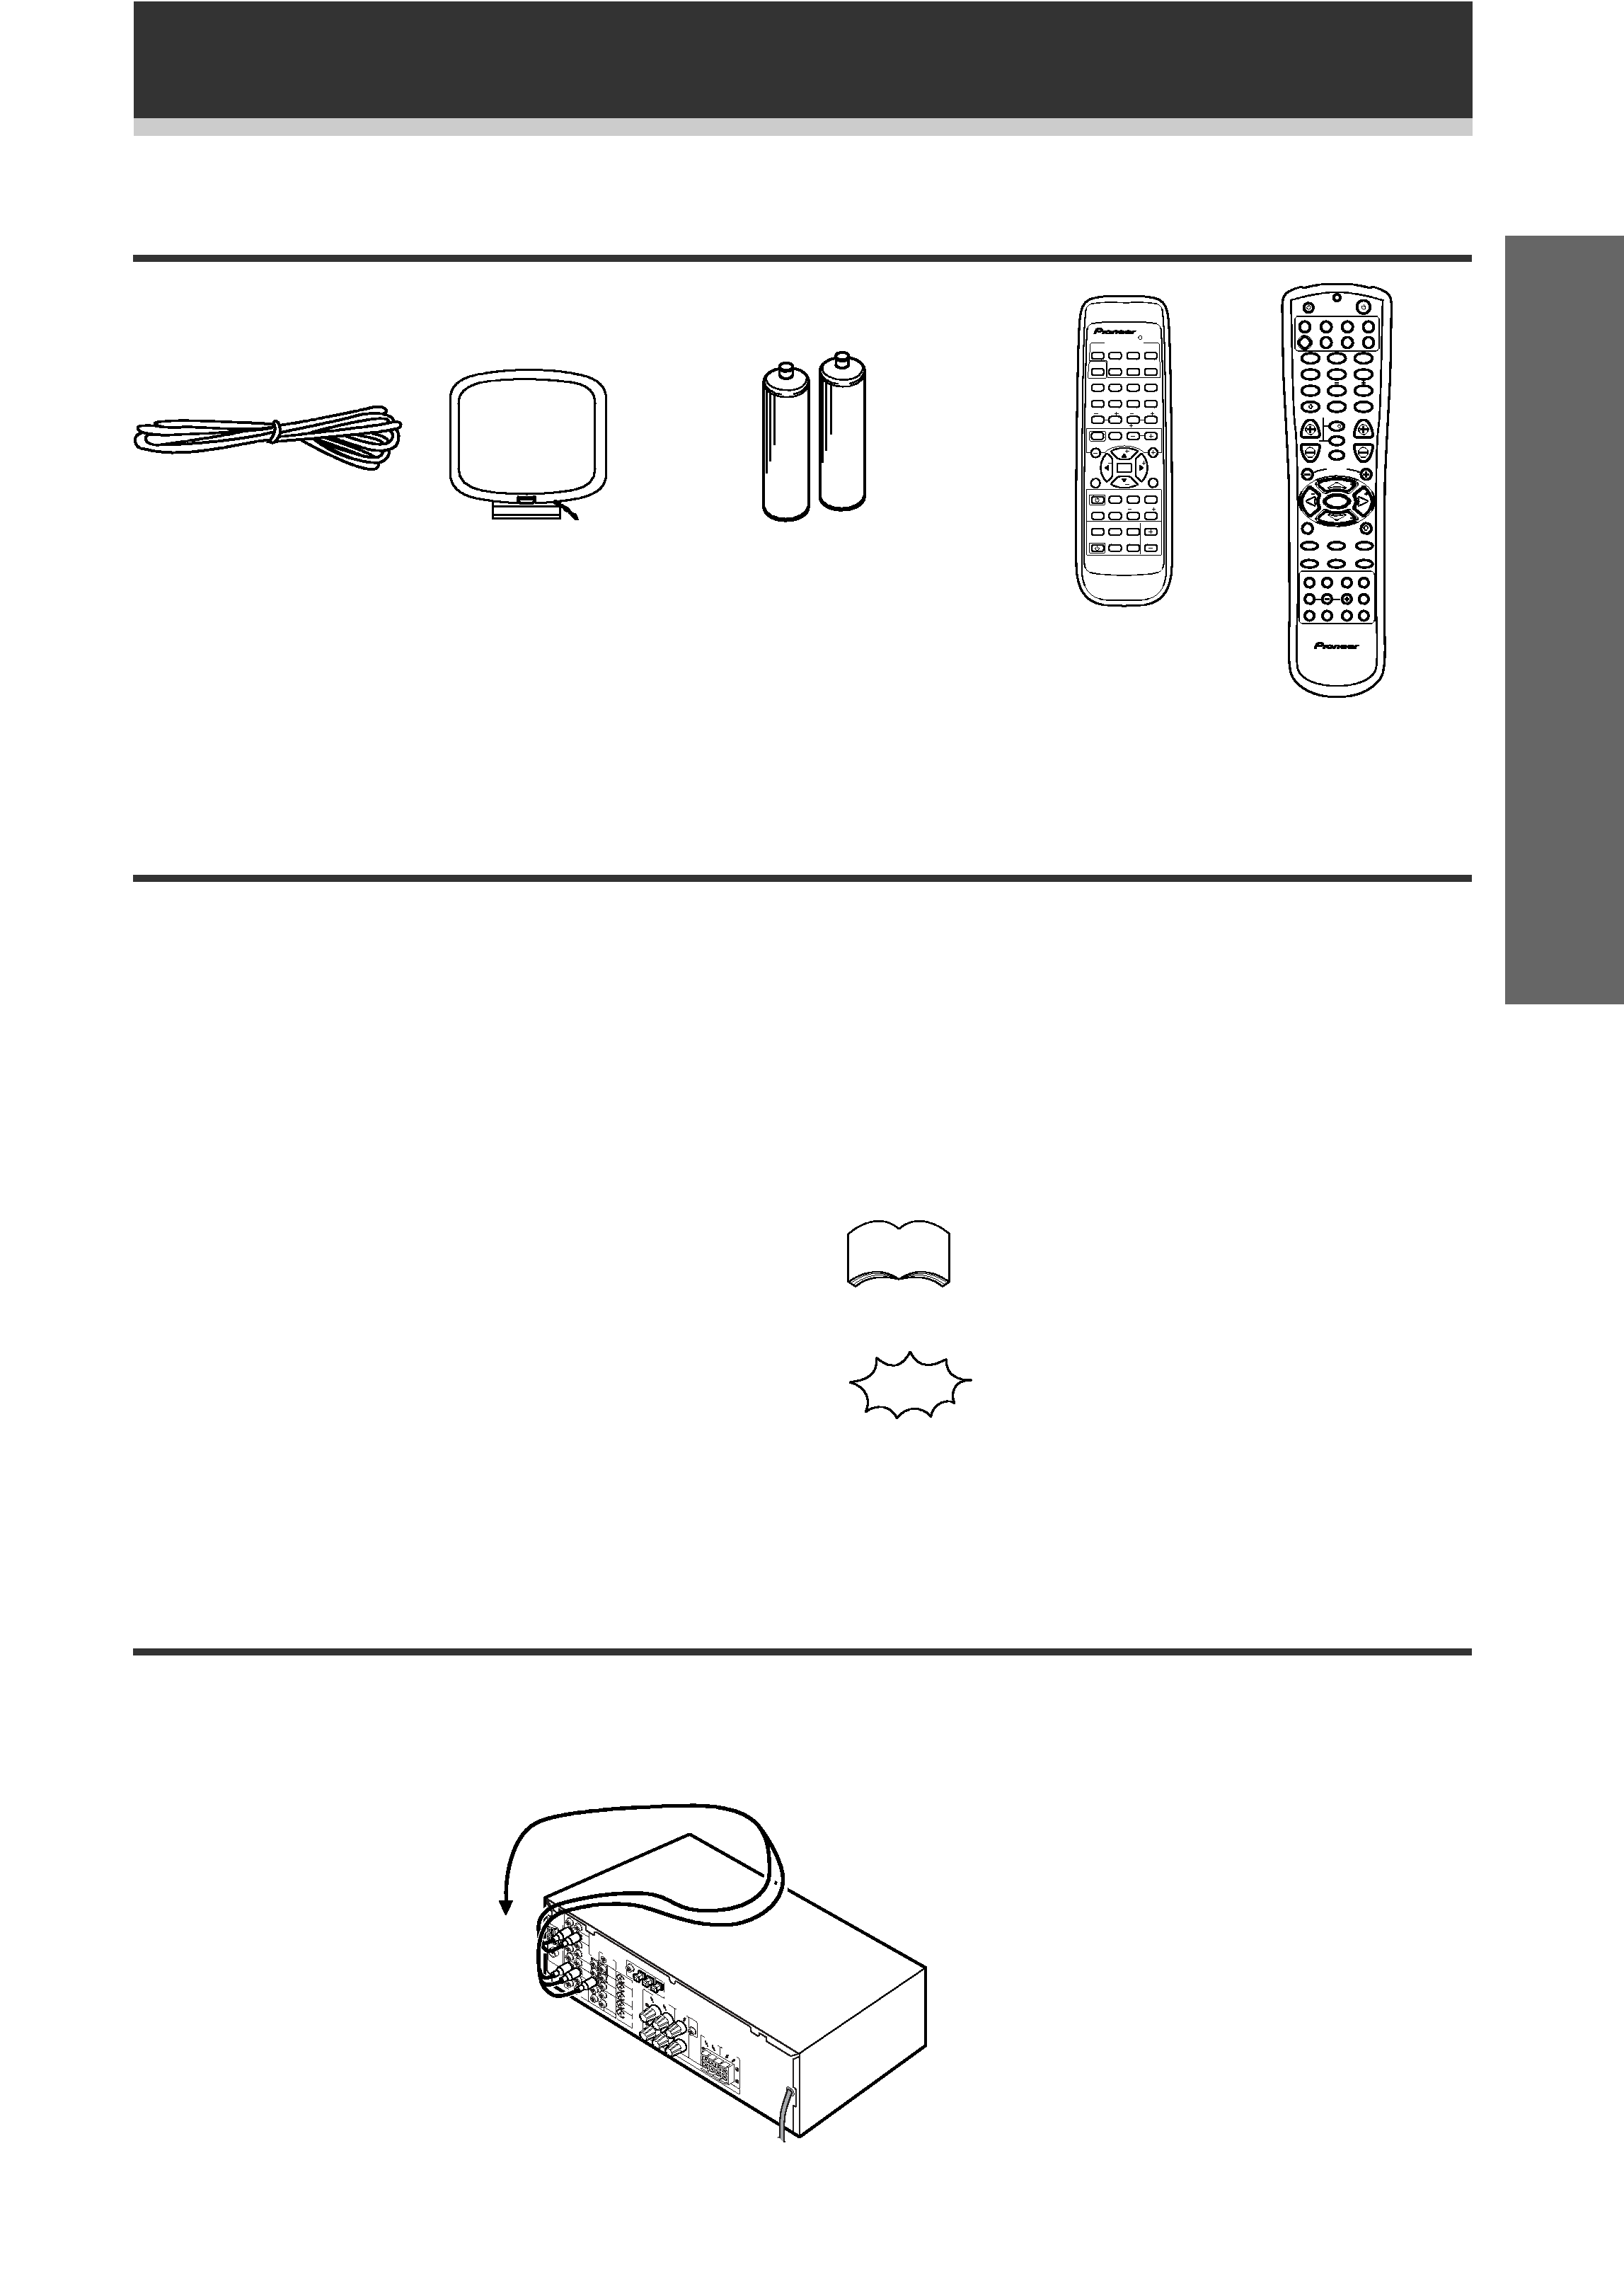
Checking the Supplied Accessories
Please check that you've received the following supplied accessories:
Using this Manual
AM loop antenna
FM wire antenna
This manual is for the VSX-D409/VSX-D409-G/
VSX-D509S/VSX-D509S-G audio/video multi-
channel receivers. It is divided into two main
sections:
Set up
This section covers installing your receiver and
connecting up all the other components in your
home theater system to it. It also describes how to
set up a multi-channel speaker system to take full
advantage of the great surround sound features of
your receiver.
Operation
This section shows you how to use every feature of
the receiver and its remote control unit. It also
covers using the supplied remote control to operate
your other home theater components. To find out
memo
Remote control units
Dry cell batteries
Size AA / IEC R6P x 2
(VSX-D409/D409-G)
Size AA / IEC LR6 x 2
(VSX-D509S/D509S-G)
MULTI CONTROL
DVD/LD TV/SAT VCR/DVR
CD
SOUCE CLASS
MPX
BAND
LOUDNESS FUNCTION MUTING
RECEIVER
D.ACCESS
CHANNEL
ATT
VOL
MENU
TOP
MENU
VOL
CH
2
DSPMODE MIDNIGHT 5.1CH
CD-R/
TAPE/MD
CHANNEL
SELECT
CHANNEL
LEVEL
EFFECT
ENTER
ENTER
FQ
FQ
ST
ST
FL
DIMMER
REMOTE
SETUP
MASTER
VOLUME
AUDIO/VIDEOPRE-PROGRAMMED
REMOTECONTROLUNIT
TV CONTROL
FUNC
10
DISC
SIGNAL
SELECT
TEST
TONE
RECEIVER TUNER
TVCONT
Î
1
2
3
4
4
¢
78
3
5
6
7
8
9
0
Î
SOURCE
ENTER
MIDNIGHT
SIGNAL SELECT
TV CONTROL
TV VOL
TVFUNC
TV
MENU
ENTER
D.ACCESS
BAND
CLASS
CH SELECT
CH LEVEL
AV PRE-PROGRAMMED AND LEARNING
REMOTE CONTROL UNIT
DSP
TEST TONE
FL DIMMER
LOUDNESS FUNCTION
SETUP
MUTING
MPX
DTV ON / OFF
DTV MENU
FQ
FQ
ST
ST
CHANNEL
EFFECT
MASTERVOLUME
DISC
+10
5.1CH
MULTI CONTROL
ATT
DVD
TV
VCR
CD-R
RCV
CD
TUN
TVC
RECEIVER
1
2
3
4
5
6
7
8
9
7
3
0
8
2
VSX-D409/
D409-G
VSX-D509S/D509S-G
more about a specific button, control or indicator,
see Displays & Controls starting on page 29. This
will point you to the relevant chapter in the manual.
In the Additional Information section (p. 50-52) you'll
find a troubleshooting section and specifications.
The following symbols are used
throughout this manual:
Provides detailed precautions and
advice on operations, etc.
Indicates that display is blinking.
Introductory Information
When Making Cable Connections
Be careful not to arrange cables in a manner that bends the cables over the top of this unit as shown in the
illustration. If the cables are brought over this unit, the magnetic field produced by the transformers in this unit
may cause a humming noise to come from the speakers.

Reviews

There are no reviews of this manual yet.