2
En
Thank you for buying this Pioneer product. Please read through
these operating instructions so you will know how to operate your
model properly. After you have finished reading the instructions,
put them away in a safe place for future reference.
Before you start
· The nominal impedance of this speaker system is 6
. Connect
the speaker system to an amplifier with a load impedance of
6
(a model with "6 " displayed on the speaker output
terminals).
In order to prevent damage to the speaker system resulting from
input overload, please observe the following precautions:
· Do not supply power to the speaker system in excess of the
maximum permissible input.
· When using a graphic equalizer to emphasize loud sounds in
the high-frequency range, do not use excessive amplifier
volume.
· Do not try to force a low-powered amplifier to produce loud
volumes of sound (the amplifier's harmonic distortion will be
increased, and you may damage the speaker).
Care of the speaker cabinets
· With normal use, wiping with a soft cloth should be sufficient
to keep the cabinet clean. If necessary, clean with a cloth
dipped in a neutral cleanser diluted five or six times with water,
and wrung out well. Do not use furniture wax or cleansers.
Never use alcohol, thinners, benzine, insecticide sprays or
other chemicals on or near this unit since these will corrode the
surfaces. When using chemically-treated cloths, be sure to
carefully read their accompanying instruction manual.
Cleaning the glossy finish of the speaker system
· When cleaning the finish of the speaker system, gently wipe it
with a dry soft cloth; the supplied cleaning cloth.
· If you use a dusty or hard cloth or if you rub the screen hard, the
finish of the product will be scratched.
· If you clean the surface of the speaker system with a wet cloth,
water droplets on the surface may enter into the product,
resulting in malfunction.
Caution
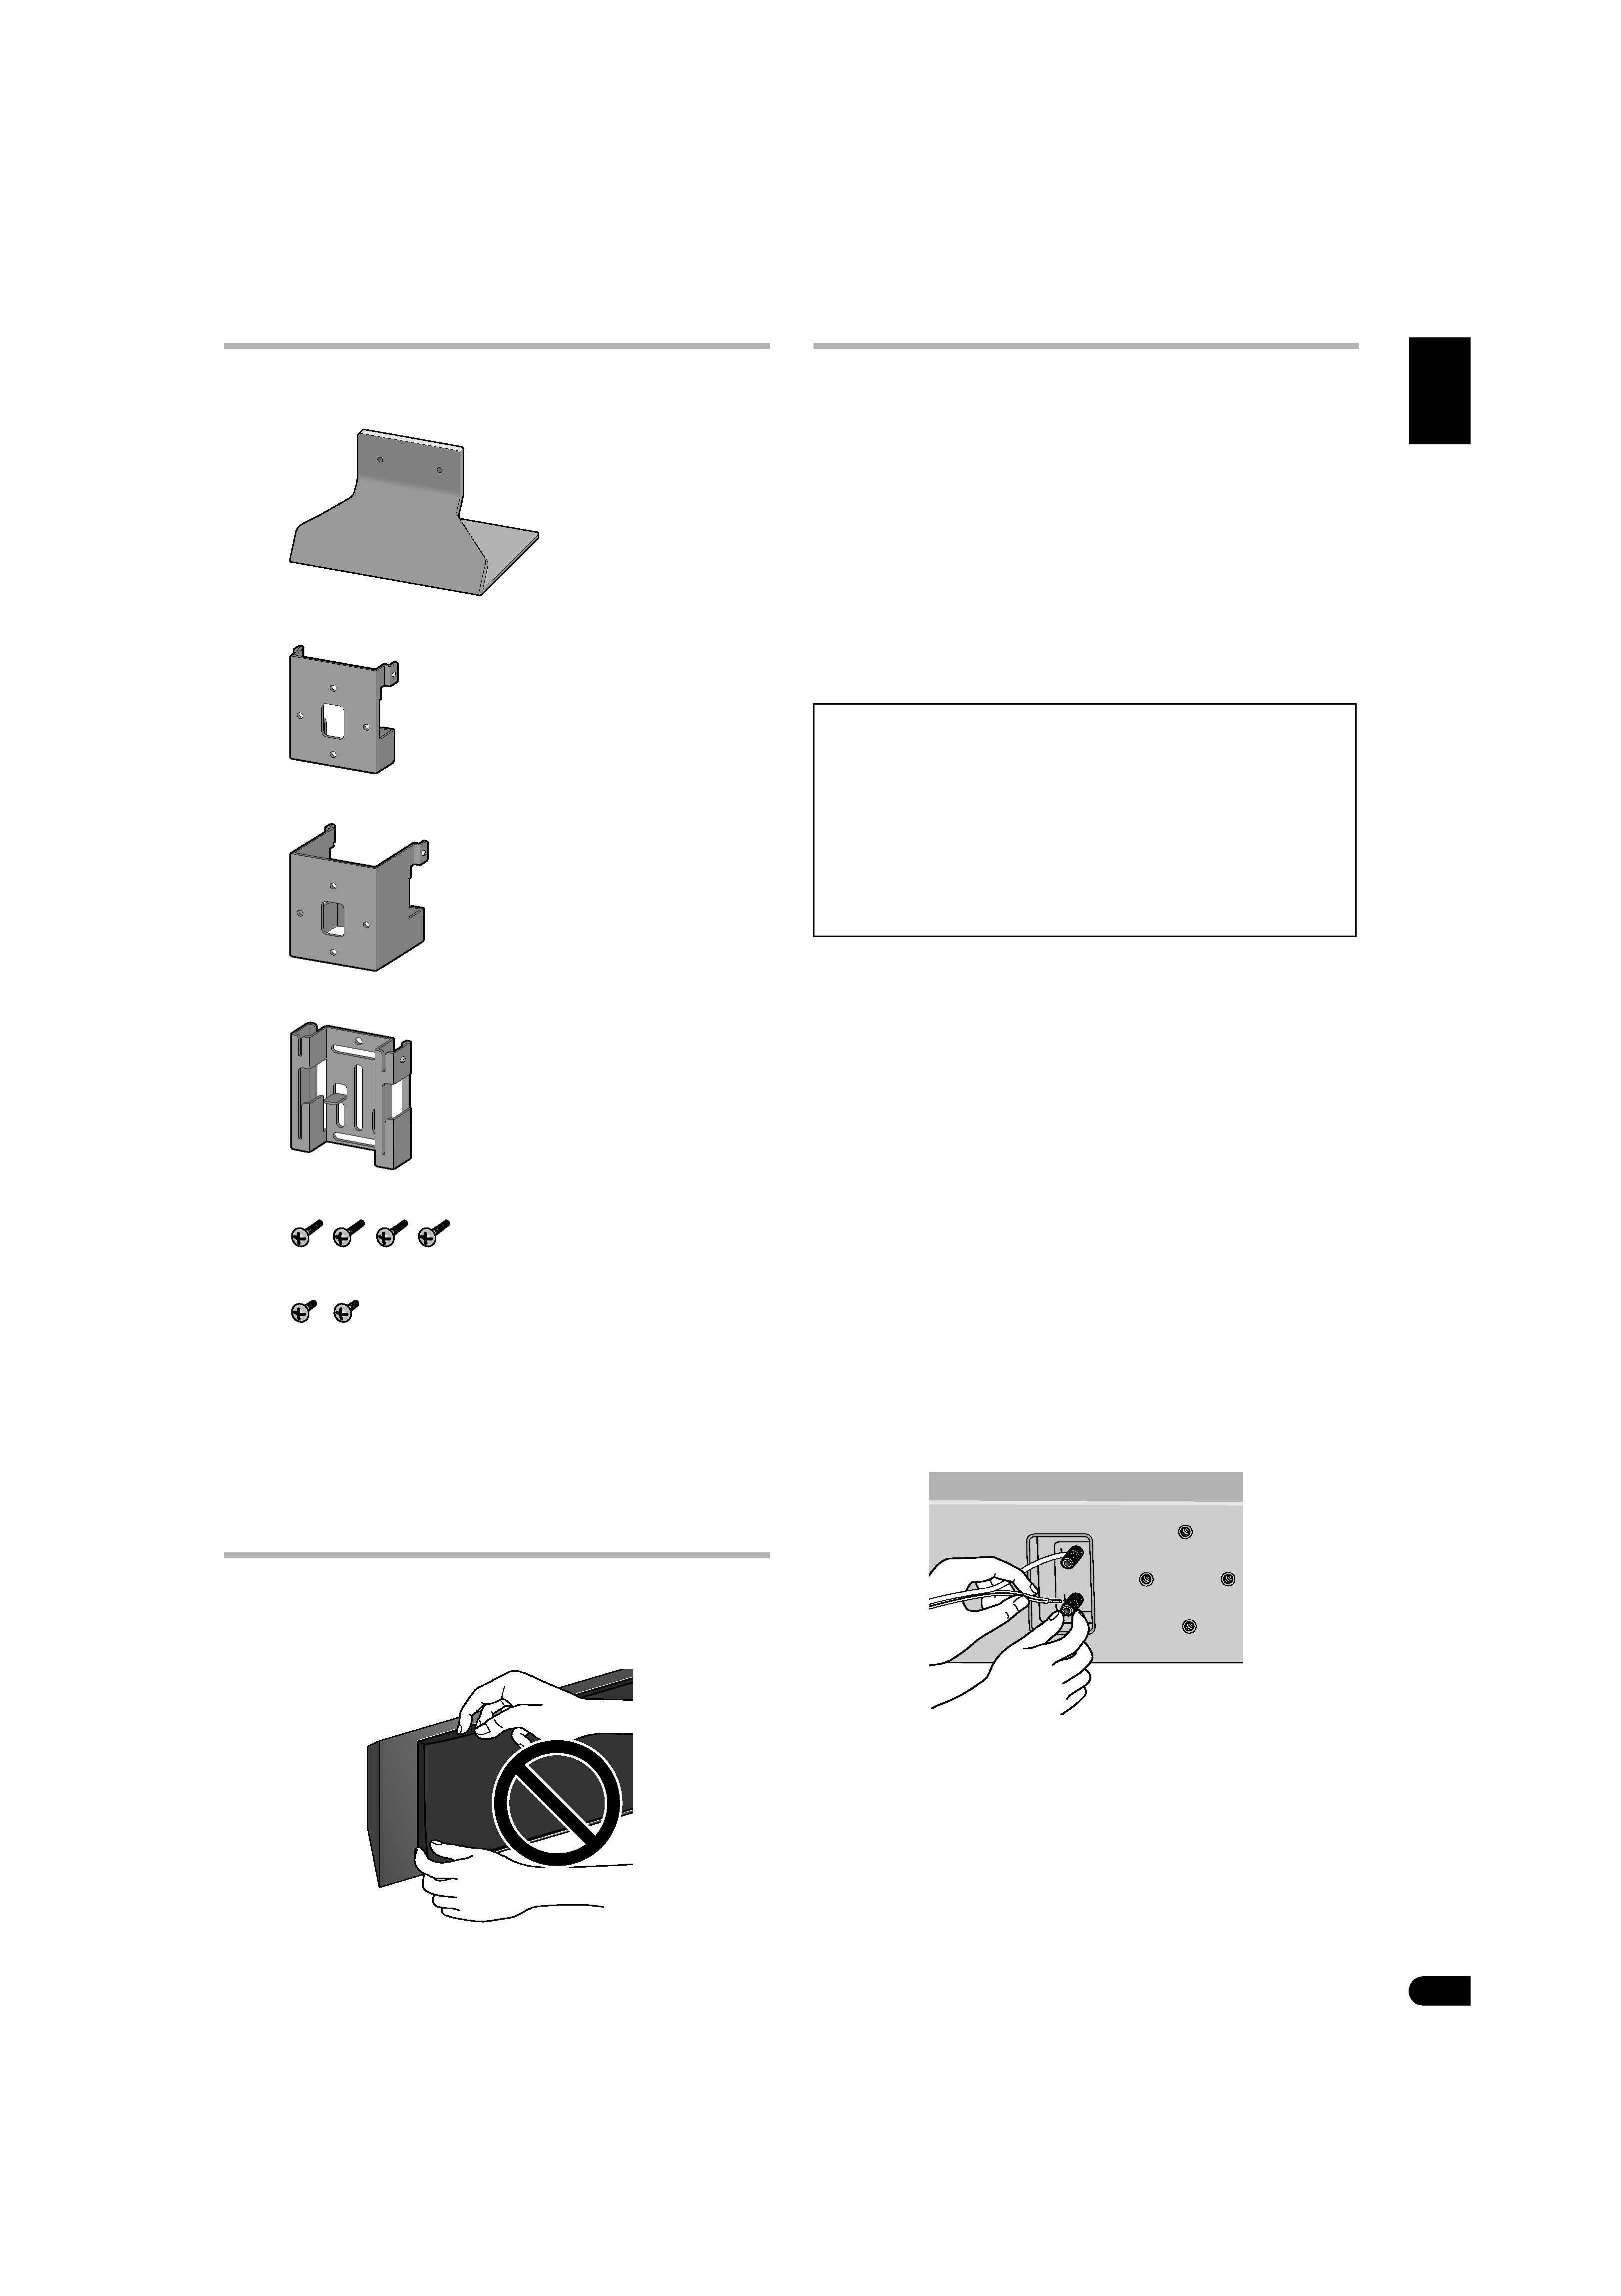
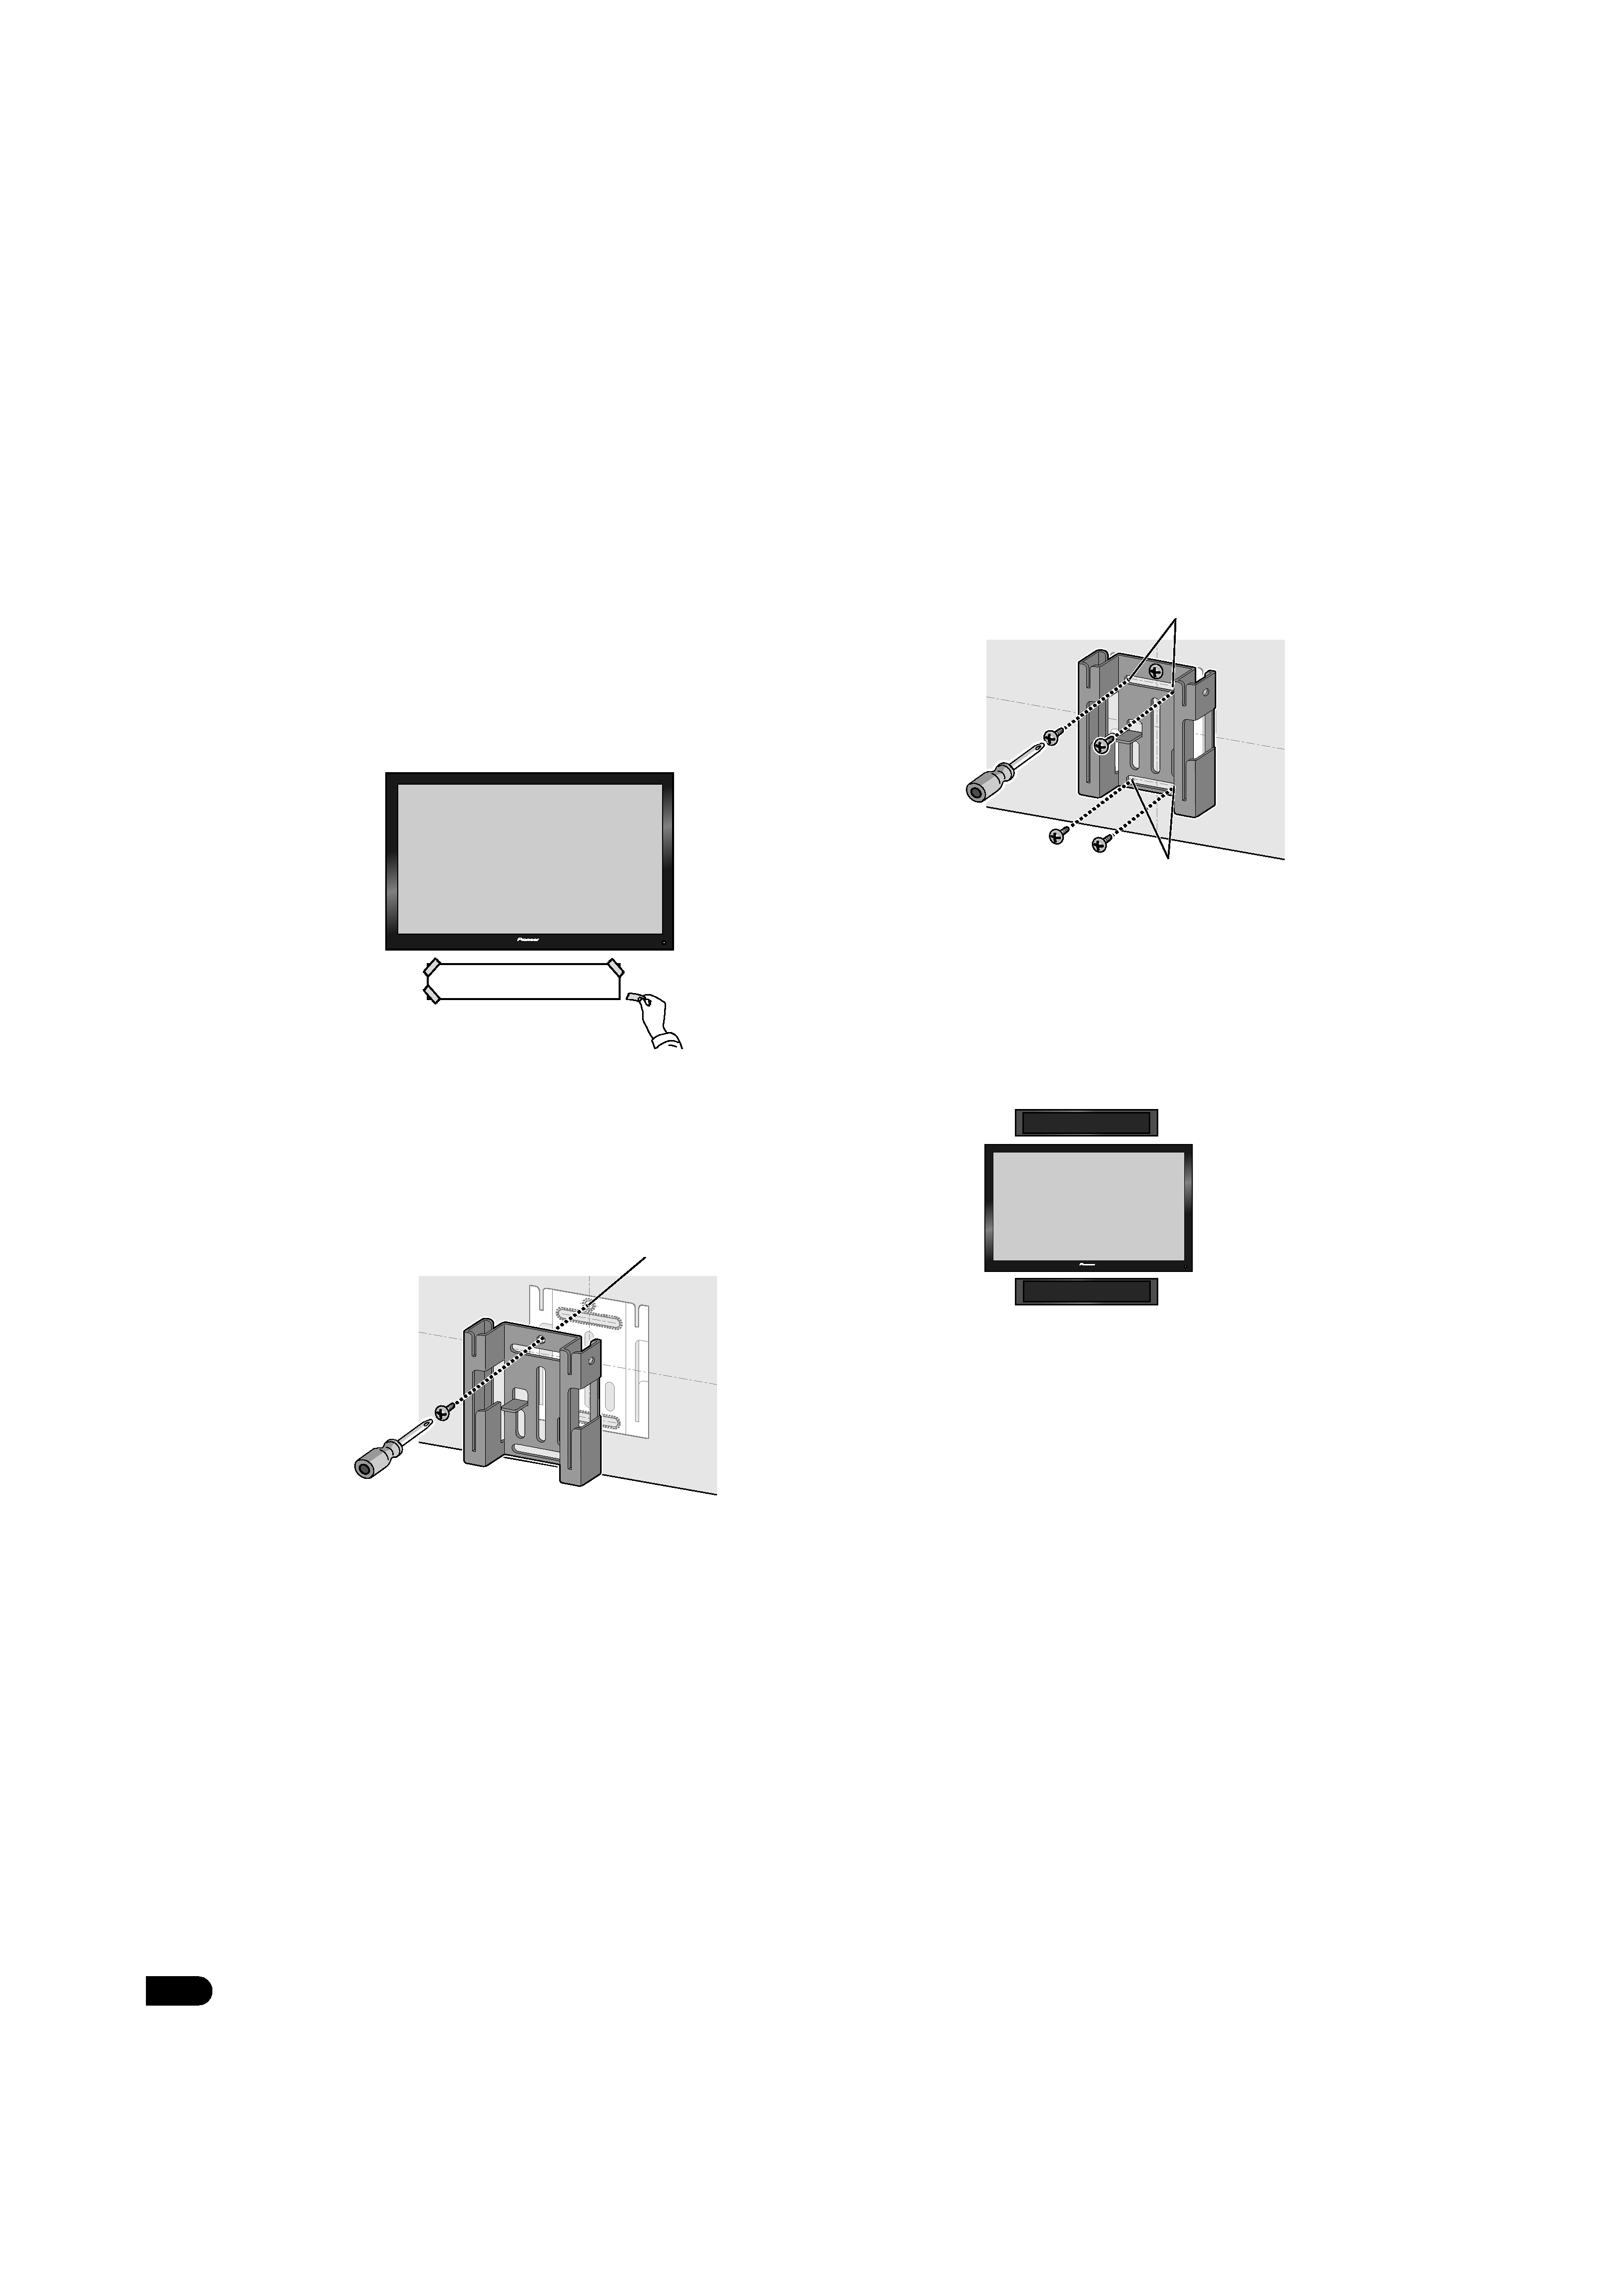
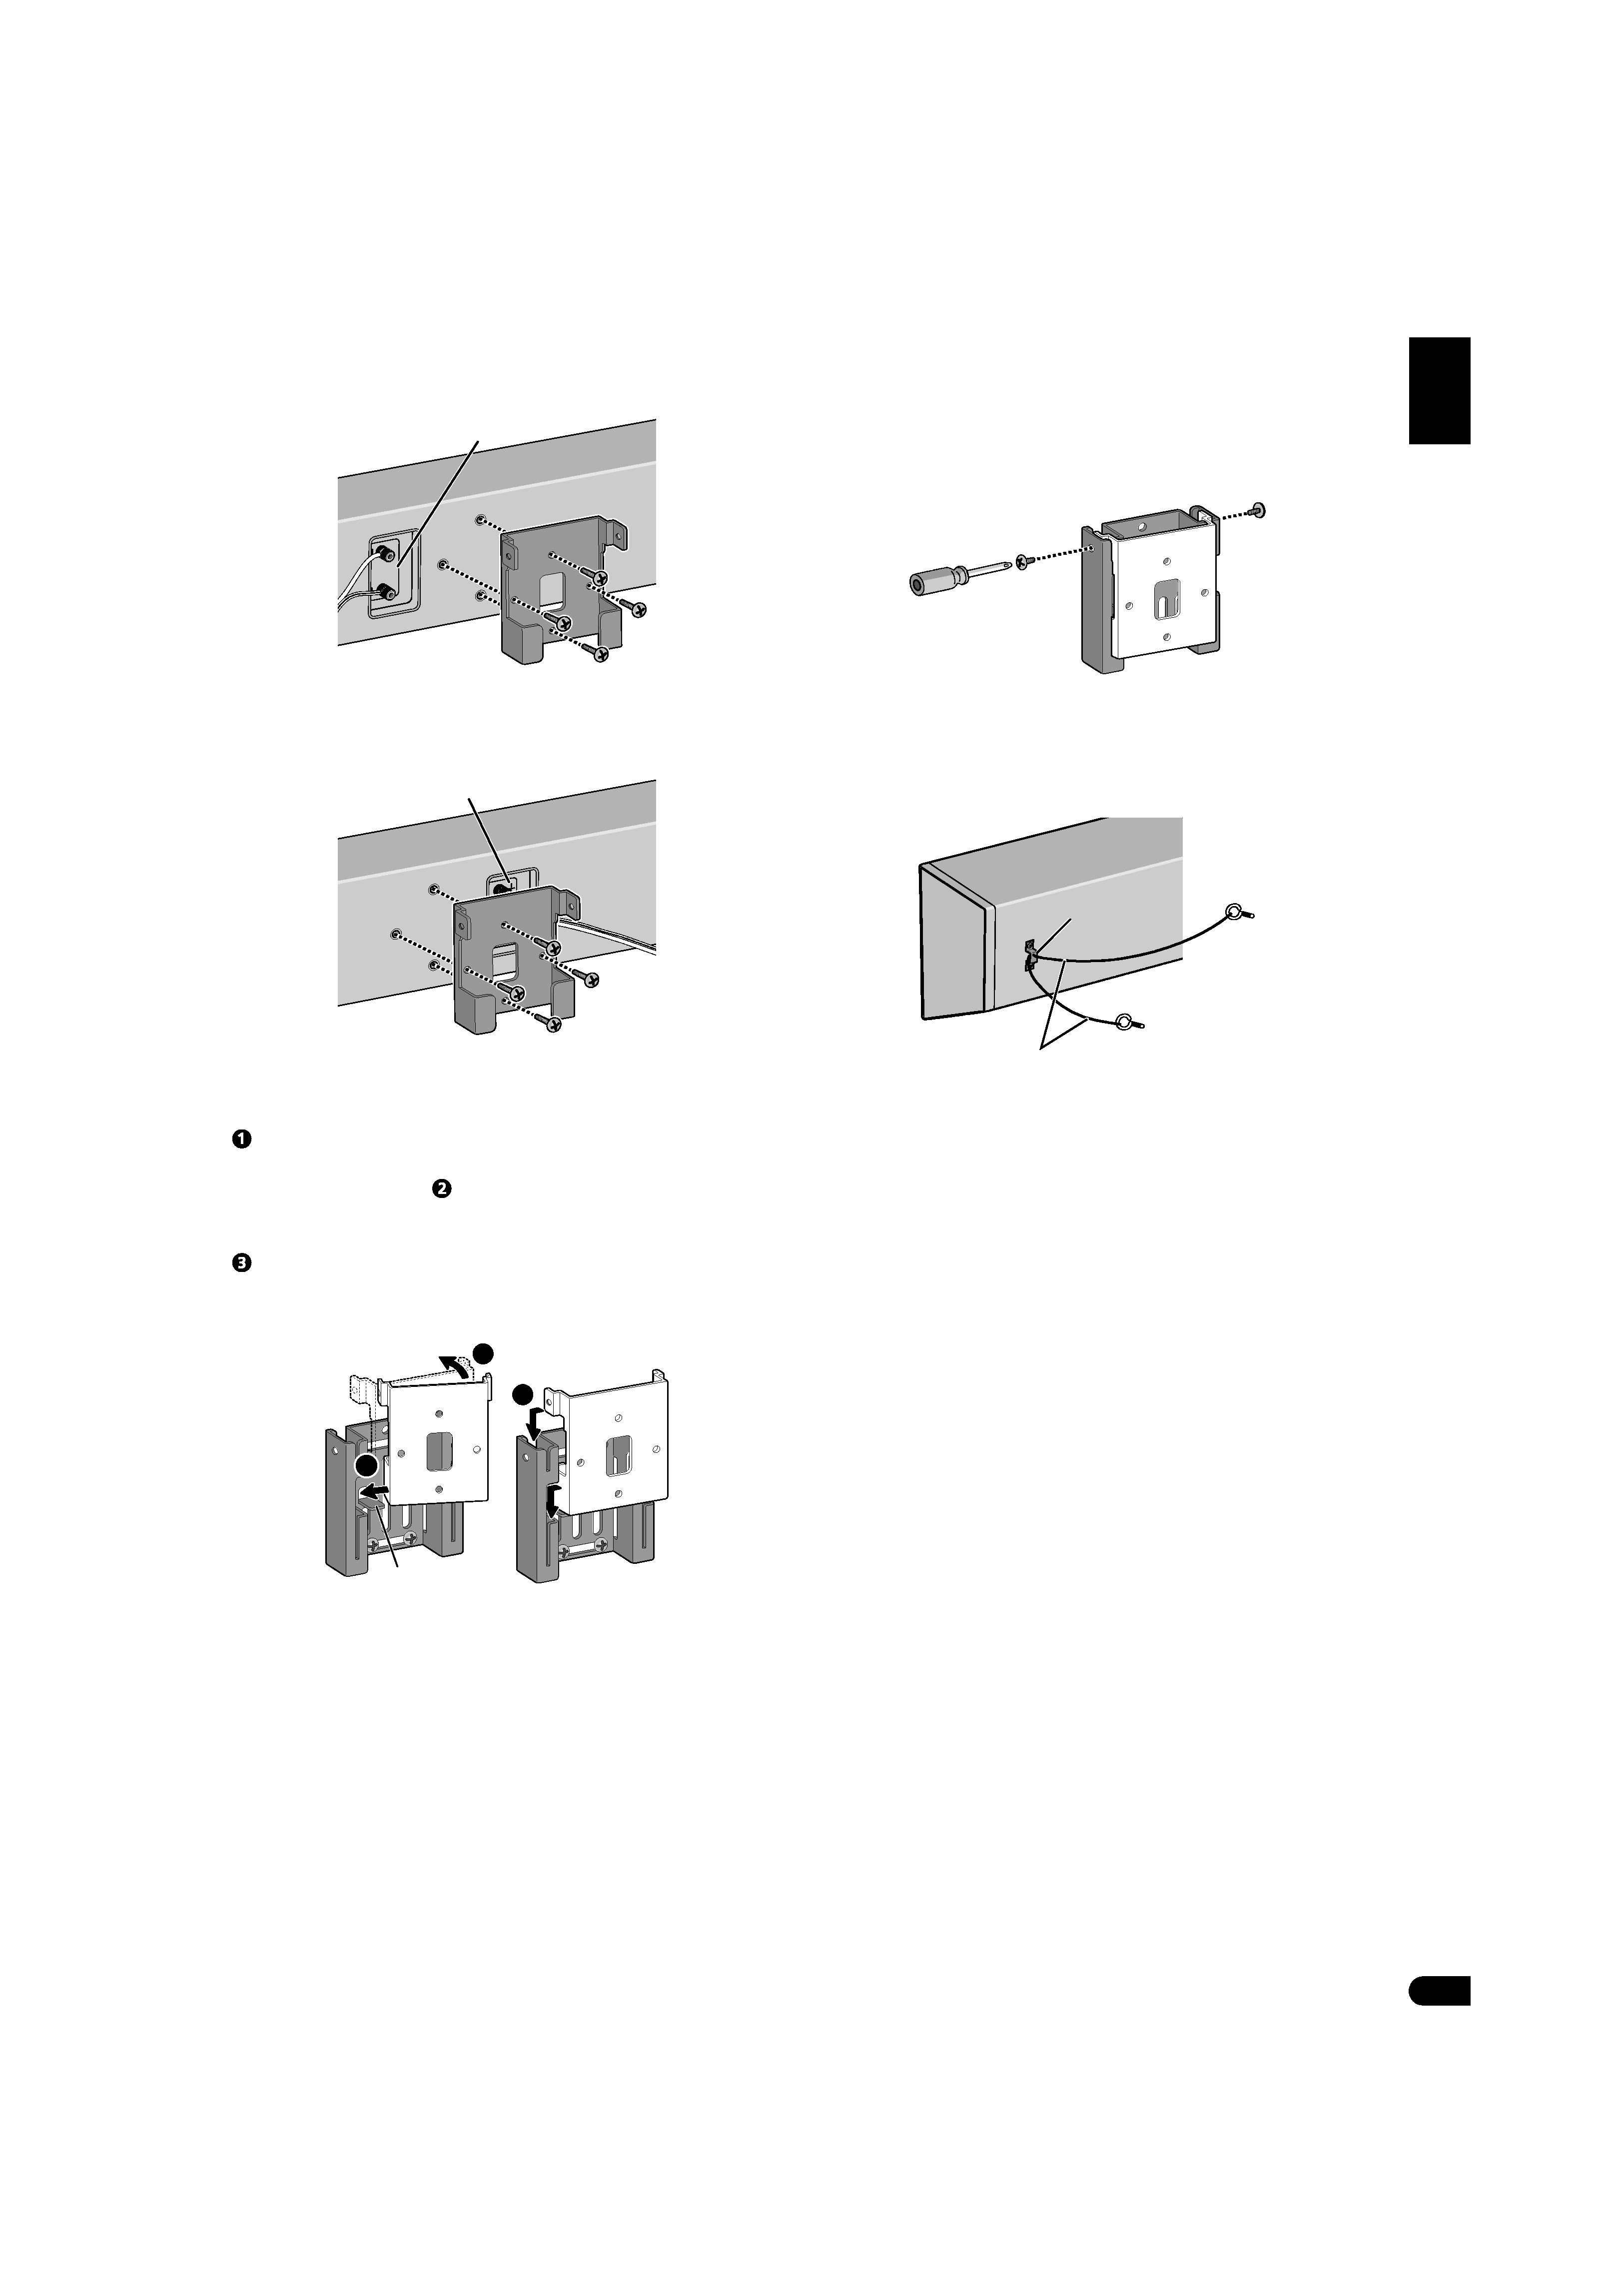
Installation
· Do not place the speaker on an unstable surface, as doing so
may cause the speaker to fall and cause damage or bodily
injury.
· Switch off and unplug your AV equipment and consult the
instructions when connecting up components. Make sure you
use the correct connecting cables.
· When placing this unit, avoid areas where it may be likely to fall
and cause injury in the event of a natural disaster (such as an
earthquake). For more information, see page 5.
· Pioneer is not responsible for any accidents or damage that
result from improper installation, misuse or modification of the
product, or natural disasters.
Using the speakers
· Do not use the speaker to output distorted sound for long
periods of time. This can result in damages to the speaker and
poses a potential fire hazard.
· Do not sit or stand on the speaker, or let children play on the
speaker. Doing so could provoke the speaker to fall, causing
damages or bodily injury.
CAUTION
These speaker terminals carry
HAZARDOUS LIVE voltage. To
prevent the risk of electric shock when connecting or
disconnecting the speaker cables, disconnect the power cord
before touching any uninsulated parts.
01_S-LX70C_En.book
2