PIONEER S-2EX-W/SXTW/EW5 Owner's Manual

Cover page of PIONEER S-2EX-W/SXTW/EW5 Owner's Manual

Owner's Manual for PIONEER S-2EX-W/SXTW/EW5, downloadable as a PDF file.

We also have service manual to this model.

Manual details

  • Immediate download after payment.
  • Delivered as a PDF file.
  • The manual has 52 pages
  • File size: 2.16 MB
  • Available language versions: Portuguese, Swedish, French, English, Russian, Spanish, Dutch, German, Danish, Italian, Finnish, Norwegian
  • Different language versions may vary sligthly in file size and page count.

We guarantee that...

  • our manuals are complete,
  • our manuals are checked with antivirus,
  • We'll issue refund if the manual is damaged, incomplete or unreadable (our refund policy)

Sample pages

Thumbnail of page 1Thumbnail of page 2Thumbnail of page 3Thumbnail of page 4
Thumbnail of page 5Thumbnail of page 6Thumbnail of page 7Thumbnail of page 8
Thumbnail of page 9
background image
S-2EX
background image
S-2EX
background image
2
En
Thank you for buying this Pioneer product. Please read
through these operating instructions so you will know how to
operate your model properly. After you have finished reading
the instructions, put them away in a safe place for future
reference.
Features of this speaker system
· Construction follows leading-edge TAD technology
· Beryllium dual-concentric tweeter
· Aramid/carbon fiber reinforced composite 18cm woofer
· Perfect time design
Before you start
· The nominal impedance of this speaker system is 6
ohms. Connect the speaker system to an amplifier with
a load impedance ranging from 4 to 16 ohms (a model
with "4 ­ 16
" displayed on the speaker output
terminals).
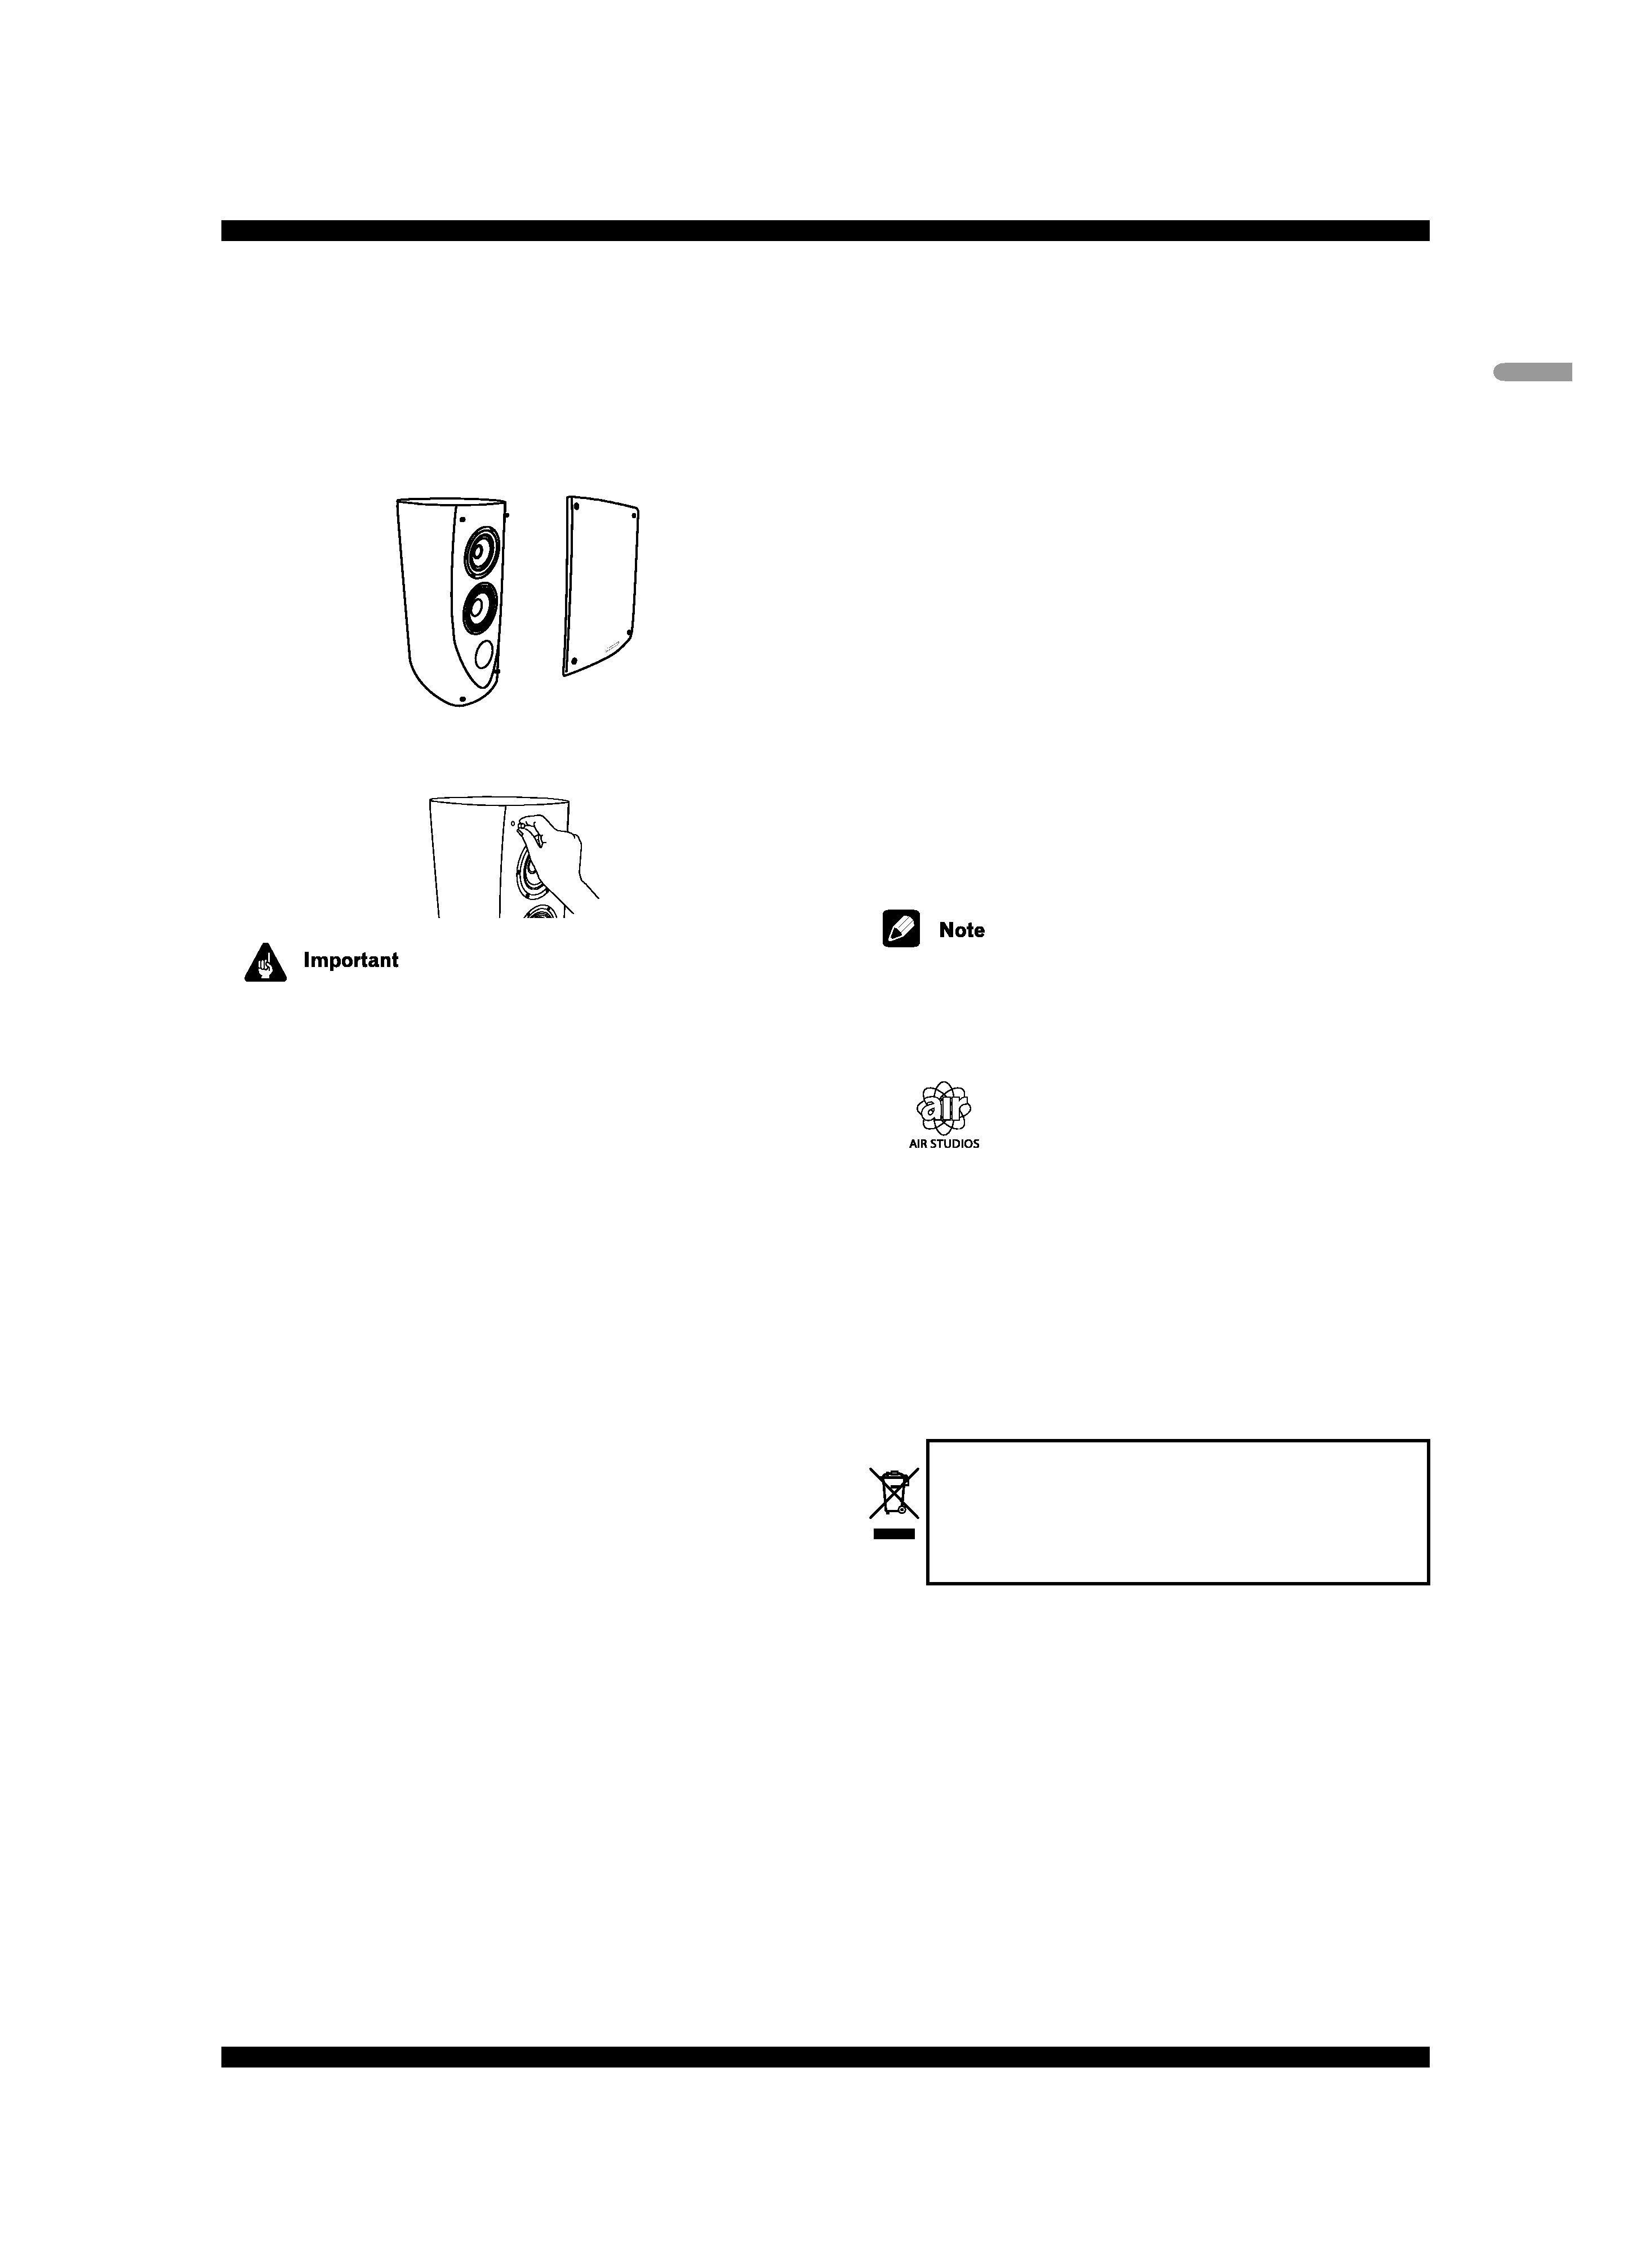
· Do not touch the speaker cones as they are easily
damaged.
In order to prevent damage to the speaker system resulting
from input overload, please observe the following precau-
tions:
· Do not supply power to the speaker system in excess of
the maximum permissible input.
· When connecting or disconnecting anything in your AV
system, make sure the amplifier is switched off.
· When using a graphic equalizer to emphasize loud
sounds in the high-frequency range, do not use exces-
sive amplifier volume.
· Do not try to force a low-powered amplifier to produce
loud volumes of sound (the amplifier's harmonic
distortion will be increased, and you may damage the
tweeter).
Caution: installation
· Do not place the speaker on an unstable surface. It
could present a hazard if it falls, as well as damaging the
equipment. If placing the speaker on a thick carpet, we
recommend using the supplied speaker spikes for
stability.
· Switch off and unplug your AV equipment and consult
the instructions when connecting up components. Make
sure you use the correct connecting cables.
· Do not put a TV or other AV equipment on top of this
speaker. It could present a hazard if it falls, as well as
damaging the equipment.
Caution: in use
· Do not use the speaker to output distorted sound for
long periods of times. This can result in a fire hazard.
· Do not sit or stand on the speaker, or let children play on
the speaker.
· Do not put large or heavy objects on top of the speaker.
Installing your speaker
Please observe the following points when installing speakers:
· These speakers are bookshelf-type speakers which will
give their best performance when placed on a solid,
level surface off the floor. Placing the speakers directly
on the floor will result in boomy, undefined sound.
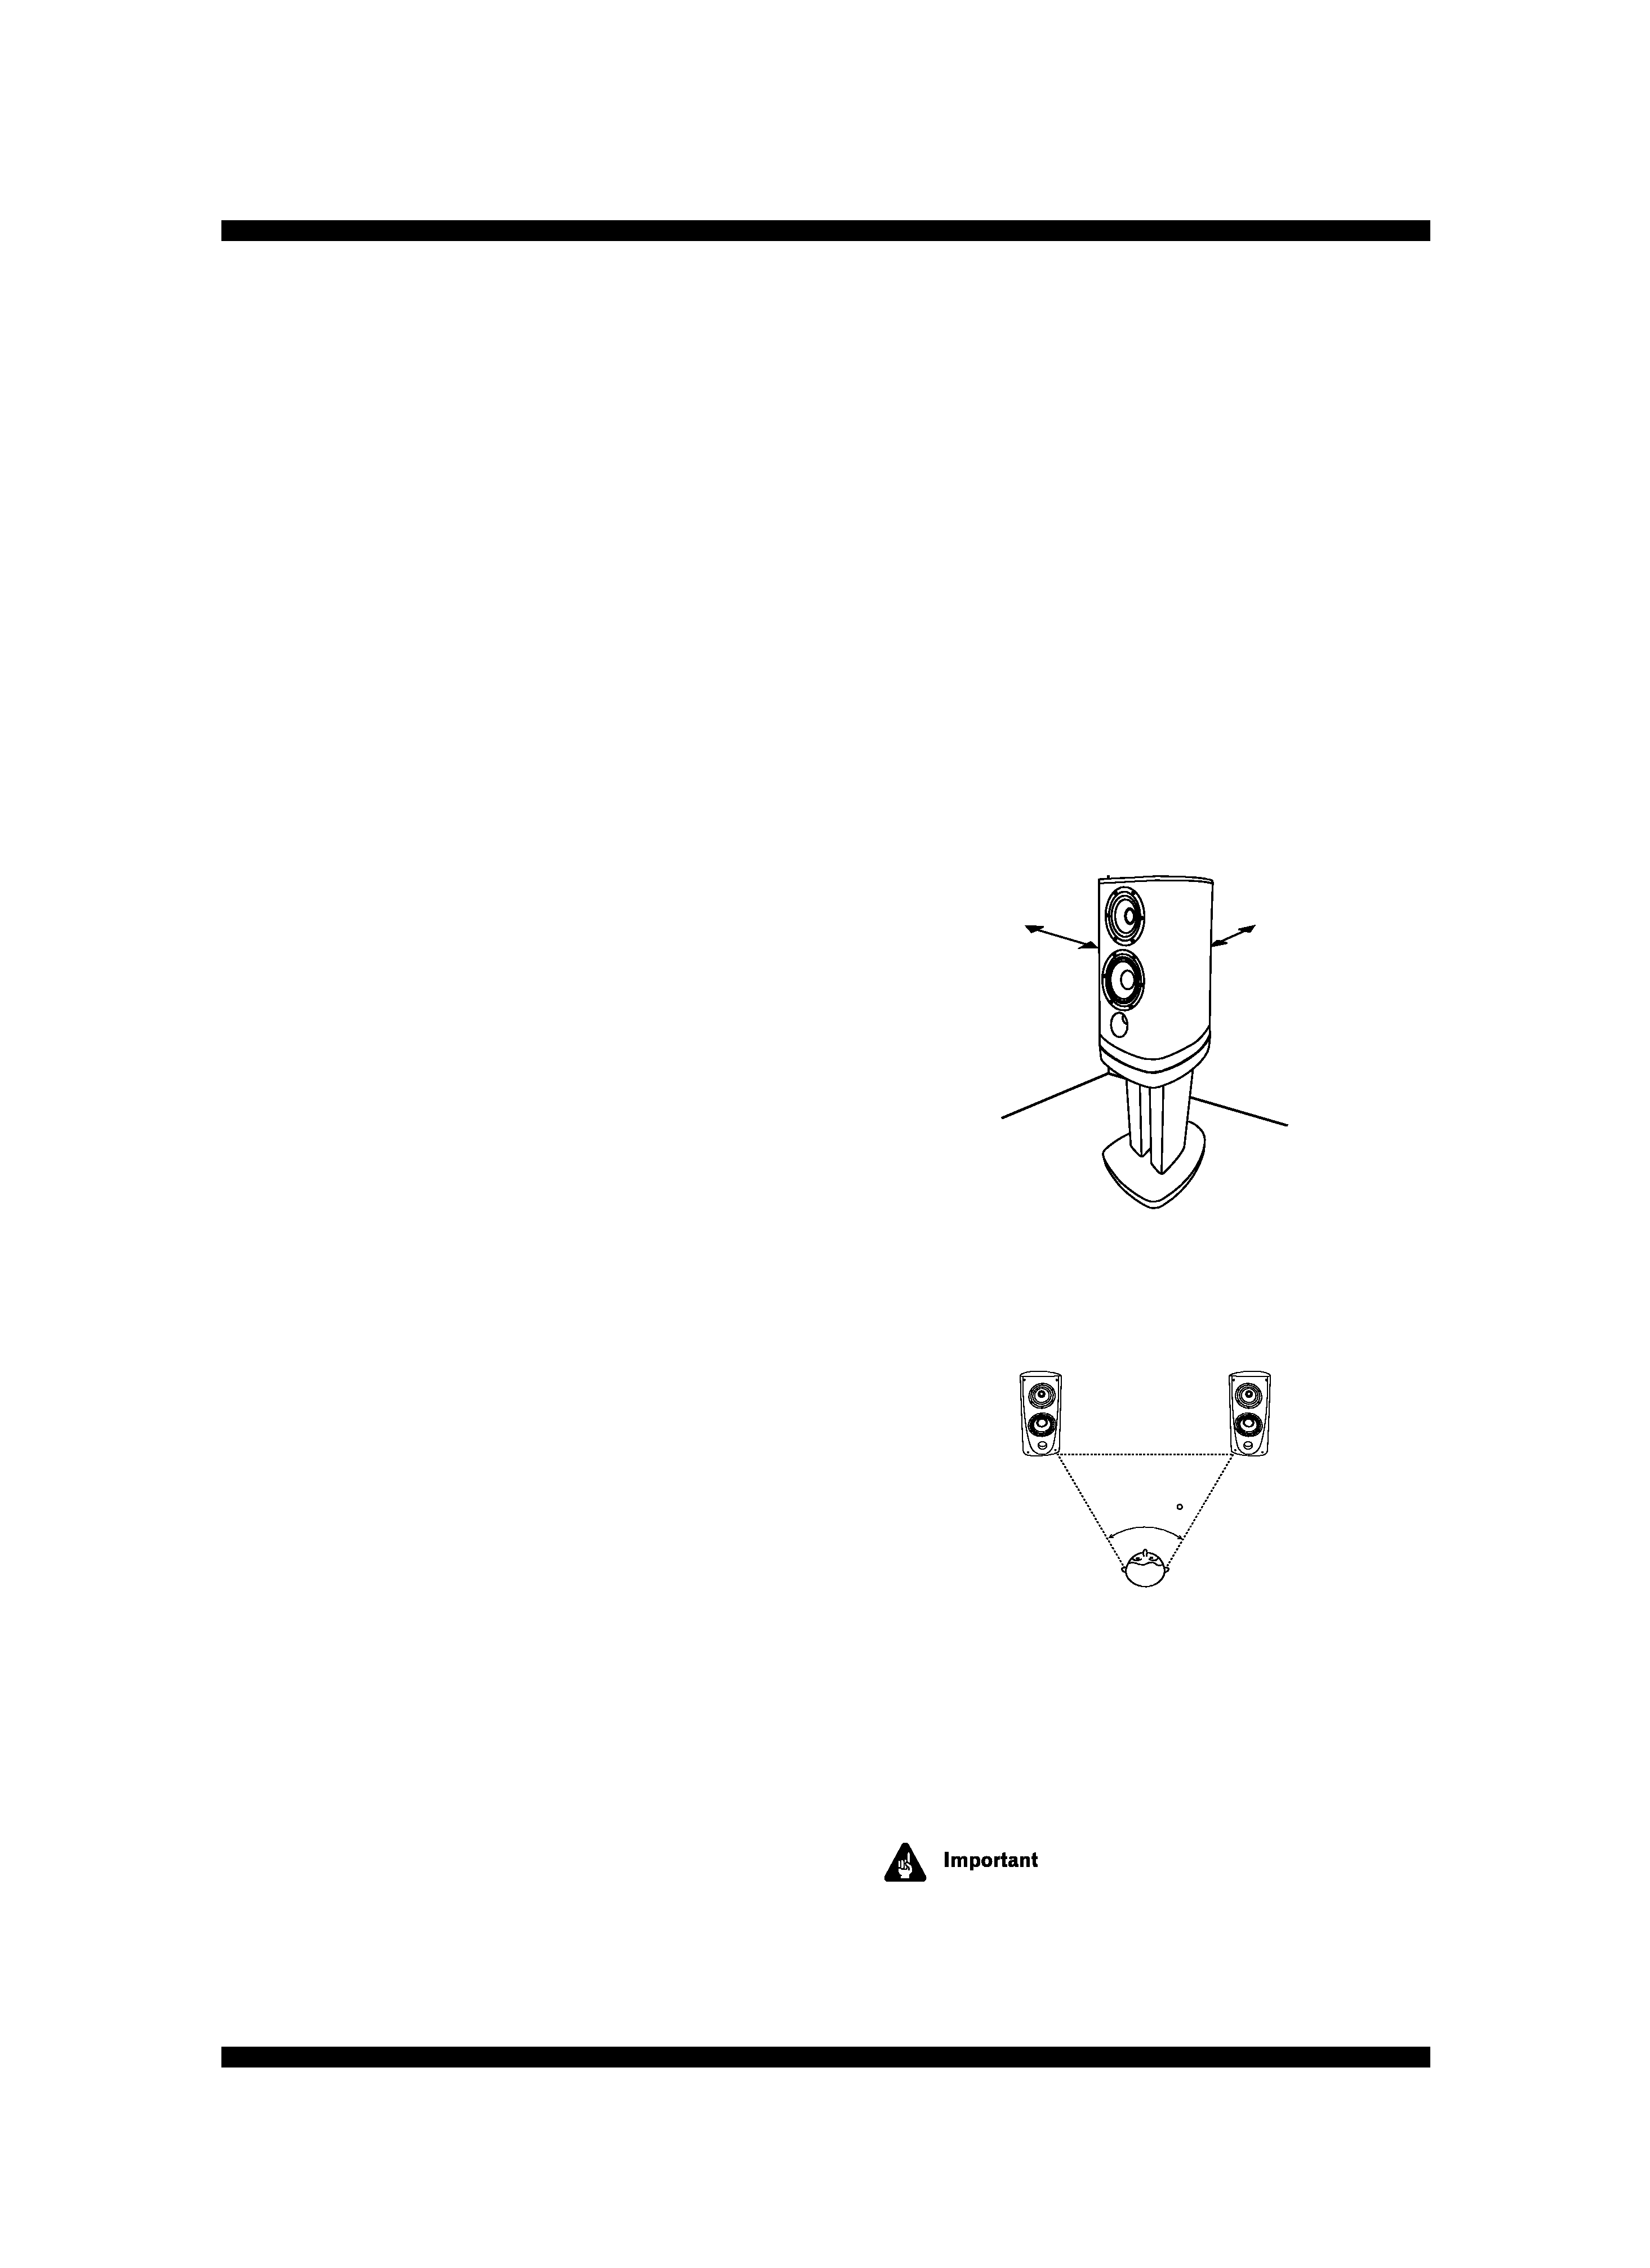
Ideally, the tweeters should be at about ear level when
seated in your listening position. We recommend using
the CP-2EX speaker stand for optimal sound and stability.
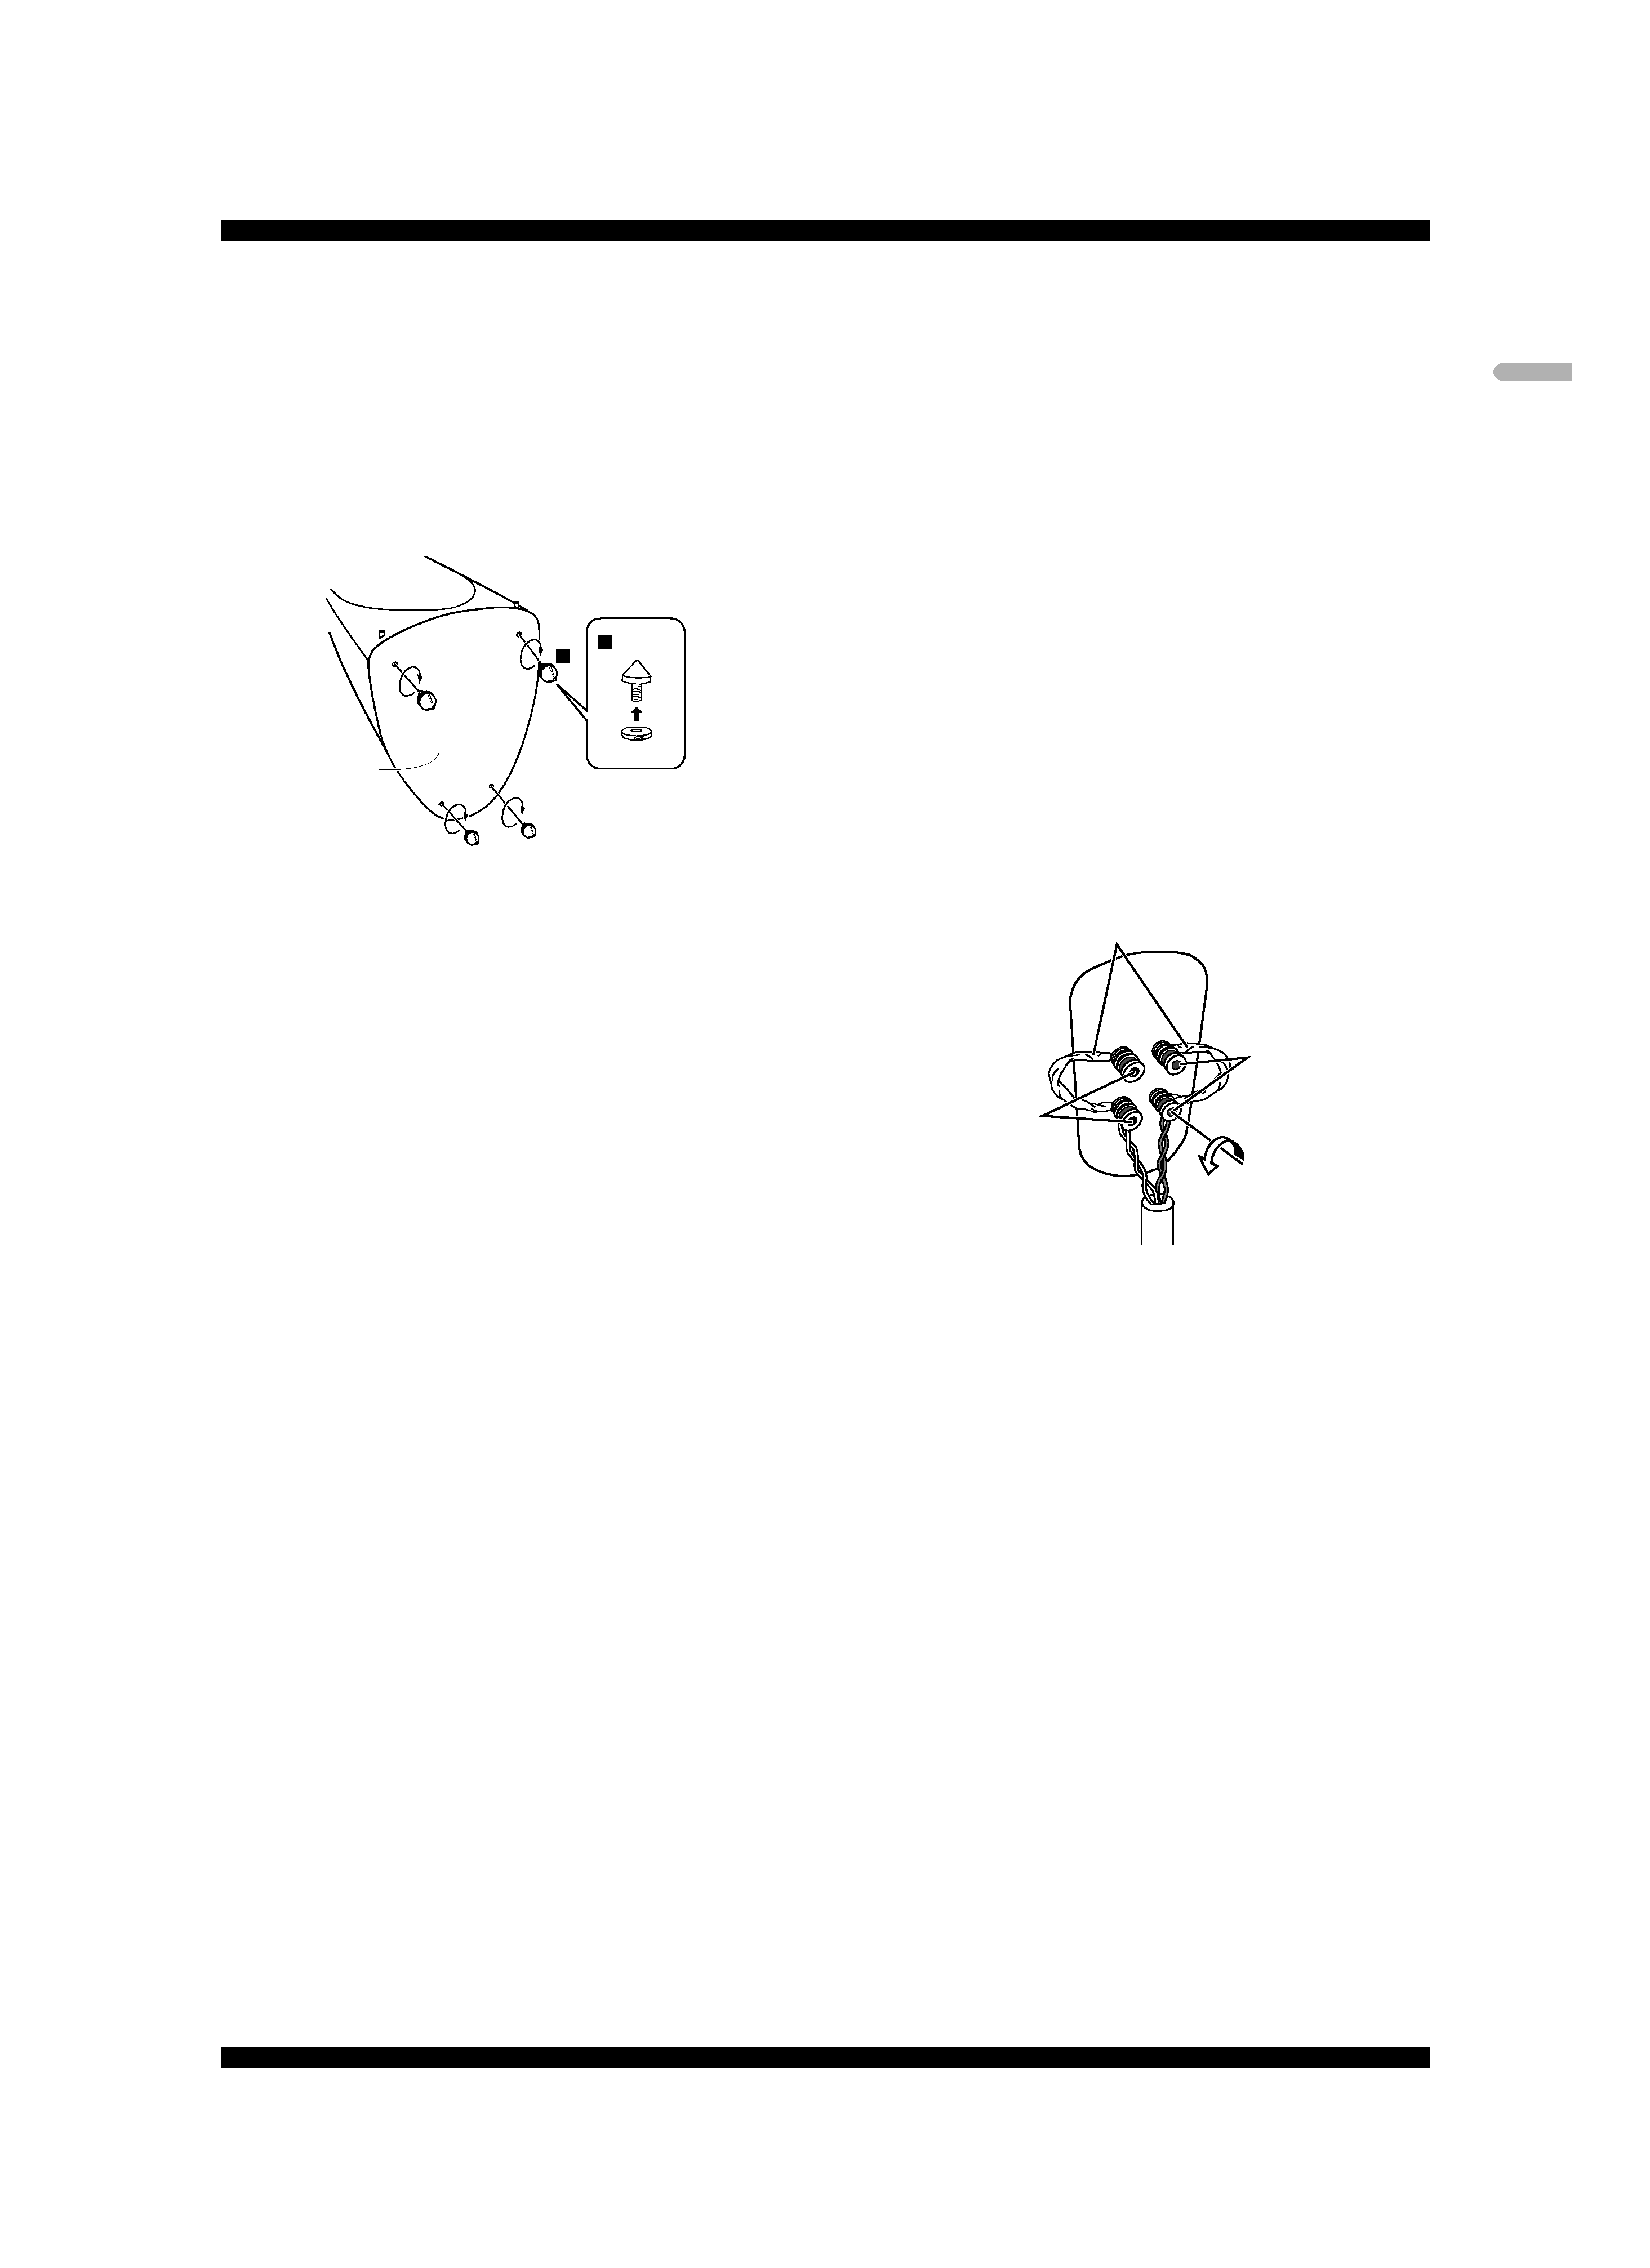
If you choose to use the CP-2EX speaker stand, make sure
you secure it with the screws provided.
· Sounds played through speaker systems are easily
affected in subtle ways by the conditions in the listening
space.
· For good sound, the speaker should be about 20cm
away from the back wall and at least 50cm away from
the side wall. If the room has a lot of reverberation, we
recommend hanging heavy fabric on the walls, and/or
putting a carpet on the floor to damp the sound. For best
results, cover walls completely.
50 cm
20 cm
· Place speakers equal distances from your listening
position for good stereo sound. Use speaker cords of the
same length for each speaker.
50 ­ 60
· If you are using a set of speakers for your TV sound,
install the speakers at equal distances either side of the
TV and point them in the same direction as the TV.
· Do not place the speaker where it will be in direct
sunlight, and avoid positioning it near heaters and air
conditioners. This may cause warping and discoloration
of the speaker cabinet and damage the speaker.
· Pioneer assumes no liability whatsoever for damages
resulting from assembly, improper mounting, insuffi-
cient reinforcement, misuse of the product, acts of
nature, etc.
background image
3
En
English
Using the spikes
This speaker system includes spikes that you can use to
isolate the speaker from the floor. Spikes are recommended
when placing the speakers on a thick carpet (for added
stability), or for better sound when placing the speakers on a
hard reverberant surface (such as a concrete or wood floor).
Use the supplied spike bases to avoid scratching the floor or
other surface where the speaker is placed.
1
2
1
Attach the spikes to the nuts provided.
2
Attach all four spikes to the threaded metal inserts
at the base of the speaker.
3
Choose the location for speaker placement then put
the spike bases on the floor.
4
Place the speaker upright so that the spikes are
resting on the spike bases on the floor.
Make sure the speaker is stable and resting squarely on all
four spikes.
Caution: when using the spikes
· Note that these spikes are sharp metal and can cause
damage to flooring. Make sure to lay down a cloth or
suitable base before setting up.
· The speaker is very heavy (about 28 kg) and can cause
serious damage or injury if you are attempting to adjust
the spikes with the speaker standing or leaning. Make
sure to lay down a cloth and make spike adjustments
with the speaker laying flat. Two people or more during
placement and setup is advised.
Connecting to an amplifier
Before connecting to your amplifier, make sure that the amp is
switched off.
This speaker does not include speaker cables used for
connecting to a stereo. Note the following when selecting
speaker cables.
· Use heavy-gauge speaker cable if possible, and keep the
cables to the minimum necessary length.
· If the length of cable required for left and right speakers
differs, use cables of the same length, matched to the
longer distance.
· Cables have differing characteristics. Keep this in mind
when using any cable.
· Select cables with as little resistance as possible, and
make sure the cables to the speaker terminals and amp
are firm and secure.
CAUTION
These speaker terminals carry
HAZARDOUS LIVE
voltage. To prevent the risk of electric shock when
connecting or disconnecting the speaker cables,
disconnect the power cord before touching any
uninsulated parts.
D3-4-2-2-3_A_En
Connecting the cables
1
Switch off the power to your amplifier.
2
Connect the speaker cables to the input terminals
(lower) on the back of the speaker. For input terminal
polarity, red is positive (+) and black is negative (­).
Grasp the cap knobs on the lower input terminals and rotate
them to the left (counter-clockwise), insert the speaker cable
wires into the holes in the terminal posts, then tighten the
knobs to secure the short bar as well as the wires.
· You can also use banana plugs for this connection. To do
so, you must first remove the caps from the terminal
posts.
3
Connect the other ends of the cables to the amp's
speaker output terminals (for more details, refer to your
amp owner's manual).
· After connecting the plugs, pull lightly on the cables to
make sure that the ends of the cables are securely
connected to the terminals. Poor connections can
create noise and interruptions in the sound.
· If the cables' wires happen to be pushed out of the
terminals, allowing the wires to come into contact with
each other, it places an excessive additional load on the
amp. This may cause the amp to stop functioning, and
may even damage the amp.
· When using a set of speakers connected to an amplifier,
you won't be able to obtain the normal stereo effect if the
polarity (
,
) of one of the speakers (left or right) is
reversed.
Black terminal (
)
Red terminal (
)
Short bar connectors
Speaker base
Spike
Nut
background image
4
En
Bi-wiring Connections
Bi-wiring requires two cables for each speaker, one for high
frequencies and one for low frequencies. Using separate
cables for the high end and low end improves the sound.
1
Loosen the cap knobs on the left input terminals and
remove the two short bars.
In this state, the low-frequency speakers and the higher-
frequency speakers are completely independent. Store the
short bars in a safe place for later use. The lower terminals
are for the bass, and the upper terminals are for midrange
and treble sounds.
2
Insert a speaker cable into each of the terminal post
holes, then tighten the knobs.
Caution: when bi-wiring
Note that in this setup, connecting the cables with the
polarity reversed may seriously degrade the tone; refer to the
section "Connecting the cables" again and confirm that the
cables are connected properly.
3
Connect the matched pairs to the same speaker
terminals on your amp (taking care not to get the
polarity reversed).
Make sure to use the same type of cable for the low-fre-
quency and the same type for the high-frequency connec-
tions.
When bi-amping
Bi-amping is an even more powerful way of connecting your
speakers. Just as with bi-wiring, the input terminal short bars
are removed, but here the low-frequency terminals are
connected to a separate, dedicated low-frequency amp, and
the high-frequency terminals are connected to a dedicated
high-frequency amp.
Attaching and removing the front grille
The front grille of this speaker system is removable. Follow
the instructions below to attach/remove the grilles.
Attaching the grille
1
Insert the supplied fastening screws into the four
holes provided on the front of the speaker.
Use your fingers (not a screwdriver) to secure the screws to
the front of the speaker.
2
Line up the holes on the grille with the protruding
ends of the screws on the front of the speaker and press
firmly.
3
Insert the supplied finishing screws into the four
holes on the front of the grille and tighten to secure.
Use your fingers to tighten the finishing screws.
Amplifier
Black terminal (
)
Red terminal (
)
High frequency
terminals
Low frequency
terminals
Black Red
Black Red
Speaker
Speaker
Black Red
Black Red
Speaker
Speaker
Woofer
R ch
L ch
R ch
L ch
R ch
L ch
Finishing
screws
Tweeter
Long fastening
screws
Short fastening
screws
background image
5
En
English
Removing the grille
1
Loosen, then remove the finishing screws from the
four corners on the front of the grille.
2
After detaching the grille, remove the fastening
screws from the four holes on the front of the speaker.
Optionally, you can insert the supplied caps into the holes.
· Do not use a screwdriver (or hex wrench) to tighten the
screws. Overtightening could damage the speaker.
· When not in use, store the screws with these operating
instructions for safekeeping.
Magnetic shielding
This speaker system is magnetically shielded. However,
depending on the installation location, color distortion may
occur if the speaker system is installed extremely close to the
screen of a television set.
If this happens, turn off the television, then turn it on again
after 15 to 30 minutes. If the problem persists, place the
speaker system away from the television set.
Cleaning the speaker cabinet
With normal use, wiping with a dry cloth should be sufficient
to keep the cabinet clean. If necessary, clean with a cloth
dipped in a neutral cleanser diluted five or six times with
water, and wrung out well. Do not use furniture wax or
cleansers.
Never use thinners, benzine, insecticide sprays or other
chemicals on or near this unit since these will corrode the
surfaces.
Specifications
Enclosure .......................................... Bass-reflex bookshelf type
(magnetically shielded)
Configuration ...................................................................... 3-way
Woofer ....................................................................... 18 cm cone
Tweeter ............................................. 14 cm cone / 3.5 cm dome
Nominal impedance .............................................................. 6
Frequency response ........................................... 34 Hz~100 kHz
Sensitivity ........................................................... 86.5 dB (2.83 V)
Maximum input power ..................................................... 200 W
Exterior dimensions ............... 291 (W)
× 565 (H) × 413 (D) mm
Weight .................................................................................. 28 kg
Supplied accessories
Speaker spikes (with attached nuts) ...............................
×4
Spike bases .......................................................................
×4
Long fastening screws (for grille) ....................................
×2
Short fastening screws (for grille) ...................................
×2
Caps .................................................................................
×10
Finishing screws (for grille) ..............................................
×4
Grille ...................................................................................
×1
Warranty card ....................................................................
×1
These operating instructions ...........................................
×1
· Specifications and design subject to possible modifica-
tion without notice, due to improvements.
With the cooperation of AIR Studios, this speaker
has been designated AIR Studios Monitor
Reference.
If you want to dispose this product, do not mix it with
general household waste. There is a separate collection
system for used electronic products in accordance with
legislation that requires proper treatment, recovery and
recycling.
Private households in the 25 member states of the EU, in
Switzerland and Norway may return their used electronic
products free of charge to designated collection facilities or to a
retailer (if you purchase a similar new one).
For countries not mentioned above, please contact your local
authorities for the correct method of disposal.
By doing so you will ensure that your disposed product under-
goes the necessary treatment, recovery and recycling and thus
prevent potential negative effects on the environment and
human health.
Published by Pioneer Corporation.
Copyright © 2005 Pioneer Corporation.
All rights reserved.

Reviews

There are no reviews of this manual yet.