PIONEER M-NS1 Owner's Manual

Cover page of PIONEER M-NS1 Owner's Manual

Owner's Manual for PIONEER M-NS1, downloadable as a PDF file.

We also have service manual to this model.

Manual details

  • Immediate download after payment.
  • Delivered as a PDF file.
  • The manual has 40 pages
  • File size: 1.23 MB
  • Available language versions: English
  • Different language versions may vary sligthly in file size and page count.

We guarantee that...

  • our manuals are complete,
  • our manuals are checked with antivirus,
  • We'll issue refund if the manual is damaged, incomplete or unreadable (our refund policy)

Sample pages

Thumbnail of page 1Thumbnail of page 2Thumbnail of page 3Thumbnail of page 4
Thumbnail of page 5Thumbnail of page 6Thumbnail of page 7Thumbnail of page 8
Thumbnail of page 9
background image
XC-F10
XC-NS1
M-F10
M-NS1
CT-F10
S-F10-LRW
S-NS1-LRW
Operating Instructions
Stereo CD Tuner
Stereo Power Amplifier
Speaker System
Stereo Cassette Deck
background image
XC-F10
XC-NS1
M-F10
M-NS1
CT-F10
S-F10-LRW
S-NS1-LRW
Operating Instructions
Stereo CD Tuner
Stereo Power Amplifier
Speaker System
Stereo Cassette Deck
background image
WARNING: TO PREVENT FIRE OR SHOCK
HAZARD, DO NOT EXPOSE THIS APPLIANCE TO
RAIN OR MOISTURE.
Thank you for buying this Pioneer product.
In the UK, this system comprises the XC-F10 (Stereo CD Tuner);
M-F10 (Stereo Power Amplifier); and S-F10-LRW (Speaker
System). In all other countries the model names are XC-NS1, M-
NS1 and S-NS1-LRW respectively.
The optional CT-F10 Stereo Cassette Deck is available in the UK
only.
Please read through these operating instructions so you will
know how to operate your model properly. After you have
finished reading the instructions, put them away in a safe place
for future reference.
In some countries or regions, the shape of the power plug and
power outlet may sometimes differ from that shown in the
explanatory drawings. However, the method of connecting and
operating the unit is the same.
IMPORTANT
FOR USE IN THE
UNITED KINGDOM
The wires in this mains lead are
coloured in accordance with the
following code:
Blue :
Neutral
Brown : Live
If the plug provided is unsuitable for
your socket outlets, the plug must be
cut off and a suitable plug fitted.
The cutoff plug should be disposed of
and must not be inserted into any 13
amp socket as this can result in
electric shock. The plug or adaptor of
the distribution panel should be
provided with a 5 amp fuse. As the
colours of the wires in the mains lead
of this appliance may not correspond
with coloured markings identifying
the terminals in your plug, proceed as
follows:
The wire which is coloured blue must
be connected to the terminal which is
marked with the letter N or coloured
black.
The wire which is coloured brown
must be connected to the terminal
which is marked with the letter L or
THE STANDBY/ON BUTTON IS SECONDARY
CONNECTED AND THEREFORE DOES NOT SEPA-
RATE THE UNIT FROM MAINS POWER IN STANDBY
POSITION.
This product complies with the Low Voltage
Directive (73/23/EEC), EMC Directives (89/336/EEC,
92/31/EEC) and CE Marking Directive (93/68/EEC).
coloured red.
Do not connect either wire to the earth
terminal of a three-pin plug.
NOTE
After replacing or changing a fuse, the
fuse cover in the plug must be replaced
with a fuse cover which corresponds to
the colour of the insert in the base of the
plug or the word that is embossed on
the base of the plug, and the appliance
must not be used without a fuse cover.
If lost, replacement fuse covers can be
obtained from your dealer.
Only 5 A fuses approved by B.S.I. or
A.S.T.A. to B.S. 1362 should be used.
RISK OF ELECTRIC SHOCK
DO NOT OPEN
CAUTION
ATTENTION
DANGER D'ELECTROCUTION
NE PAS OUVRIR
These labels can be found on
the unit's bottom panel.
[For XC-F10/ XC-NS1]
CAUTION
This product contains a laser diode of higher
class than 1. To ensure continued safety, do not
remove any covers or attempt to gain access to
the inside of the product.
Refer all servicing to qualified personnel.
The following caution label appears on your unit.
Location: Bottom of the unit.
CLASS 1
LASER PRODUCT
INFRINGEMENT OF COPYRIGHT
Recording and playback of copyrighted material
may require consent. See the Copyright Design
and Patent Act 1988.
US and foreign patents licensed from Dolby
Laboratories
These Operating Instructions describe the operating
procedures of both the XC-F10 Stereo CD Tuner, M-F
10 Stereo Power Amplifier (Non -UK models, XC-NS1
Stereo CD Tuner and the M-NS1 Stereo Power
Amplifier) and the CT-F10 Stereo Cassette Deck.
However, the CT-F10 is sold separately.
RISK OF ELECTRIC SHOCK
DO NOT OPEN
CAUTION
IMPORTANT 1
CAUTION:
TO PREVENT THE RISK OF ELECTRIC SHOCK, DO
NOT REMOVE COVER (OR BACK).
NO USER-
SERVICEABLE PARTS INSIDE. REFER SERVICING TO
QUALIFIED SERVICE PERSONNEL.
The exclamation point within an equilateral triangle is
intended to alert the user to the presence of important
operating and maintenance (servicing) instructions in
the literature accompanying the appliance.
The lightning flash with arrowhead symbol, within an
equilateral triangle, is intended to alert the user to the
presence of uninsulated "dangerous voltage" within the
product's enclosure that may be of sufficient magnitude
to constitute a risk of electric shock to persons.
background image
Contents
1 Before You Start
Checking what's in the box ................................. 4
Using this manual .............................................. 4
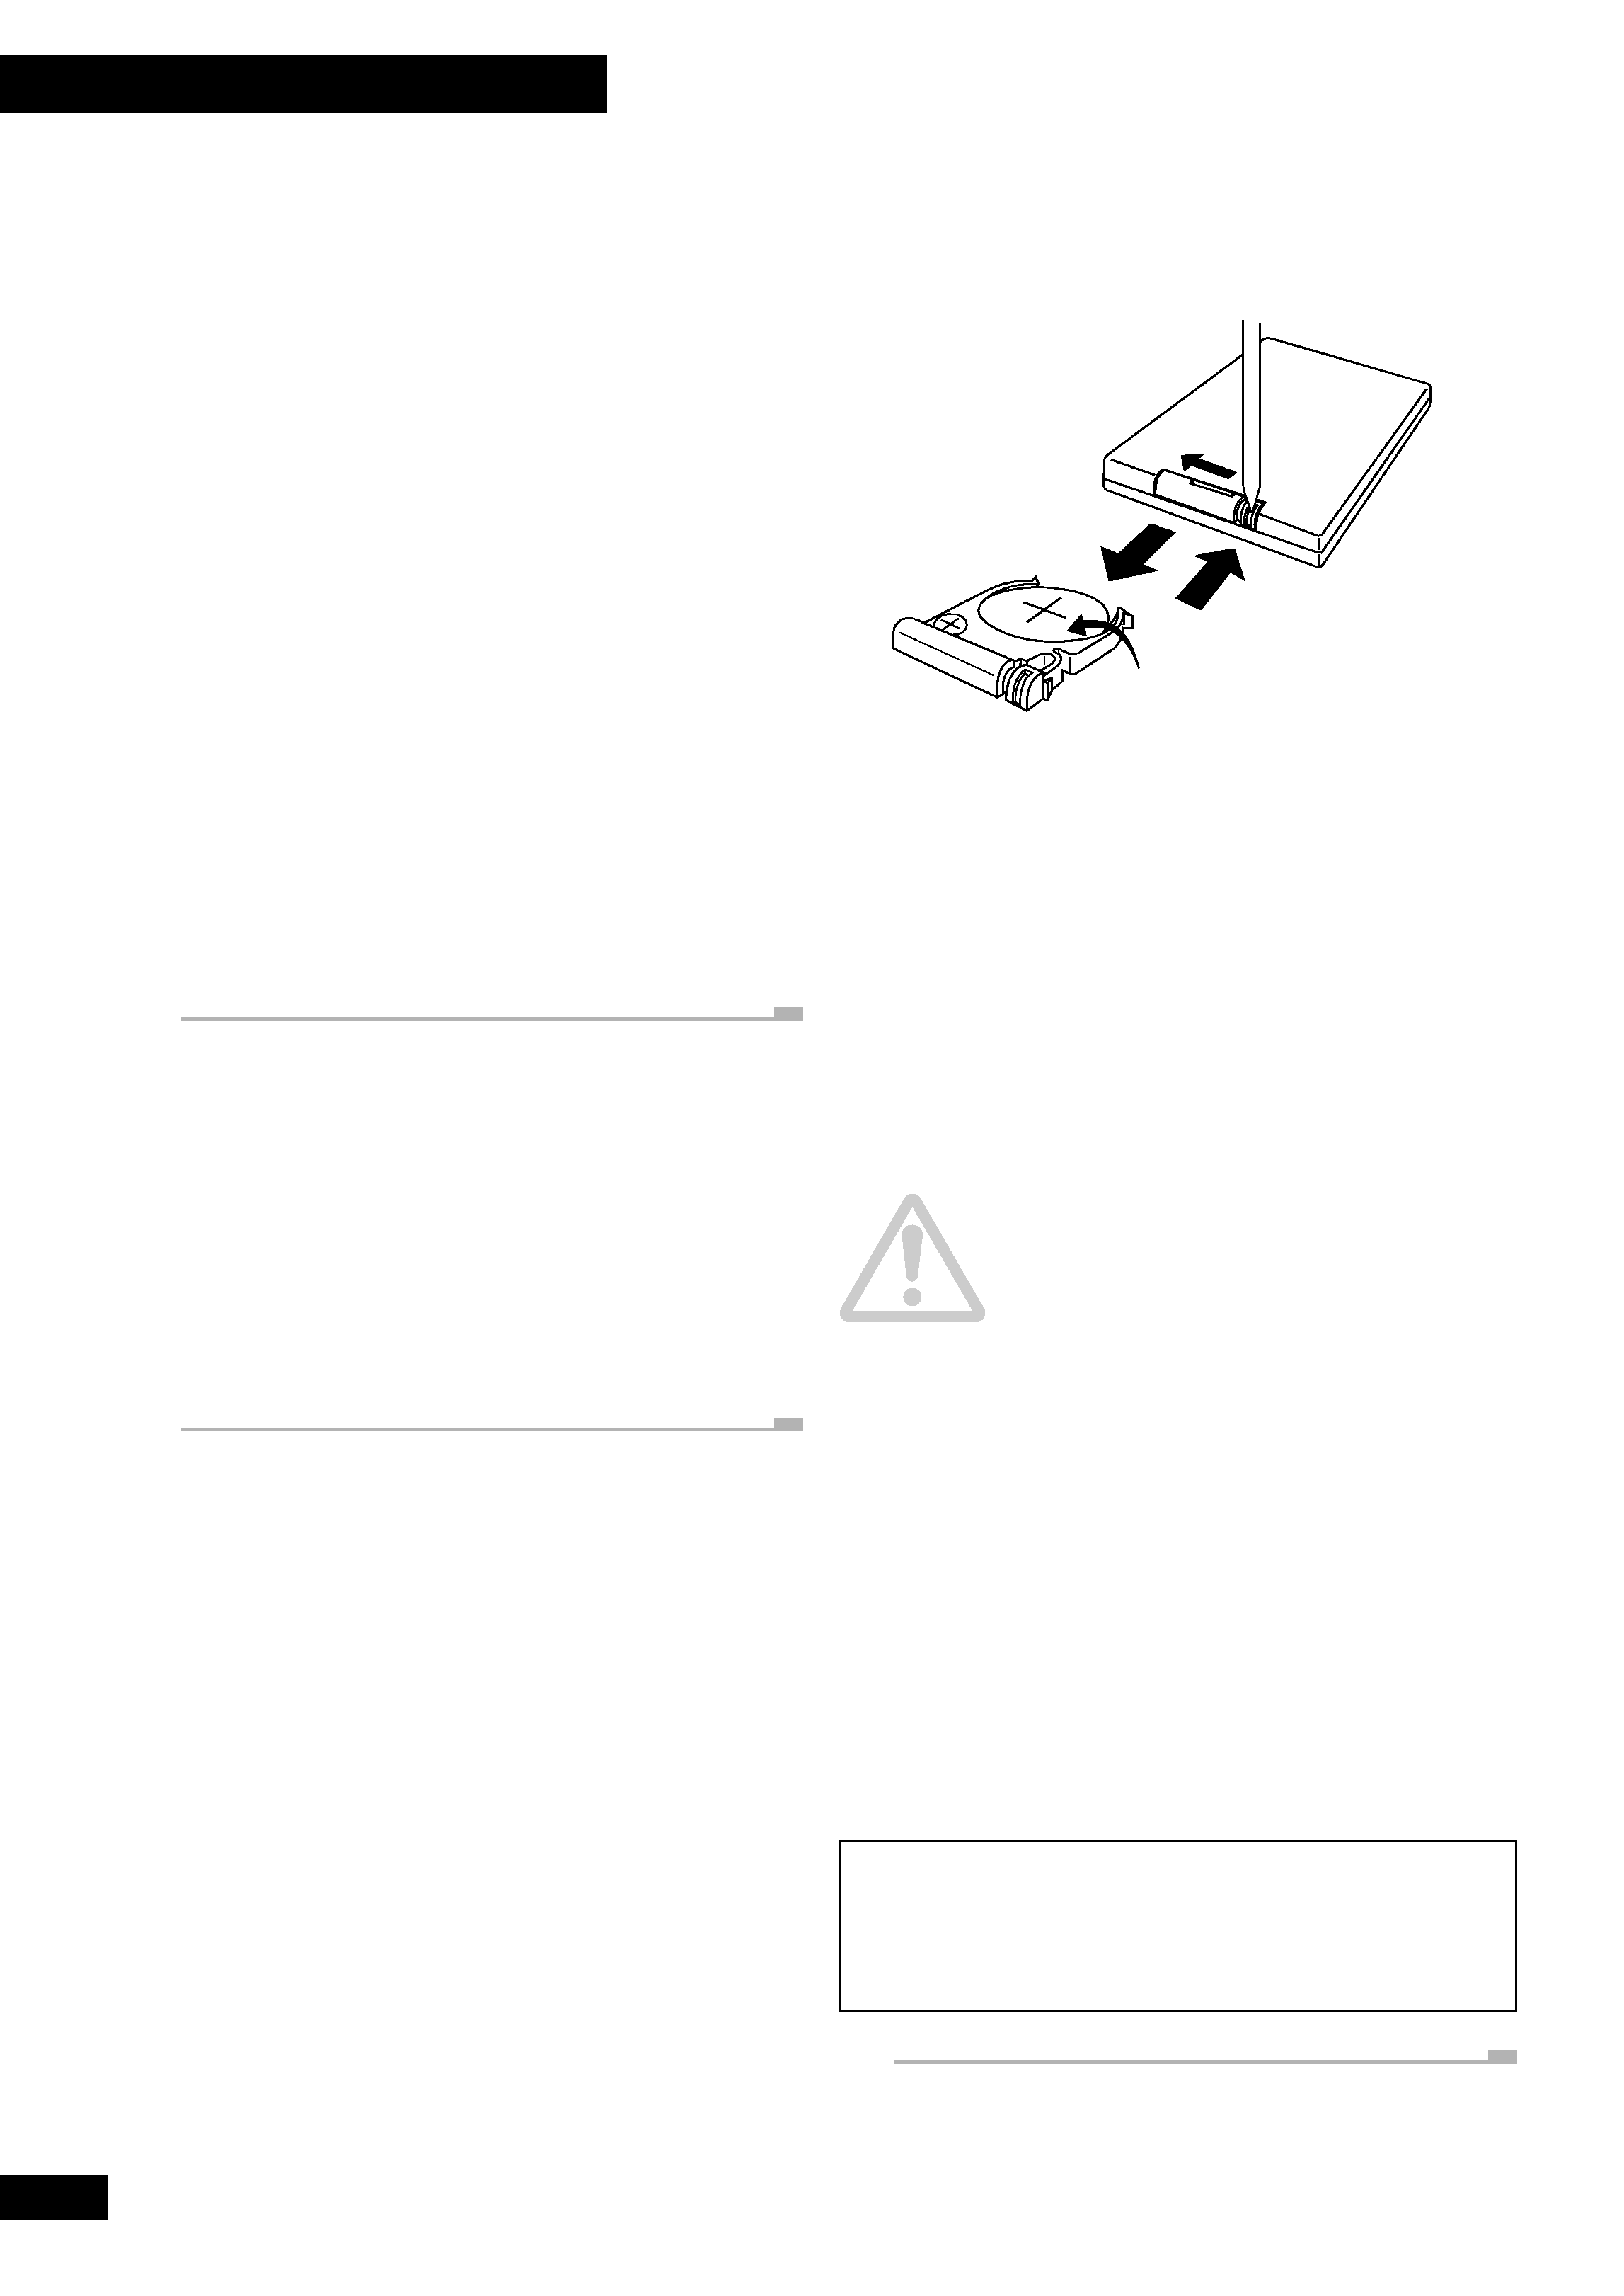
Putting the battery in the remote ....................... 4
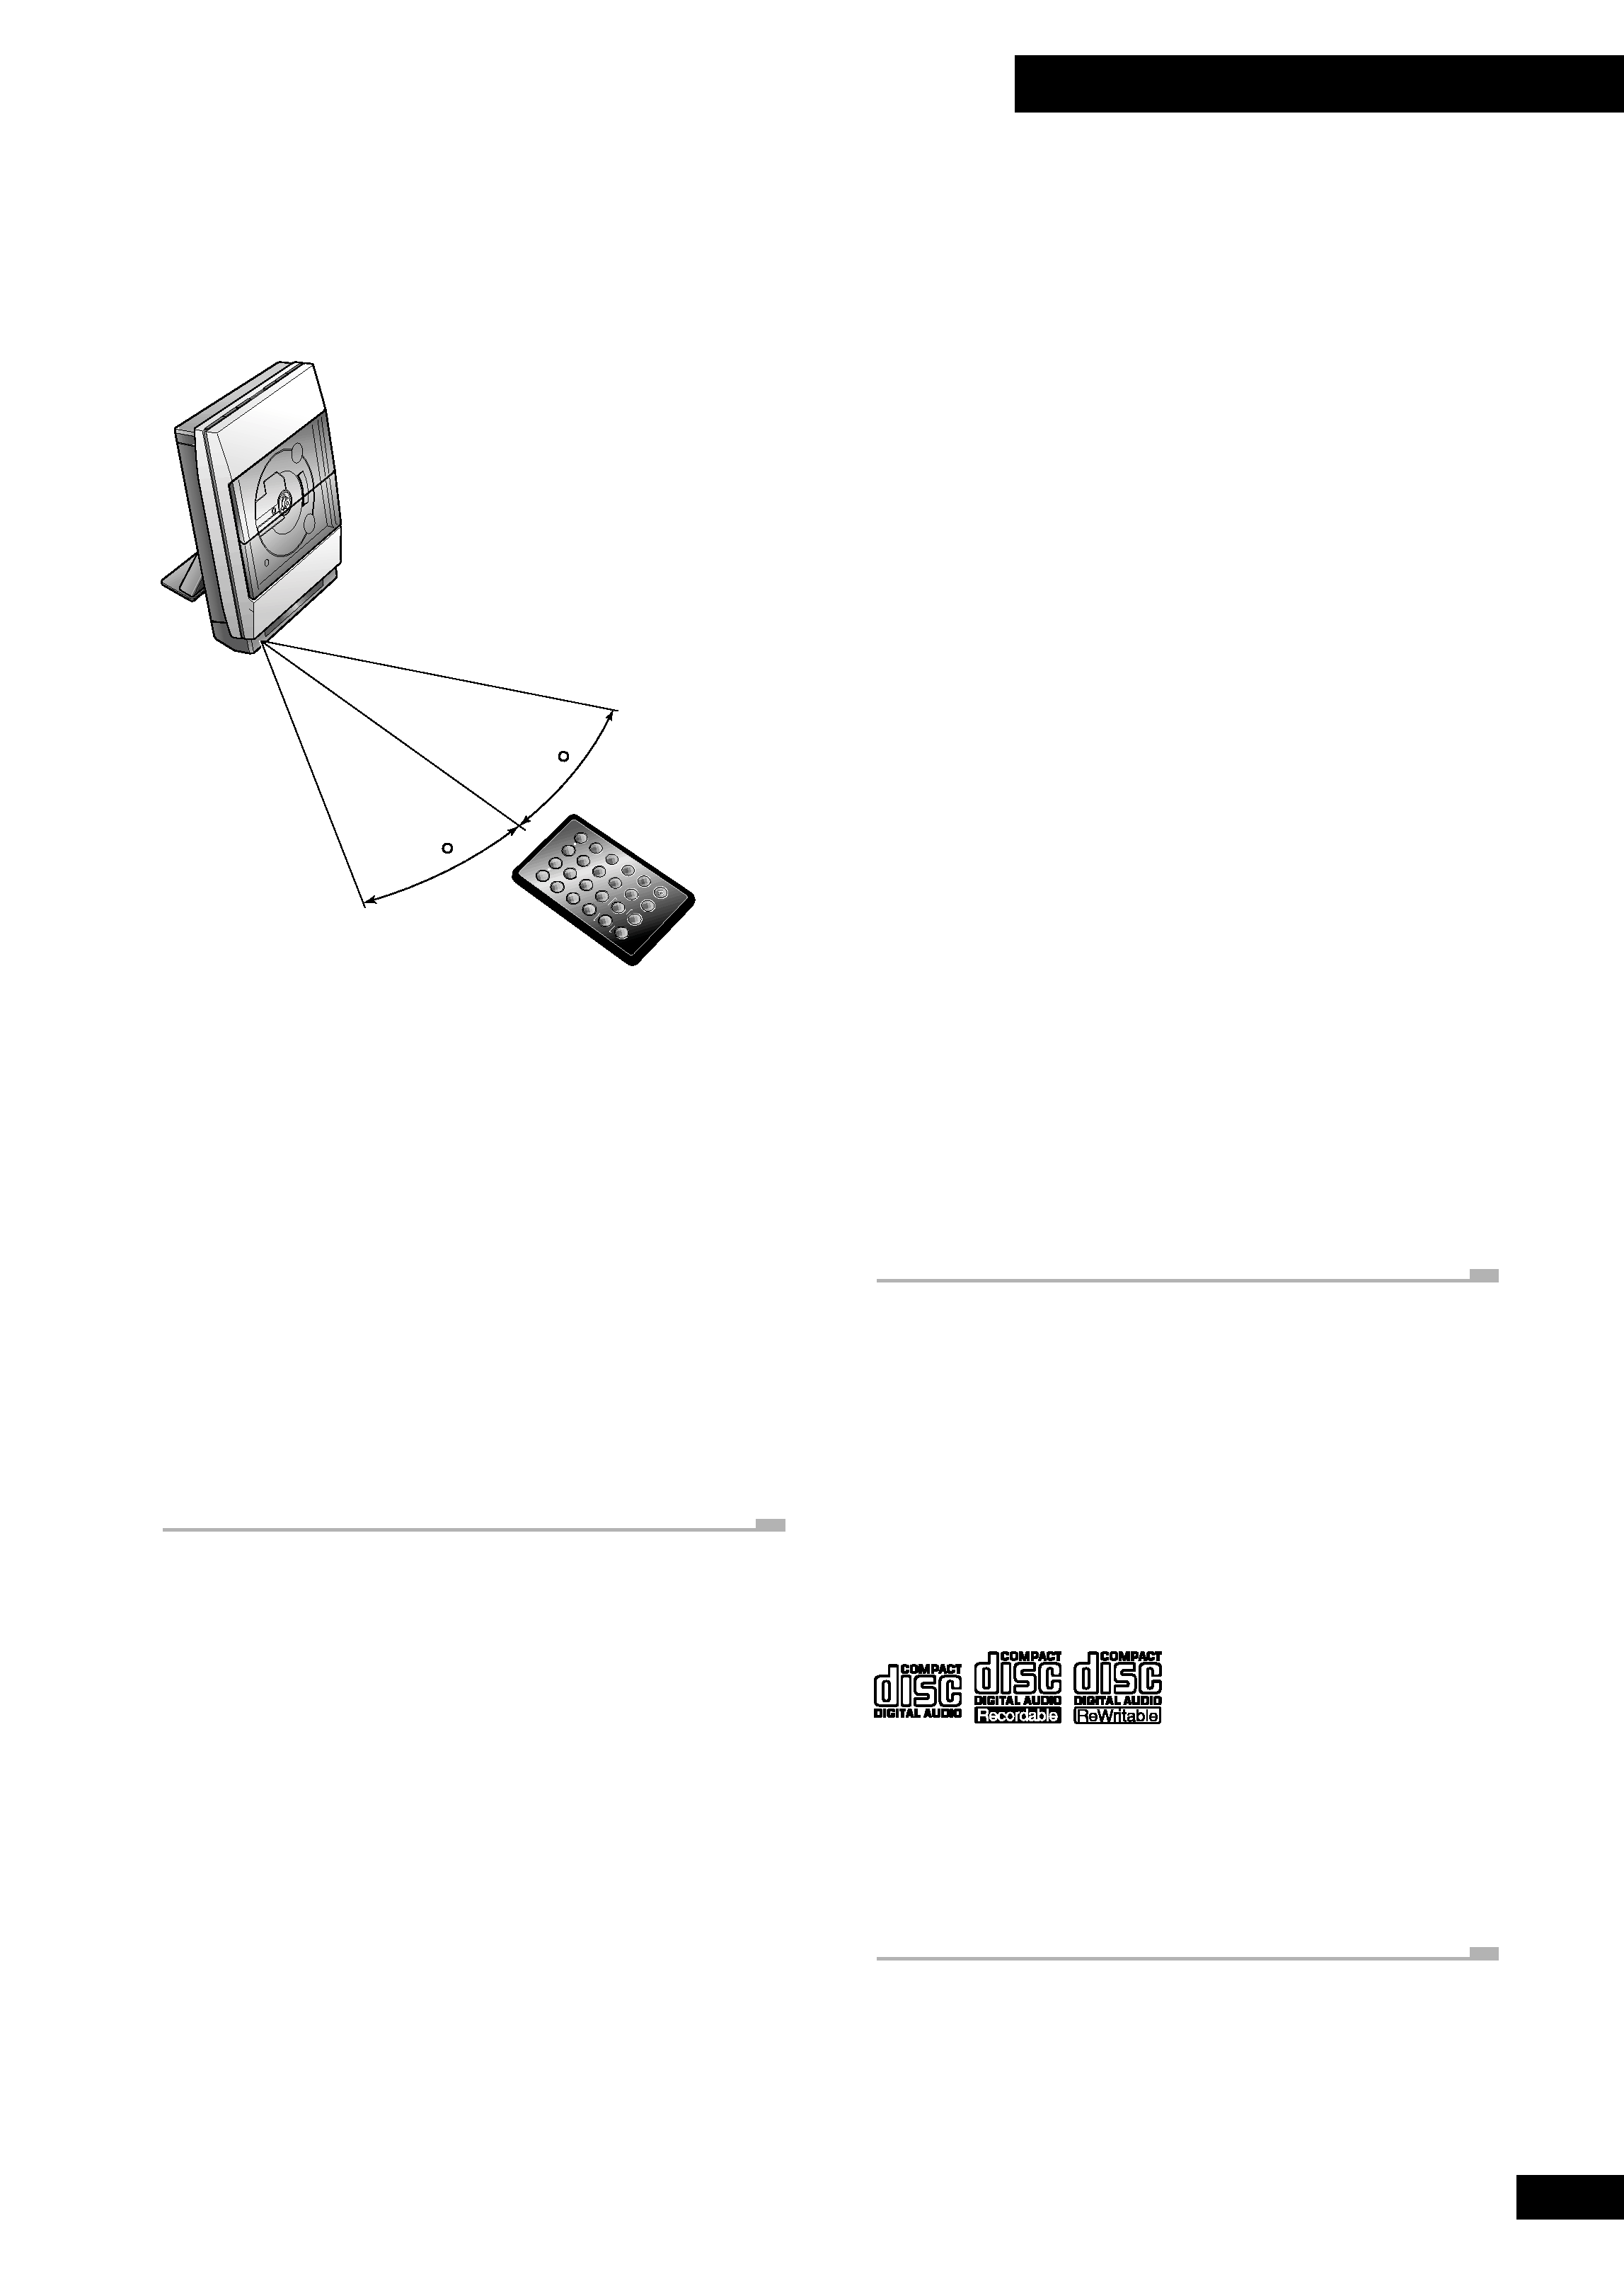
Using the remote control ................................... 5
Hints on installation ........................................... 5
Avoiding condensation problems ................. 5
Discs compatible with this system ....................... 5
2 Connecting Up
Connecting the CD-tuner to the amplifier .......... 6
Connecting the speakers .................................... 7
Connecting the satellite speakers ................ 7
Connecting the subwoofer .......................... 8
Placing the speakers ........................................... 8
Wall-mounting your system ................................ 9
Connecting the AM and FM antennas ................. 9
AM loop antenna ........................................ 9
FM wire antenna ........................................ 10
Connecting external antennas .......................... 10
External AM antenna ................................. 10
External FM antenna .................................. 10
Connecting to other components ...................... 11
Connecting the power ....................................... 11
Power cord caution .................................... 11
Ventillation ................................................ 11
3 Controls and Displays
Remote control ................................................. 12
Display ............................................................. 12
CD-tuner ......................................................... 13
Amplifier ......................................................... 13
Tape deck (UK model only) .............................. 13
4 Getting Started
Using menus ..................................................... 14
Switching on and setting the clock .................... 14
Playing a CD ..................................................... 15
About the automatic door open sensor ...... 16
Adjusting the sound .......................................... 16
Listening to the radio ........................................ 17
Improving poor FM reception ..................... 17
5More CD features
Programming the track order ............................ 18
Checking the playlist order ........................ 18
Deleting the playlist ................................... 18
Using repeat play .............................................. 19
Using random play ............................................ 19
Changing the display ........................................ 20
When a disc is stopped .............................. 20
When a disc is playing ............................... 20
6 More Tuner Features
Saving station presets ...................................... 21
Listening to a station preset ............................. 21
Giving a station memory a name ...................... 22
Using RDS ....................................................... 23
Program types ........................................... 23
Searching for a program type .................... 24
Switching the displayed information .......... 24
Changing the tuning frequency interval ............ 25
7 Using the Tape Deck
Playing a tape .................................................. 26
Setting the reverse mode ........................... 27
Reducing tape hiss with Dolby NR. ............ 27
Making tape recordings .................................... 28
Recording CDs .......................................... 28
Recording other sources ............................ 29
Setting up a future recording ........................... 30
Cancelling the record timer ....................... 30
Setting the record timer and
the wake-up timer ..................................... 31
Changing the display ........................................ 31
Resetting the tape counter ........................ 31
8 Using the Timer
The timer menu ............................................... 32
Setting the wake up timer ................................ 32
Cancelling the wake up timer ..................... 33
Setting the sleep timer ..................................... 33
9 Additional Information
Care information ............................................. 34
Handling discs ........................................... 34
Storing discs ............................................. 34
Discs you should avoid .............................. 34
Using cassette tapes .................................. 34
Tapes you should avoid .............................. 34
Erase protection ........................................ 35
Cleaning external surfaces ......................... 35
Moving the unit ......................................... 35
CD lens cleaner ......................................... 35
Tape head cleaner ..................................... 35
Demagnetizing the tape head .................... 35
Magnetic shielding of speakers .................. 35
Removing/replacing the satellite
speaker grilles ........................................... 35
Switching the door open sensor on/off ............ 36
Switching the open/close beep on/off ............ 36
Switching the auxiliary attenuator on/off ......... 36
Setting the display brightness .......................... 36
Switching the time format ................................ 37
Troubleshooting ............................................... 38
Specifications .................................................. 39
Switching the demo on/off .................. Back cover
background image
4
1 Before You Start
Checking what's in the box
Thank you for buying this Pioneer product. Before starting to
set up your new system, please check that you have received
the following supplied accessories:
· Lithium battery (CR2025) (for remote control)
· Remote control unit
· Stand A (mounting bracket)
· Stand B (table-top stand)
· Paper pattern (for wall-mounting units)
· System cable
· AC power cord
· FM wire antenna
· AM loop antenna
· Warranty card
· These operating instructions
With the speakers you should also have received the follwing:
· Subwoofer connecting cable
· Speaker cables (x2)
· Speaker stands (x2)
· Extra speaker grilles (UK model only) (x2)
Using this manual
This manual is for the XC-F10, M-F10, S-F10-LRW and CT-
F10. Non-UK models for the XC-NS1, M-NS1 and S-NS1-LRW.
It is split into three sections: setting up (chapters 1 and 2);
using the system (chapters 3 to 8), and additional informa-
tion (chapter 9). This last chapter contains care information
for the unit and discs, a troubleshooting section and
specifications.
Putting the battery in the
remote
1
2
4
3
1
Turn over the remote control, then use a pen
or pencil to release the battery cover catch.
2
Slide out the battery holder.
3
Put in the supplied battery.
Take care to put it in the right way up (
+ side up).
4
Push the battery holder back in, and your
remote is ready for use.
Caution!
Incorrect use of batteries can result in hazards such as
leakage and bursting. Please observe the following:
· Make sure that the plus and minus sides of each battery
match the indications in the battery compartment.
· Remove batteries from equipment that isn't going to be
used for a month or more.
· Keep the lithium battery out of reach of children.
· If somebody swallows the lithium battery, immediately call
your doctor.
· When disposing of used batteries, please comply with
governmental regulations or environmental public
institution's rules that apply in your country/area.
· Be careful never to insert the battery holder in a wrong
orientation, for this will result in damage.
CAUTION
Danger of explosion if battery is incorrectly replaced.
Replace only with the same or equivalent type recom-
mended by the manufacturer. Discard used batteries
according to the manufacturer's instructions.
background image
5
1 Before You Start
Using the remote control
The diagram below shows the operating range of the remote
control.
7 meters
30
30
Keep in mind the following when using the remote control:
· Make sure that nothing is blocking the remote sensor on
the unit.
· Remote operation may become unreliable is direct
sunlight or fluorescent light is shining onto the remote
sensor.
· Remotes for different devices can interfere with each other.
Avoid using remotes for other equipment located nearby
this unit.
· Replace the battery when you notice a fall off in the
operating range of the remote.
Hints on installation
We want you to enjoy using this system for years to come, so
please bear in mind the following points when choosing a
suitable location for it:
Do...
Use in a well-ventilated room.
Place on a solid, flat, level surface, such as a
table, shelf or stereo rack.
Don't...
Use in a place exposed to high temperatures
or humidity, including near radiators and
other heat-generating appliances.
Place on a window sill or other place where
the system will be exposed to direct sunlight.
Use in an excessively dusty or damp environ-
ment.
Use near a television or monitor as you may
experience interference--especially if the
television uses an indoor antenna.
Use in a kitchen or other room where the
system may be exposed to smoke or steam.
Use on a thick rug or carpet, or cover with
cloth--this may prevent proper cooling of the
unit.
Place on an unstable surface, or one that is
not large enough to support the system fully.
Avoiding condensation problems
Condensation may form inside the player if it is brought into
a warm room from outside, or if the temperature of the room
rises quickly. Although the condensation won't damage the
system, it may temporarily impair its performance. For this
reason you should leave it to adjust to the warmer tempera-
ture for about an hour before switching on and using.
Discs compatible with this
system
Any disc that displays one of the following logos should play
in this system. Other discs (such as CD-ROMs) will not play in
this unit. Note that this unit cannot record onto recordable
discs.
This system can play CD-R and CD-RW discs recorded with
audio. However, depending on the condition of the player and
the disc, you may find that not all discs will play successfully.
(For example, if the disc is scratched or dirty, or if the player's
pickup lens is dirty.)

Reviews

There are no reviews of this manual yet.