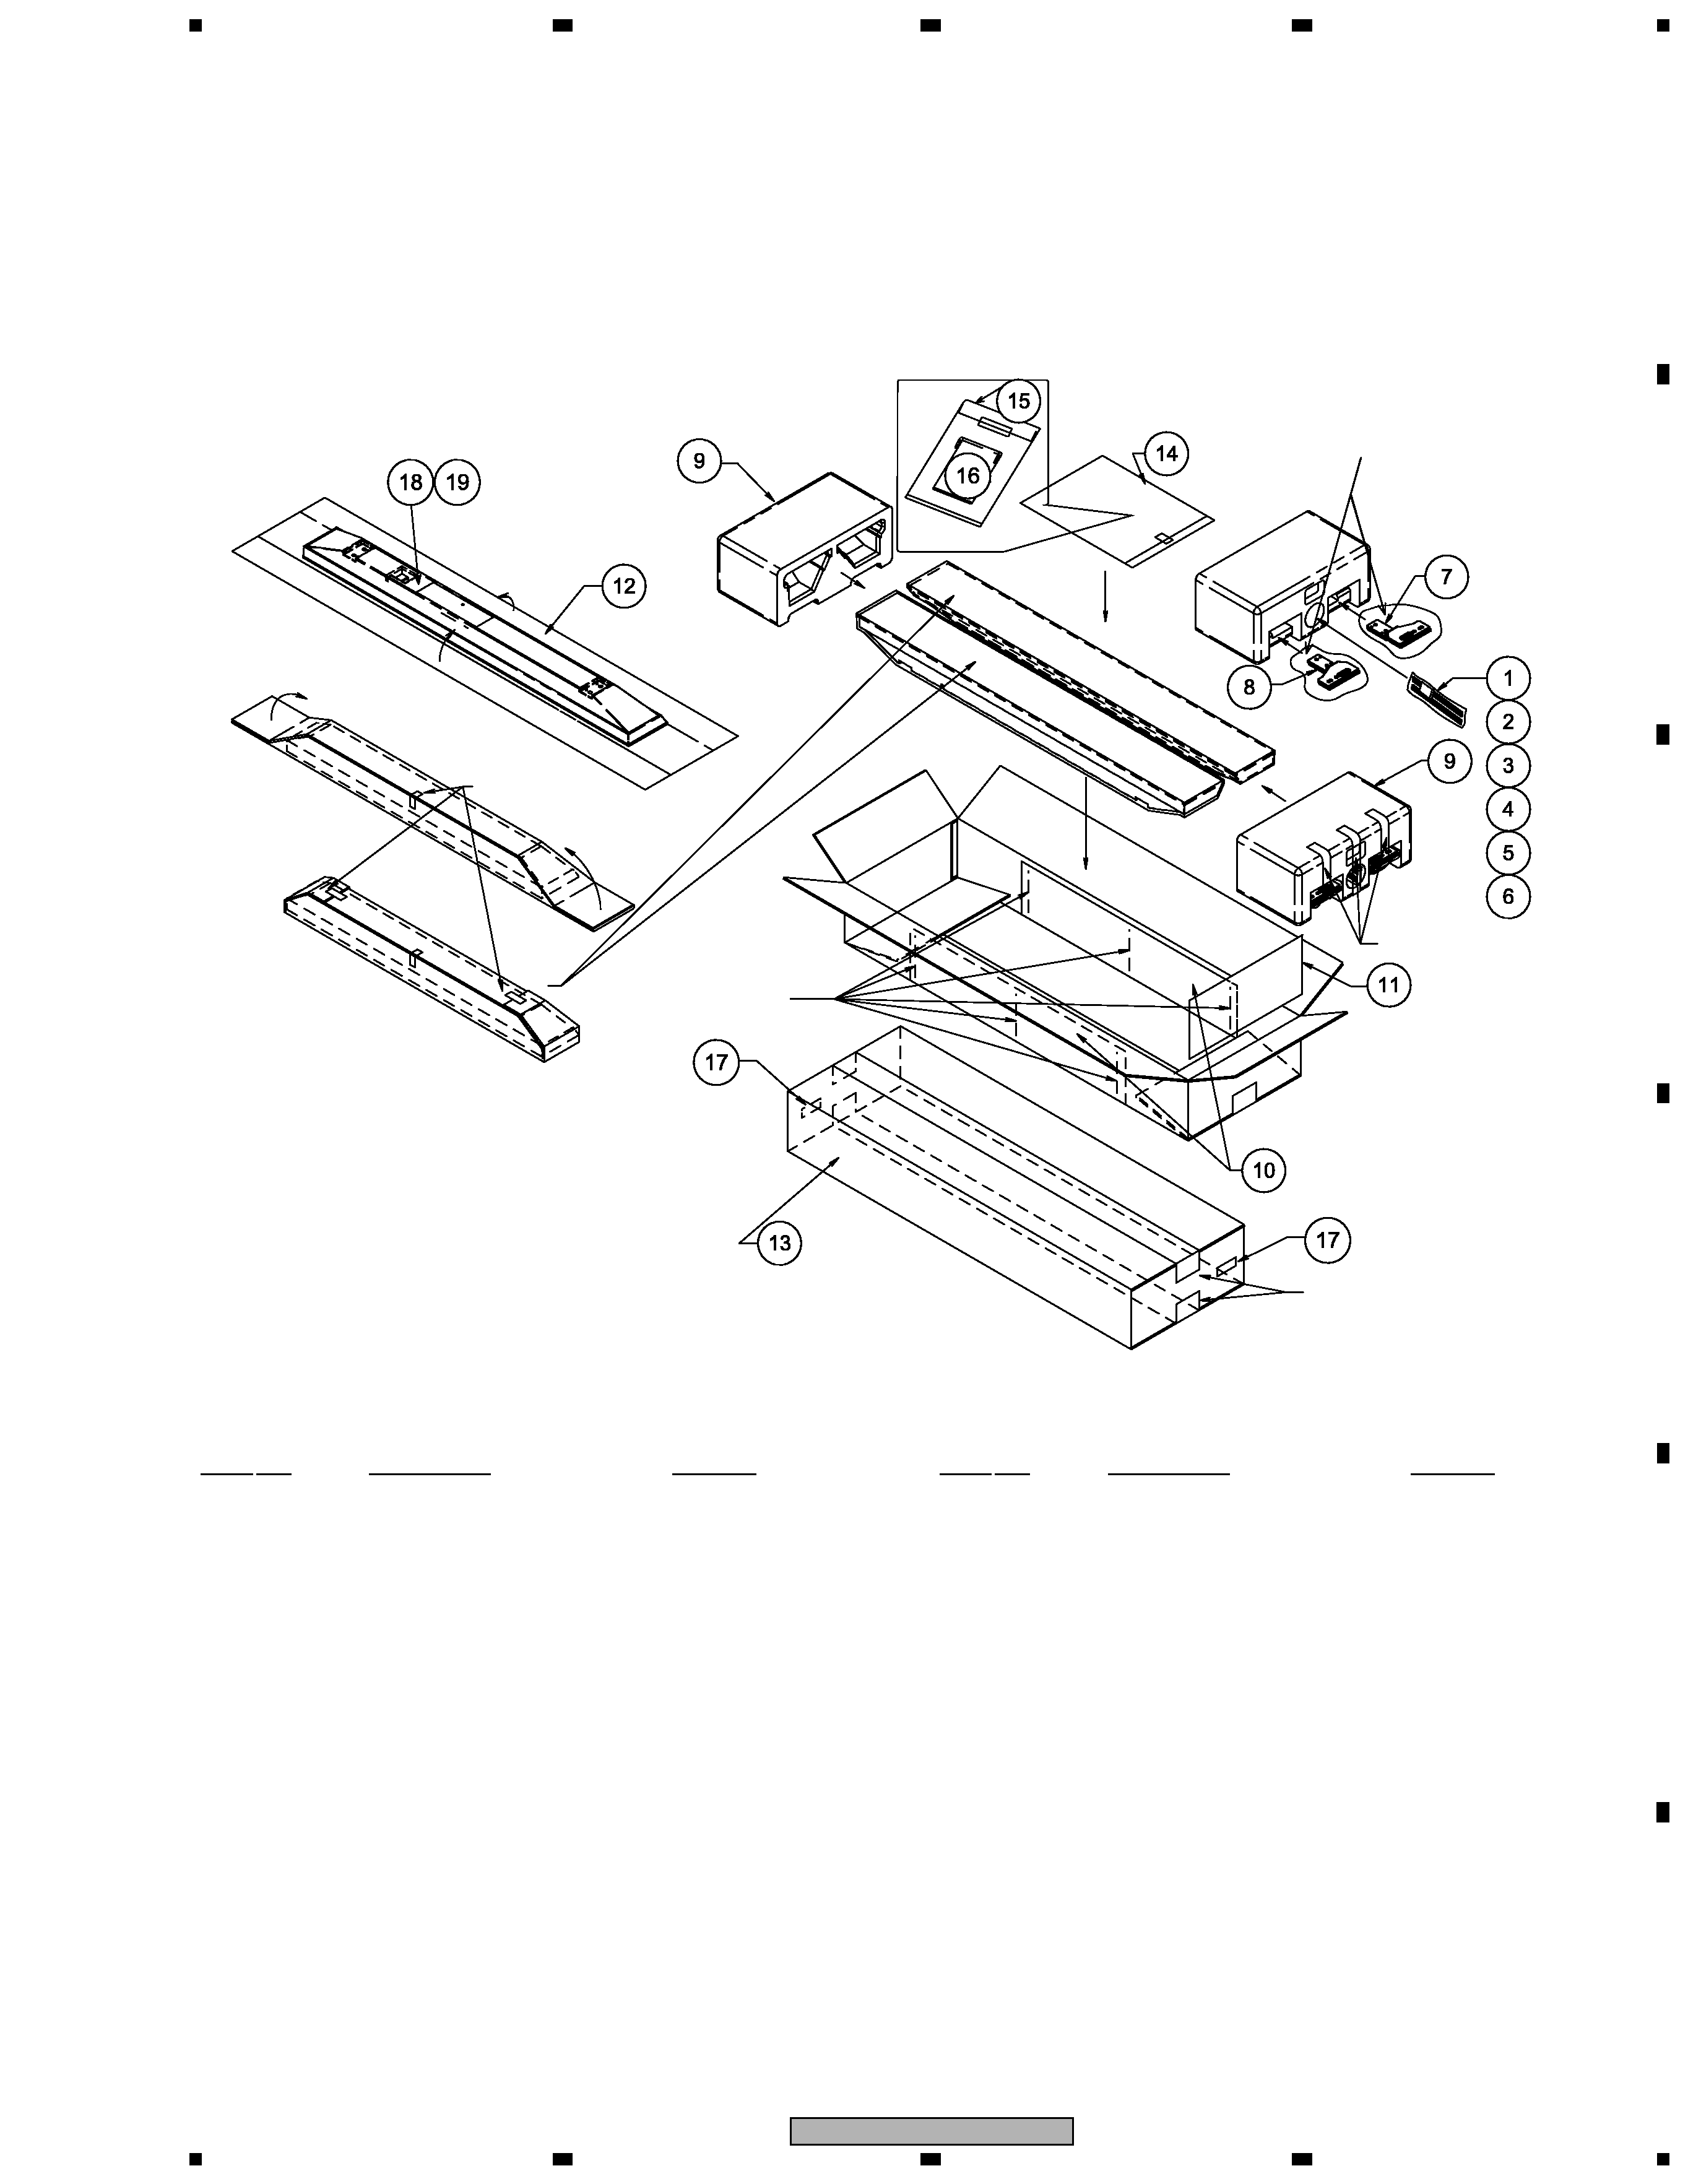
PIONEER KRP-S01/SXTW/E5 Service Manual

Cover page of PIONEER KRP-S01/SXTW/E5 Service Manual

Service Manual for PIONEER KRP-S01/SXTW/E5, downloadable as a PDF file.

We also have owner's manual to this model.

Manual details

  • Immediate download after payment.
  • Delivered as a PDF file.
  • The manual has 7 pages
  • File size: 1.44 MB
  • Available language versions: English
  • Different language versions may vary sligthly in file size and page count.

We guarantee that...

  • our manuals are complete,
  • the manual includes circuit diagrams,
  • our manuals are checked with antivirus,
  • We'll issue refund if the manual is damaged, incomplete or unreadable (our refund policy)

Sample pages

Thumbnail of page 1Thumbnail of page 2Thumbnail of page 3Thumbnail of page 4
Thumbnail of page 5Thumbnail of page 6Thumbnail of page 7Thumbnail of page 8
Thumbnail of page 9
background image
ORDER NO.
PIONEER CORPORATION 4-1, Meguro 1-chome, Meguro-ku, Tokyo 153-8654, Japan
PIONEER ELECTRONICS (USA) INC. P.O. Box 1760, Long Beach, CA 90801-1760, U.S.A.
PIONEER EUROPE NV Haven 1087, Keetberglaan 1, 9120 Melsele, Belgium
PIONEER ELECTRONICS ASIACENTRE PTE. LTD. 253 Alexandra Road, #04-01, Singapore 159936
PIONEER CORPORATION 2008
KRP-S01
ARP3498
T-ZZR JUNE 2008 printerd in Japan
SPEAKER SYSTEM
* Be careful in handling this product, because scratches on cabinet coating are easily
noticeable. When working on this unit, be sure to place the cabinet on a piece of
soft cloth for protection.
SERVICE PRECAUTIONS
KRP-S01
/SXTW/E5
KRP-S01
/XTW/CN5
background image
2
KRP-S01
1
2
3
4
C
D
F
A
B
E
1
2
3
4
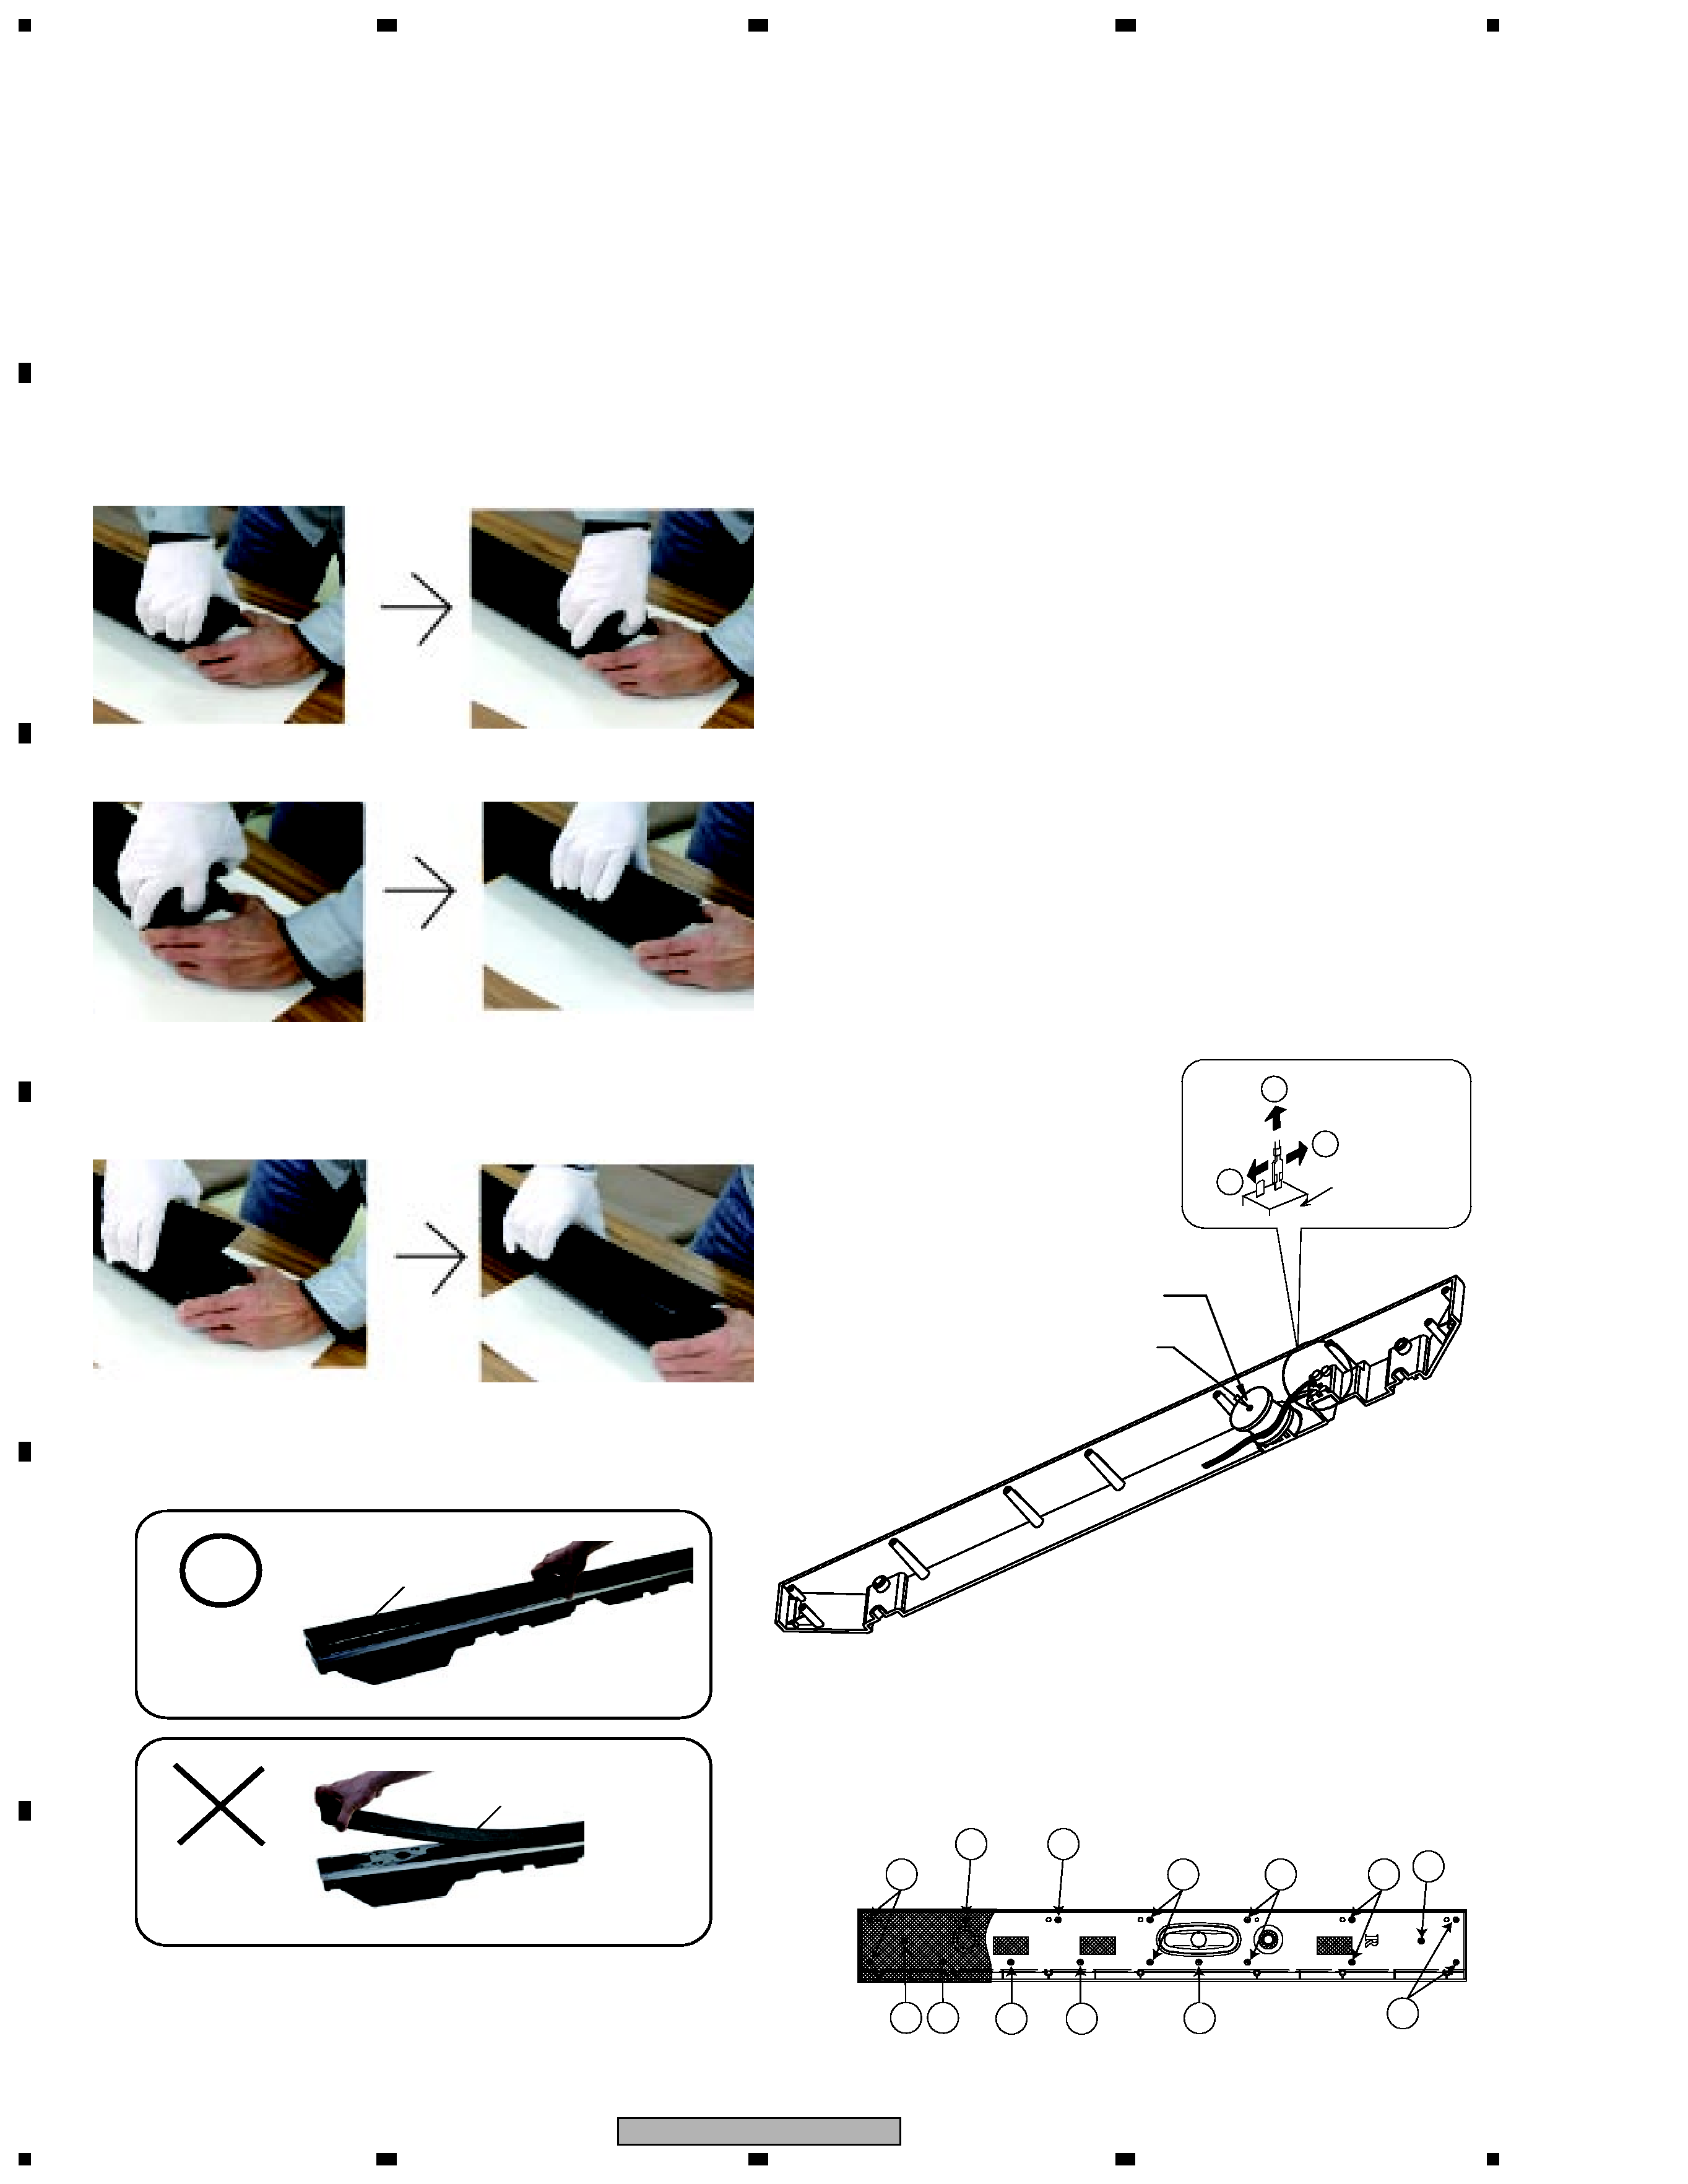
1. REASSEMBLY AND DISASSEMBLY PRECAUTIONS
Network ASSY
When reassembling it,
apply a adhesive to the screws.
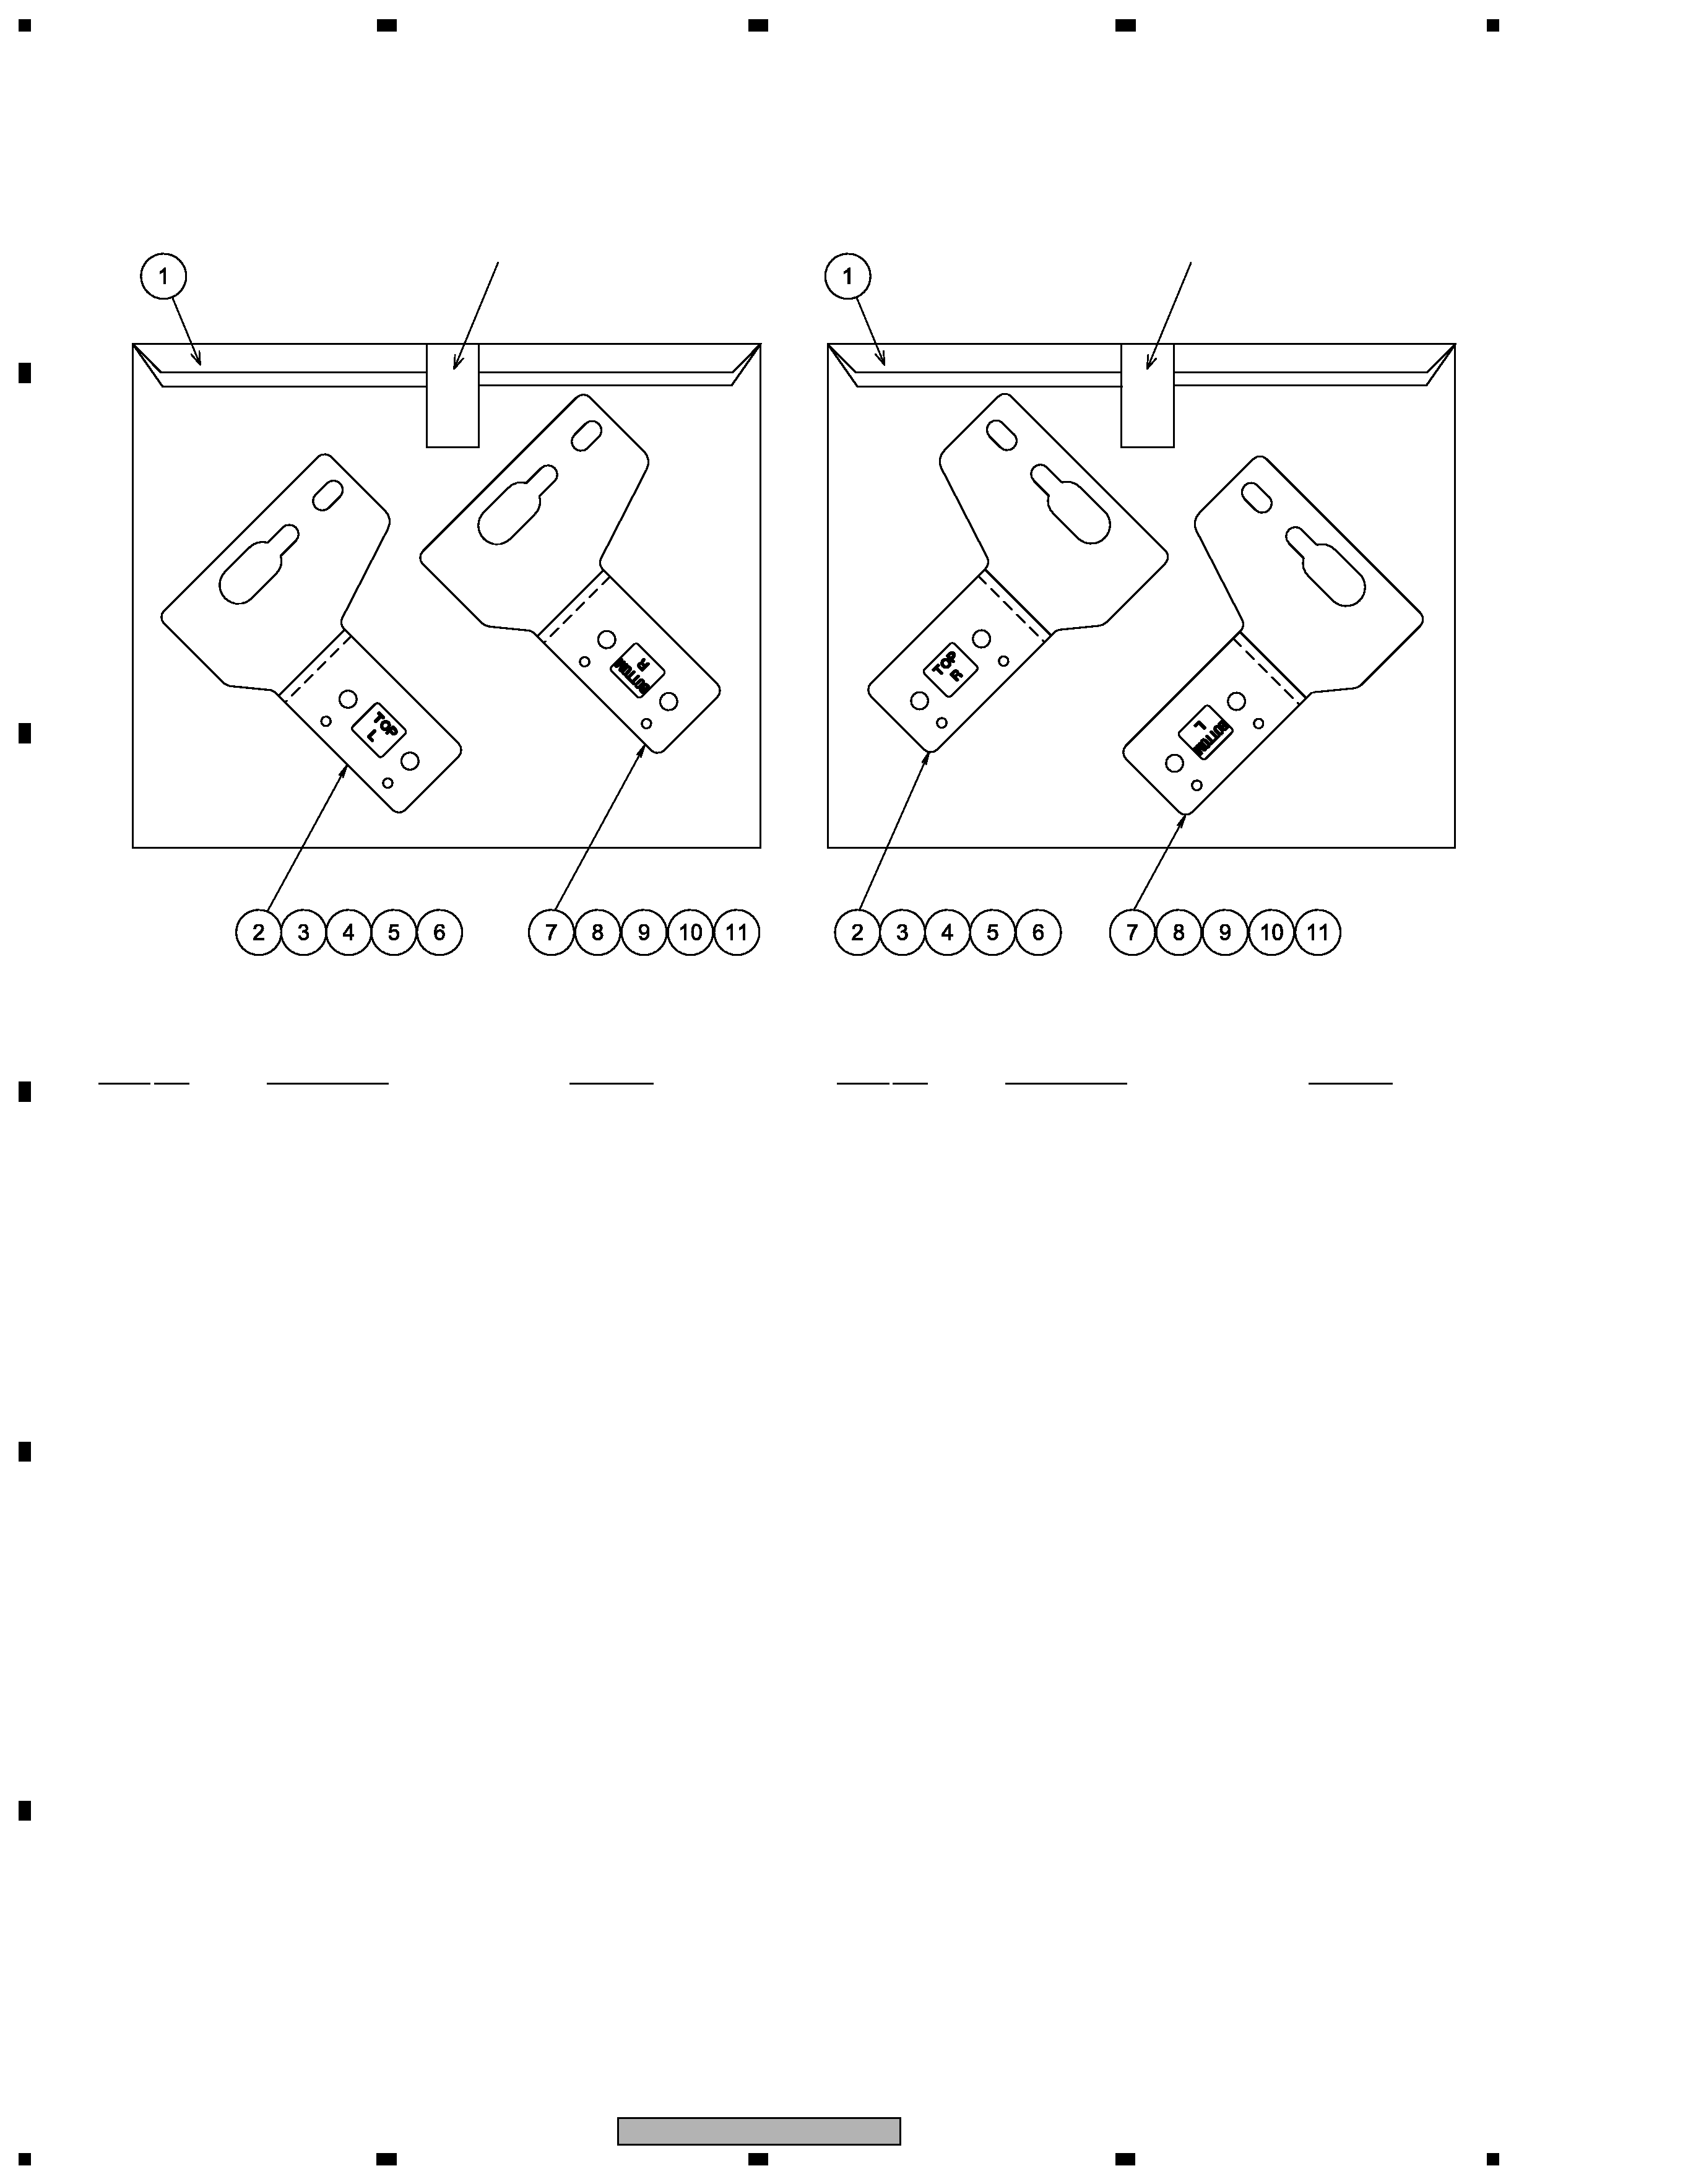
1
2
1
Input terminal
1.1 GRILLE ASSY
1
2
3
4
5
6
7
8
11
12
9
10
13
Grille ASSY
Grille ASSY
OK
NG
1.2 WOOFER
1.3 TWEETER
Disassembly
Reassembly
Baffle Assy(Caution)
Network Assy(Caution)
Reassembly
Reassembly
Disassembly
Disassembly
The Grille Assy is secured to the baffle plate with adhesive double
side coated tape and bosses. When removing the Grille Assy, it is
necessary to wear cotton gloves.
Remove it from the under side.
1. Insert the tip of your gloved finger into the gap between the
Grille Assy in front and the corner of the baffle plate so that the
Grille Assy is slightly lifted.
2. Insert the gloved finger to the extent of the second joint into the
gap between the cabinet and the Grille Assy.
3. Alternately and gradually lift the left and right sides of the
Grille Assy by about 5 cm, sliding gloved fingers along the
cabinet. When lifting the Grille Assy, be sure to lift the left and
right side alternately, but not both sides simultaneously.
Note: Be careful not to bend the Grille Assy too far. Otherwise, it
may be damaged.
OK : Good example NG : Bad example
Remove the old adhesive double side coated tape attached
between the rear side of the Grille Assy and the front side of the
Baffle, and then attach new one. Press the bosses into the baffle
plate and press the entire grille into position.
The woofer is attached to the baffle plate by internal four screws.
To remove the woofer, first remove the baffle plate.
When reassembling the woofer, face its plus terminal downward.
Tighten the screws to the baffle.
The tweeter is attached to the baffle plate by internal two screws.
To remove the tweeter, first remove the baffle plate.
When reassembling the tweeter, face its plus terminal outside.
When removing the Network Assy, pull it out a little at a time
from alternate sides, because it is seated tightly.
When reassembling the cabinet and the baffle plate, secure the
screws in the order shown in the figure below:
background image
3
KRP-S01
5
6
7
8
5
6
7
8
C
D
F
A
B
E
2. EXPLODED VIEWS AND PARTS LIST
NOTES :
· Parts marked by " NSP " are generally unavailable because they are not in our Master Spare Parts List.
· The
> mark found on some component parts indicates the importance of the safety factor of the part.
Therefore, when replacing, be sure to use parts of identical designation.
2.1 PACKING
Tape
Tape
Adhesive
Tape
Tape
Refer to "2.2 BRACKET
and BRACKET SETS".
NSP 1
1..Accessory Set
SME3847
2
2..Speaker Wire
SDS1212
3
2..Polyethylene Bag S1
SHL1439
NSP 4
2..Screws Set
SME3852
5
3..Cosmetic Screw M5
SBA1292
6
3..Polyethylene Bag S0
SHL1438
NSP 7
Bracket Set
SME3861
NSP 8
Bracket Set
SME3862
9
Protector
SHA2628
NSP 10
Inner Carton Board
SHB1184
NSP 11
Inner Carton Board
SHB1197
12
Protection Sheet S4
SHC1865
13
Packing Case
(for SXTW/E5 type)
SHG2830
(for XTW/CN5 type)
SHG2834
PACKING Parts List
Mark No.
Description
Part No.
Mark No.
Description
Part No.
NSP 14
1...Operating Instruction Set
SME3860
(for SXTW/E5 type)
15
2..Polyethylene bag S2
SHL1437
16
2..Operating Instructions
SRD1365
(English, French, German, Italian,
Dutch, Spanish, Russian)
NSP 14
1...Operating Instruction Set
SME3876
(for XTW/CN5 type)
15
2..Polyethylene bag S2
SHL1437
16
2..Operating Instructions
SRD1371
(Chinese)
NSP 17
Label Serial
SRW1112
18
CS Assy L
- - - - - - - -
19
CS Assy R
- - - - - - - -
background image
4
KRP-S01
1
2
3
4
C
D
F
A
B
E
1
2
3
4
1
Polyethylene Bag S1
SHL1372
2
1..Bracket Assy (L-Top)
SXG1183
NSP 3
2..Label (L-Top)
SAK6005
4
2..Gasket
SED1172
5
2..Gasket
SED1200
NSP 6
2..Bracket (L-Top)
SNA1508
7
1..Bracket Assy (R-Bottom)
SXG1184
NSP 8
2..Label (R-Bottom)
SAK6006
9
2..Gasket
SED1172
10
2..Gasket
SED1200
NSP 11
2..Bracket (L-Top)
SNA1508
BRACKET SET Parts List(SME3861)
Mark No.
Description
Part No.
2.2 BRACKET SET
[2] BRACKET SET(SME3862)
[1] BRACKET SET(SME3861)
Tape
Tape
1
Polyethylene Bag S1
SHL1372
2
1..Bracket Assy (R-Top)
SXG1185
NSP 3
2..Label (R-Top)
SAK6007
4
2..Gasket
SED1172
5
2..Gasket
SED1201
NSP 6
2..Bracket Bottom (R-Top)
SNA1509
7
1..Bracket Assy (L-Bottom)
SXG1186
NSP 8
2..Label (L-Bottom)
SAK6004
9
2..Gasket
SED1172
10
2..Gasket
SED1201
NSP 11
2..Bracket Bottom (R-Top)
SNA1509
Mark No.
Description
Part No.
BRACKET SET Parts List(SME3862)
background image
5
KRP-S01
5
6
7
8
5
6
7
8
C
D
F
A
B
E
2.3 CS ASSY
CS ASSY L, R
Lch is symmetrical to center line.
*This product appearance shows Rch.
CABINET(Inside)
BAFFLE(Front)
Grille(Front)
(Rear)
Grille(Back)
Baffle(Back)

Reviews

There are no reviews of this manual yet.