PIONEER KEH-P4022/XM/EE Owner's Manual

Cover page of PIONEER KEH-P4022/XM/EE Owner's Manual

Owner's Manual for PIONEER KEH-P4022/XM/EE, downloadable as a PDF file.

We also have service manual to this model.

Manual details

  • Immediate download after payment.
  • Delivered as a PDF file.
  • The manual has 40 pages
  • File size: 0.44 MB
  • Available language versions: English, Russian
  • Different language versions may vary sligthly in file size and page count.

We guarantee that...

  • our manuals are complete,
  • our manuals are checked with antivirus,
  • We'll issue refund if the manual is damaged, incomplete or unreadable (our refund policy)

Sample pages

Thumbnail of page 1Thumbnail of page 2Thumbnail of page 3Thumbnail of page 4
Thumbnail of page 5Thumbnail of page 6Thumbnail of page 7Thumbnail of page 8
Thumbnail of page 9
background image
Operation Manual
KEH-P4022
English
Py
Multi-CD control High power cassette player with
FM/AM tuner
- F/
background image
Operation Manual
KEH-P4022
English
Py
Multi-CD control High power cassette player with
FM/AM tuner
- F/
background image
Before You Start
About this unit 2
About this manual 2
Precautions 2
In case of trouble 2
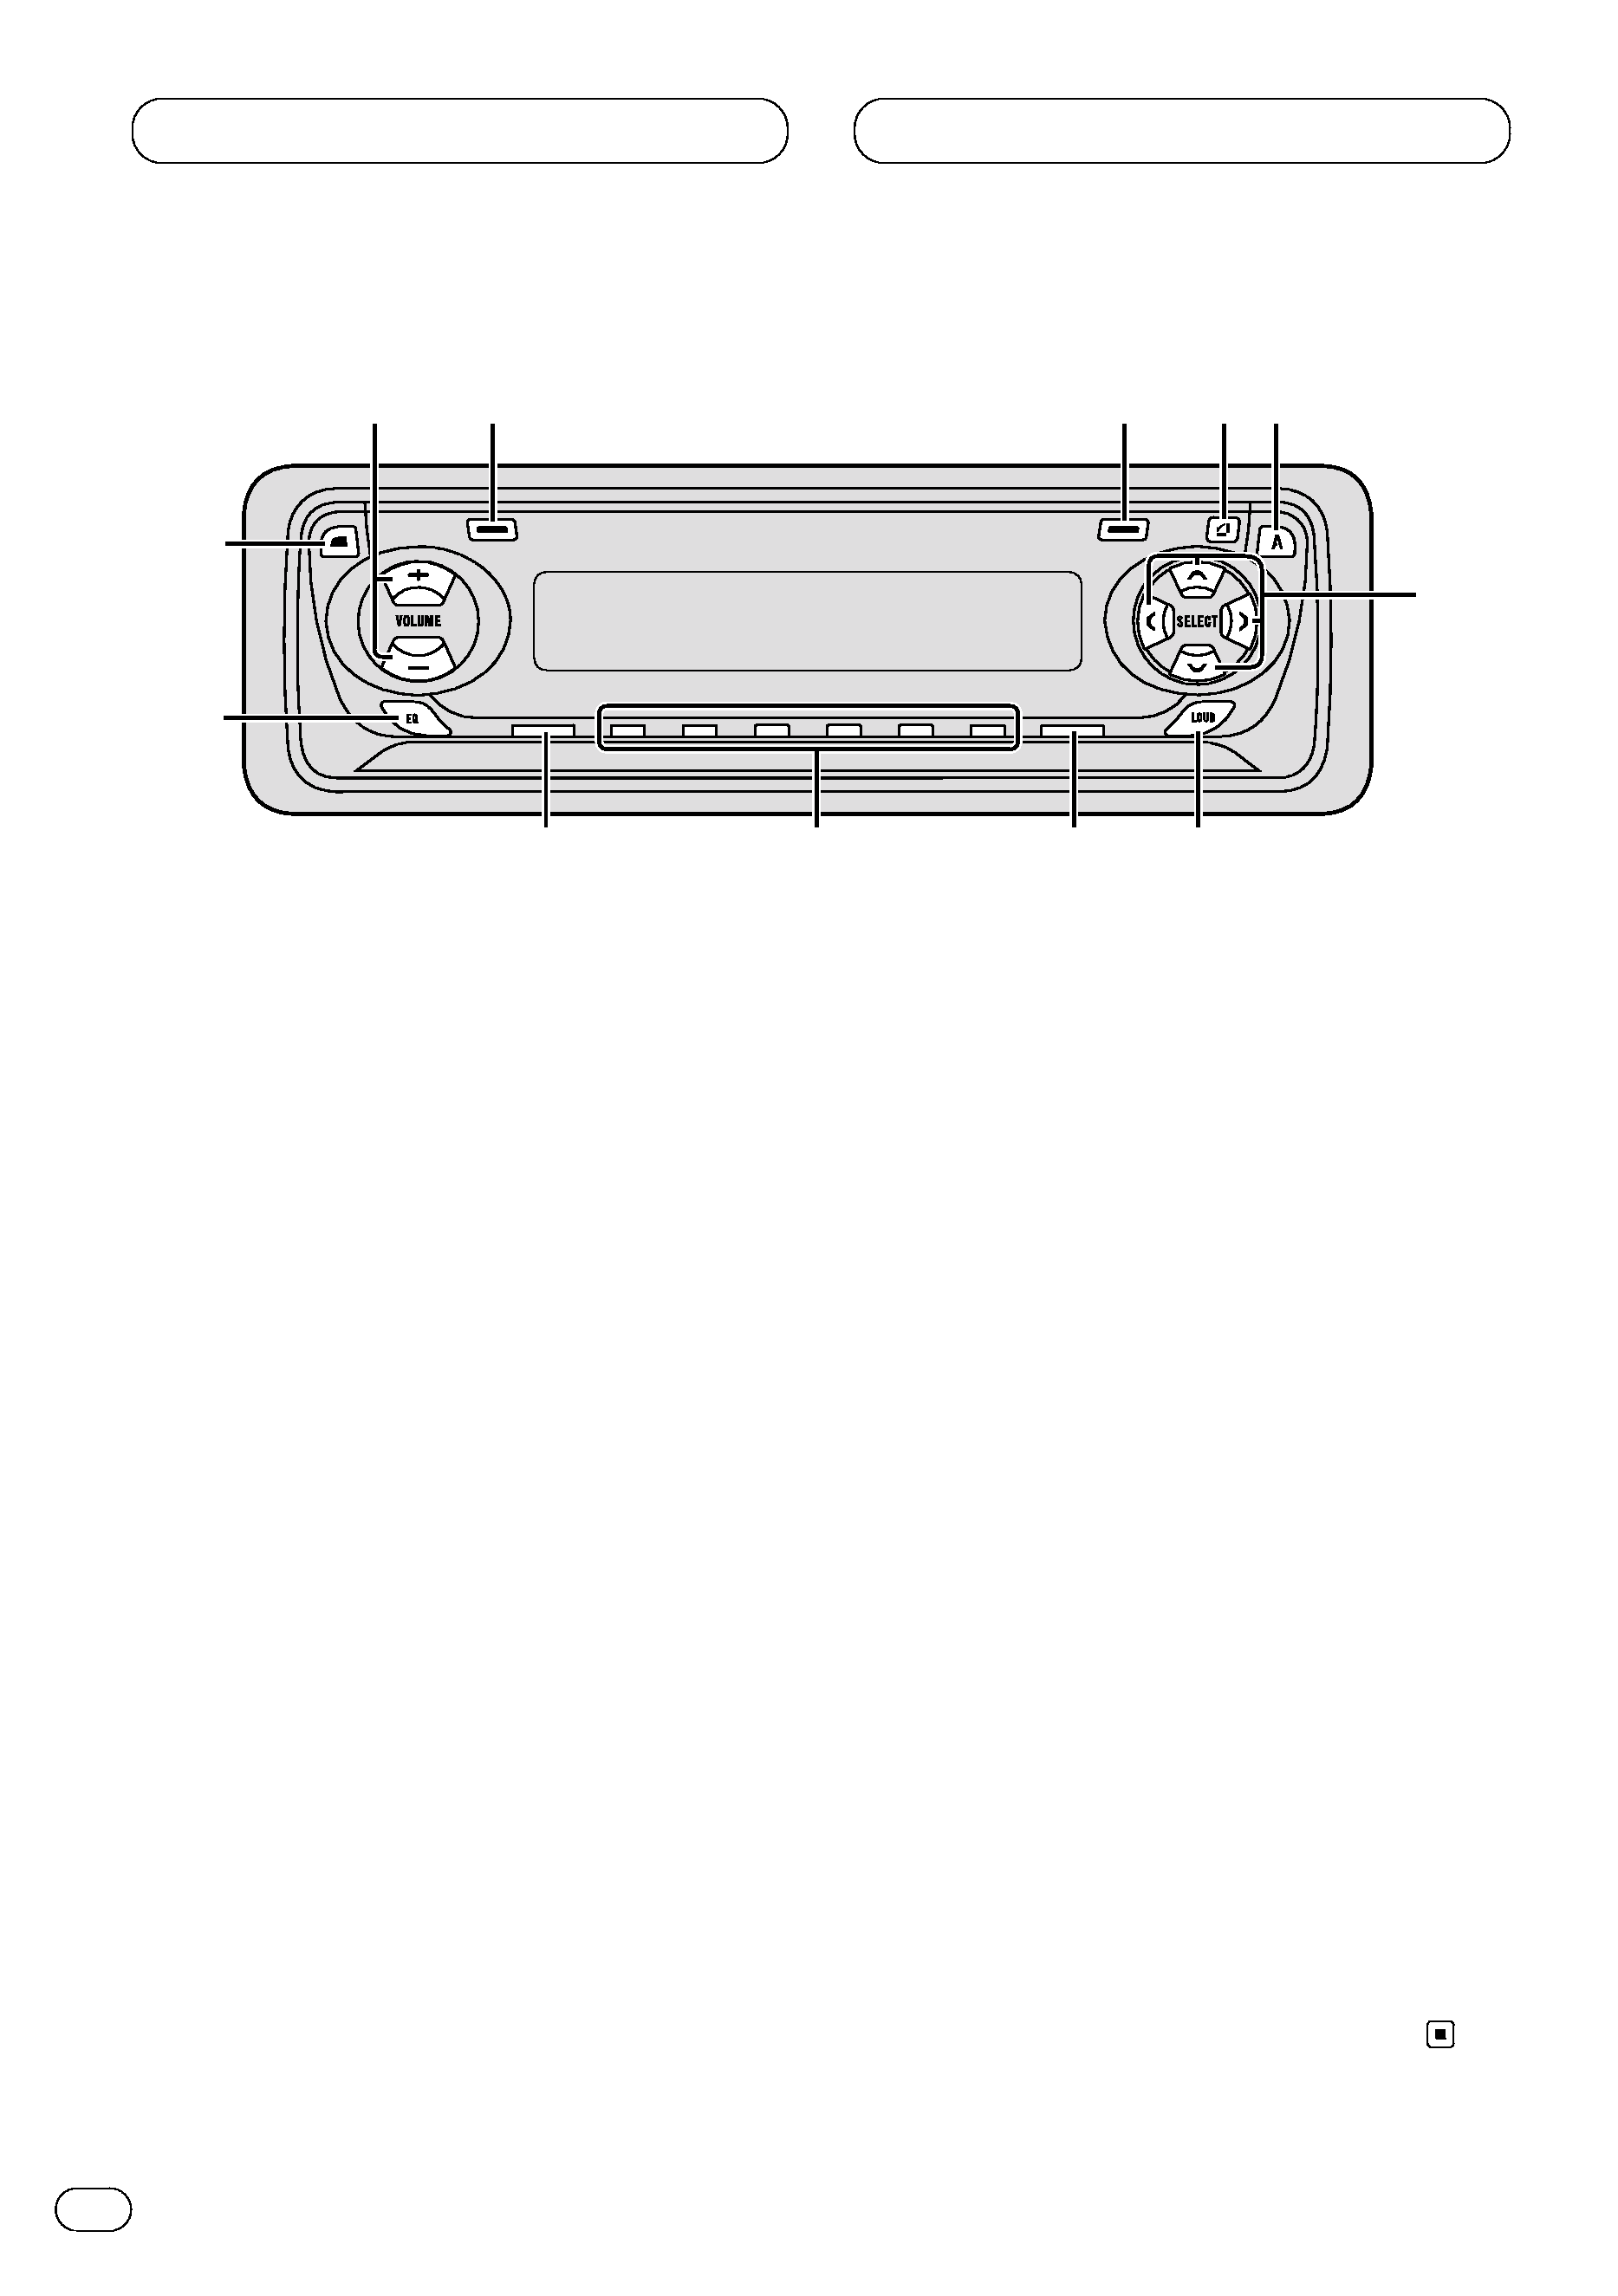
What's what 3
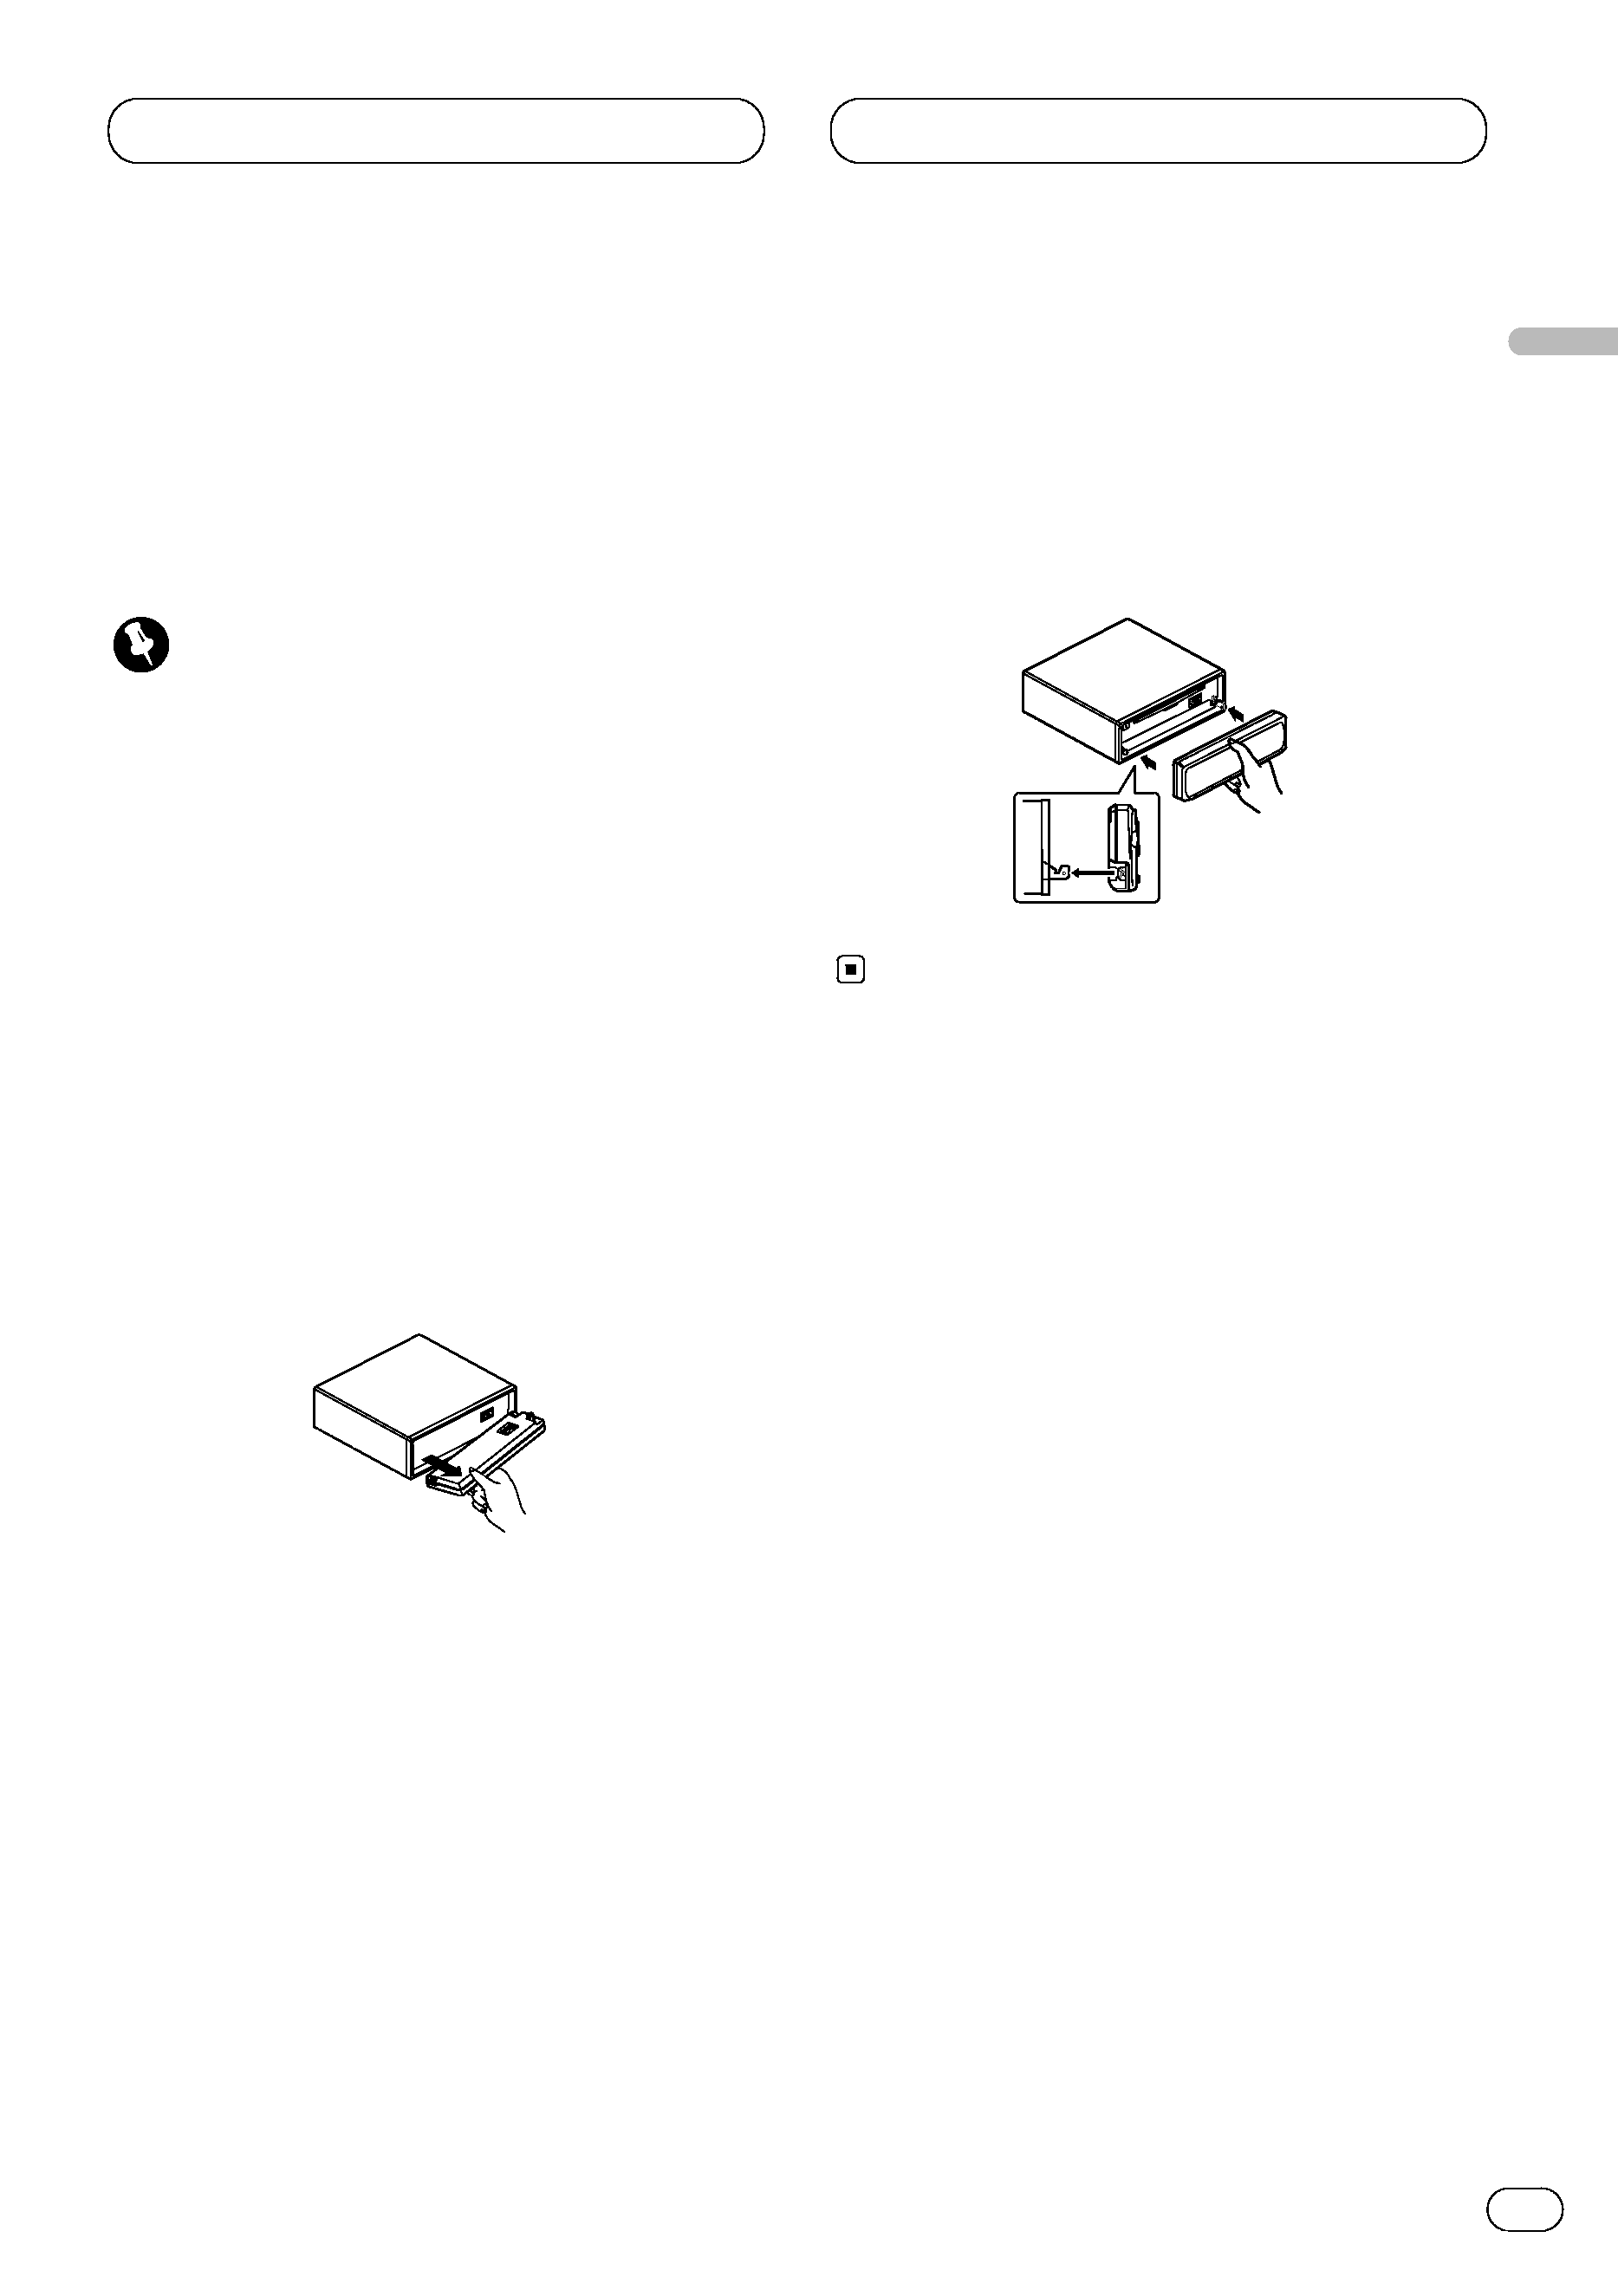
Protecting your unit from theft 4
· Removing the front panel 4
· Attaching the front panel 4
Power ON/OFF
Turning the unit on 5
Selecting a source 5
Turning the unit off 5
Tuner
Listening to the radio 6
Storing and recalling broadcast
frequencies 7
Tuning in strong signals 7
Storing the strongest broadcast
frequencies 7
Cassette Player
Playing a tepe 8
Repeating play 9
Skipping blank tape sections 9
Radio intercept 9
Multi-CD Player
Playing a CD 9
50-disc milti-CD player 10
Repeating play 10
Playing tracks in a random order 11
Scanning CDs and tracks 11
Pausing CD playback 11
Audio Adjustments
Introduction of audio adjustments 12
Using balance adjustment 12
Using the equalizer 13
· Recalling equalizer curves 13
· Adjusting equalizer curves 13
Adjusting loudness 13
Front image enhancer (FIE) 14
Adjusting source levels 14
Initial Settings
Adjusting initial settings 15
Setting the time 15
Setting the FM tuning step 15
Setting the AM tuning step 16
Switching the auxiliary setting 16
Other Functions
Setting the time display on or off 16
Usigng the AUX source 16
· Selecting AUX as the source 16
Additional Information
Cassette tapes 17
Cleaning the playback head 17
Music search and repeat functions 17
Specifications 18
Thank you for buying this Pioneer product.
Please read through these operating instructions so you will know how to oper-
ate your model properly. After you have finished reading the instructions, put them
away in a safe place for future reference.
Contents
En
1
background image
About this unit
The tuner frequencies on this unit are allocated
for use in Europe, Asia, the Middle East, Africa
and Oceania. Use in other areas may result in
improper reception.
About this manual
This unit features a number of sophisticated
functions ensuring superior reception and oper-
ation. All the functions have been designed for
the easiest possible use, but many are not self-
explanatory. This operation manual will help you
benefit fully from this product's potential and to
maximize your listening enjoyment.
We recommend that you familiarize yourself
with the functions and their operation by read-
ing through the manual before you begin using
this unit. It is especially important that you read
and observe precautions on this page and in
other sections.
Precautions
· Keep this manual handy as a reference for
operating procedures and precautions.
· Always keep the volume low enough so you
can hear sounds outside of the car.
· Protect this product from moisture.
· If the battery is disconnected or discharged,
the preset memory will be erased and must be
reprogrammed.
In case of trouble
Should this product fail to operate properly,
contact your dealer or nearest authorized
Pioneer Service Station.
Before You Start
En
2
English
Español
Deutsch
F
rançais
Italiano
Nederlands
background image
En
3
Before You Start
What's what
1 VOLUME button
Press to increase or decrease the volume.
2 LOCAL button (tuner)
Press to switch local function on or off.
PAUSE/SCAN
button
Press to switch pause function on or off.
Press and hold for two seconds to switch
scan function on or off.
3 BSM button (tuner)
Press and hold for two seconds to switch
BSM function on or off.
REPEAT/RANDOM
button
Press to switch repeat function on or off.
Press and hold for two seconds to switch
random function on or off.
4 OPEN button
Press to open the front panel.
5 AUDIO button
Press to select various sound quality con-
trols.
6
5//2/3 buttons
Press to do manual seek tuning, fast for-
ward, reverse and track search controls. Also
used for controlling functions.
7 LOUDNESS button
Press to switch loudness function on or off.
8 BAND button
Press to select among three FM and one AM
band and cancel the control mode of func-
tions.
9 1­6 (PRESET TUNING) buttons
Press for preset tuning and disc number
search when using a multi-CD player.
0 SOURCE button
This unit is switched on by selecting a
source. Press to cycle through all of the
available sources.
- EQ button
Press to select various equalizer curves.
= CLOCK button
Press to switch clock display on or off.
35
=
-
98
7
6
0
1
2
4
background image
Before You Start
En
4
English
Español
Deutsch
F
rançais
Italiano
Nederlands
Protecting your unit from theft
The front panel can be detached from the head
unit and stored in the protective case provided
to discourage theft.
· Keep the front panel closed while driving.
Important
· Never use force or grip the display and the
buttons tightly when removing or attaching.
· Avoid subjecting the front panel to excessive
shocks.
· Keep the front panel out of direct sunlight and
high temperatures.
Removing the front panel
1 Press OPEN to open the front panel.
2 Grip the left side of the front panel and pull
it gently outward.
Take care not to grip it tightly or drop it.
3 Put the front panel into the protective case
provided for safe keeping.
Attaching the front panel
Replace the front panel by holding it upright
to this unit and clipping it securely into the
mounting hooks.

Reviews

There are no reviews of this manual yet.