&RQWHQWV
Installation ............................................. 4
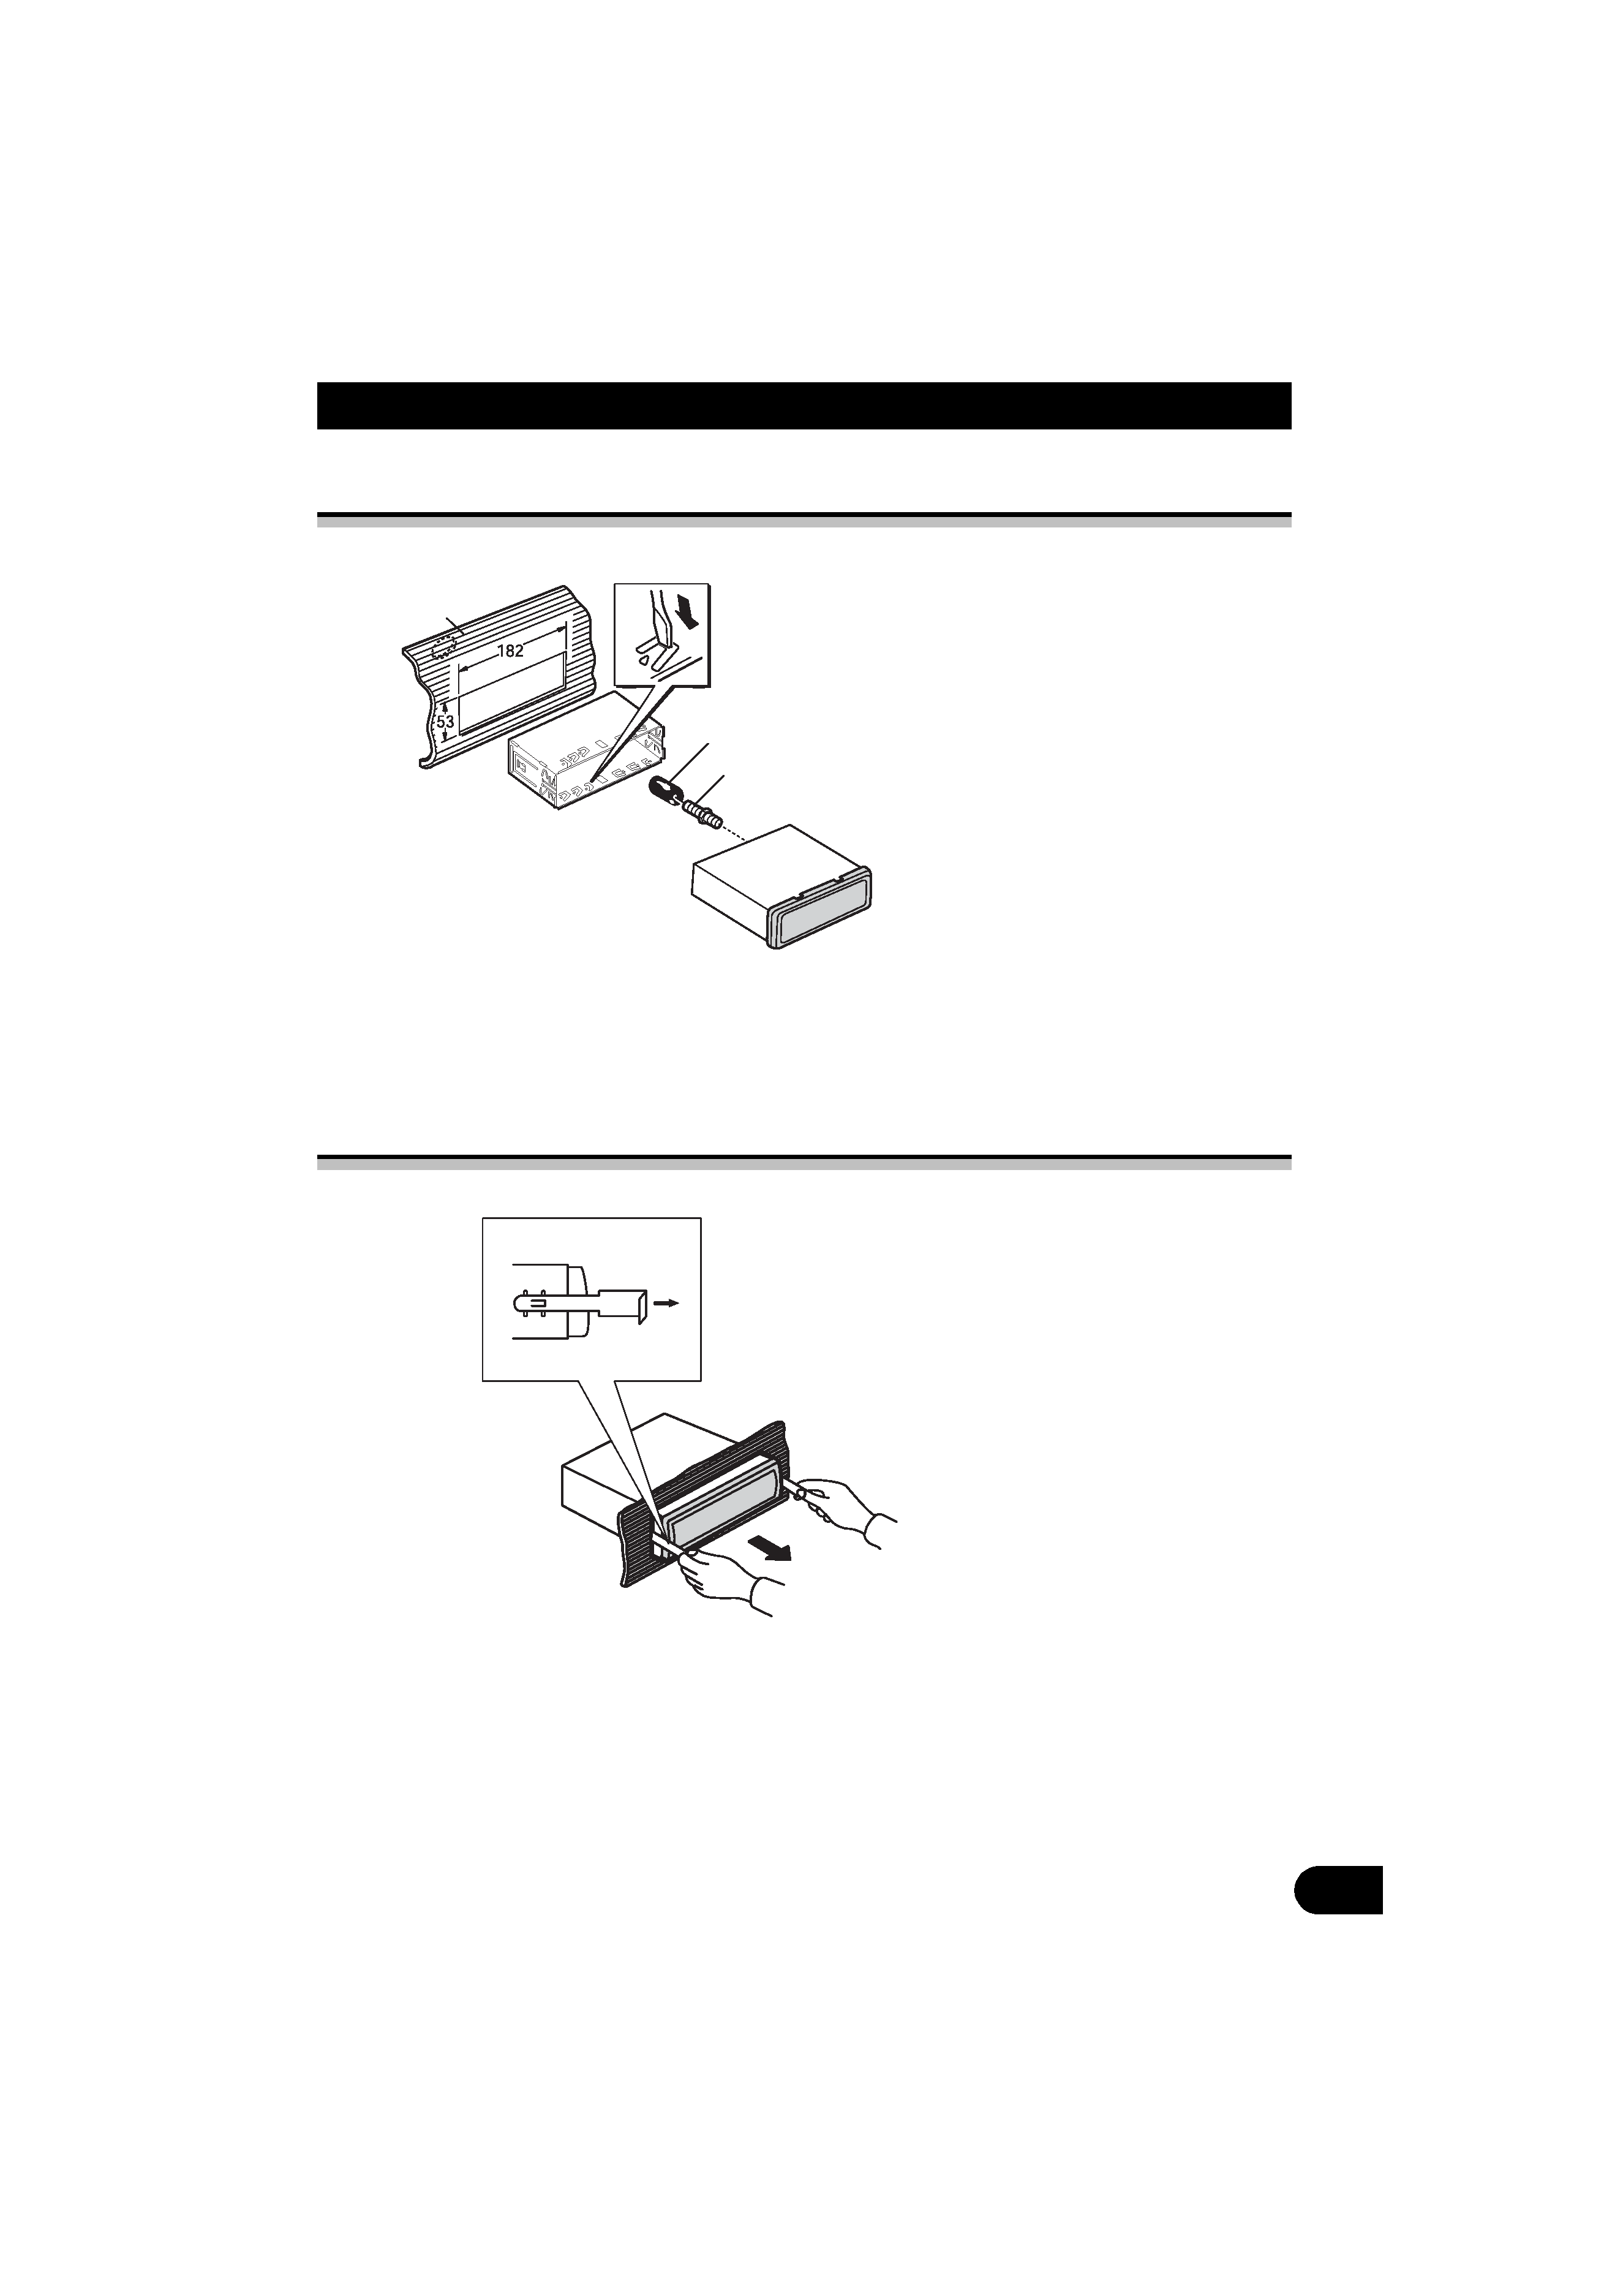
Installation with the Rubber Bush ...................... 5
Removing the Unit ............................................. 5
Connecting the Units ............................ 6
Connection Diagram ............................. 8
Key Finder ........................................... 10
·Head Unit
Before Using This Product ................. 11
About This Product ........................................... 11
About This Manual ........................................... 11
Precaution ......................................................... 11
In Case of Trouble ............................................ 11
Basic Operation .................................. 12
To Listen to Music ............................................ 12
Basic Operation of Tuner ................................. 13
· Manual and Seek Tuning
·Preset Tuning
·Band
Basic Operation of Built-in CD Player ............. 14
·Eject
· Track Search and Fast Forward/Reverse
· Disc Loading Slot
Corresponding Display Indications
and Buttons .....................................................15
Entering the Function Menu ............................. 16
Function Menu Functions ................................. 17
Tuner Operation .................................. 18
· Local Seek Tuning (LOCAL)
· Best Stations Memory (BSM)
Using the Built-in CD Player .............. 19
· Repeat Play (REPEAT)
· Random Play (RANDOM)
· Scan Play (T-SCAN)
· Pause (PAUSE)
Audio Adjustment ............................... 21
Selecting the Equalizer Curve .......................... 21
Entering the Audio Menu ................................. 21
Audio Menu Functions .................................... 22
· Balance Adjustment (FADER)
· Equalizer Curve Adjustment
(EQ-LOW/MID/HIGH)
· Equalizer Curve Fine Adjustment
· Loudness Adjustment (LOUD)
· Front Image Enhancer Function (FIE)
· Source Level Adjustment (SLA)
Detaching and Replacing
the Front Panel ................................ 28
Theft Protection ............................................... 28
· Detaching the Front Panel
· Replacing the Front Panel
Other Functions .................................. 29
Setting the Time ............................................... 29
Time Display .................................................... 30
· Displaying the Time
Using the PROGRAM Button (PGM-FUNC) . 30
· Setting the PROGRAM Button
· Using the PROGRAM Button
Cellular Telephone Muting .............................. 32
CD Player and Care ............................. 33
Precaution ........................................................ 33
Built-in CD Player's Error Message ................. 34
Specifications ...................................... 35