4
<DRB1311>
En
CONTENTS
CAUTIONS REGARDING HANDLING .............................................................. 4
FEATURES ............................................................................................................... 6
CONNECTIONS ...................................................................................................... 7
PANEL FACILITIES ............................................................................................... 9
Top Panel ........................................................................................................ 9
Display .......................................................................................................... 10
Jog Dial Display ............................................................................................ 10
DISC LOADING / UNLOADING ....................................................................... 11
DJ PLAYER OPERATION ................................................................................... 11
Auto Cueing .................................................................................................. 11
Starting Playback ......................................................................................... 11
Stopping Playback ....................................................................................... 12
To Pause Play ............................................................................................... 12
Track Cueing ................................................................................................ 12
Fast-Forward / Fast-Reverse ........................................................................ 12
Cue Point Settings ........................................................................................ 12
Changing Playback Speed ........................................................................... 13
Applying Master Tempo ............................................................................... 13
Jog Dial Functions ....................................................................................... 13
Mixing Different Tracks ............................................................................... 13
ADVANCED OPERATIONS ................................................................................ 14
Scratch Play .................................................................................................. 14
How to Spin .................................................................................................. 14
How to Brake ................................................................................................ 14
Hot Cue ......................................................................................................... 14
Loop Playback .............................................................................................. 14
Reversing Playback ...................................................................................... 15
Fader Start Playback .................................................................................... 15
Relay Play Using Two Players ..................................................................... 15
Wave Display ................................................................................................. 15
About the CD TEXT ...................................................................................... 15
USING CUE POINTS / LOOP POINTS MEMORY ....................................... 16
Using Internal Memory ............................................................................... 16
Using a Commercially Available Multimedia Card ................................... 16
Copying MMC Data ...................................................................................... 17
Copying Data in the Internal Memory ....................................................... 17
TROUBLESHOOTING ......................................................................................... 18
SPECIFICATIONS .................................................................................. Back cover
Thank you for buying this Pioneer product.
Please read through these operating instructions so you will know how to operate
your model properly. After you have finished reading the instructions, put them
away in a safe place for future reference.
In some countries or regions, the shape of the power plug and power outlet may
sometimes differ from that shown in the explanatory drawings. However the method
of connecting and operating the unit is the same.
K015 En
BEFORE OPERATIONS
CAUTIONS REGARDING HANDLING
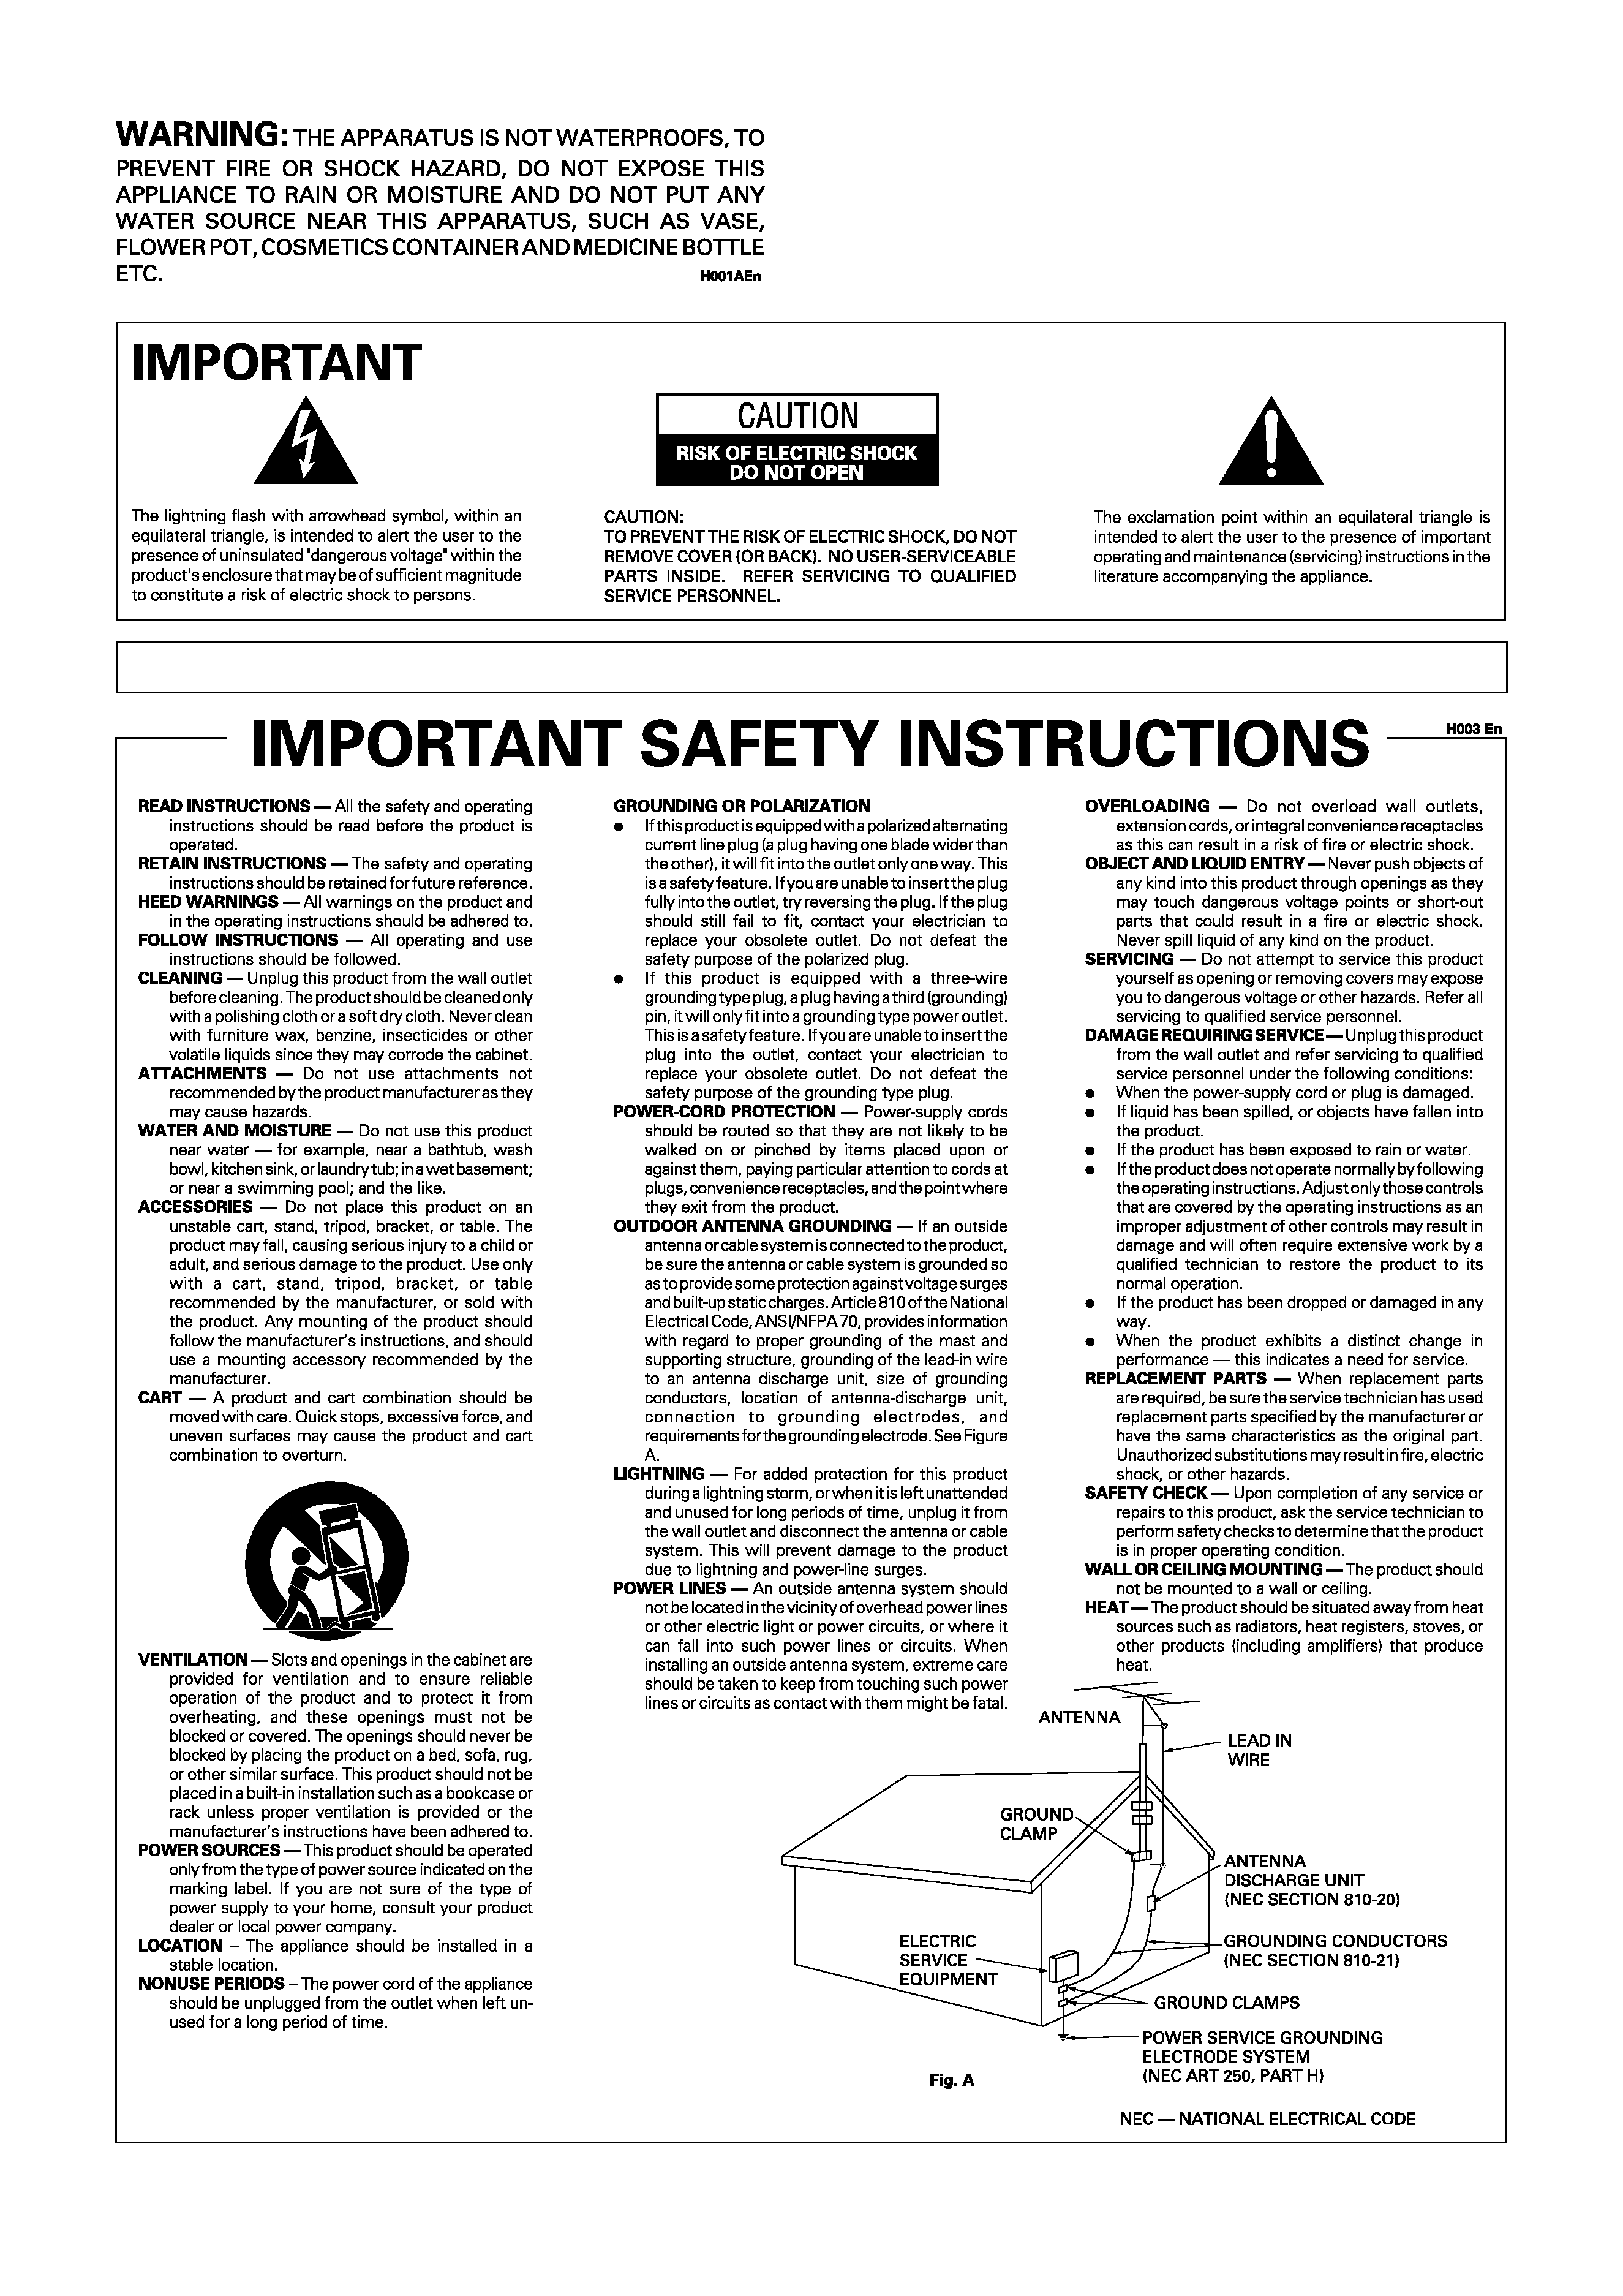
Location
Install the player in a well-ventilated location where it will not be
exposed to high temperatures or humidity.
Do not install the player in a location which is exposed to direct sunlight, or near
stoves or radiators. Excessive heat can adversely affect the cabinet and internal
components. Installation of the player in a damp or dusty environment may aiso
result in a malfunction and can be hazardous. Avoid installation near cookers etc.,
where the player may be exposed to oily smoke, steam or heat.
Installation guidelines
÷ Placing and using the compact disc player for long periods on heat-generating
sources such as amplifiers or near spotlights, etc. will affect product perform-
ance. Avoid placing the player on heat-generating sources.
÷ Install this compact disc player as far as possible away from tuners and TV sets.
A compact disc player installed in close proximity to such equipment may cause
noise or degradation of the picture.
÷ Noise may be noticeable when an indoor antenna is used. In such cases, make
use of an outdoor antenna or turn off power to the compact disc player.
÷ When the unit is used in a loud-sound environment, e.g., near a speaker, sound
skip may occur. Install the unit away from the speaker or reduce the listening
volume.
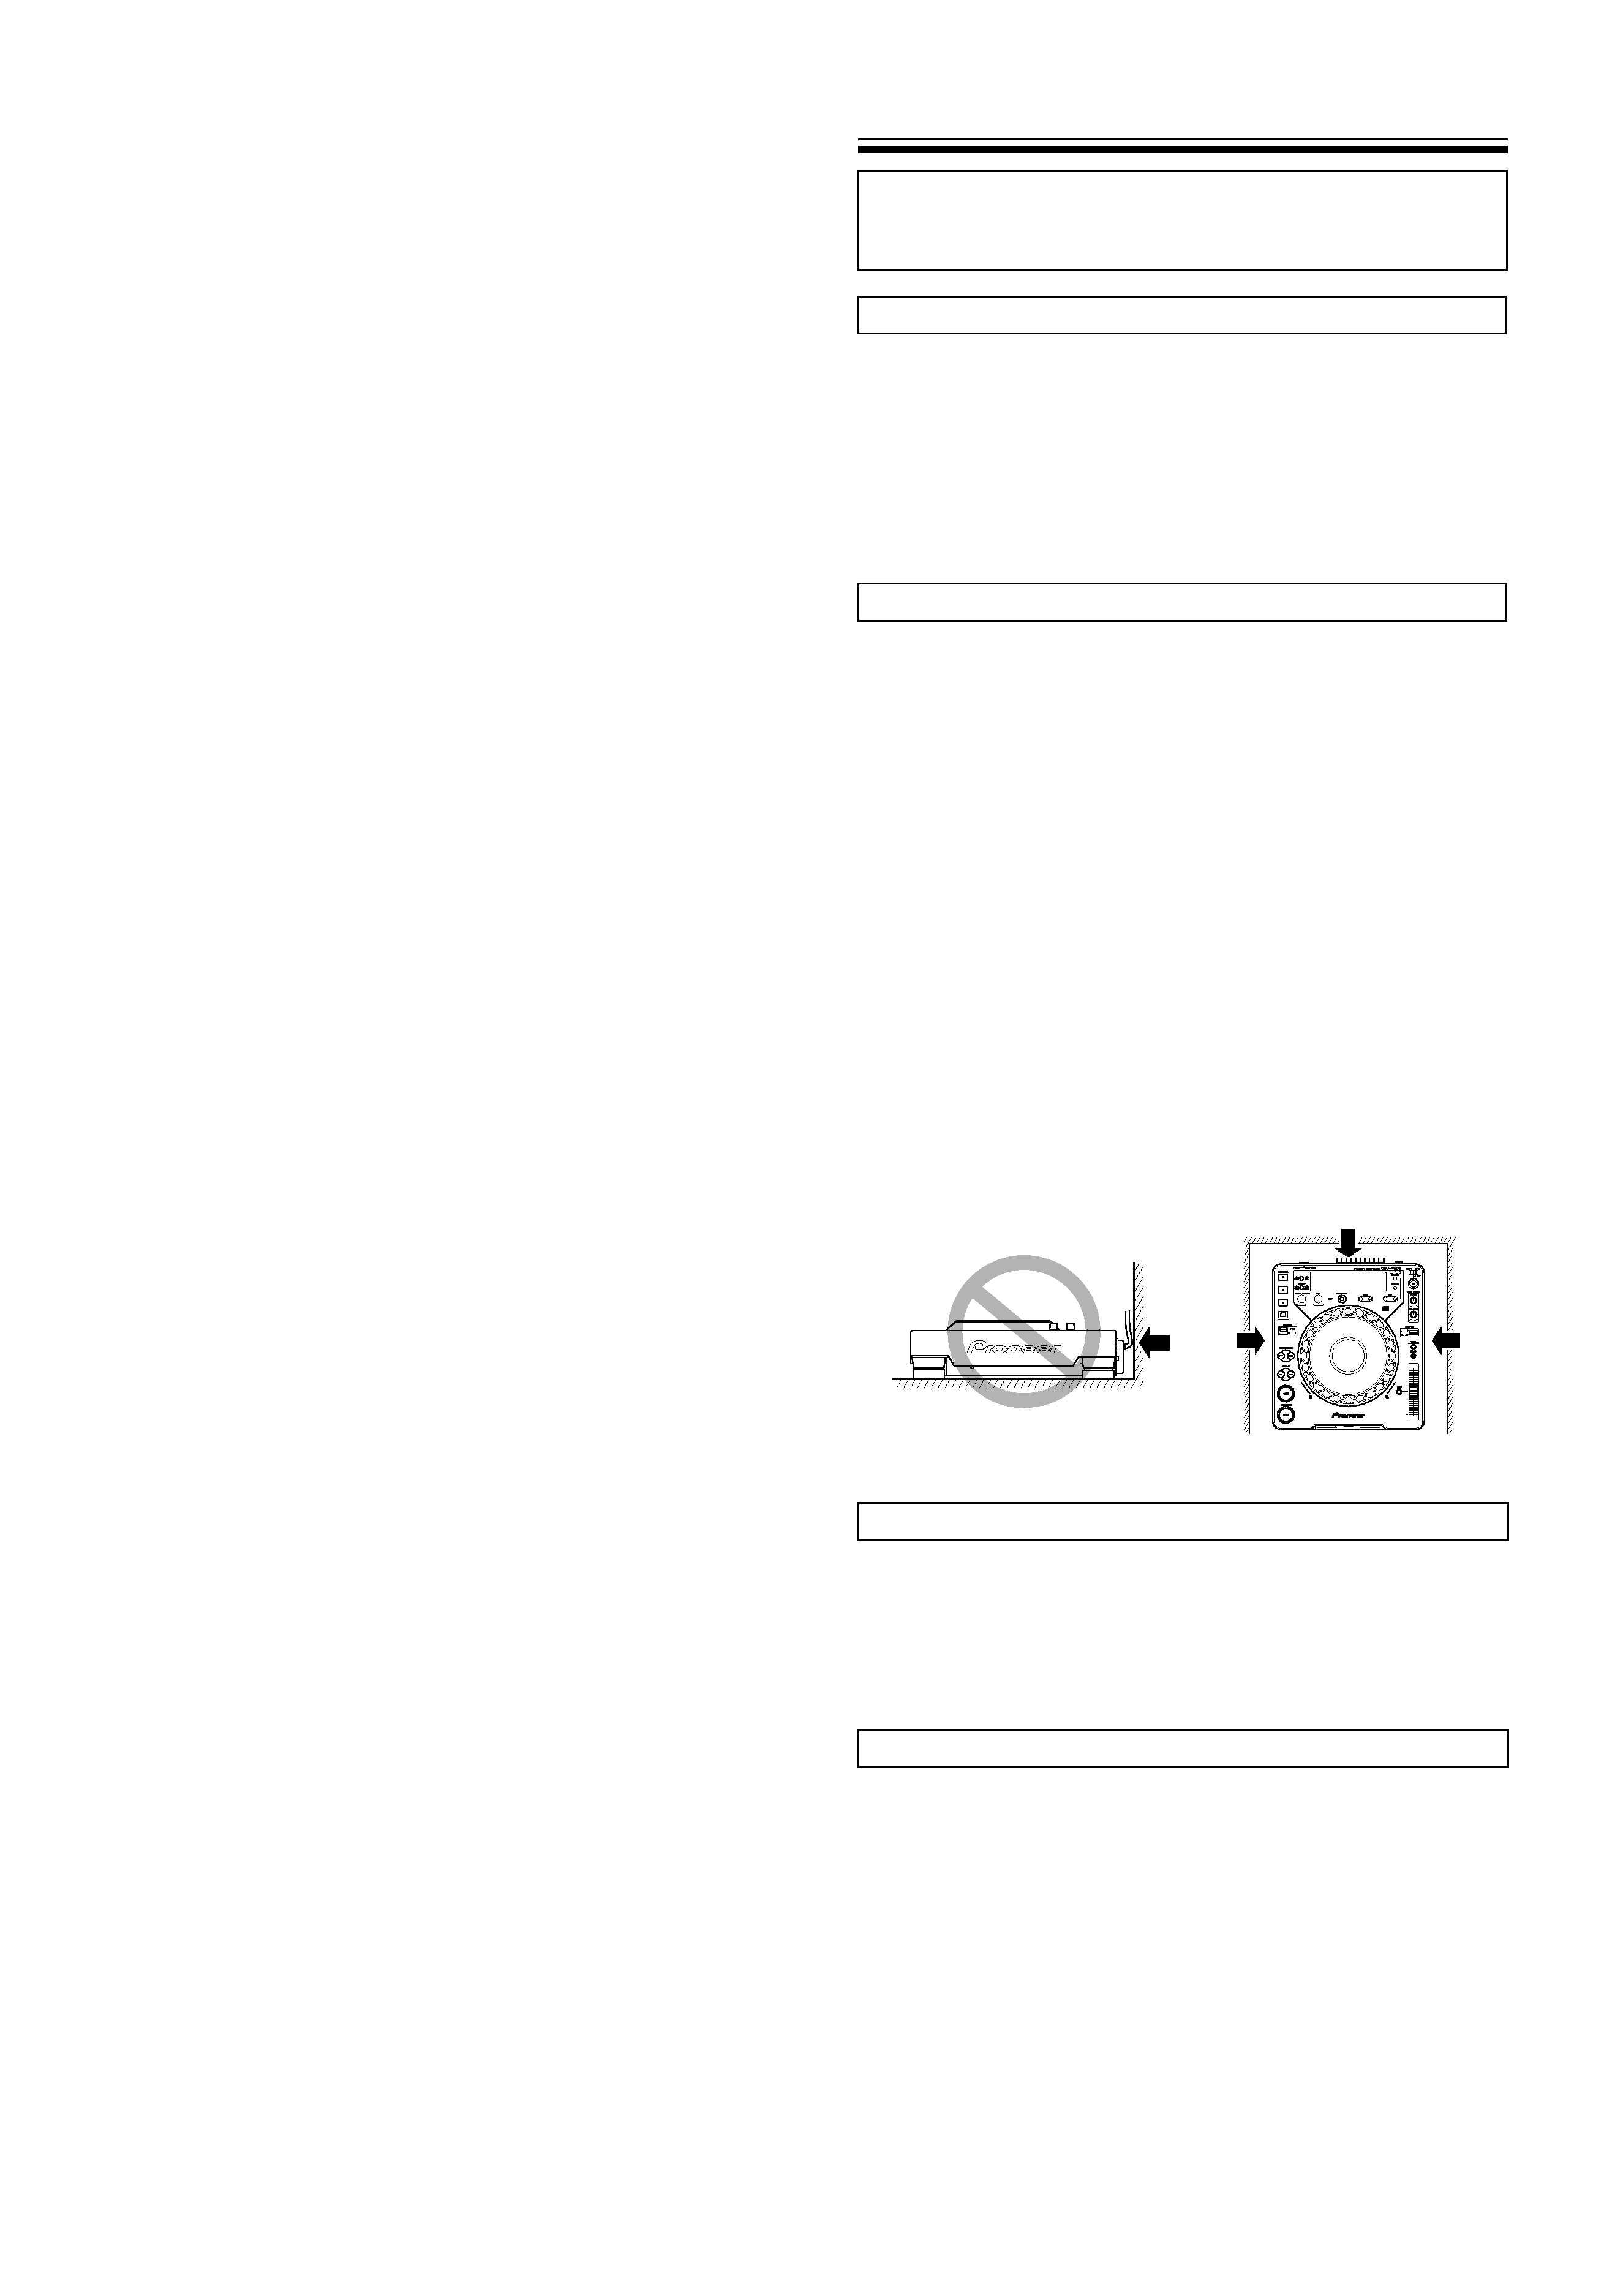
÷ Place this unit on a level surface and a stable platform.
÷ Be sure the player, including its audio and power supply cords, does not touch
vibrating materials. Any cause of vibration other than the insulators may cause
the disc to skip. Take special care when using the player while it is installed in
a carrying case.
Do not place on or against vibrating materials!
Cleaning the player
To clean the PLAYER wipe with a polishing or a soft, dry cloth. For stubborn dirt,
moisten a soft cloth with a weak solution of neutral detergent (diluted in five to six
parts water), wring the cloth well, and wipe away the dirt. Use a dry cloth to wipe
the surface dry. Do not use volatile liquids such as benzene or thinner which will
damage the unit.
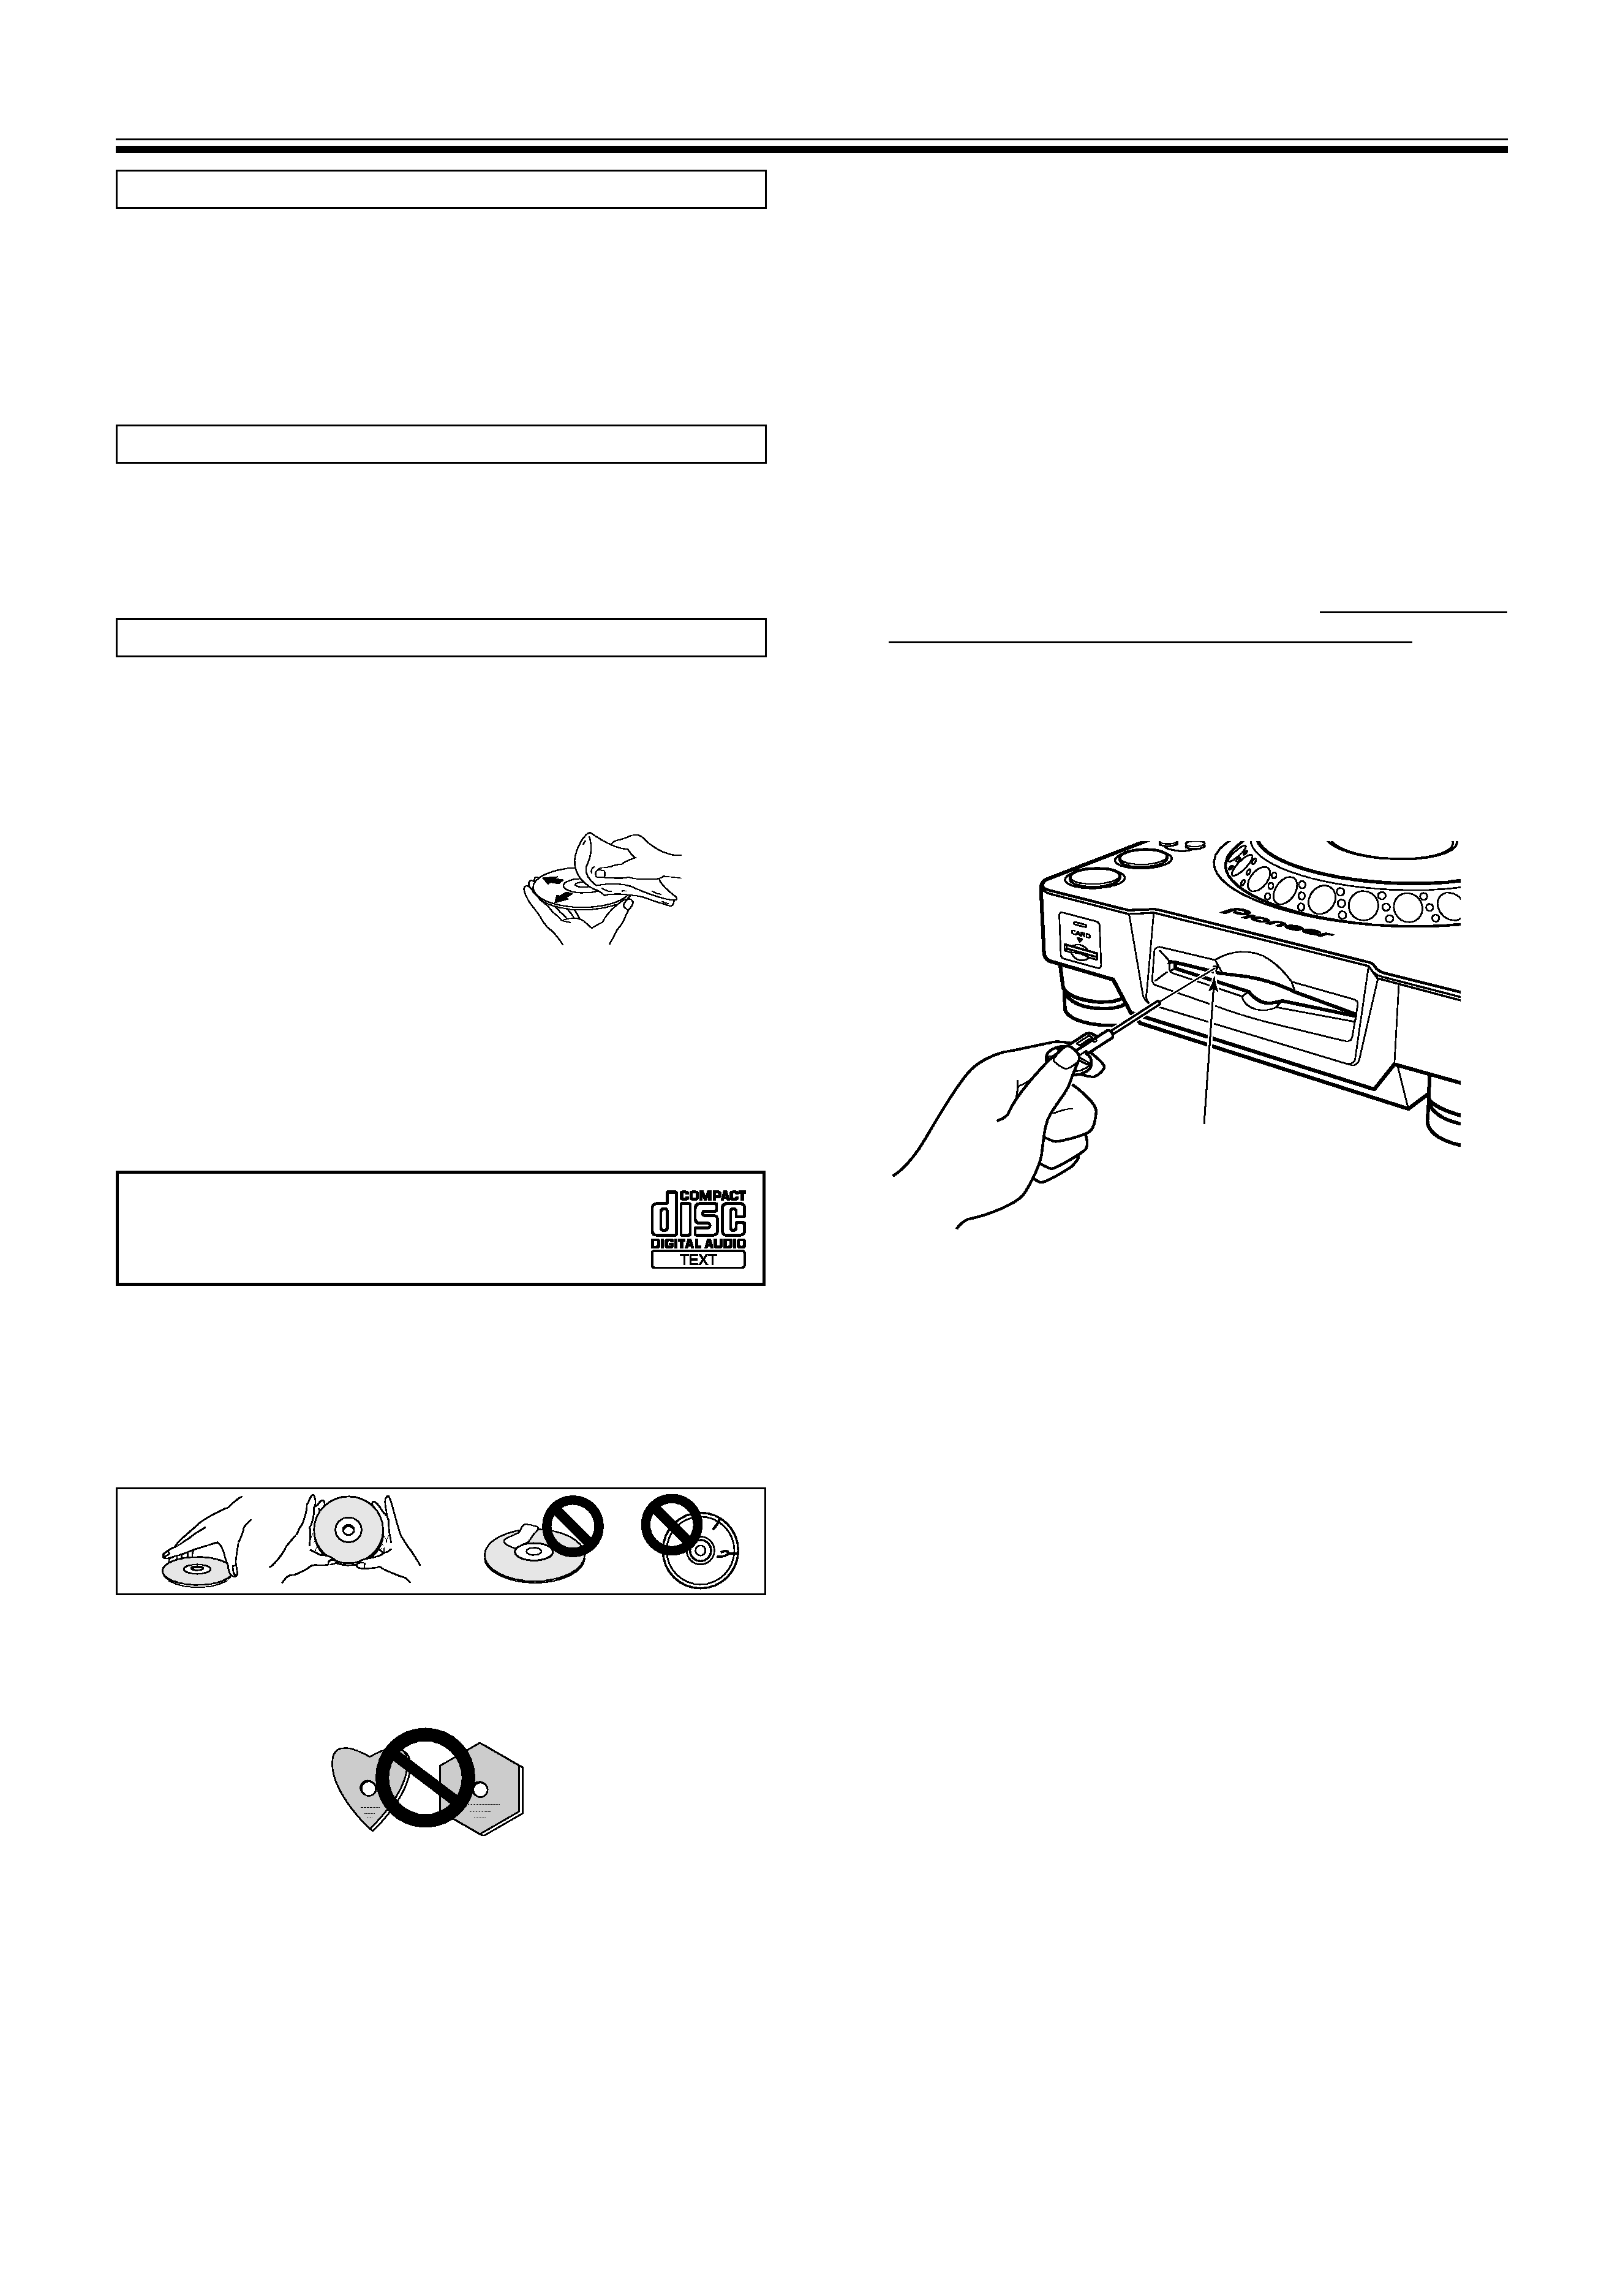
CD lens cleaner
The player's pickup lens should not become dirty in normal use. If for some rea-
son, the lens becomes soiled and malfunctions, contact your nearest PIONEER
authorized service center. Lens cleaners for CD players are commercially available,
but special care should be exercised in their use as some may cause damage to the
lens.
REC MODE
¶ Please be sure to leave
a space to allow for
heat radiation.