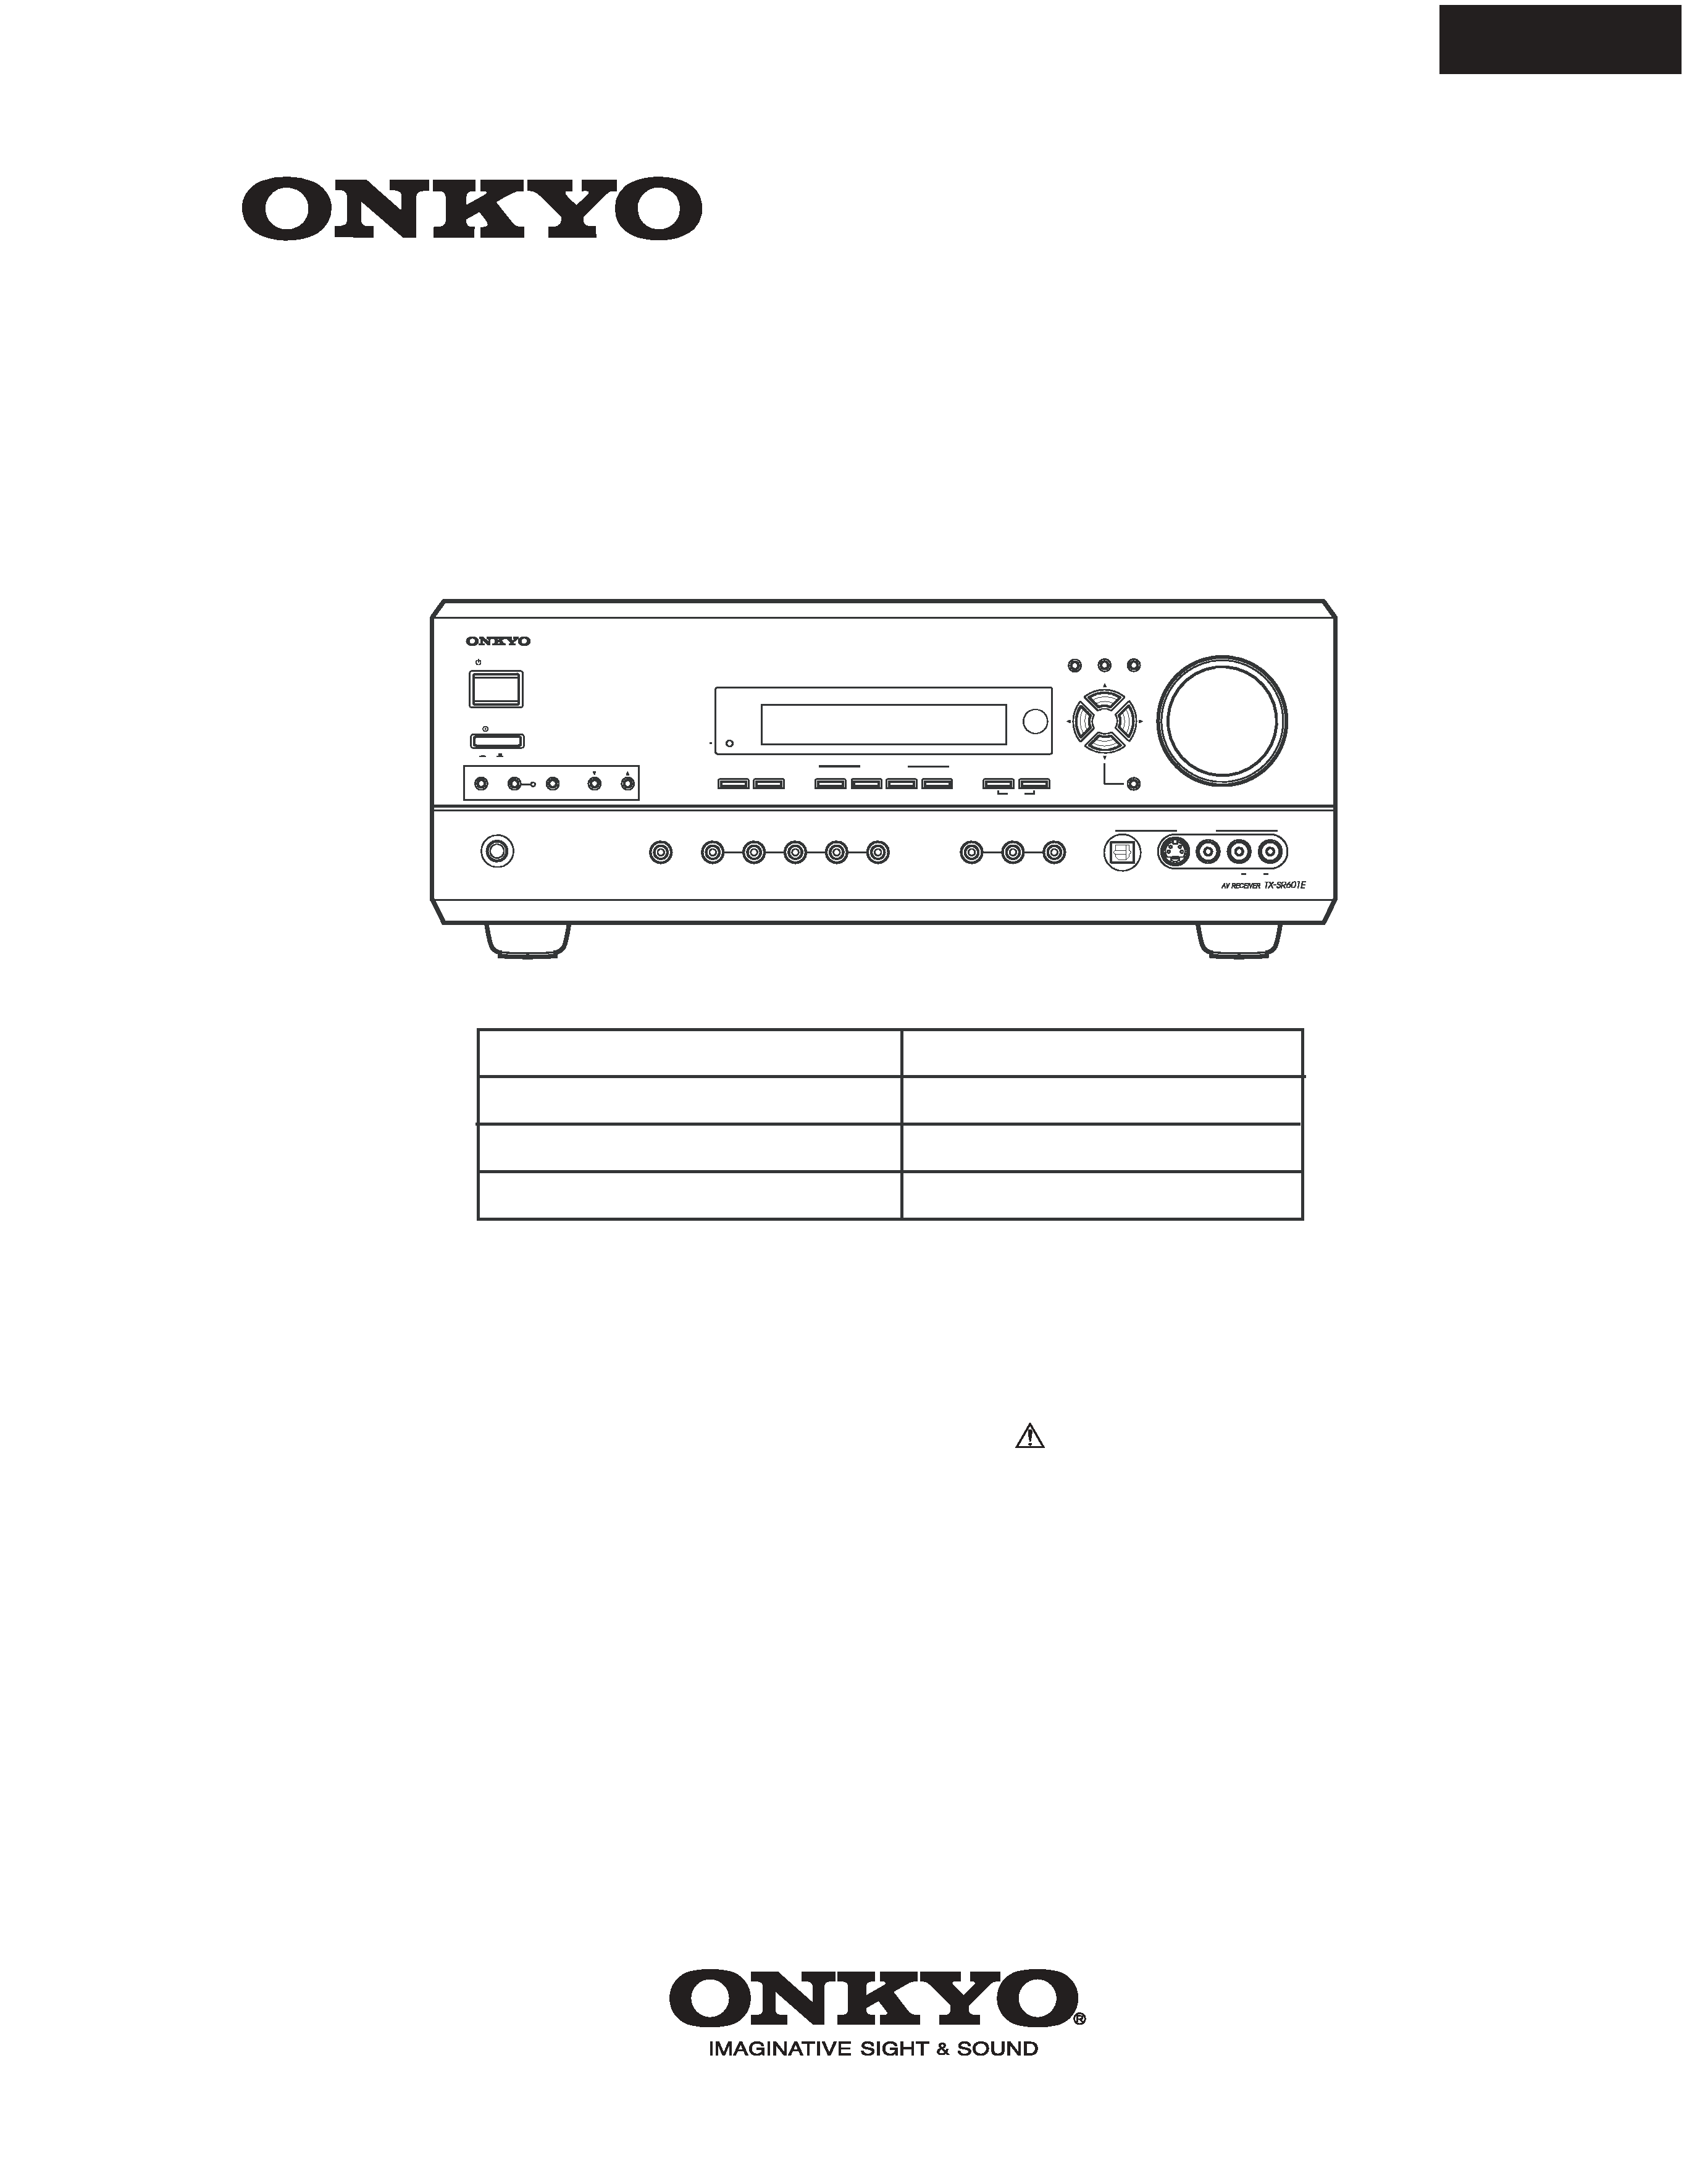
TX-SR601
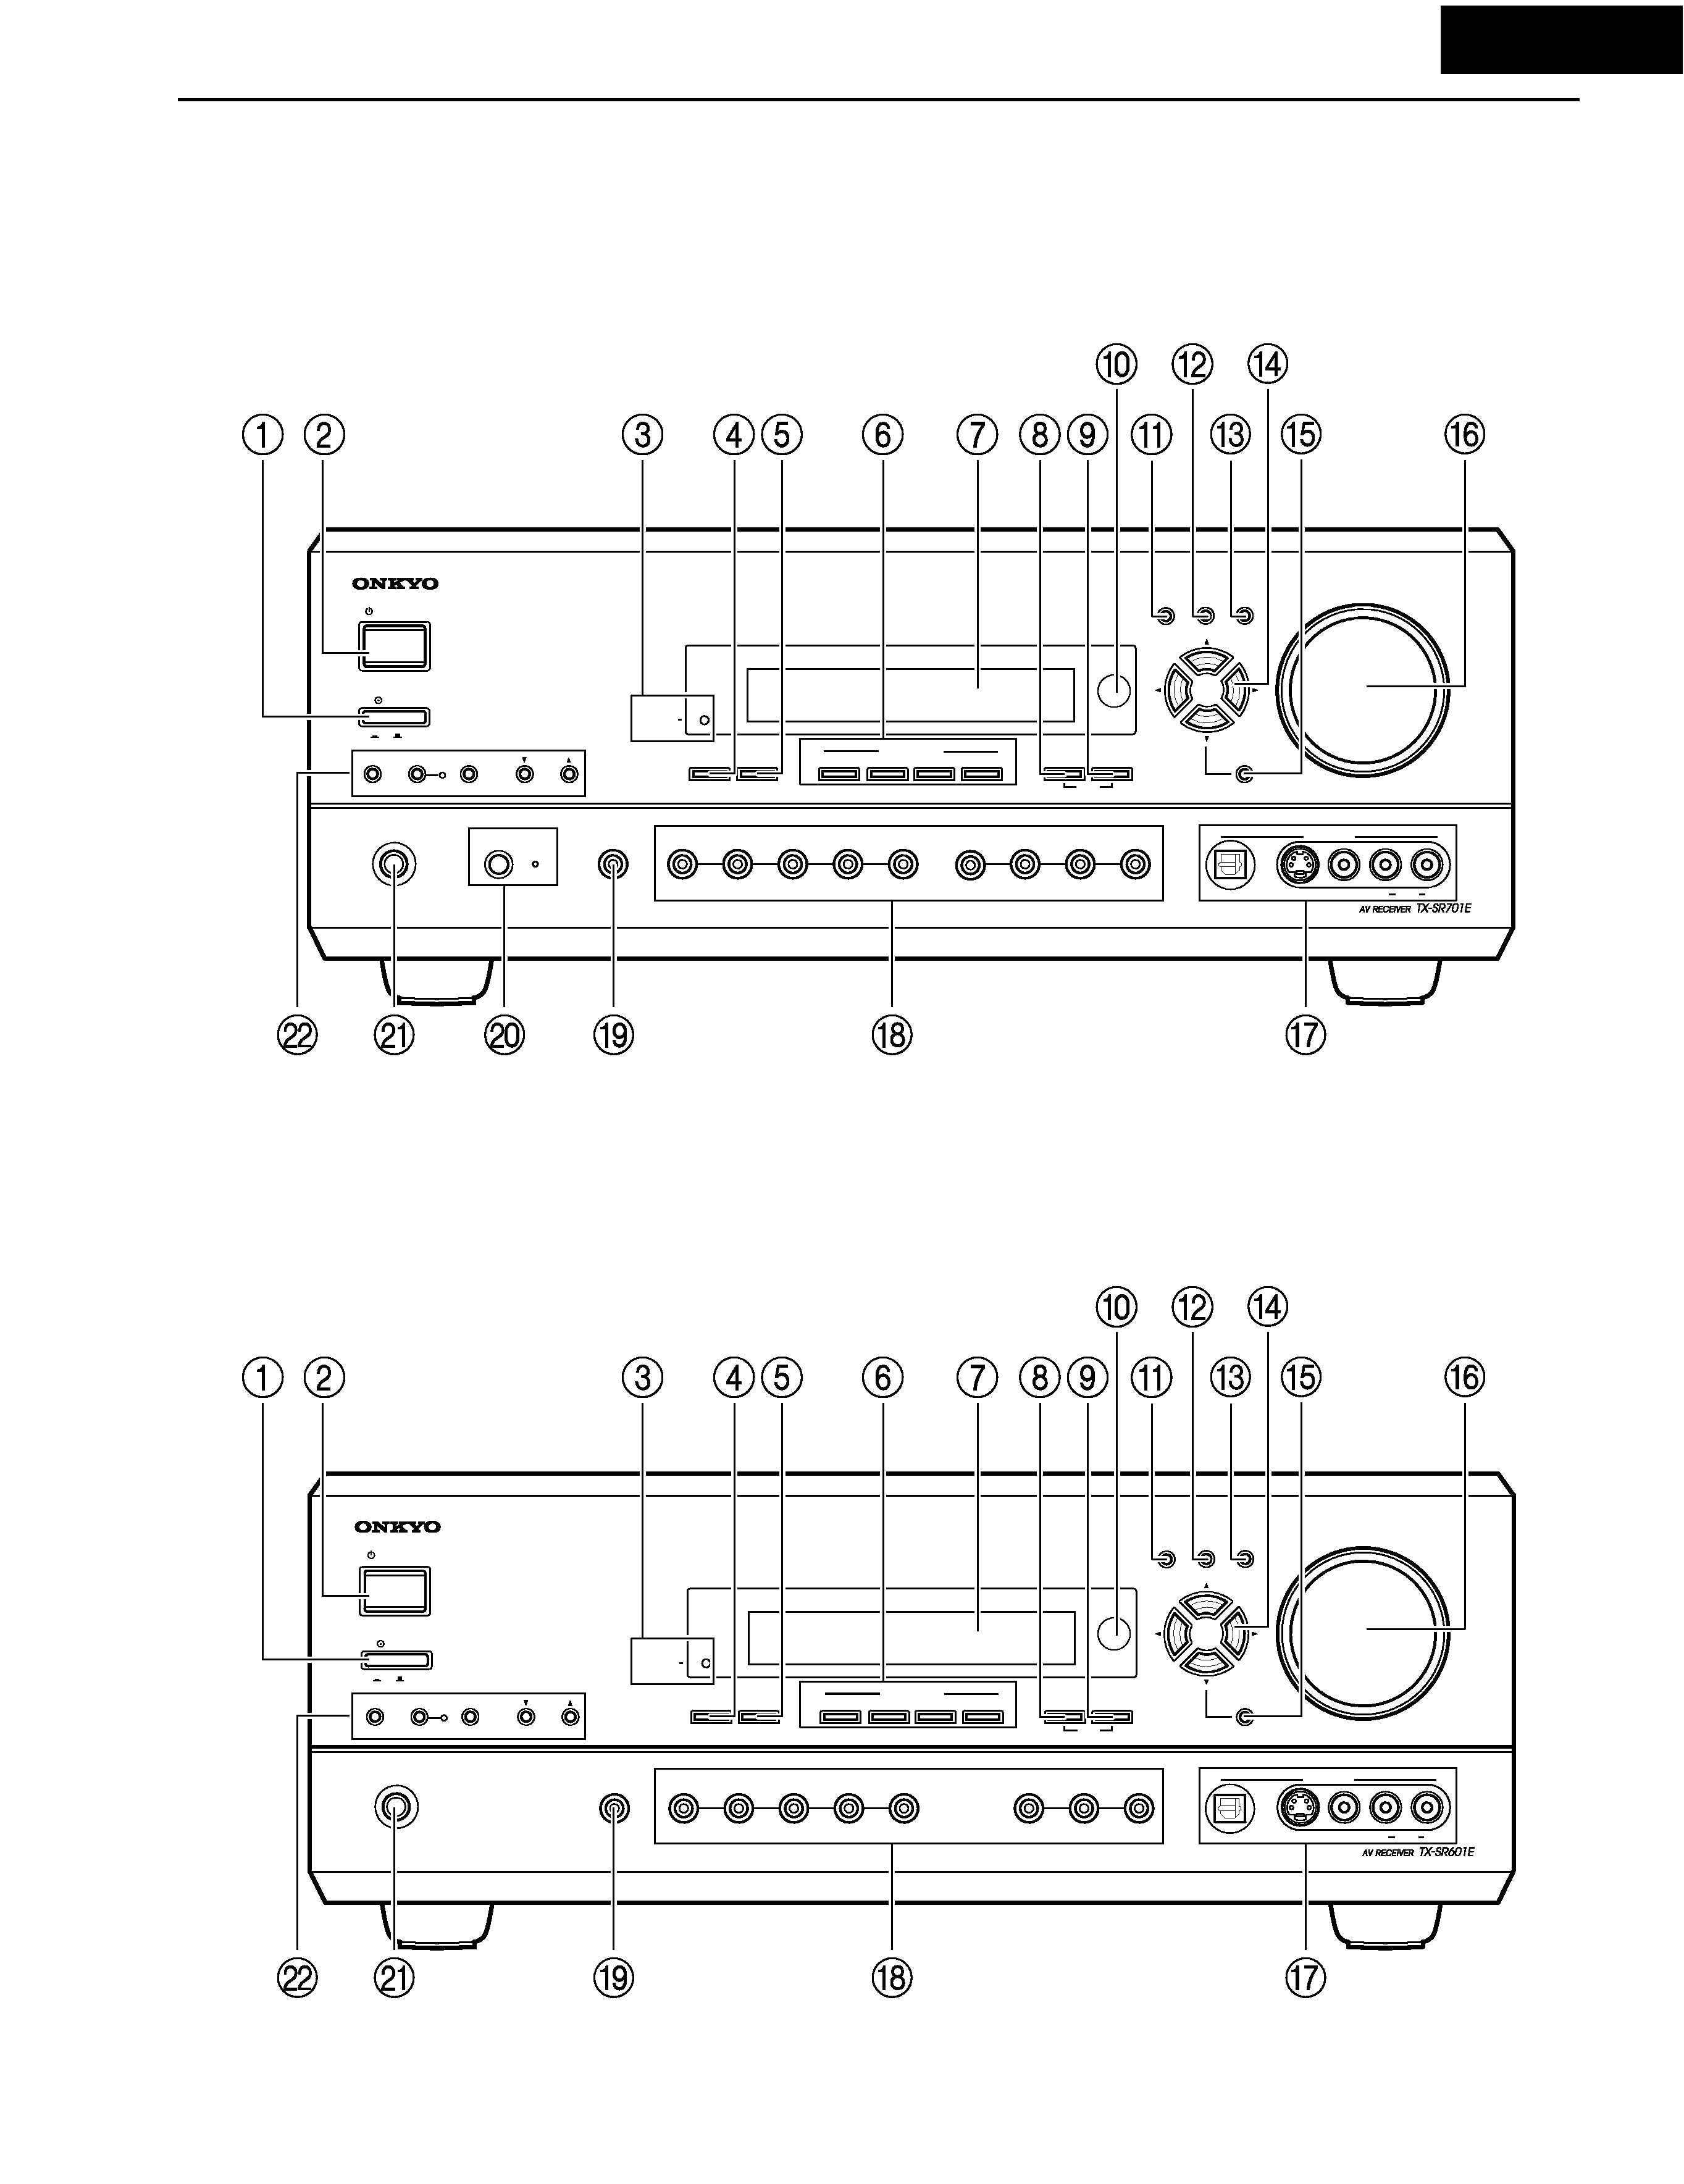
Front panel facilities
POWER switch (for all models other than USA and
Canadian models, and Australian models)
Press to turn on and off the main power supply for the TX-SR701/
701E/601/601E. When the TX-SR701/701E/601/601E is turned on
with the POWER switch, the STANDBY indicator lights.
· Before turning on the power, check to make sure that all cords
are properly connected.
· When the power is turned on, a sudden surge of current will
occur that may adversely affect the operation of other devices.
To prevent this, do not plug the TX-SR701/701E/601/601E into
the same circuit used by sensitive equipment, e.g., computers.
STANDBY/ON button
If pressed with the POWER switch turned on (with the receiver
plugged in for US models and Australian models), the TX-SR701/
701E/601/601E turns on and the display lights up. If pressed again,
the TX-SR701/701E/601/601E returns to the standby state. In the
standby state, the display is turned off and the TX-SR701/701E/
601/601E cannot be operated.
STANDBY indicator
Lights when the TX-SR701/701E/601/601E is in the standby state
and when a signal is received from the remote controller.
DISPLAY button
Press to display information about the current input source signal.
Each time you press the display button, the screen changes to show
you different information concerning the input signal.
RT/PTY/TP (European models only) button
This button is only available on European models. Press this button
to tune into the Radio Data System (RDS) for FM broadcasting.
RDS was developed within the European Broadcasting Union
(EBU) and is available in most European countries. Each time the
button is pressed, the display changes from RT (radio text) to PTY
(program type) to TP (traffic program) and then back to RT again.
DIMMER button
(other than European models)
Press to set the brightness of the front display.
There are three settings available: normal, dark,
and very dark.
· The brightness of the front display can also
be adjusted using the remote controller.
LISTENING MODE buttons
Press these buttons to select a listening mode for the current input
source. Press the DIRECT (TX-SR601/601E), THX (TX-SR701/
701E), STEREO, and SURROUND buttons to select a listening
mode directly. Press the DSP button to select any of the possible
listening modes for the input source currently selected.
Note:
During playback of a multichannel source, press the DIRECT
button to turn off the tone control and the SURROUND button to
turn on the tone control.
Front display
MEMORY button
Press to assign the radio station that you are currently tuned into to a
preset channel or press to delete a previously preset station.
FM MODE button
Press to change the stereo mode from AUTO to MONO and vice
versa. Each time this button is pressed, the AUTO indication turns
on and off indicating the current mode. If you are listening to an FM
radio station in stereo and the sound cuts out or there is a great deal
of noise, switch from AUTO to MONO.
Remote control sensor
AUDIO ADJUST button
Press to adjust the sound quality and the listening mode.
SETUP button
Press to enter the Setup Menu. The OSD Menu will appear on the
TV monitor as well as the front display on the TX-SR701/701E/
601/601E.
RETURN button
When in the Setup Menu, press to go back one level. If pressed
while at the Main Menu, you will exit the Setup Menu.
TUNING
/ , PRESET
/ , cursor ( / / / ) buttons
To tune into a radio station, press the TUNING
/
buttons. The
tuner frequency is displayed in the front display and it can be
changed in 100-kHz (or 50-kHz) increments for FM and 10-kHz (or
9-kHz) increments for AM.
When FM is selected as the input source, you can hold down either
the TUNING
or
button and then release it to activate the auto-
search feature. It will search for a station in the direction of the
button you pressed and stop when it tunes into one. When
navigating through the menu settings, these buttons move the cursor
up or down (or change the highlighted item).
To select a radio station that was stored using the MEMORY button,
press the PRESET
/
buttons.
When navigating through the menu settings, these buttons select the
value or item that you selected with the TUNING
/
buttons.
When you press the SETUP button, the TUNING and PRESET
buttons become cursor buttons to be used for Setup Menu
operations.
ENTER button
Press to display the screen for the item that is selected in the Setup
Menu.
MASTER VOLUME dial
Use to control the volume in the main zone. The volume for the
remote zone (Zone 2) is independent.
VIDEO 4 INPUT terminals
For connecting a video camera or game device.
STANDBY
DISPLAY
DIMMER
Page 5