
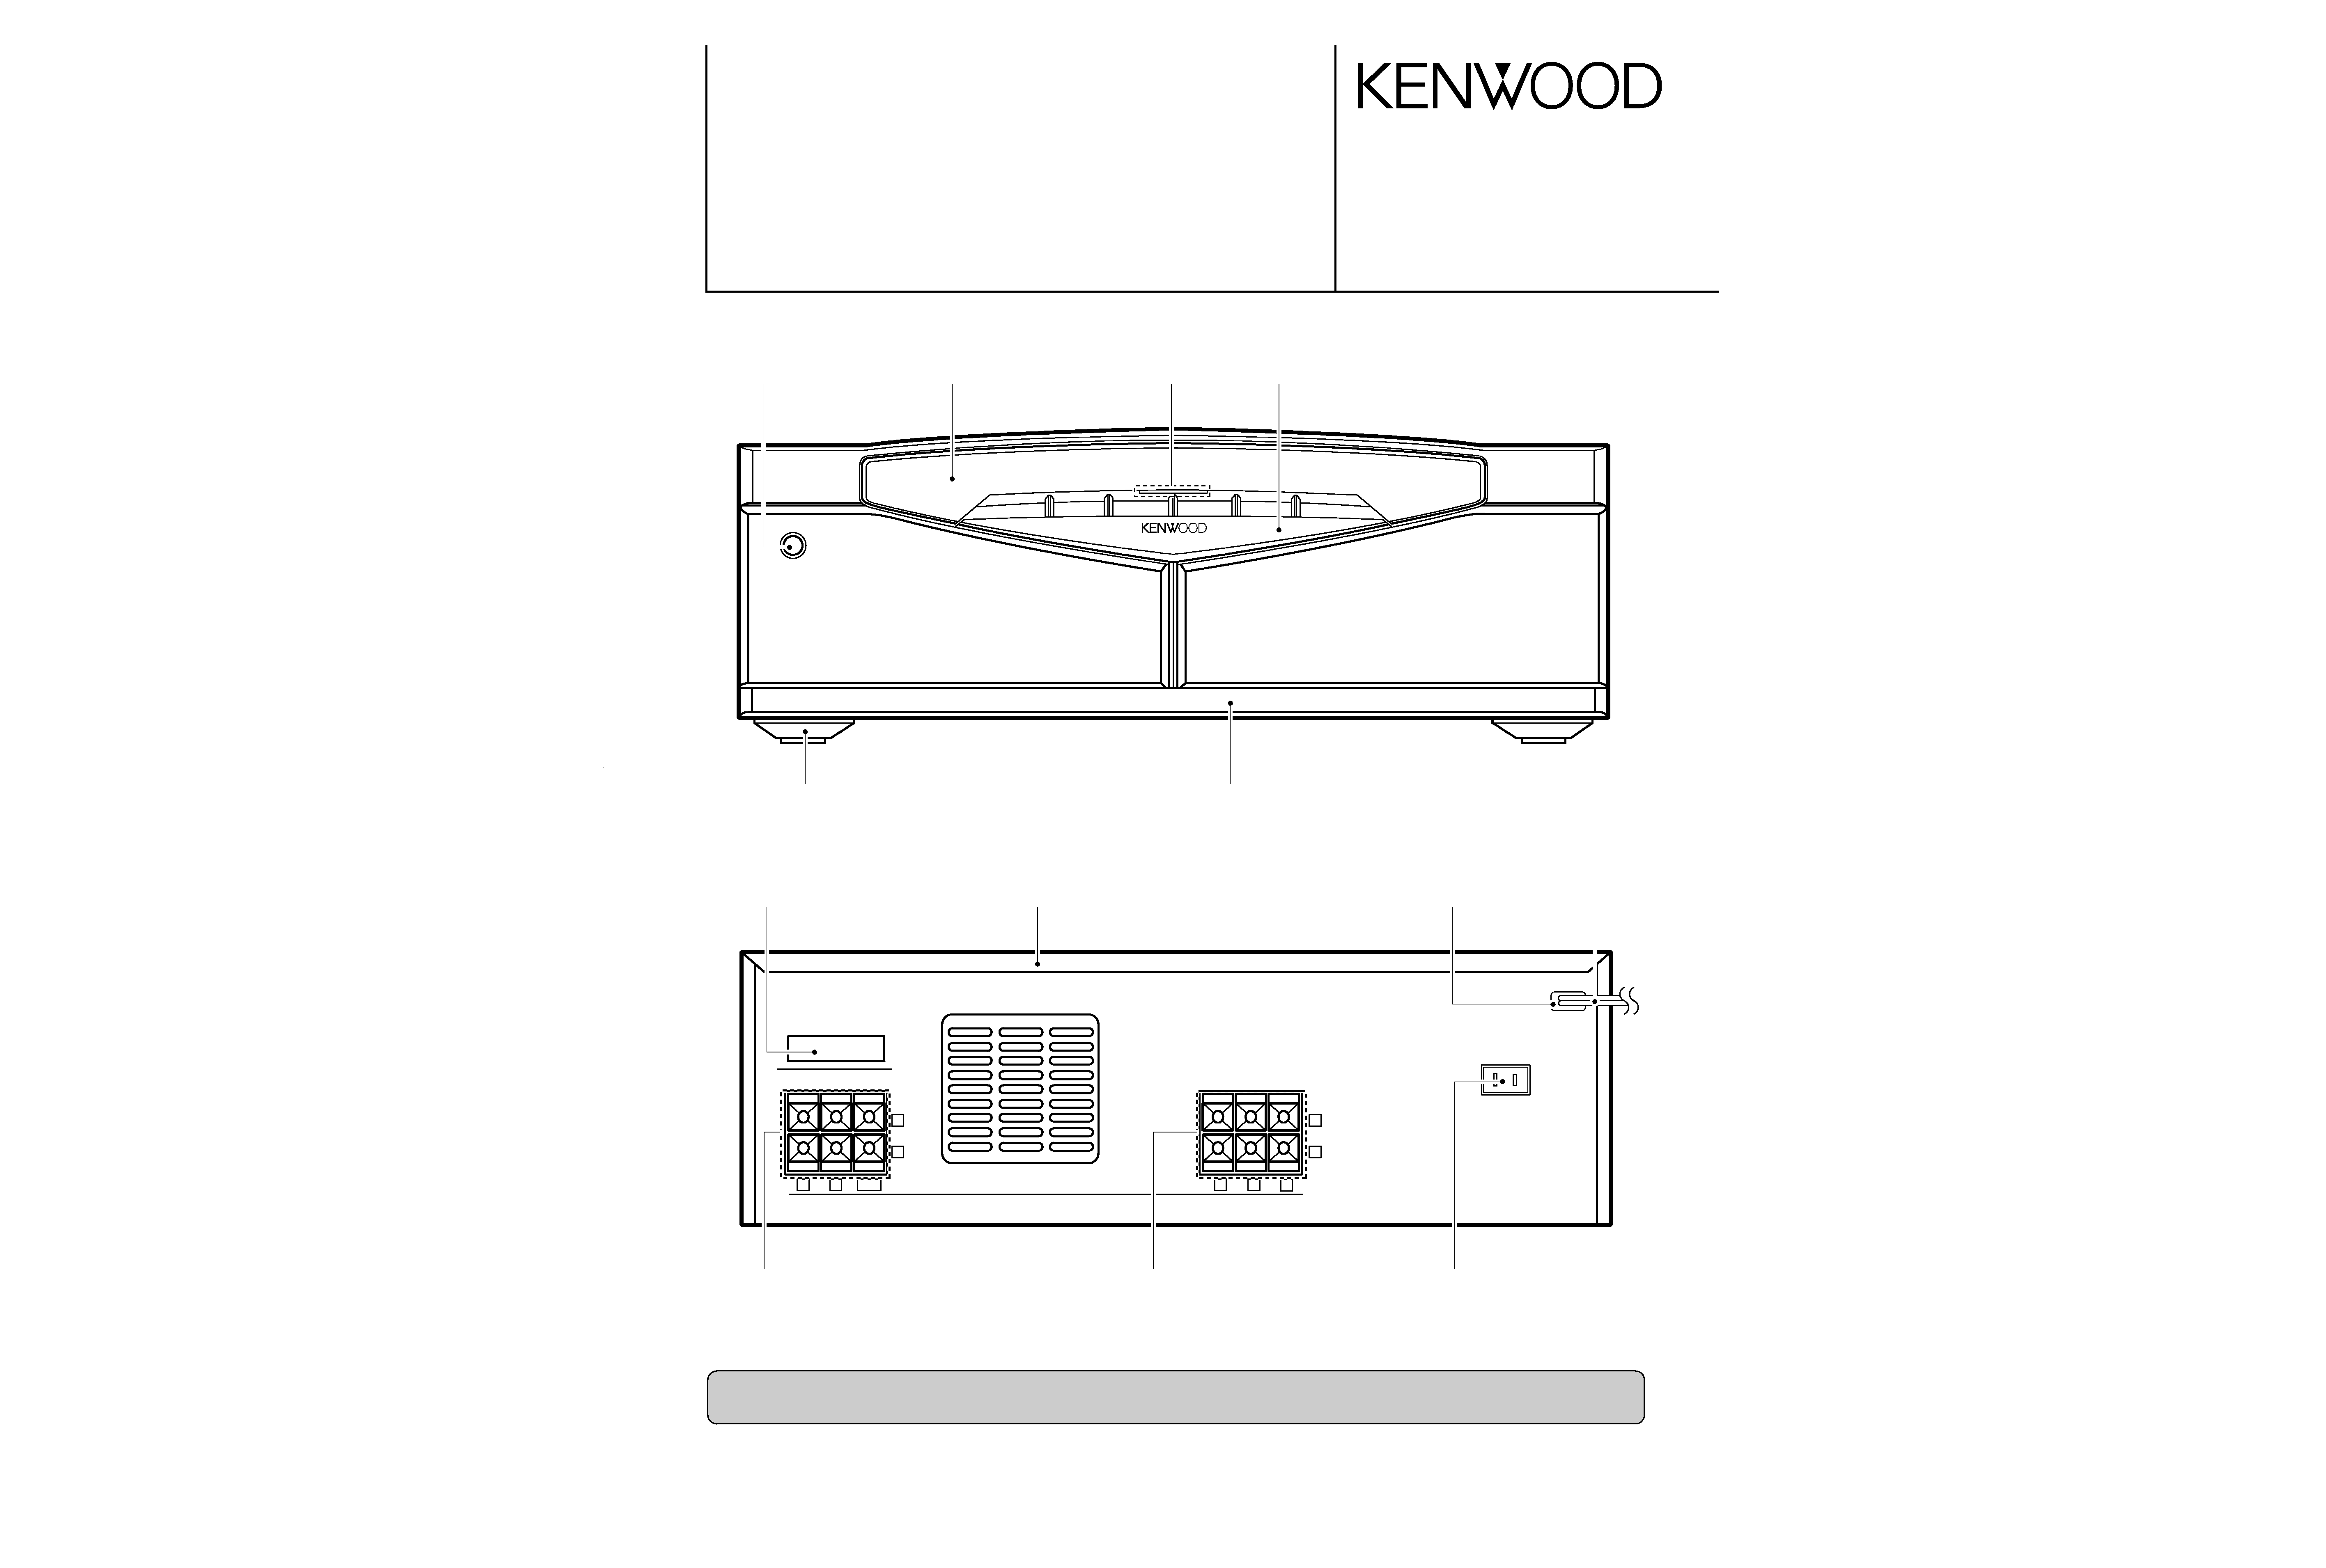
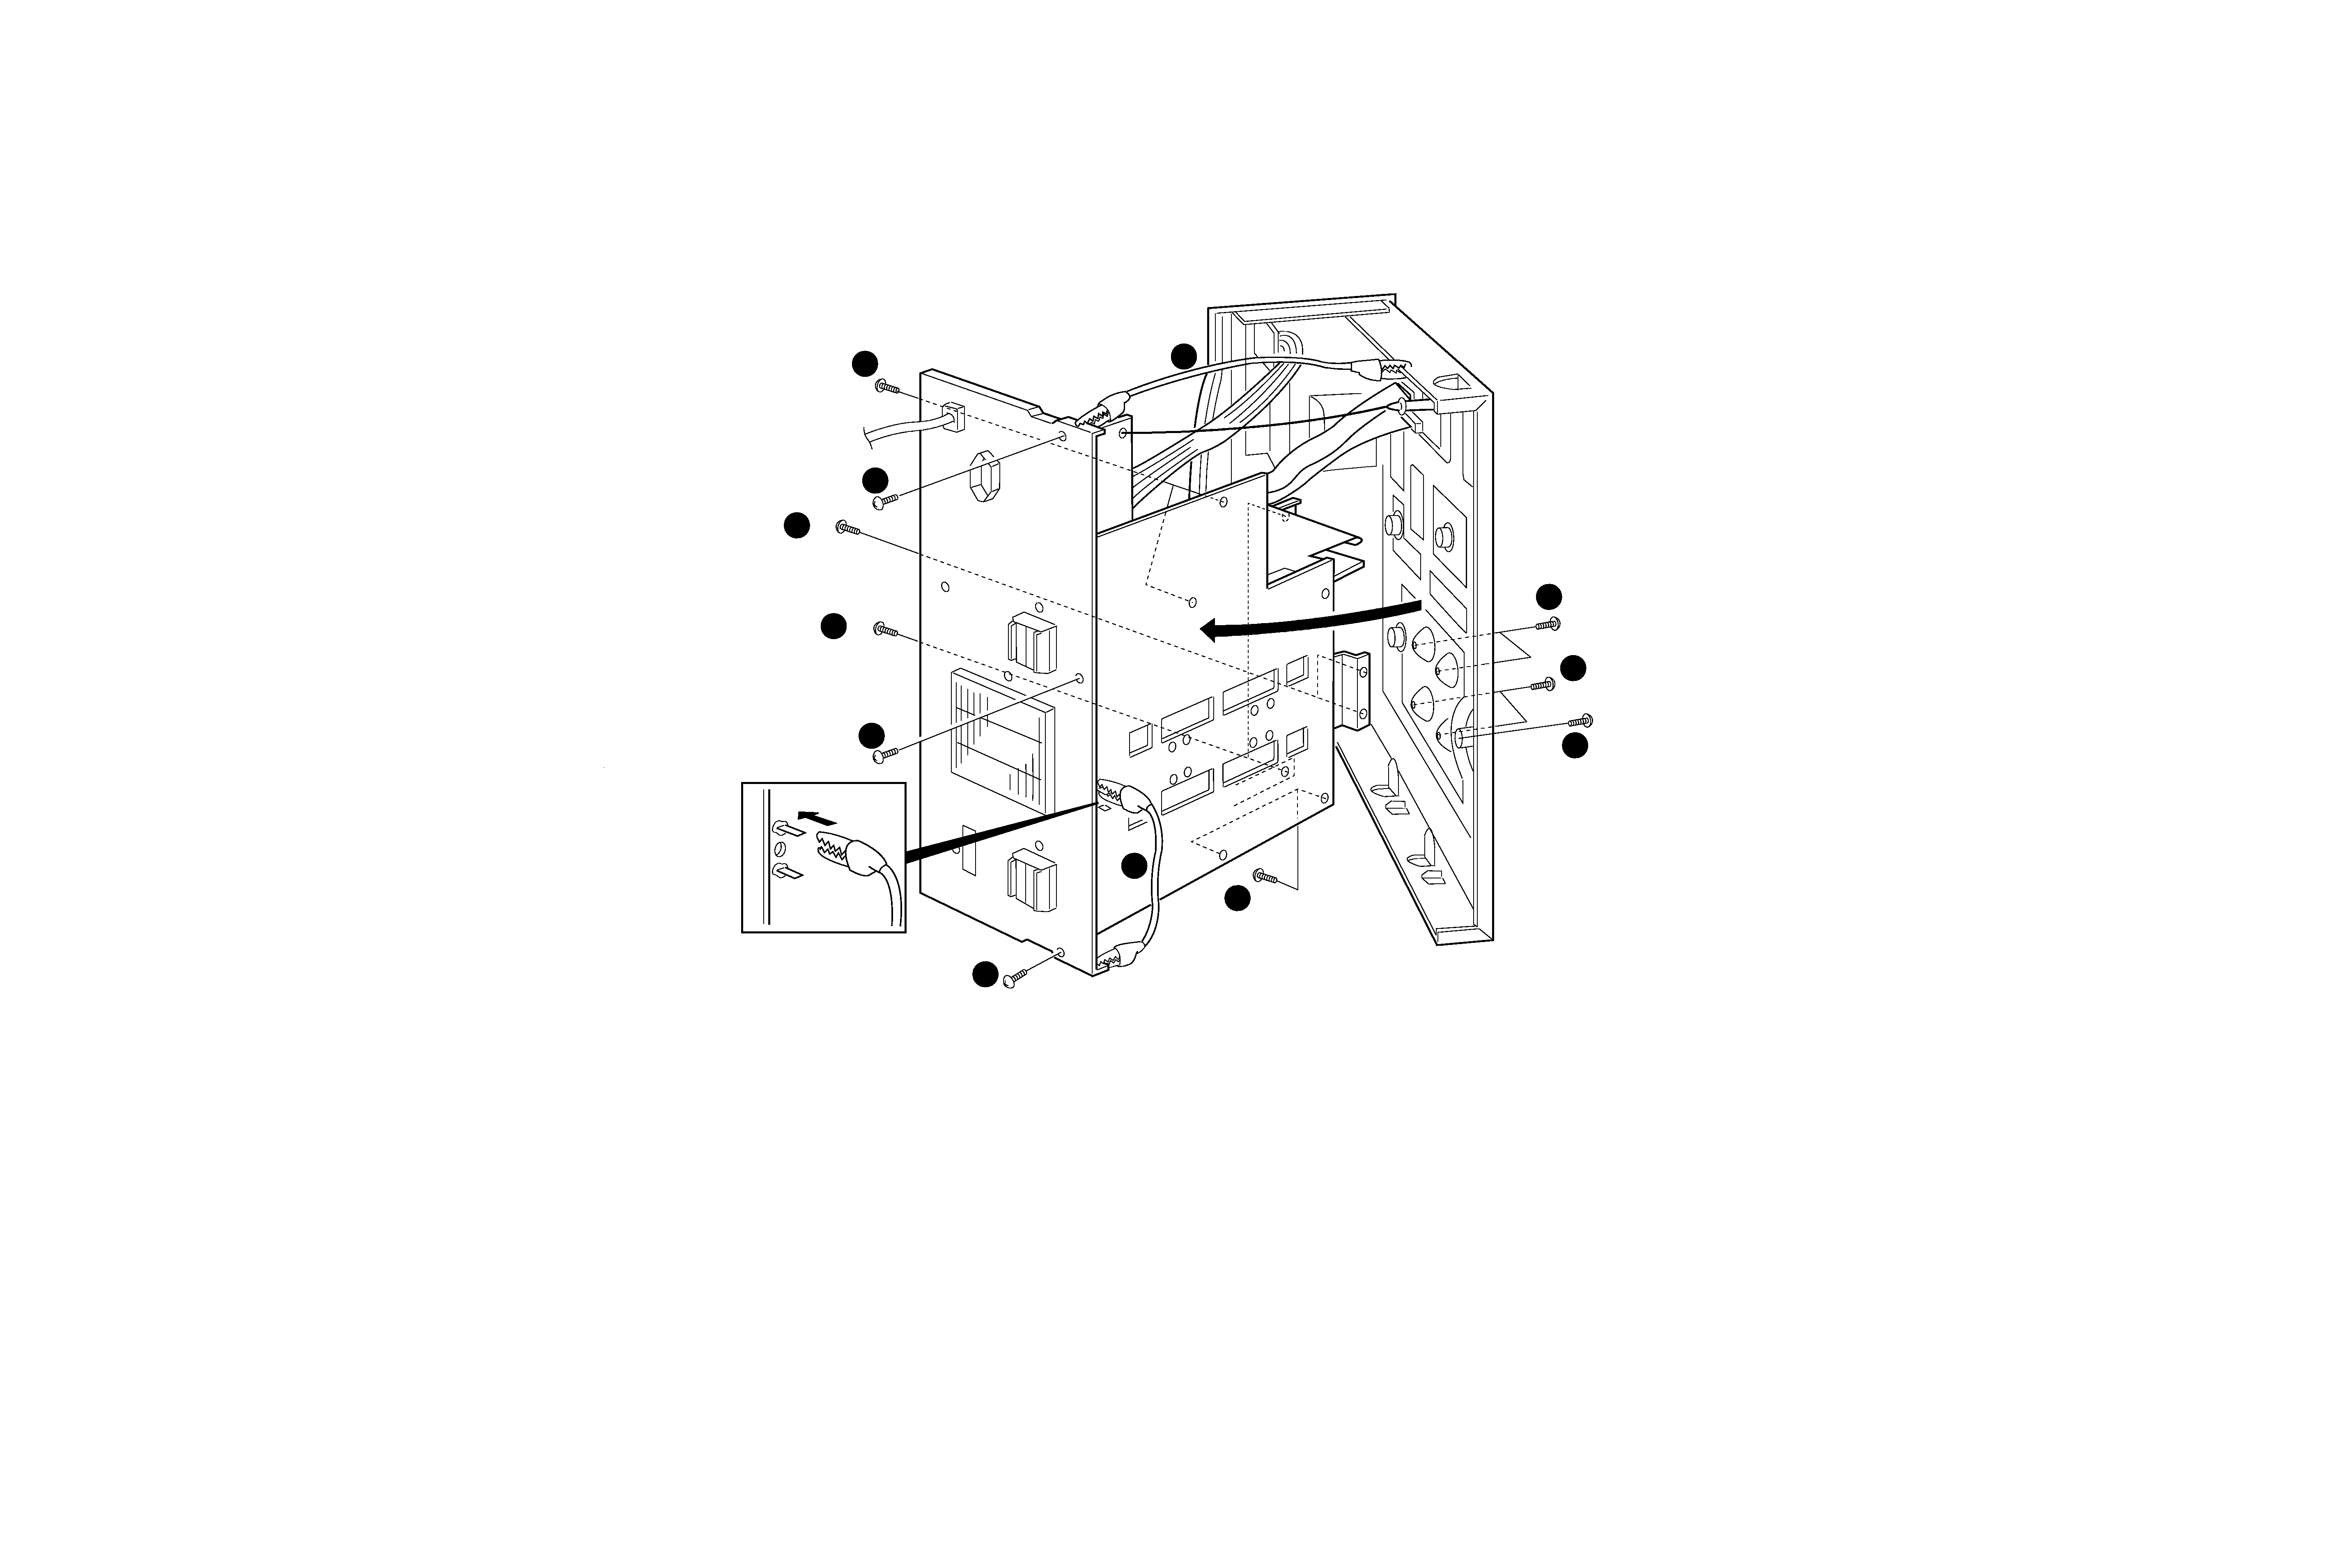
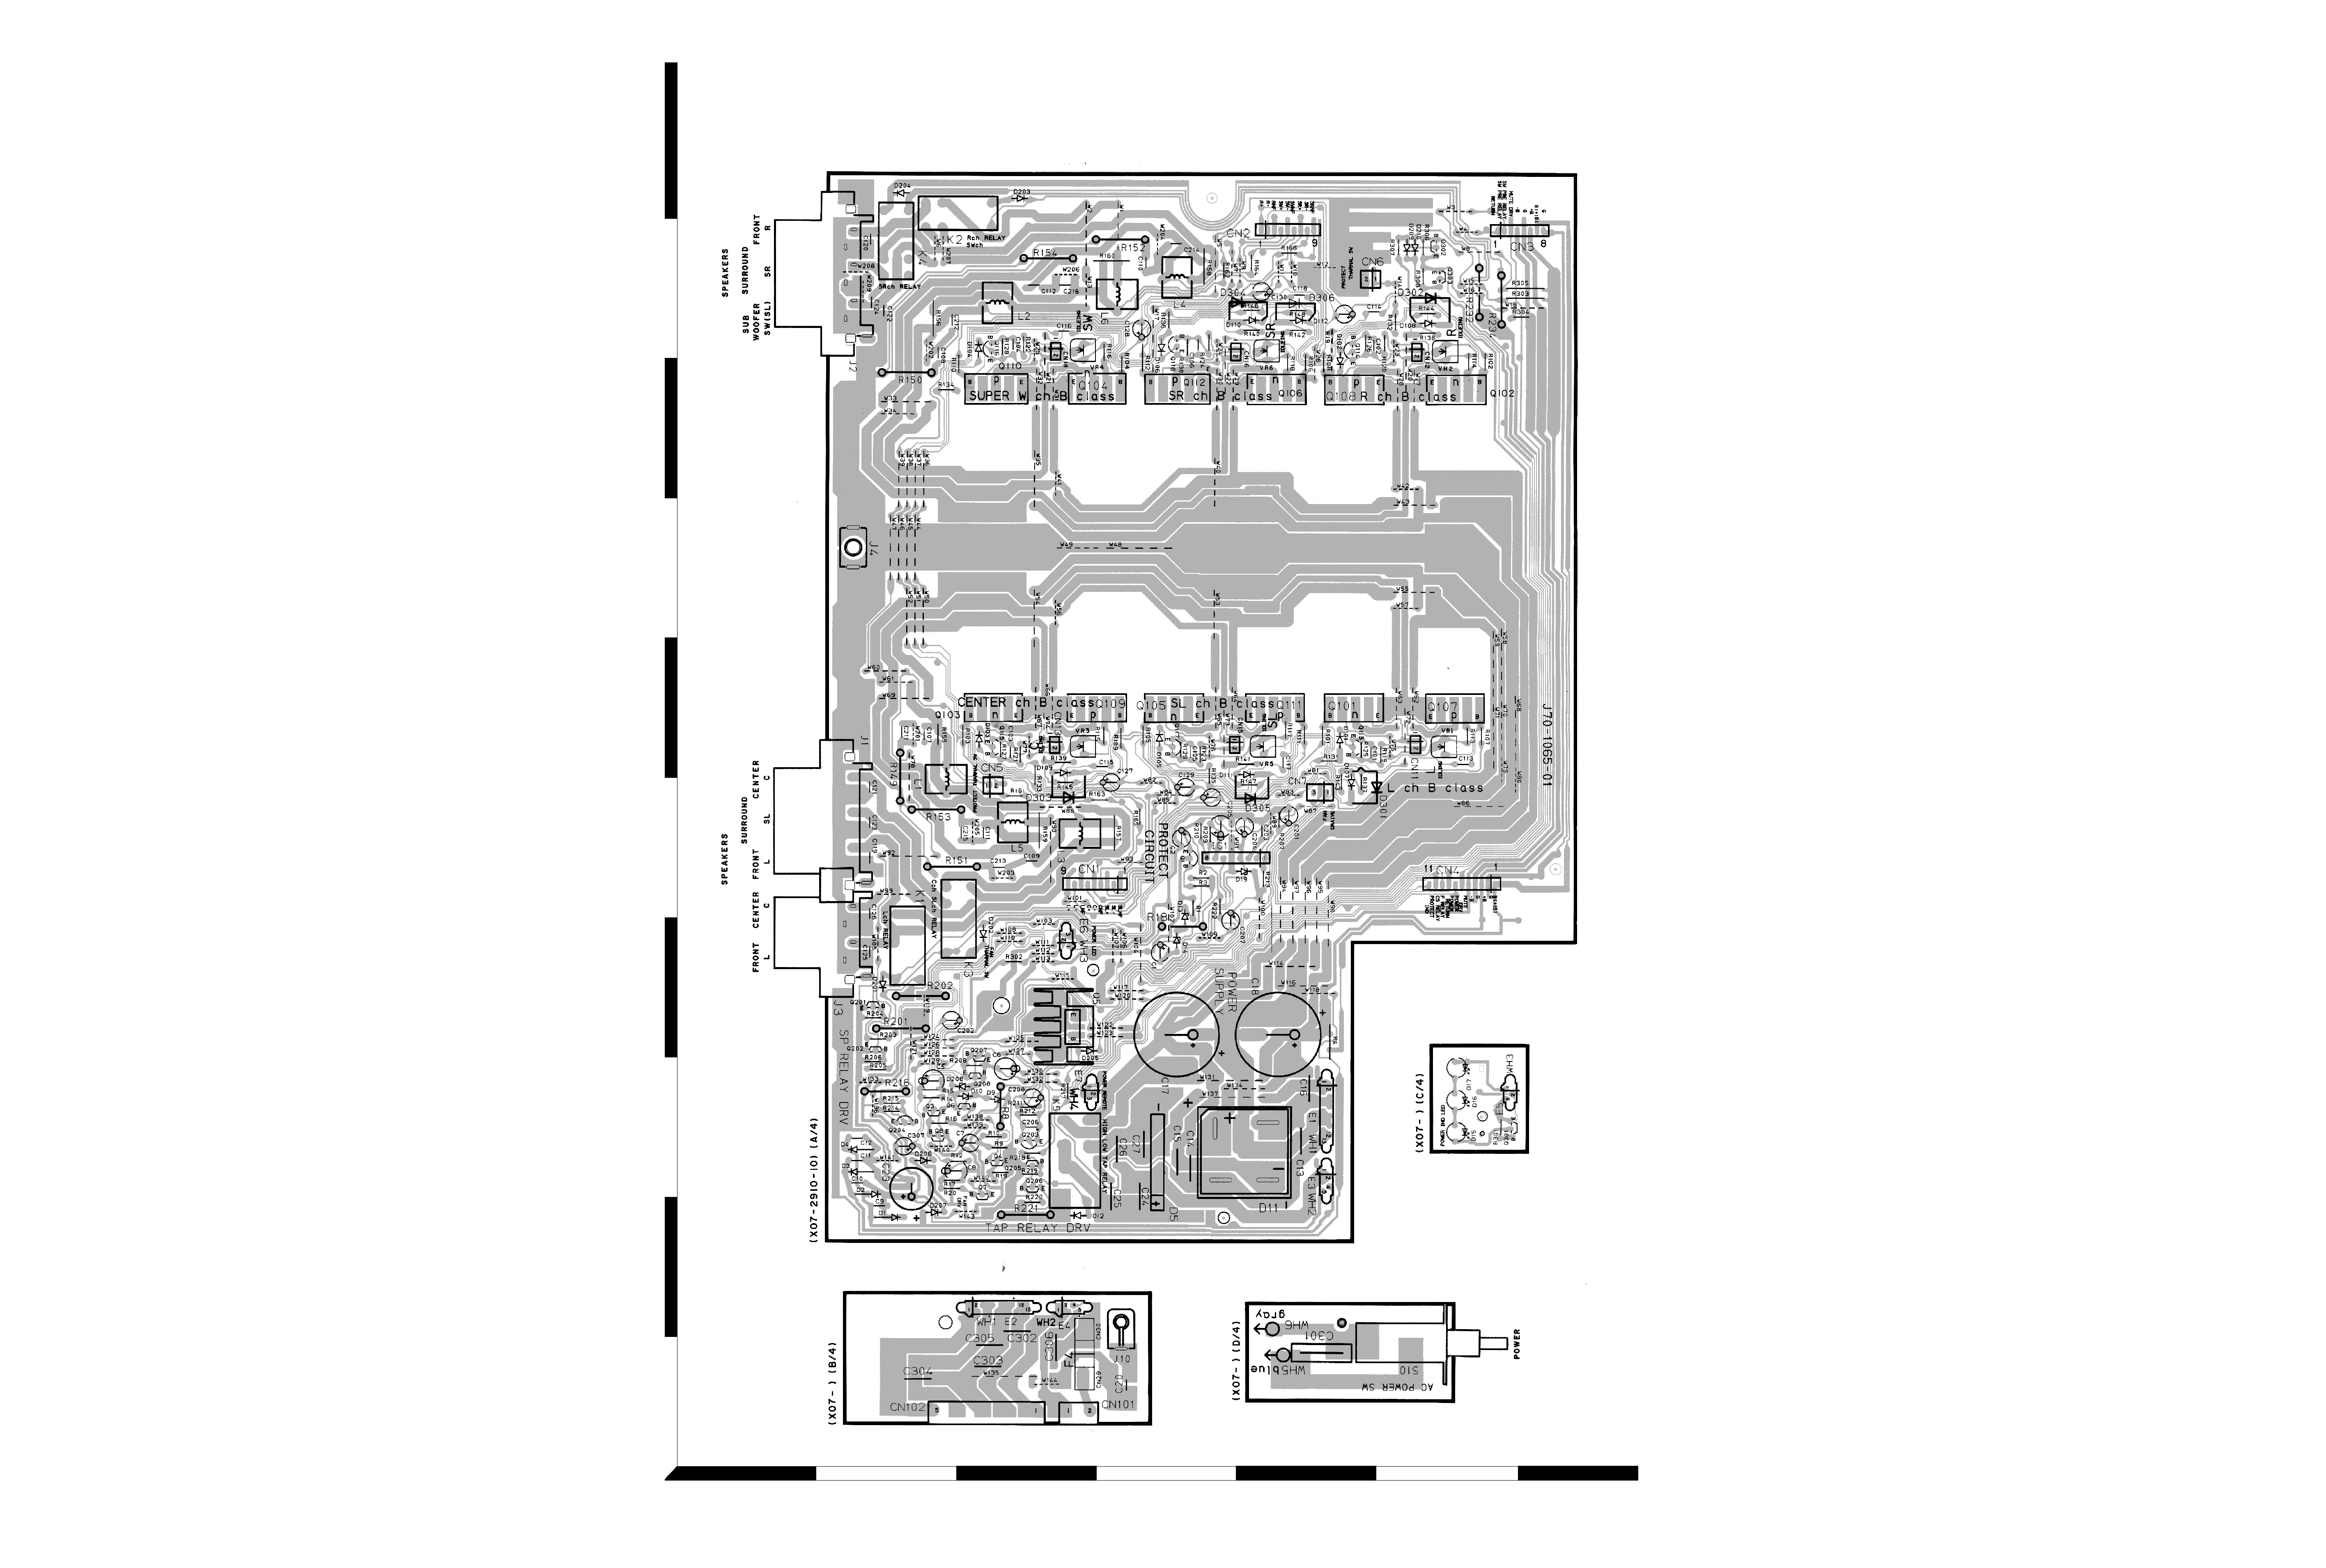
- KENWOOD M-A100 Service Manual

Service Manual for KENWOOD M-A100, downloadable as a PDF file.
We also have owner's manual to this model.


Copyright © Manual-Buddy.com. All rights reserved.
All trademarks and brands are the property of their respective owners.
[email protected] | +48 536 948 240


