KENWOOD M-909DV Owner's Manual

Cover page of KENWOOD M-909DV Owner's Manual

Owner's Manual for KENWOOD M-909DV, downloadable as a PDF file.

Manual details

  • Immediate download after payment.
  • Delivered as a PDF file.
  • The manual has 28 pages
  • File size: 0.84 MB
  • Available language versions: French, English, Spanish, Dutch, German, Italian
  • Different language versions may vary sligthly in file size and page count.

We guarantee that...

  • our manuals are complete,
  • our manuals are checked with antivirus,
  • We'll issue refund if the manual is damaged, incomplete or unreadable (our refund policy)

Sample pages

Thumbnail of page 1Thumbnail of page 2Thumbnail of page 3Thumbnail of page 4
Thumbnail of page 5Thumbnail of page 6Thumbnail of page 7Thumbnail of page 8
Thumbnail of page 9
background image
© B60-5817-08/00 (E, X)
DVD COMPACT Hi-Fi COMPONENT SYSTEM
M-909DV
INSTRUCTION MANUAL
Declaration of Conformity with regard to the EMC Directive
2004/108/EC
Manufacturer:
Kenwood Corporation
2967-3 Ishikawa-machi, Hachioji-shi, Tokyo, 192-8525 Japan
EU Representative's:
Kenwood Electronics Europe BV
Amsterdamseweg 37, 1422 AC UITHOORN, The Netherlands
This model consists of a main unit (RXD-M909) and a pair of speakers (LS-M909).
background image
2 | M-909DV
Before applying power
¤ Caution : Read this page carefully to
ensure safe operation.
Units are designed for operation as follows.
Australia ........................................................... AC 240 V only
Europe .............................................................. AC 230 V only
Safety precautions
WARNING : TO PREVENT FIRE
OR ELECTRIC SHOCK, DO NOT
EXPOSE THIS APPLIANCE TO
RAIN OR MOISTURE.
The marking of products using lasers
The marking this product has been classified as
Class 1. It means that there is no danger of hazard-
ous radiation outside the product.
Location: Bottom
CLASS 1 LASER PRODUCT
KLASSE 1 LASER PRODUKT
LUOKAN 1 LASER LAITE
KLASS 1 LASER APPARAT
CLASSE 1 PRODUIT LASER
IMPORTANT SAFETY
INSTRUCTIONS
¤ Caution : Read this page carefully to
ensure safe operation.
Read Instructions ­ All the safety and operating
instructions should be read before the product is
operated.
Retain Instructions ­ The safety and operating
instructions should be retained for future reference.
Heed Warnings ­ All warnings on the product and in
the operating instructions should be adhered to.
Follow Instructions ­ All operating and use
instructions should be followed.
1. Cleaning ­ Unplug this product from the wall
outlet before cleaning. Do not use liquid cleaners or
aerosol cleaners. Use a damp cloth for cleaning.
2. Attachments ­ Do not use attachments not
recommended by the product manufacturer as they
may cause hazards.
3. Water and Moisture ­ This product shall not be
exposed to dripping and splashing ­ for example, near
a bath tub, wash bowl, kitchen sink, or laundry tub; in
a wet basement; or near a swimming pool; and the
like. Do not place an object containing liquid, such as a
flower vase, on the appliance.
4. Accessories ­ Do not place this product on an
unstable cart, stand, tripod, bracket, or table. The
product may fall, causing serious injury to a child or
adult, and serious damage to the product. Use only with
a cart, stand, tripod, bracket, or table recommended
by the manufacturer. Any mounting of the product
should follow the manufacturer's instructions, and
should use a mounting accessory recommended by the
manufacturer.
A product and cart combination should
be moved with care. Quick stops,
excessive force, and uneven surfaces may
cause the product and cart combination
to overturn.
5. Ventilation ­ Slots and openings in the cabinet are
provided for ventilation and to ensure reliable operation
of the product and to protect it from overheating,
and these openings must not be blocked or covered.
The openings should never be blocked by placing the
product on a bed, sofa, rug, or other similar surface. This
product should not be placed in a built-in installation
such as a bookcase or rack unless proper ventilation is
provided or the manufacturer's instructions have been
adhered to.
CAUTION
RISK OF ELECTRIC SHOCK
DO NOT OPEN
CAUTION: TO REDUCE THE RISK OF ELECTRIC SHOCK,
DO NOT REMOVE COVER (OR BACK). NO USER-
SERVICEABLE PARTS INSIDE. REFER SERVICING TO
QUALIFIED SERVICE PERSONNEL.
THE LIGHTNING FLASH WITH ARROWHEAD
SYMBOL, WITHIN AN EQUILATERAL TRI-
ANGLE, IS INTENDED TO ALERT THE USER
TO THE PRESENCE OF UNINSULATED "DAN-
GEROUS VOLTAGE" WITHIN THE PRODUCT'
S ENCLOSURE THAT MAY BE OF SUFFICIENT
MAGNITUDE TO CONSTITUTE A RISK OF
ELECTRIC SHOCK TO PERSONS.
THE EXCLAMATION POINT WITHIN AN EQUI-
LATERAL TRIANGLE IS INTENDED TO ALERT
THE USER TO THE PRESENCE OF IMPORTANT
OPERATING AND MAINTENANCE (SERVIC-
ING) INSTRUCTIONS IN THE LITERATURE AC-
COMPANYING THE APPLIANCE.
background image
English
|
3
6. Power Sources ­ This product should be operated
only from the type of power source indicated on the
product. If you are not sure of the type of power supply
to your home, consult your product dealer or local power
company.
7.
CAUTION ­ Polarization ­ This product may
be equipped with a polarized alternating-current line
plug (a plug having one blade wider than the other).
This plug will fit into the power outlet only one way. This
is a safety feature. If you are unable to insert the plug
fully into the outlet, try reversing the plug. If the plug
should still fail to fit, contact your electrician to replace
your obsolete outlet. Do not defeat the safety purpose
of the polarized plug.
8. Power Cord Protection ­ Power-supply cords
should be routed so that they are not likely to be
walked on or pinched by items placed upon or against
them, paying particular attention to cords at plugs,
convenience receptacles, and the point where they exit
from the product.
9. Lightning ­ For added protection for this product
during a lightning storm, or when it is left unattended
and unused for long periods of time, unplug it from
the wall outlet and disconnect the antenna or cable
system. This will prevent damage to the product due to
lightning and power-line surges.
10.Overloading ­ Do not overload wall outlets,
extension cords, or integral convenience receptacles as
this can result in a risk of fire or electric shock.
11.Object and Liquid Entry ­ Never push objects of
any kind into this product through openings as they
may touch dangerous voltage points or short-out parts
that could result in a fire or electric shock. Never spill
liquid of any kind on the product.
12.Servicing ­ Do not attempt to service this product
yourself as opening or removing covers may expose
you to dangerous voltage or other hazards. Refer all
servicing to qualified service personnel.
13.Damage Requiring Service ­ Unplug this product
from the wall outlet and refer servicing to qualified
service personnel under the following conditions:
a) When the power-supply cord or plug is damaged,
b) If liquid has been spilled, or objects have fallen
into the product,
c) If the product has been exposed to rain or water,
d) If the product does not operate normally by
following the operating instructions.
e) If the product has been dropped or damaged in
any way, and
f) When the product exhibits a distinct change in
performance ­ this indicates a need for service.
g) If an abnormal smell or smoke is detected.
14.Replacement Parts
­ When replacement parts
are required, be sure the service technician has used
replacement parts specified by the manufacturer or have
the same characteristics as the original part. Unauthorized
substitutions may result in fire, electric shock, or other
hazards.
15.Safety Check ­ Upon completion of any service
or repairs to this product, ask the service technician to
perform safety checks to determine that the product is
in proper operating condition.
16.Wall or Ceiling Mounting ­ This product should
be mounted to a wall or ceiling only as recommended
by the manufacturer.
17.Heat ­ This product should be situated away from
heat sources such as radiators, heat registers, stoves,
or other products that produce heat. Do not place a
flaming object, such as a candle or lantern, or near the
product.
18.Power Lines ­ An outside antenna system should
not be located in the vicinity of overhead power lines
or other electric light or power circuits, or where it can
fall into such power lines or circuits. When installing an
outside antenna system, extreme care should be taken
to keep from touching such power lines or circuits as
contact with them might be fatal.
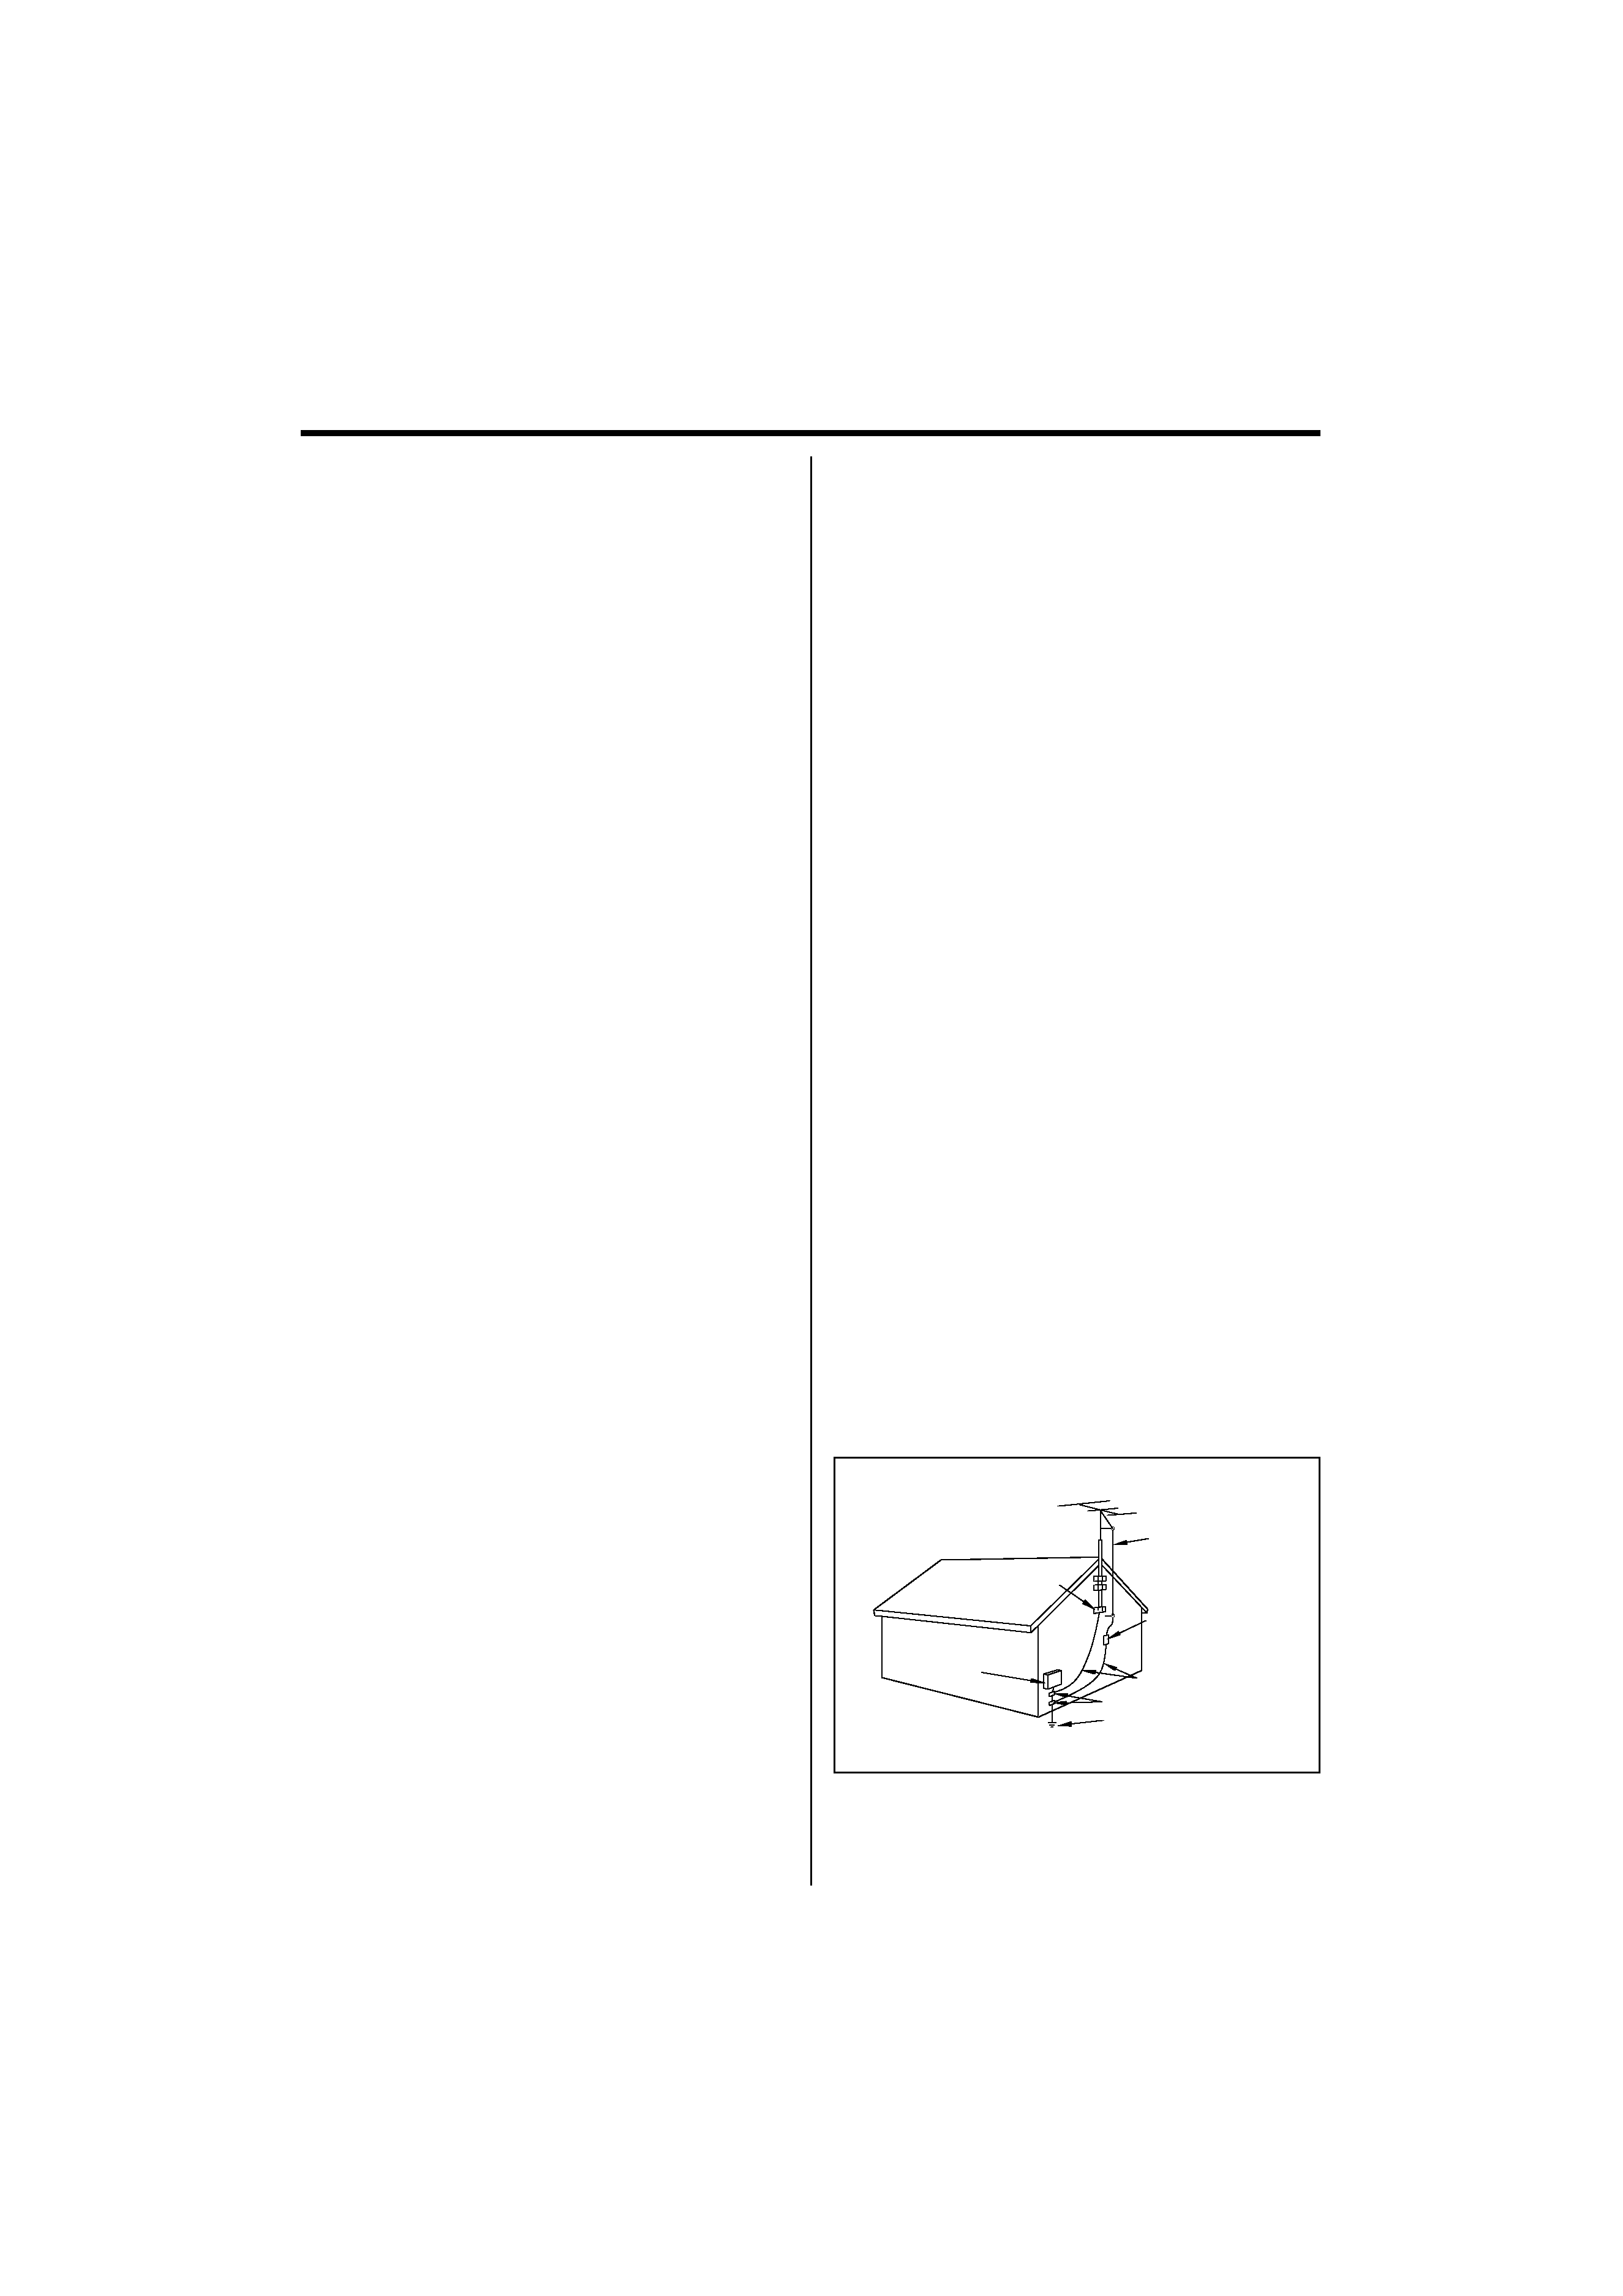
19.Outdoor Antenna Grounding ­ If an outside
antenna or cable system is connected to the product, be
sure the antenna or cable system is grounded so as to
provide some protection against voltage surges and built-
up static charges. Article 810 of the National Electrical
Code, ANSI/NFPA 70, provides information with regard to
proper grounding of the mast and supporting structure,
grounding of the lead-in wire to an antenna discharge
unit, size of grounding conductors, location of antenna-
discharge unit, connection to grounding electrodes, and
requirements for the grounding electrode.
I
EXAMPLE OF ANTENNA GROUNDING AS PER
NATIONAL ELECTRICAL CODE
POWER SERVICE GROUNDING
ELECTRODE SYSTEM
(NEC ART 250, PART H)
NEC ­ NATIONAL ELECTRICAL CODE
GROUNDING CONDUCTORS
(NEC SECTION 810-21)
ANTENNA
LEAD IN WIRE
ANTENNA
DISCHARGE UNIT
(NEC SECTION 810-20)
GROUND CLAMP
ELECTRIC
SERVICE
EQUIPMENT
GROUND CLAMPS
Notes:
1. Item 7 is not required except for grounded or
polarized equipment.
2. Item 19 complies with UL in the U.S.A.
background image
4 | M-909DV
Before applying power
Unpacking
Unpack the unit carefully and make sure that all
accessories are present.
Video code (Yellow) ........................................................................ (x 1)
FM indoor antenna.......................................................................... (x 1)
AM loop antenna.............................................................................. (x 1)
Remote control unit........................................................................ (x 1)
Battery (AAA/R3) ............................................................................... (x 2)
If any accessories are missing, or if the unit is damaged of
falls to operate, notify your dealer immediately. If your unit
was shipped to you directly, notify your shipper immediately.
Kenwood recommends that you retain the original carton and
packing materials in case you need to move or ship the unit in
the future.
Keep this manual handy for future reference.
Standby mode
While the standby indicator is lit, a small amount of power
is supplied to the system to back up the memory. This is
called standby mode. Under the condition, the system can
be turned ON by the remote control unit.
About the
Symbol Display
"
" may appear on your TV display during operation
and indicates that the function explained in this
instruction manual is not available.
Video formats
You must select the appropriate system mode for your TV
system. Remove any disc that might be in the unit, press
and hold [STEP (
8)] for more than 5 seconds to be able
to select a system (PAL, NTSC, AUTO).
Contents
Caution : Read the pages marked
¤ carefully to
ensure safe operation.
¤Before applying power ..............................2
¤Safety precautions...............................................................2
¤IMPORTANT SAFETY INSTRUCTIONS ........2
Disc information .............................................5
Connections ....................................................6
Names and functions of parts .......................8
Settings .........................................................10
OSD Initial language settings ........................................... 10
Initial Setting the Area Code ............................................. 10
Symbol Used in this Manual.............................................. 10
Adjust the settings................................................................... 10
LANGUAGE ................................................................................... 10
DISPLAY .......................................................................................... 11
AUDIO.............................................................................................. 11
LOCK................................................................................................. 11
OTHERS ........................................................................................... 11
Displaying Disc Information .............................................. 12
Hierarchical structure of VCD menus
(P.B.C. function)
(P.B.C. function)
.................................................. 12
Setting the Clock ...................................................................... 12
Setting the sound mode ..................................................... 13
Operations ....................................................13
Playing a Disc.............................................................................. 13
Playing a DivX movie file ..................................................... 15
Listening to Audio CD, MP3 or WMA files ................. 15
Viewing photo files
................................................. 16
Listening to the radio............................................................. 17
Listening to cassette tapes................................................. 17
Tape Recording.......................................................................... 18
CD Synchronized Recording ............................................. 18
Listening to music from your portable player........ 18
Connecting your portable USB player ........................ 19
USB Direct Recording ............................................................ 19
Notes..............................................................20
Language Codes / Area Codes .....................22
In case of difficulty........................................23
Specifications................................................24
background image
English
|
5
Disc information
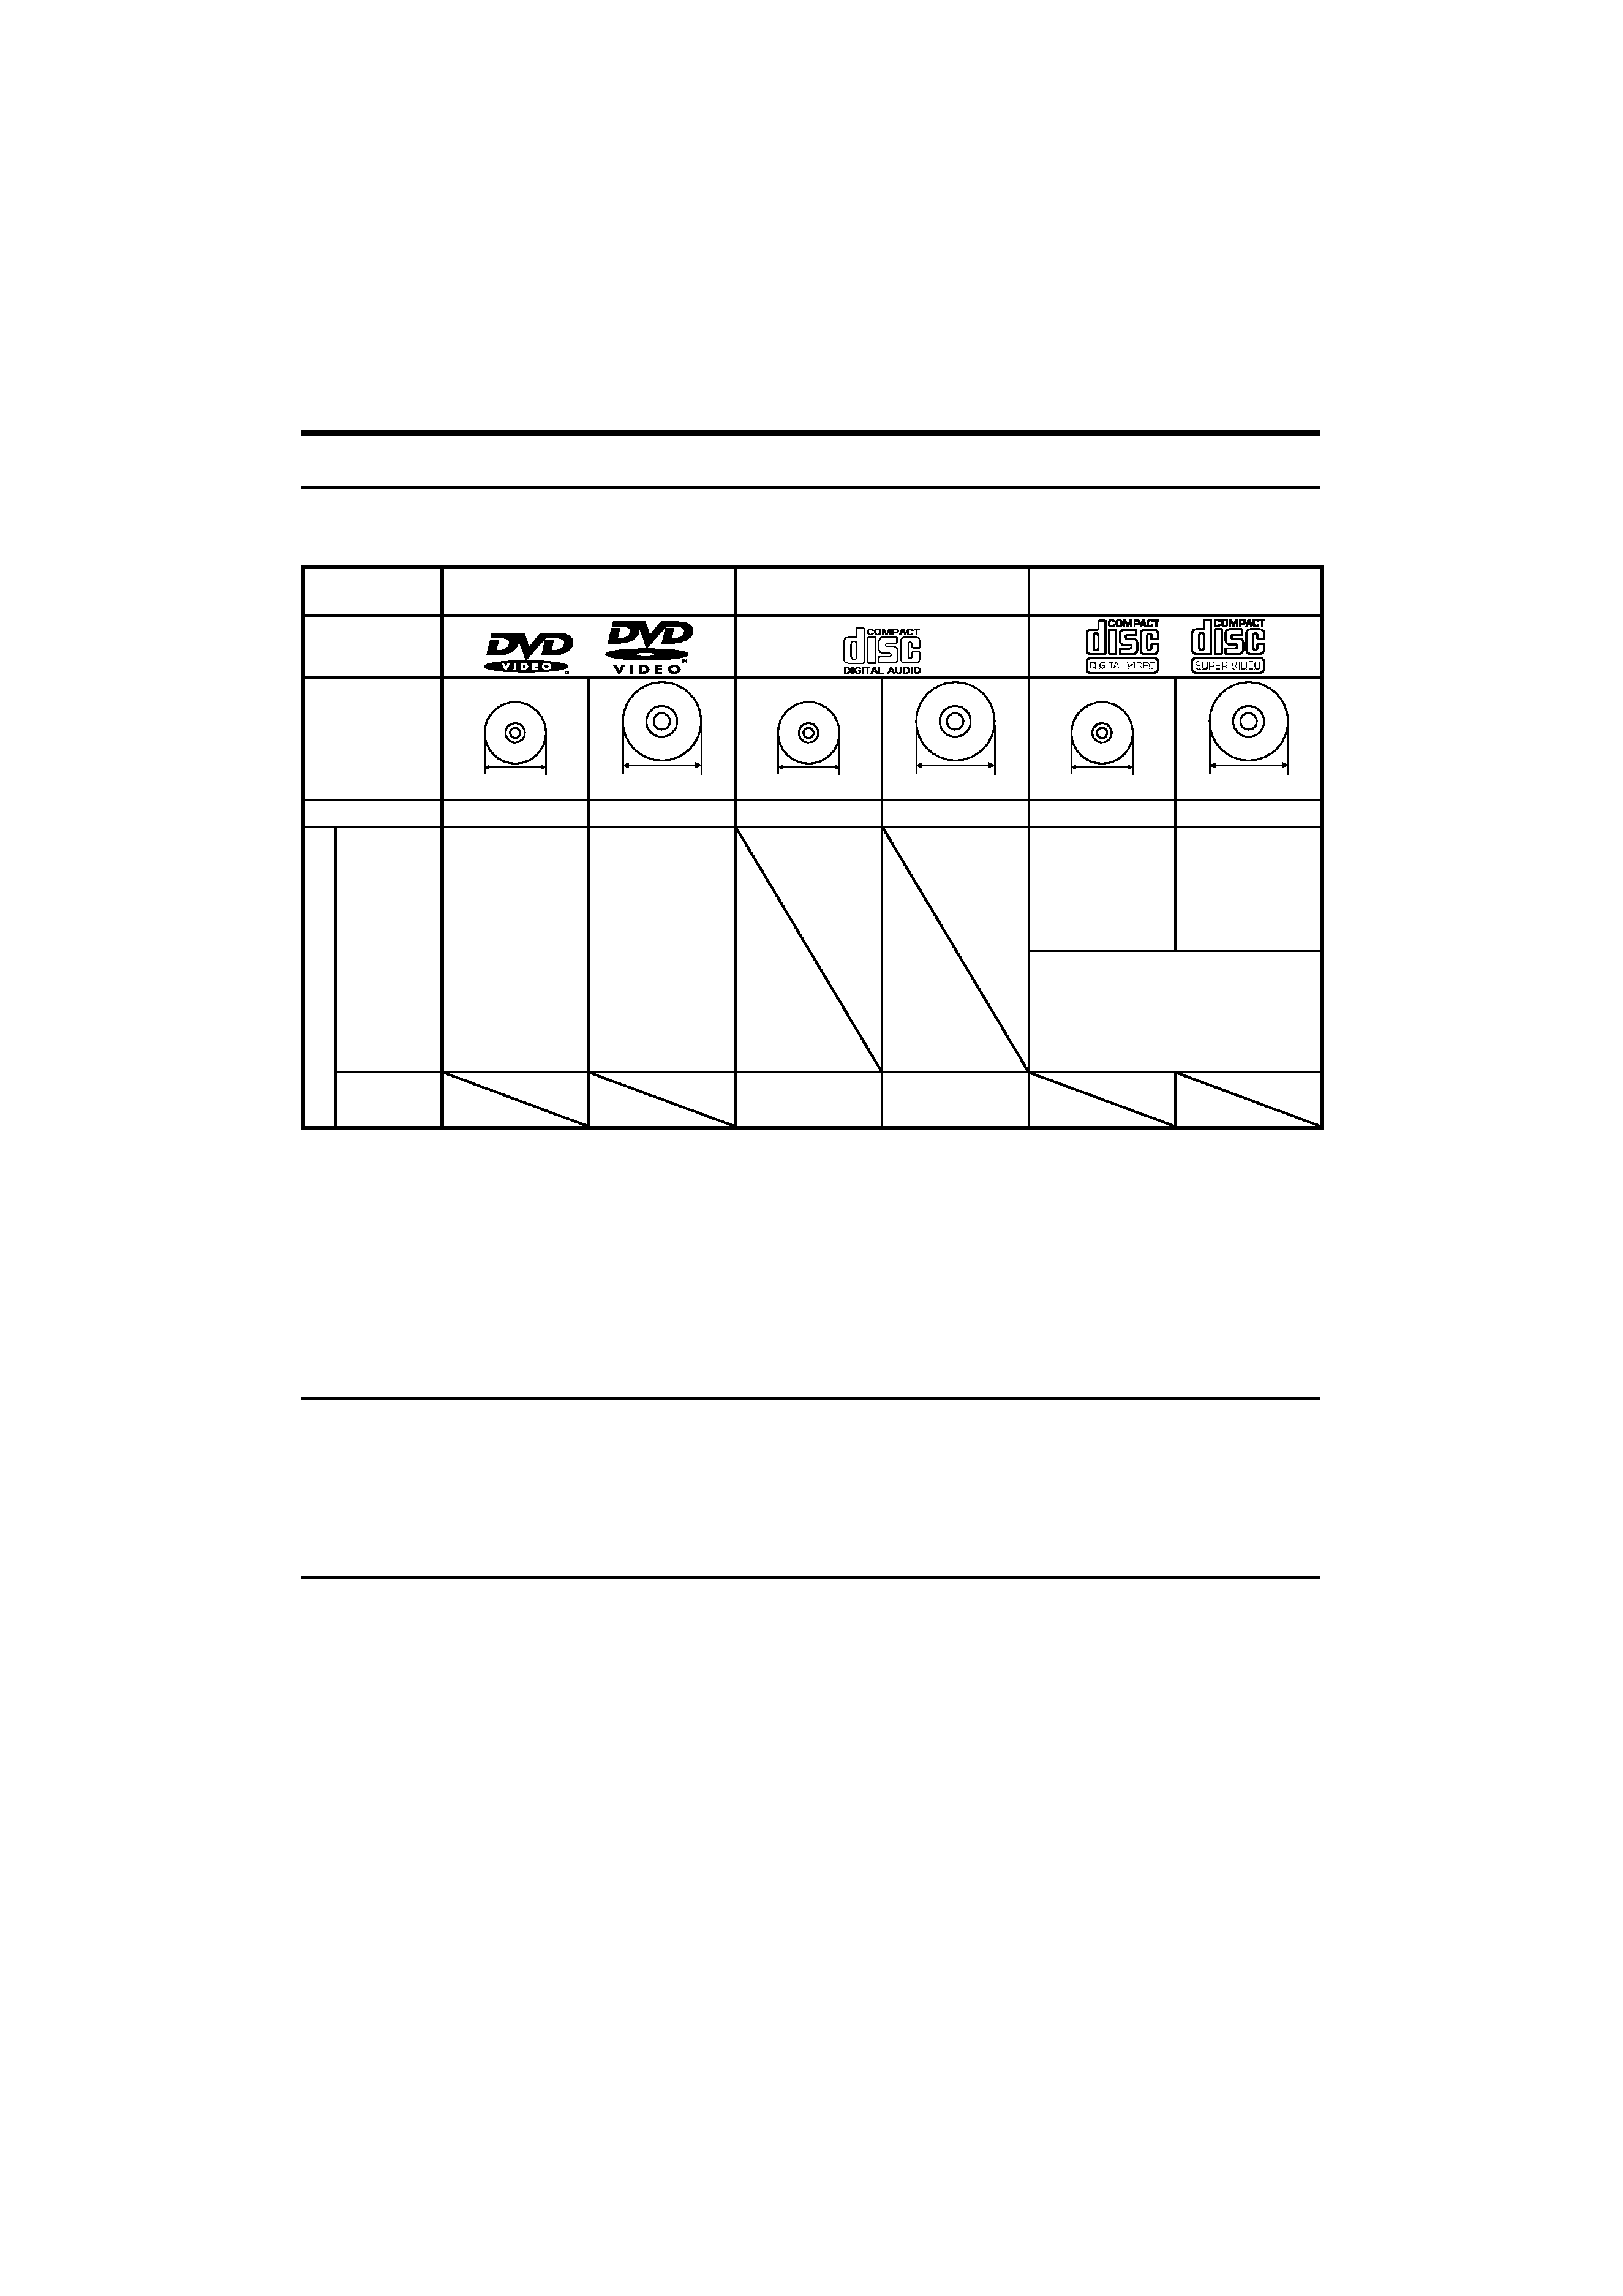
Types of Playable Discs
The system this unit is using does not only play music from CD but can also play the discs listed below to offer
you high-quality entertainment of video of movies and live concerts.
Playable Disc
DVD VIDEO
(DVD-R/RW, DVD+R/RW)
CD (CD-R, CD-RW)
VCD (SVCD*)
Logo mark
on disc
Disc size
8 cm
12 cm
8 cm
12 cm
8 cm
12 cm
Played sides
One or both
One or both
One side only
One side only
One side only
One side only
Co
n
te
n
ts
Video +
Audio
Approx. 41 min.
(1 side, 1 layer)
Approx. 75 min.
(1 side, 2 lay-
ers)
Approx. 82 min.
(2 sides, 1
layer)
Approx. 150 min.
(2 sides, 2 lay-
ers)
Approx. 133 min.
(1 side, 1 layer)
Approx. 242 min.
(1 side, 2 lay-
ers)
Approx. 266 min.
(2 sides, 1
layer)
Approx. 484 min.
(2 sides, 2 lay-
ers)
Max. 20 min.
Max. 74 min.
(In case of an SVCD, the possible
playback time becomes shorter.)
Audio
Max. 20 min., digi-
tal
Max. 80 min.,
digital
· * This unit can play SVCDs, but some functions will not work.
·
A Dual Disc is a two-sided disc combining a DVD side according to the DVD standard and a music side. The video content re-
corded on the DVD side can be played back. As the music side is not compatible with the Compact Disc (CD) standard, playback
on this unit is not assured.
·
This unit can play back DVD-R and DVD-RW discs recorded in the DVD VIDEO format and DVD+R and DVD+RW discs, but de-
pending on the recording unit, the disc manufacturer, etc., playback sometimes may not be possible.
·
This unit may also be incapable of playing certain CD-R/RW discs depending on their properties, recording conditions, etc.
·
This player cannot play back discs compatible with CPRM. CPRM is the abbreviation of Content Protection for Recordable Media,
and it is a technique for copyright protection for recording media.
Unplayable discs
This player cannot play back any of the following discs.
DVD AUDIO discs, DVD-RAM discs, SACD discs, VSD discs, CDV discs (Only the audio part can be reproduced.), CD-G/CD-EG/
CD-EXTRA discs (Only the audio can be reproduced.)
Regional code
This unit has a regional code printed on the rear of the unit. This unit can play only DVD discs labeled same as the
rear of the unit or "ALL".
·
Most DVD discs have a globe with one or more numbers in it clearly visible on the cover. This number must match your unit's
regional code or the disc cannot play.
·
If you try to play a DVD with a different regional code from your unit, the message "Check Regional Code" appears on the TV
screen.

Reviews

There are no reviews of this manual yet.