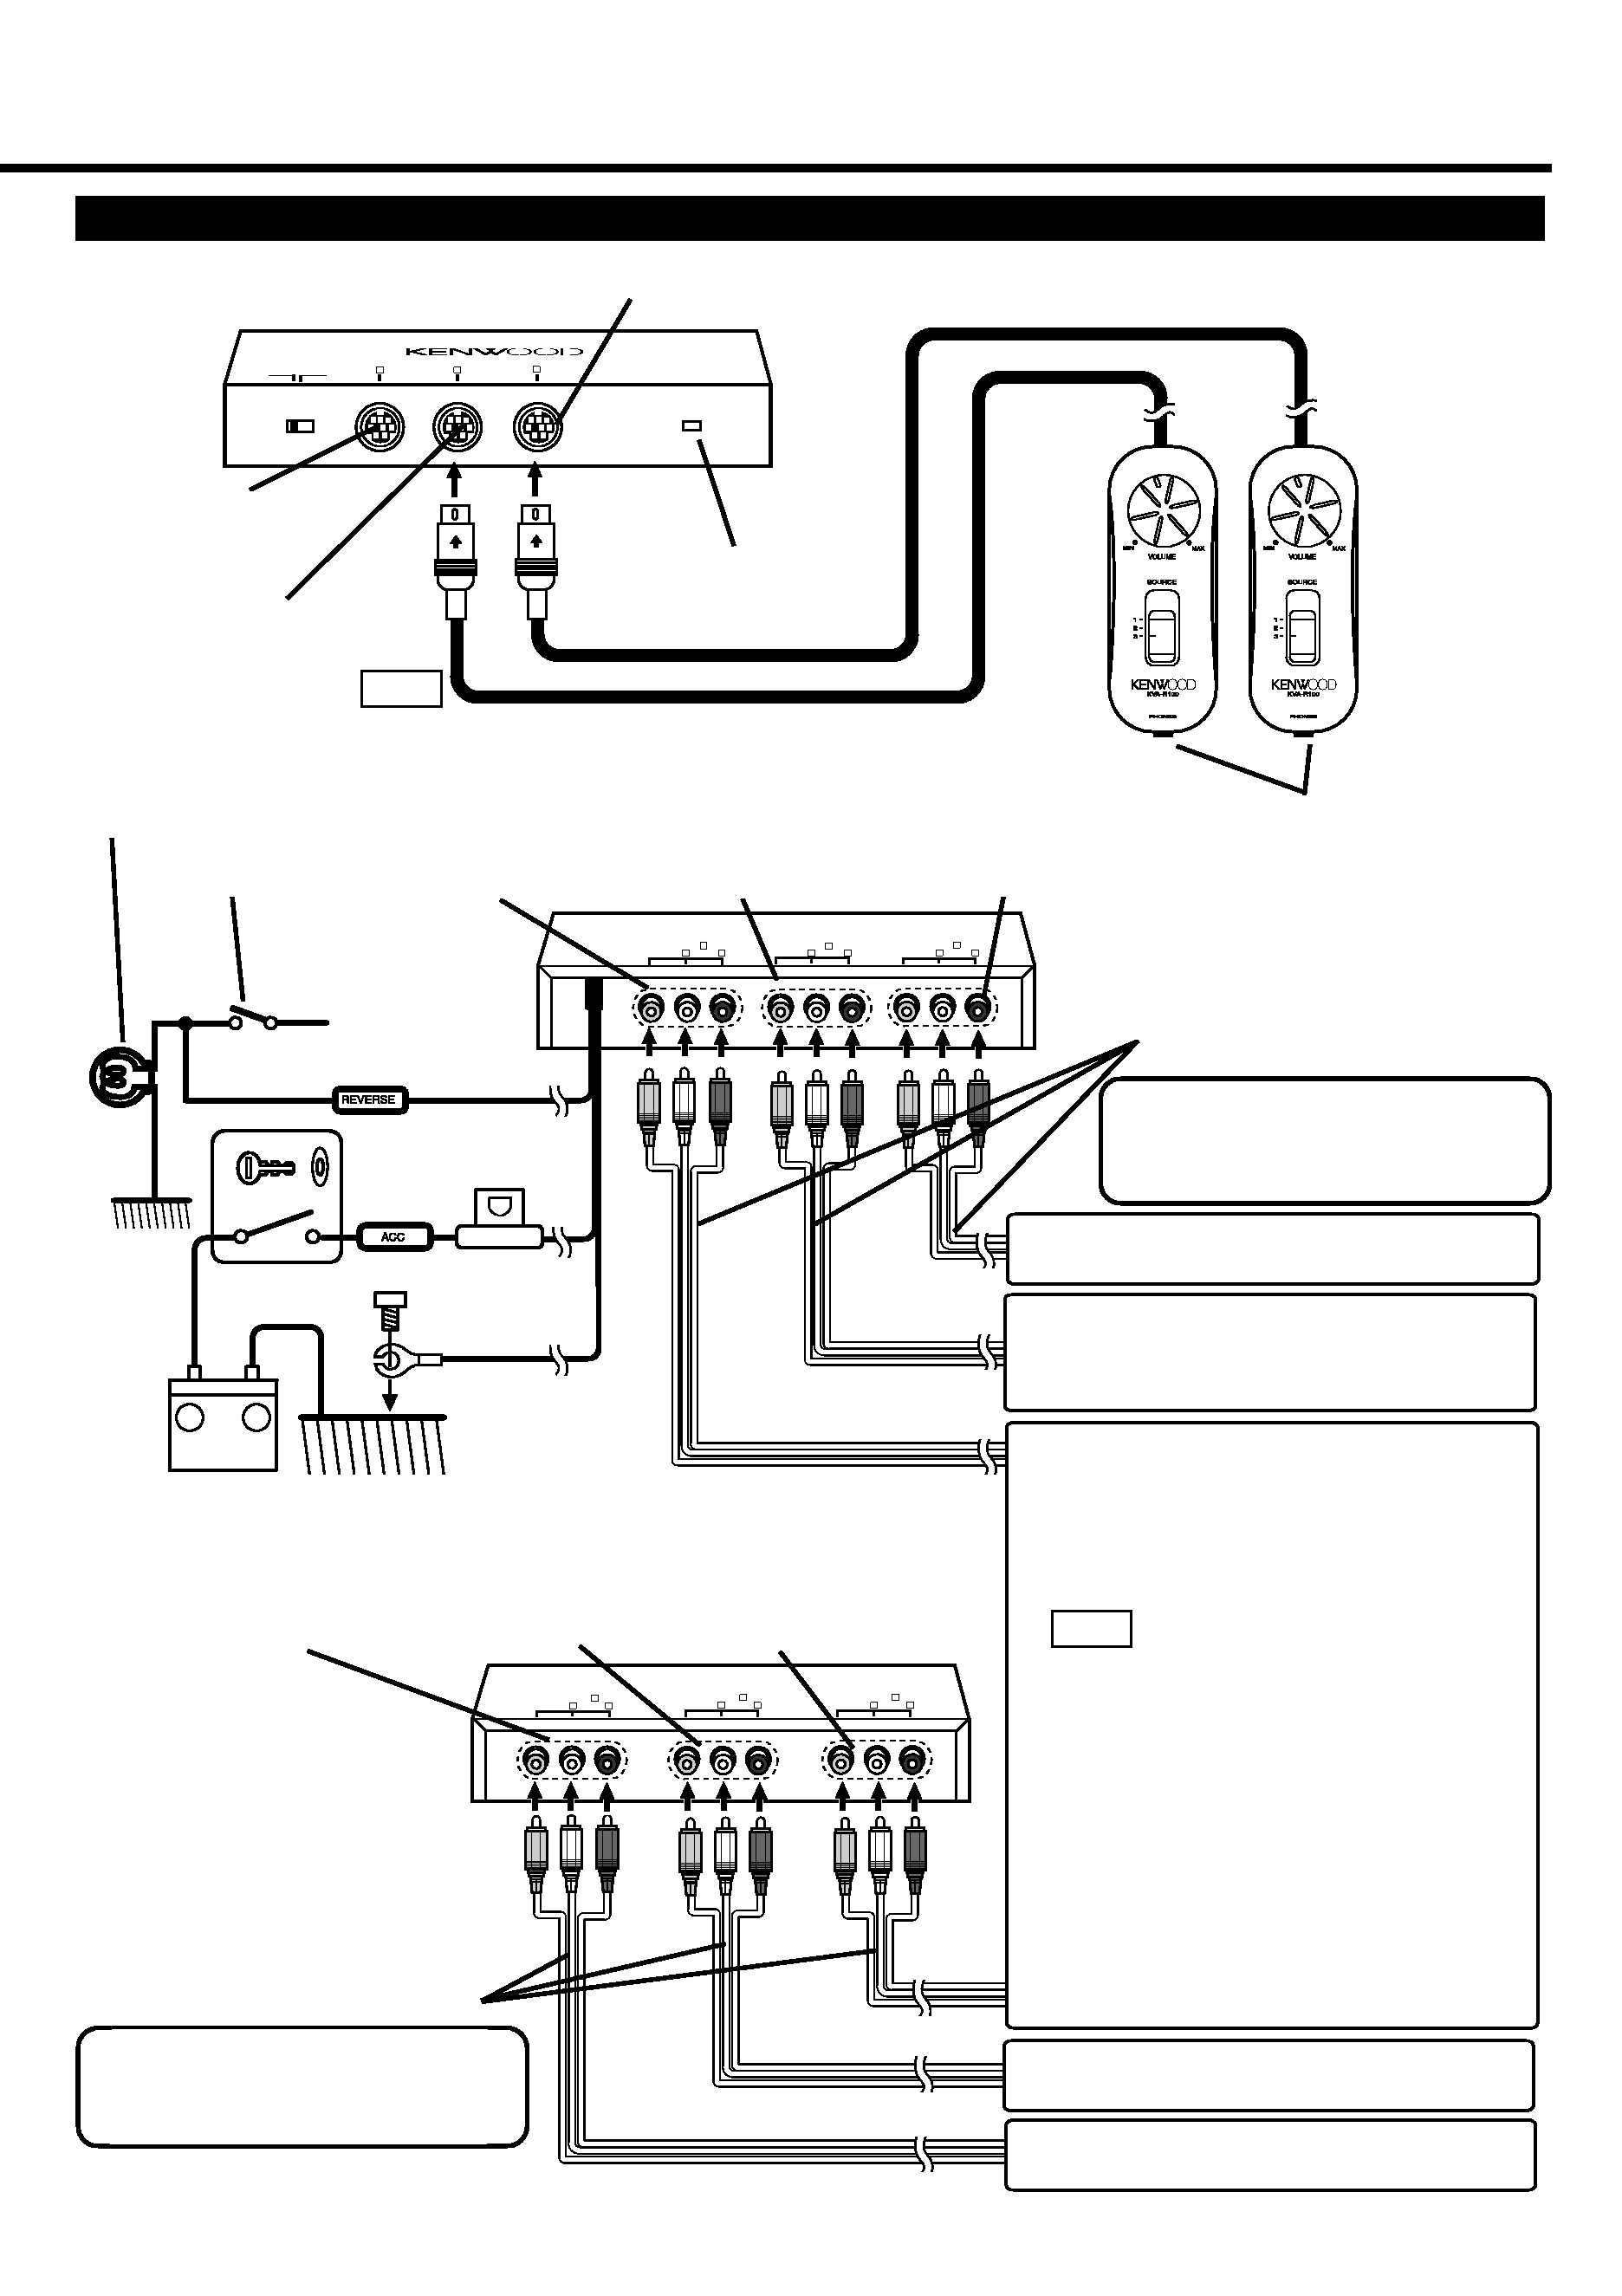
AV-in source switching
English
-5
Operation of remote controller
Operation
REVERSE VIDEO AUTO/OFF switching
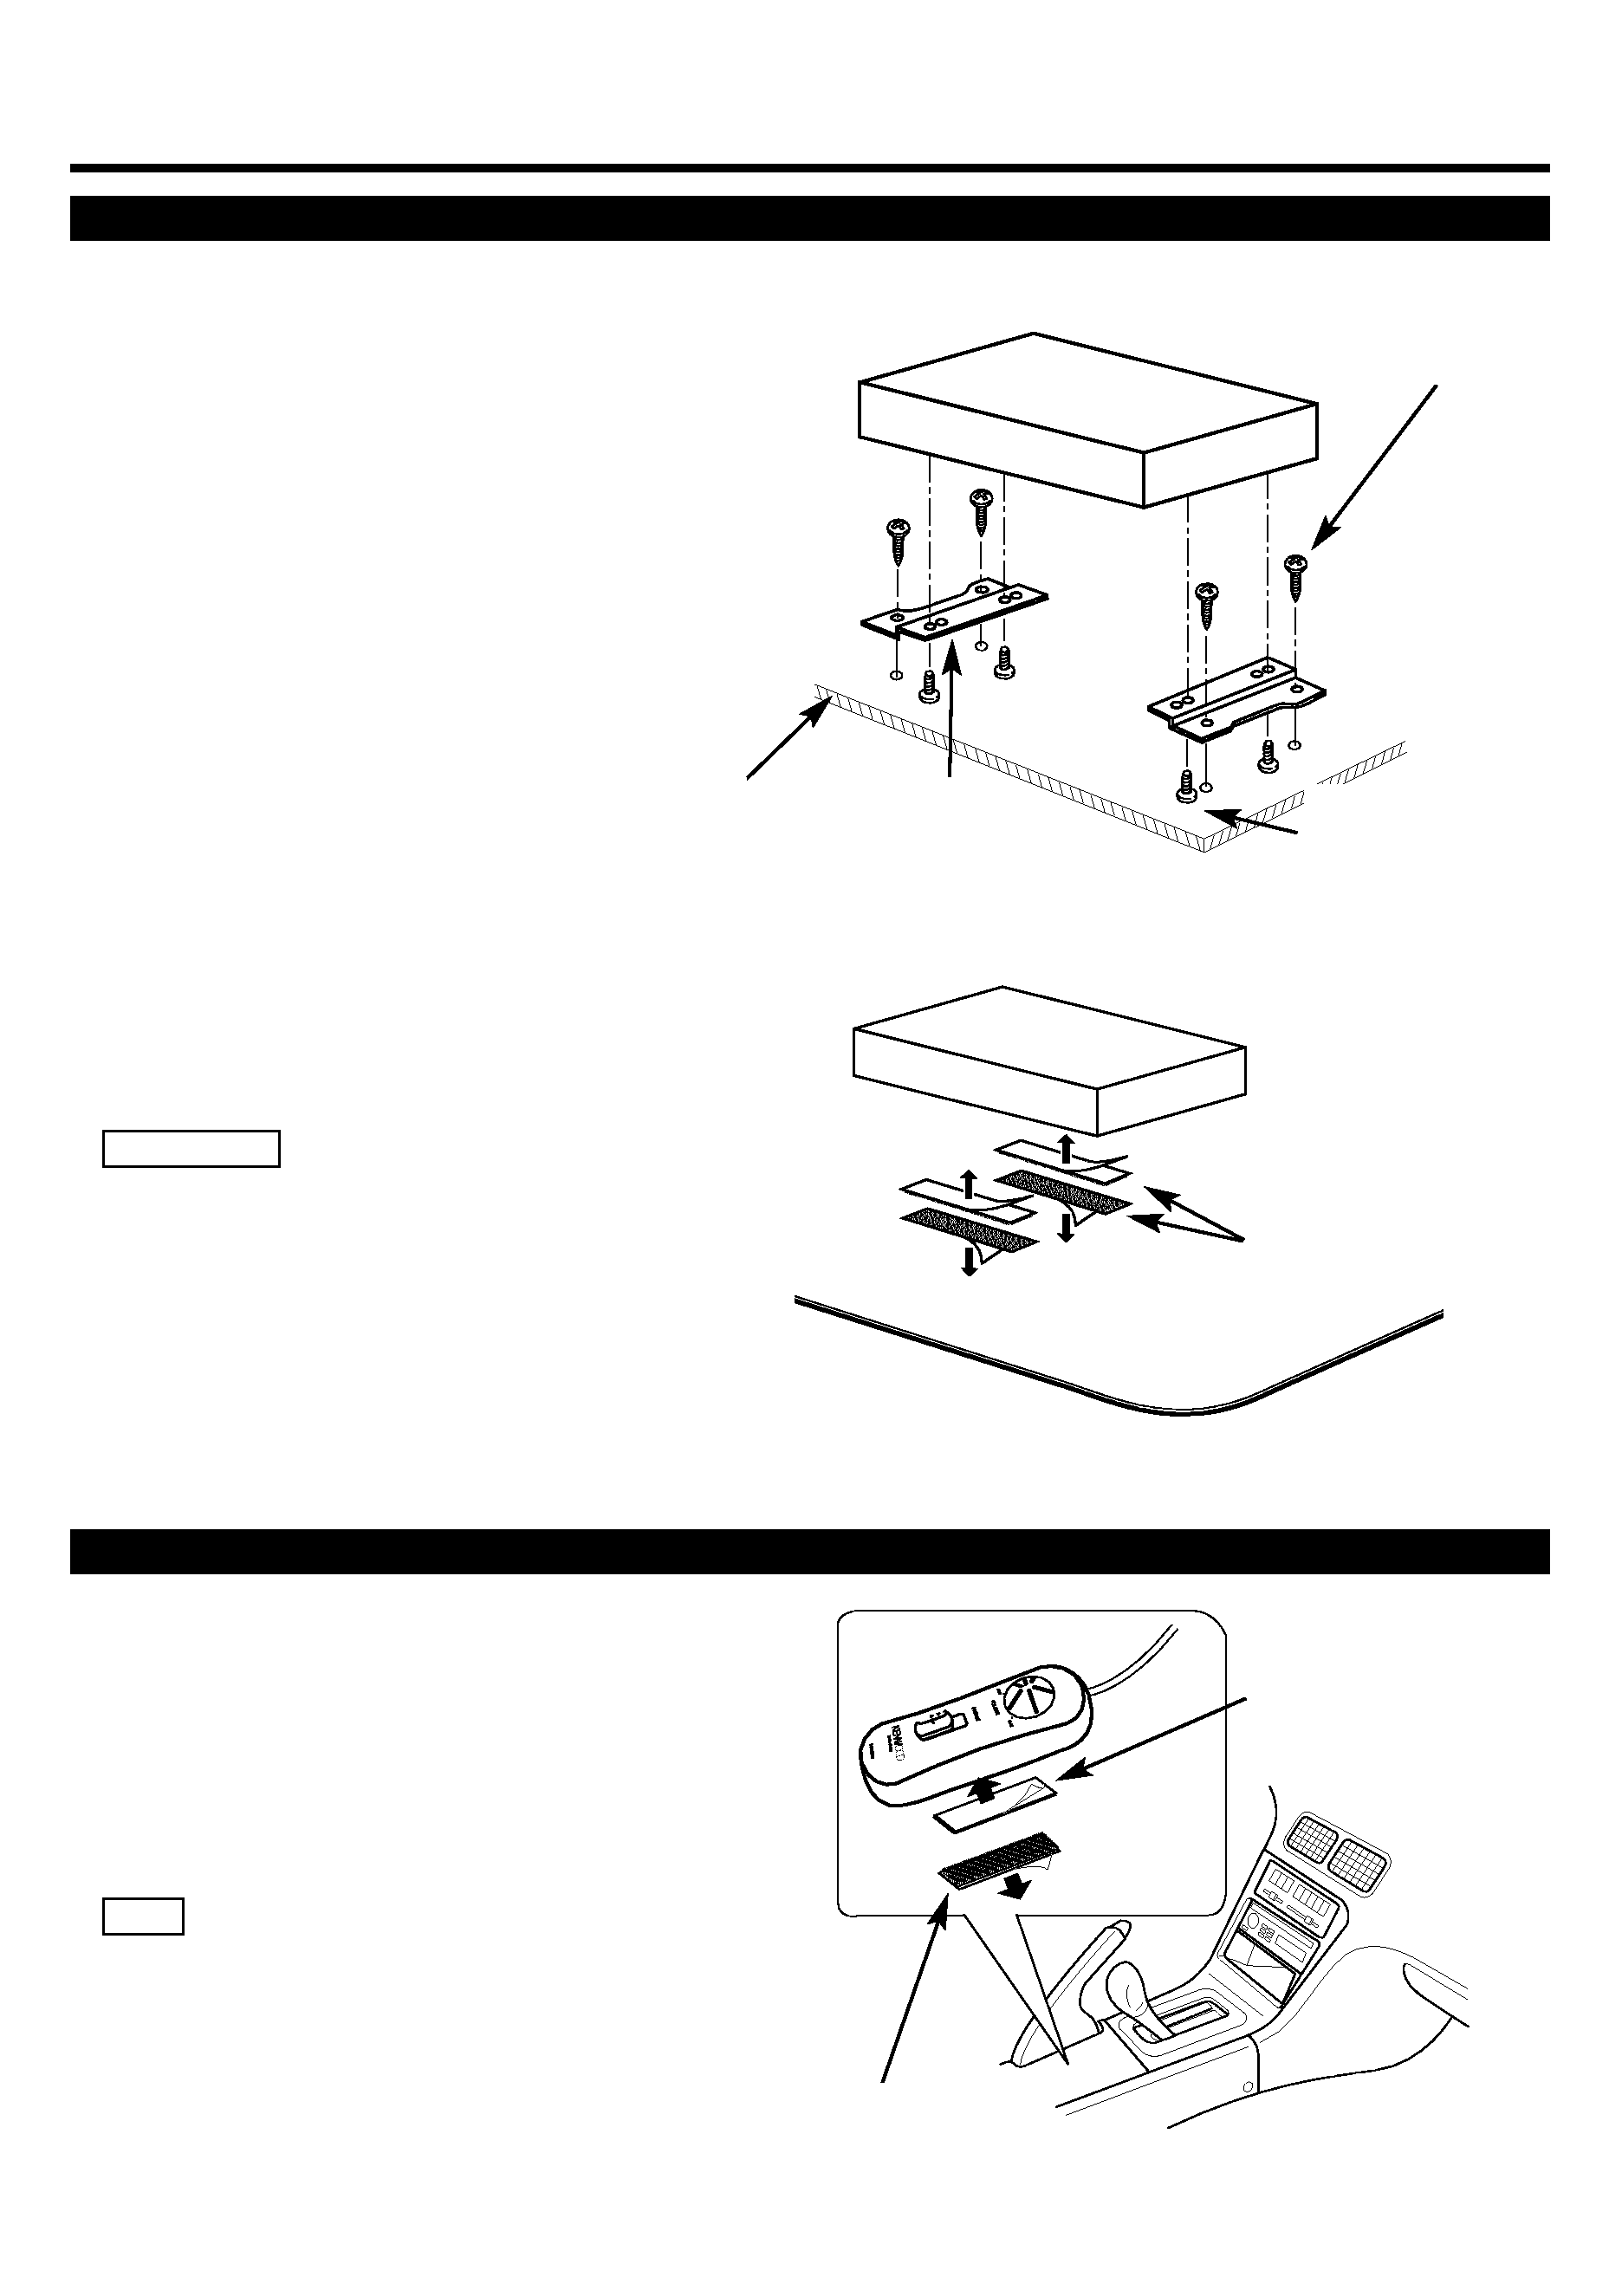
Turning clockwise the headphone volume knob on the
remote controller increases the sound volume from the
headphone and turning counterclockwise decreases the
volume.
Headphone volume, if minimized, will not be muted.
NOTE
If the remote control unit is connected to the remote
connection terminal 1, you can select the inputs from AV
INPUTs 1, 2 and 3 for the video available from AV
OUTPUT1.
Setting the remote control AV-in source control to 1
switches to the AV INPUT1 video, and 2 to the AV
INPUT2 and 3 to the AV INPUT3.The same is true with
the remote connection terminals 2 and 3.
The outputs where no corresponding remote control
units are connected are fed with the video images from
the AV INPUT1.
NOTE
Setting the REVERSE VIDEO AUTO/OFF selector switch
to AUTO with the rear-view camera (Commercially
available part) connected to the AV INPUT3 allows you to
automatically switch the AV OUTPUT1 video alone to the
rear-view camera when you put your car into reverse
gear.
If the KVA-S300 is not connected with the rear-view
camera, note that the REVERSE VIDEO AUTO/OFF
selector switch be turned off..
NOTE
REMOTE
REMOTE
2
3
REVERSE VIDEO
AUTO
OFF
REVERSE VIDEO AUTO/OFF
selector switch
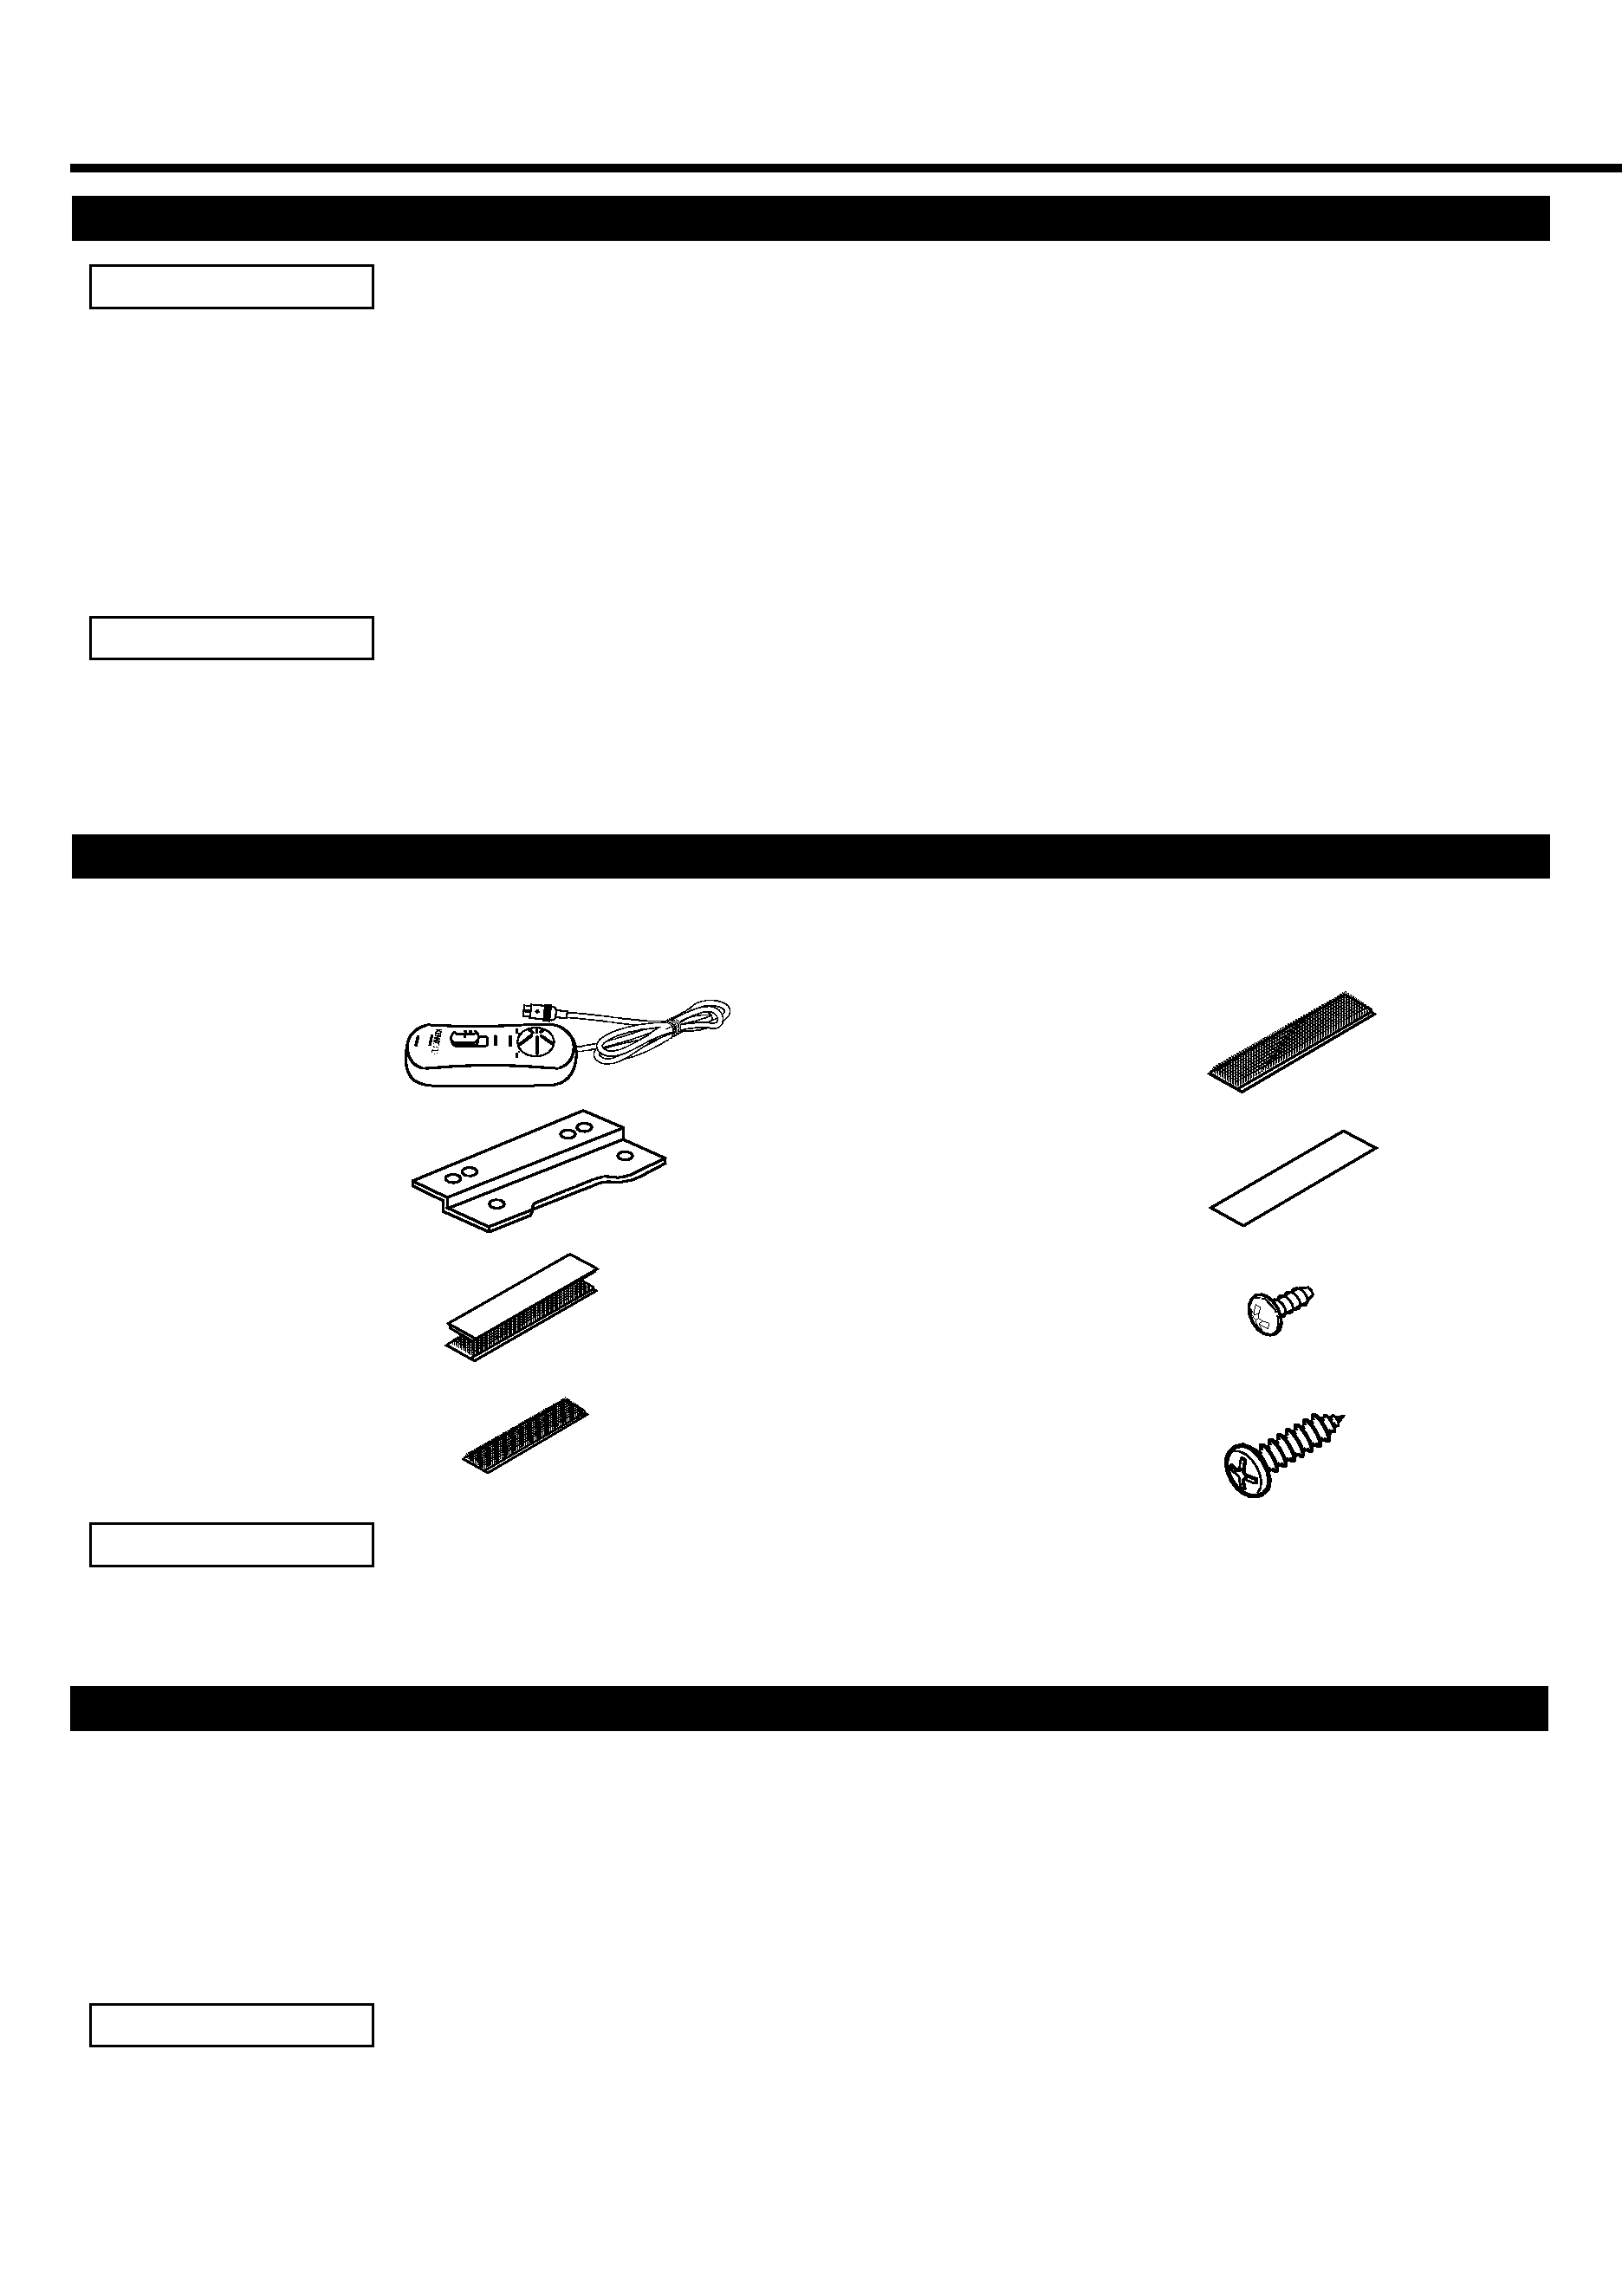
Headphone
volume knob
AV-in source
switch control
Volume adjustment
Headphone
(Commercially available part)
Specifications
Specifications subject to change without notice.
Switching Unit
Weight ......................................................814 g
Size....................168(W) x 180.4(H) x 30(D) mm
Video input level (RCA jack)
..............................................1 Vp-p/75
Audio input level (RCA jack)
....................................1.15 Vrms (22 K
)
Video output level (RCA jack)
..............................................1 Vp-p/75
Audio output level (RCA jack)
......................................1.15 Vrms (1 K
)
Controllor Unit
Size......................40(W) x 105(H) x 20.5(D) mm
Weight ......................................................160 g
Phone jack (Miniplug x 1) Audio output level
..........................15 mW + 15 mW (32
)
General
Operating voltage ........14.4 V DC (10.5 to 16 V)
Current Consumption ............................
300 mA
Input level (Reverse detection wire)
..............................................2.5 to 16
V