ENGLISH
4 EN
KS-908EX 1218/02-08/EN
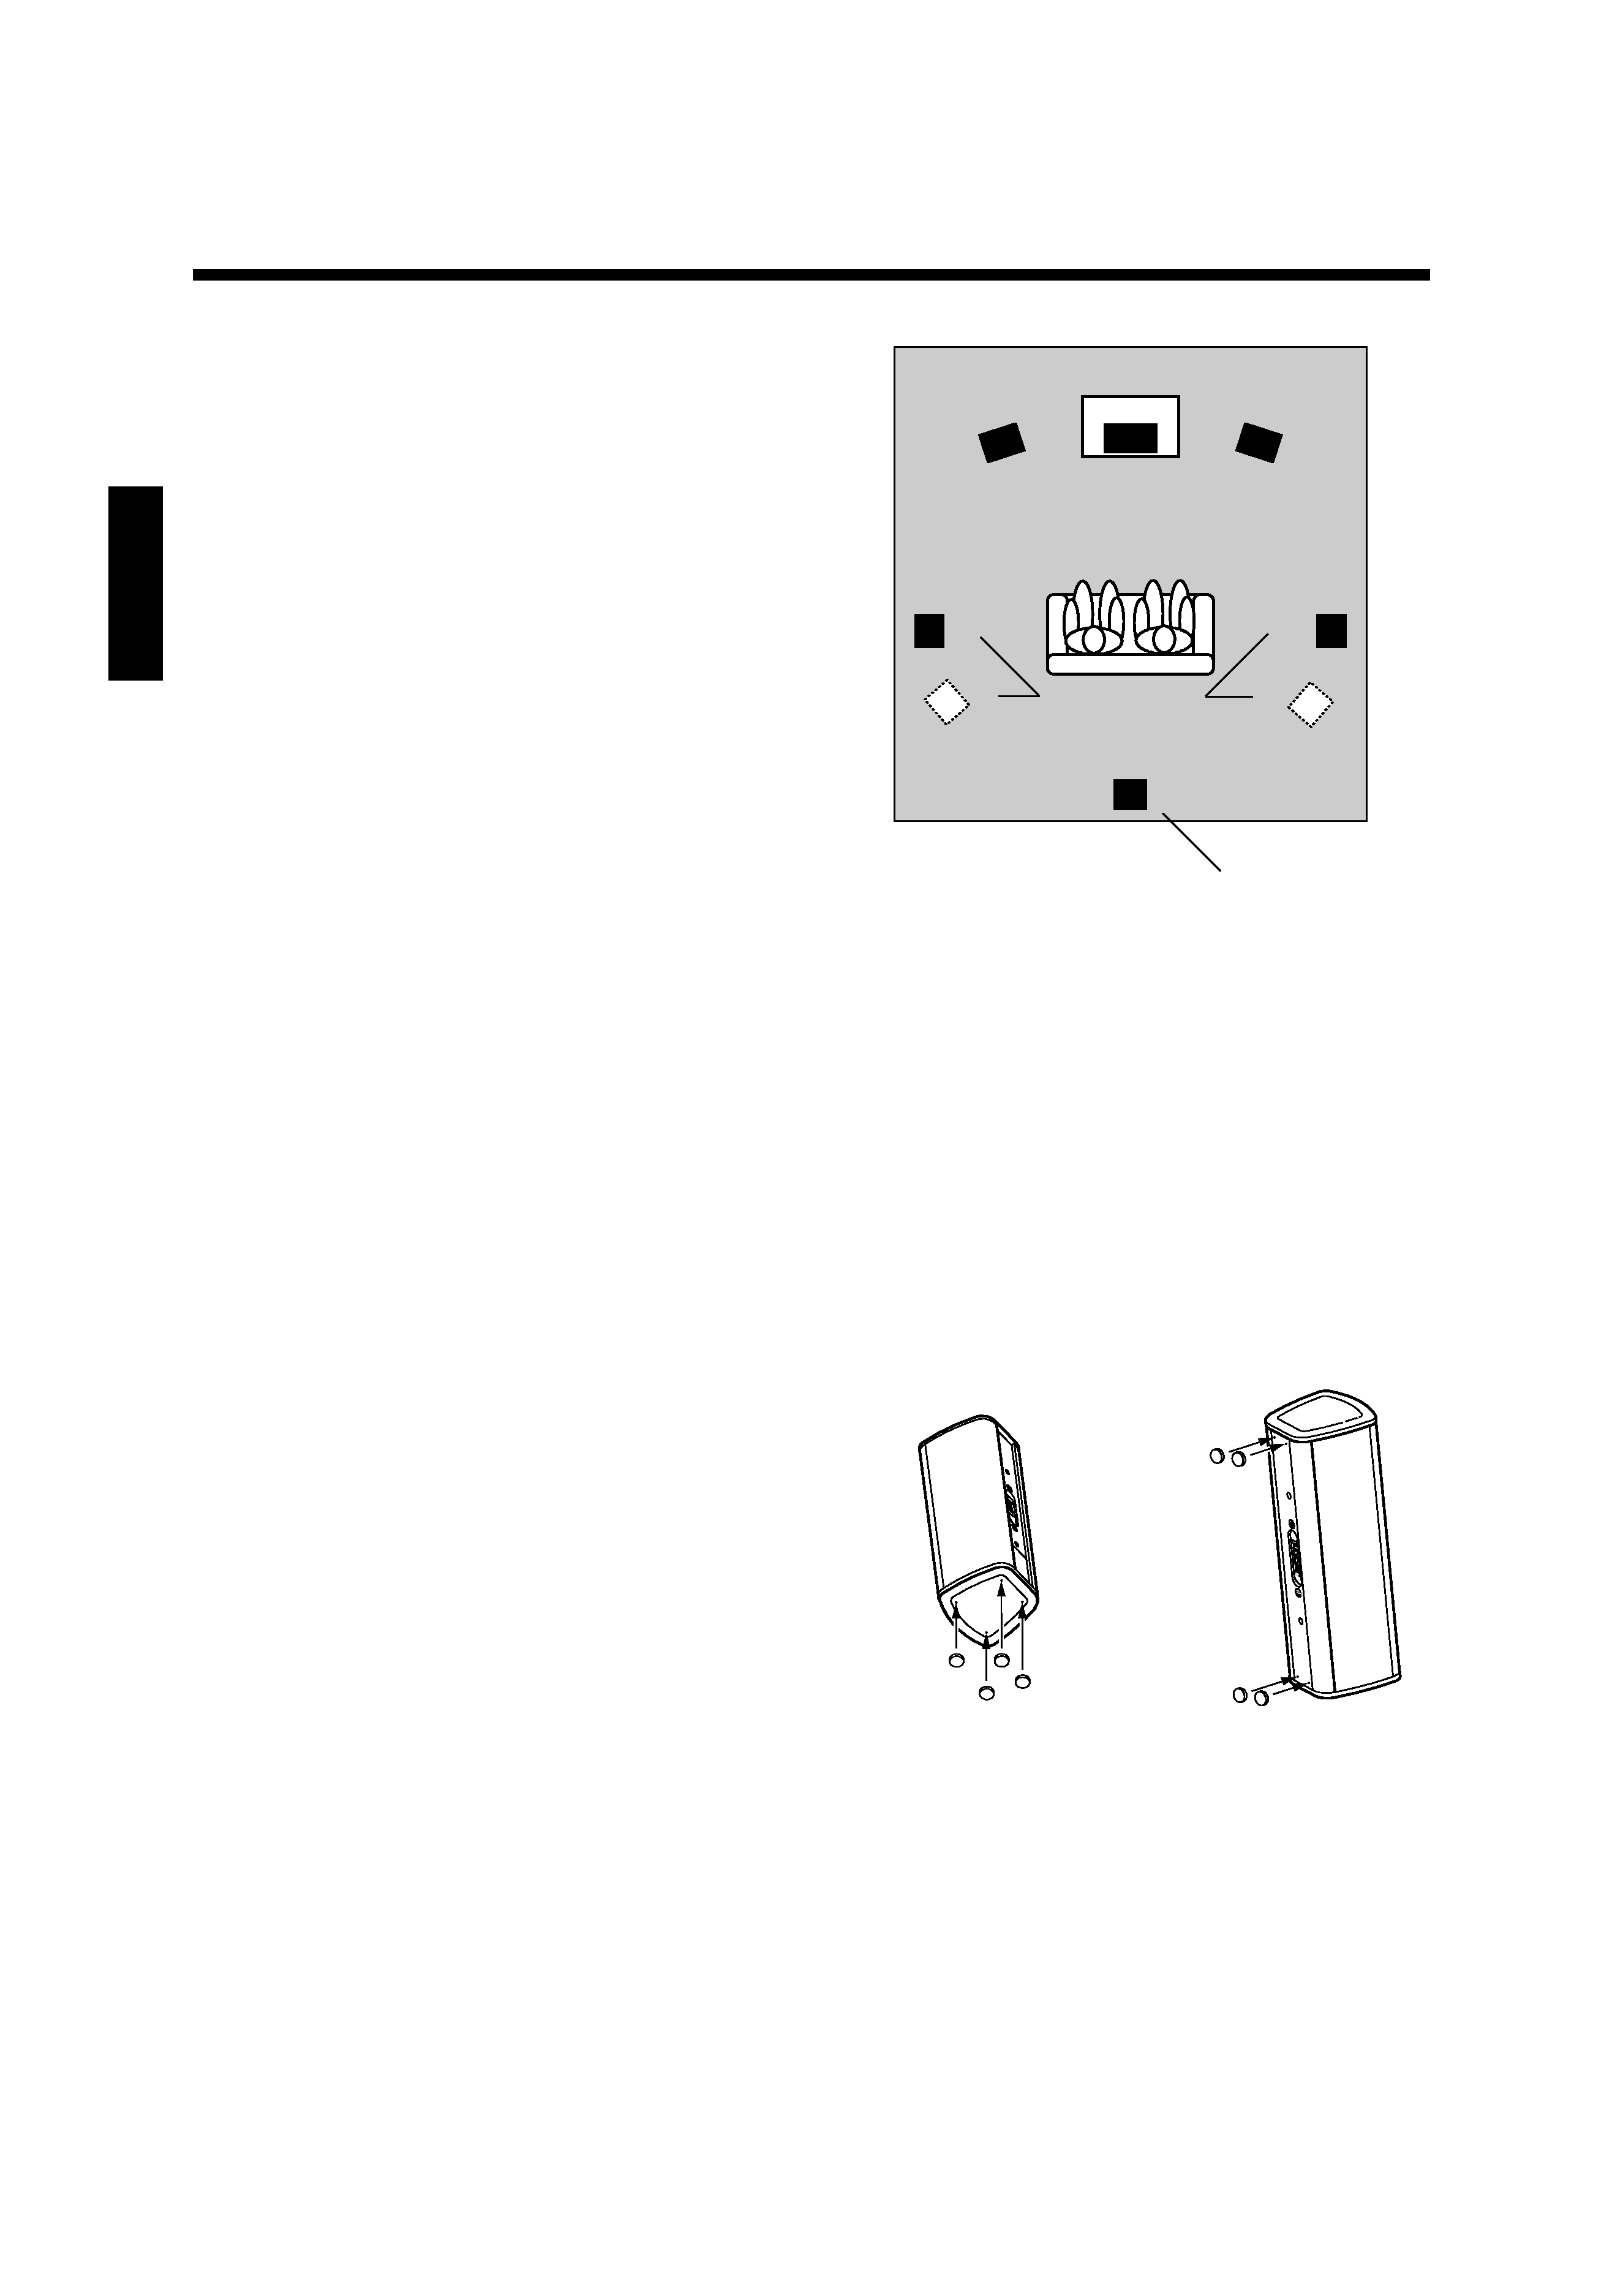
Left
speaker
Center
speaker
Right
speaker
Surround speakers
Right
Left
Surround back speaker
About Using Speakers Near a TV
This speaker include magnetic shielding and can therefore be installed close to a TV set. Note, however, that placing speakers too
close to a TV may in some cases produces distortion in the color reception. In such case, turn on the TV and check that color
reproduction is normal. If color is distorted, turn the TV off for 15 to 30 minutes, then turn it back on and check again. (This allows
the TV's degaussing circuitry to correct for the magnetic field from the speakers.) If distortion is still present, move the speakers
further from the TV.
Installation
Positioning For Optimal Surround Sound
This speaker system can provide full Surround sound. To enjoy
the full effect of the Surround sound field, please position the
speakers as described below.
· Place the left and right speakers at each side of your TV.
Angle the speakers towards the listening area to enhance
the stereo effect.
· Place the center speaker on the center between the front
left and right speakers. Tilt the speaker upward or down-
ward so that it is directly facing the listening area.
· Place the surround speakers as high as possible, either
directly to the sides of the listening area or else slightly
behind the listening area. Adjust the angles so that these
speakers are facing directly towards the listeners.
· Place the surround back speaker behind the listining position,
at the same height as the left and right surround speakers.
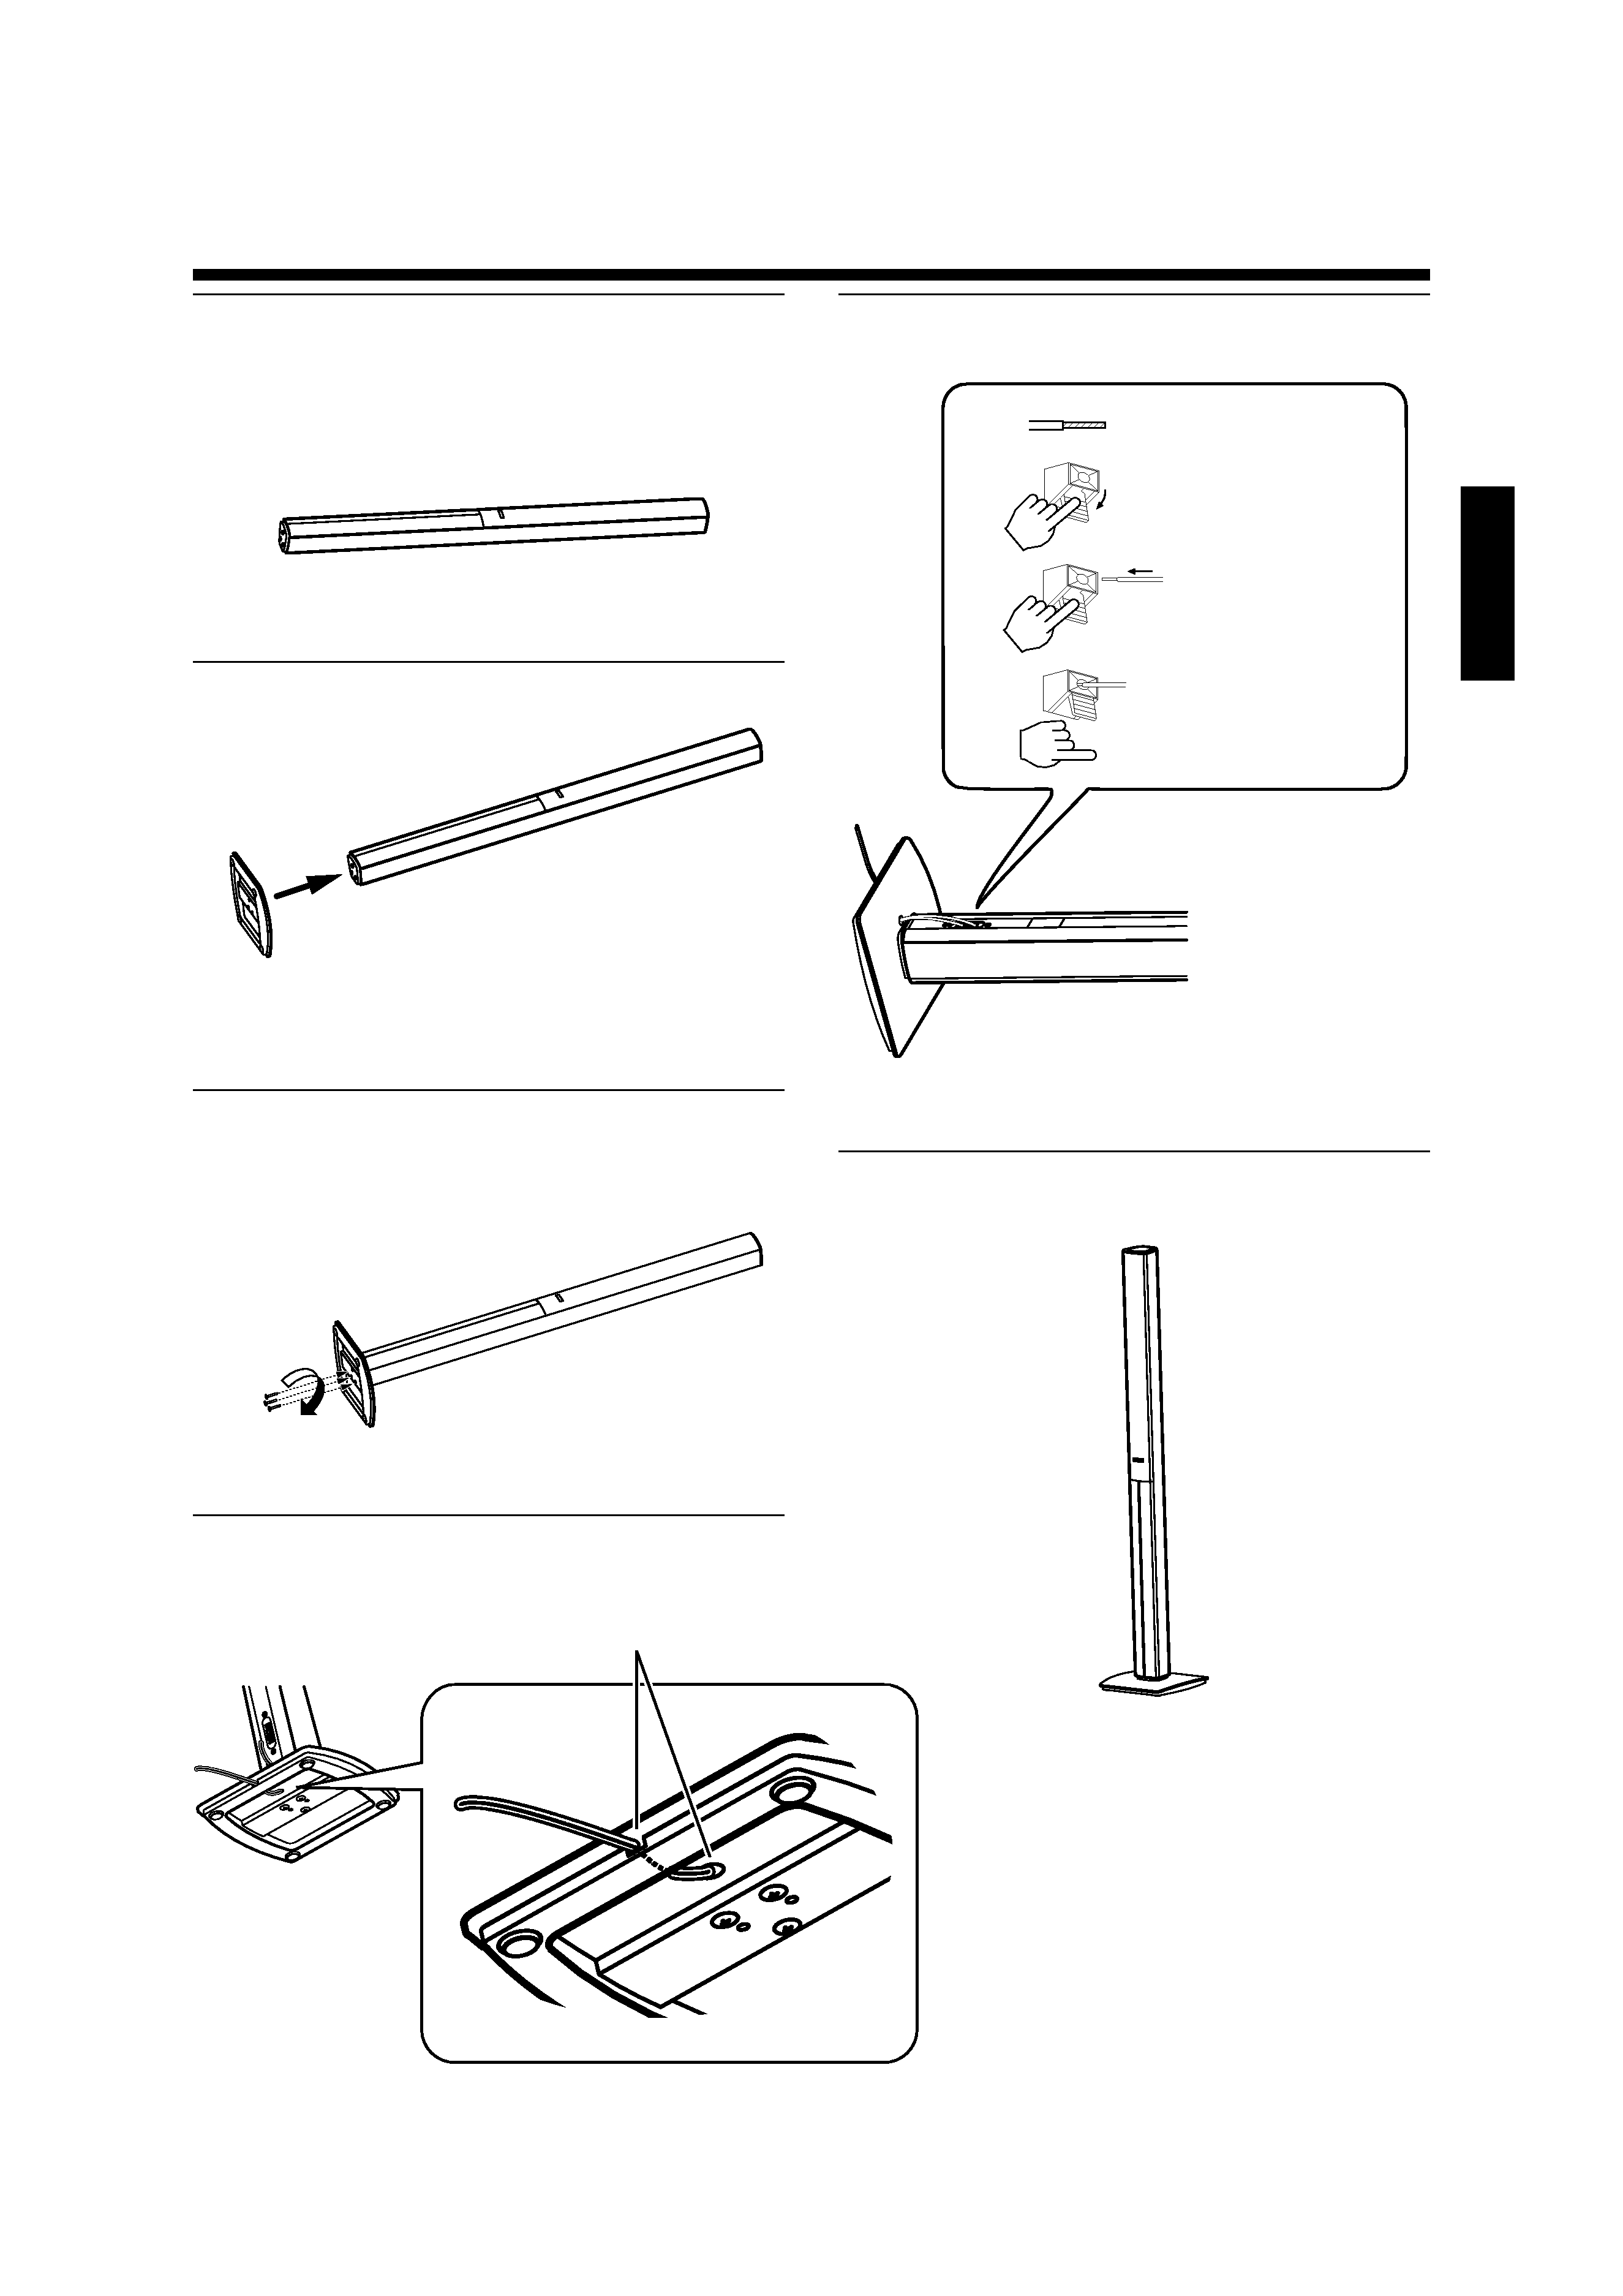
Attaching the cushions
Attach cushions to the base of the surround speaker. The
cushions prevent the speaker from sliding, and dampen its
vibrations.
On floor or shelf
On the wall
Installation Methods
On Floor or Shelf
Place the speakers on the floor or on a shelf or other horizontal stable surface. Keep in mind that speakers are not fixed into
place, so be careful to avoid knocking them over.
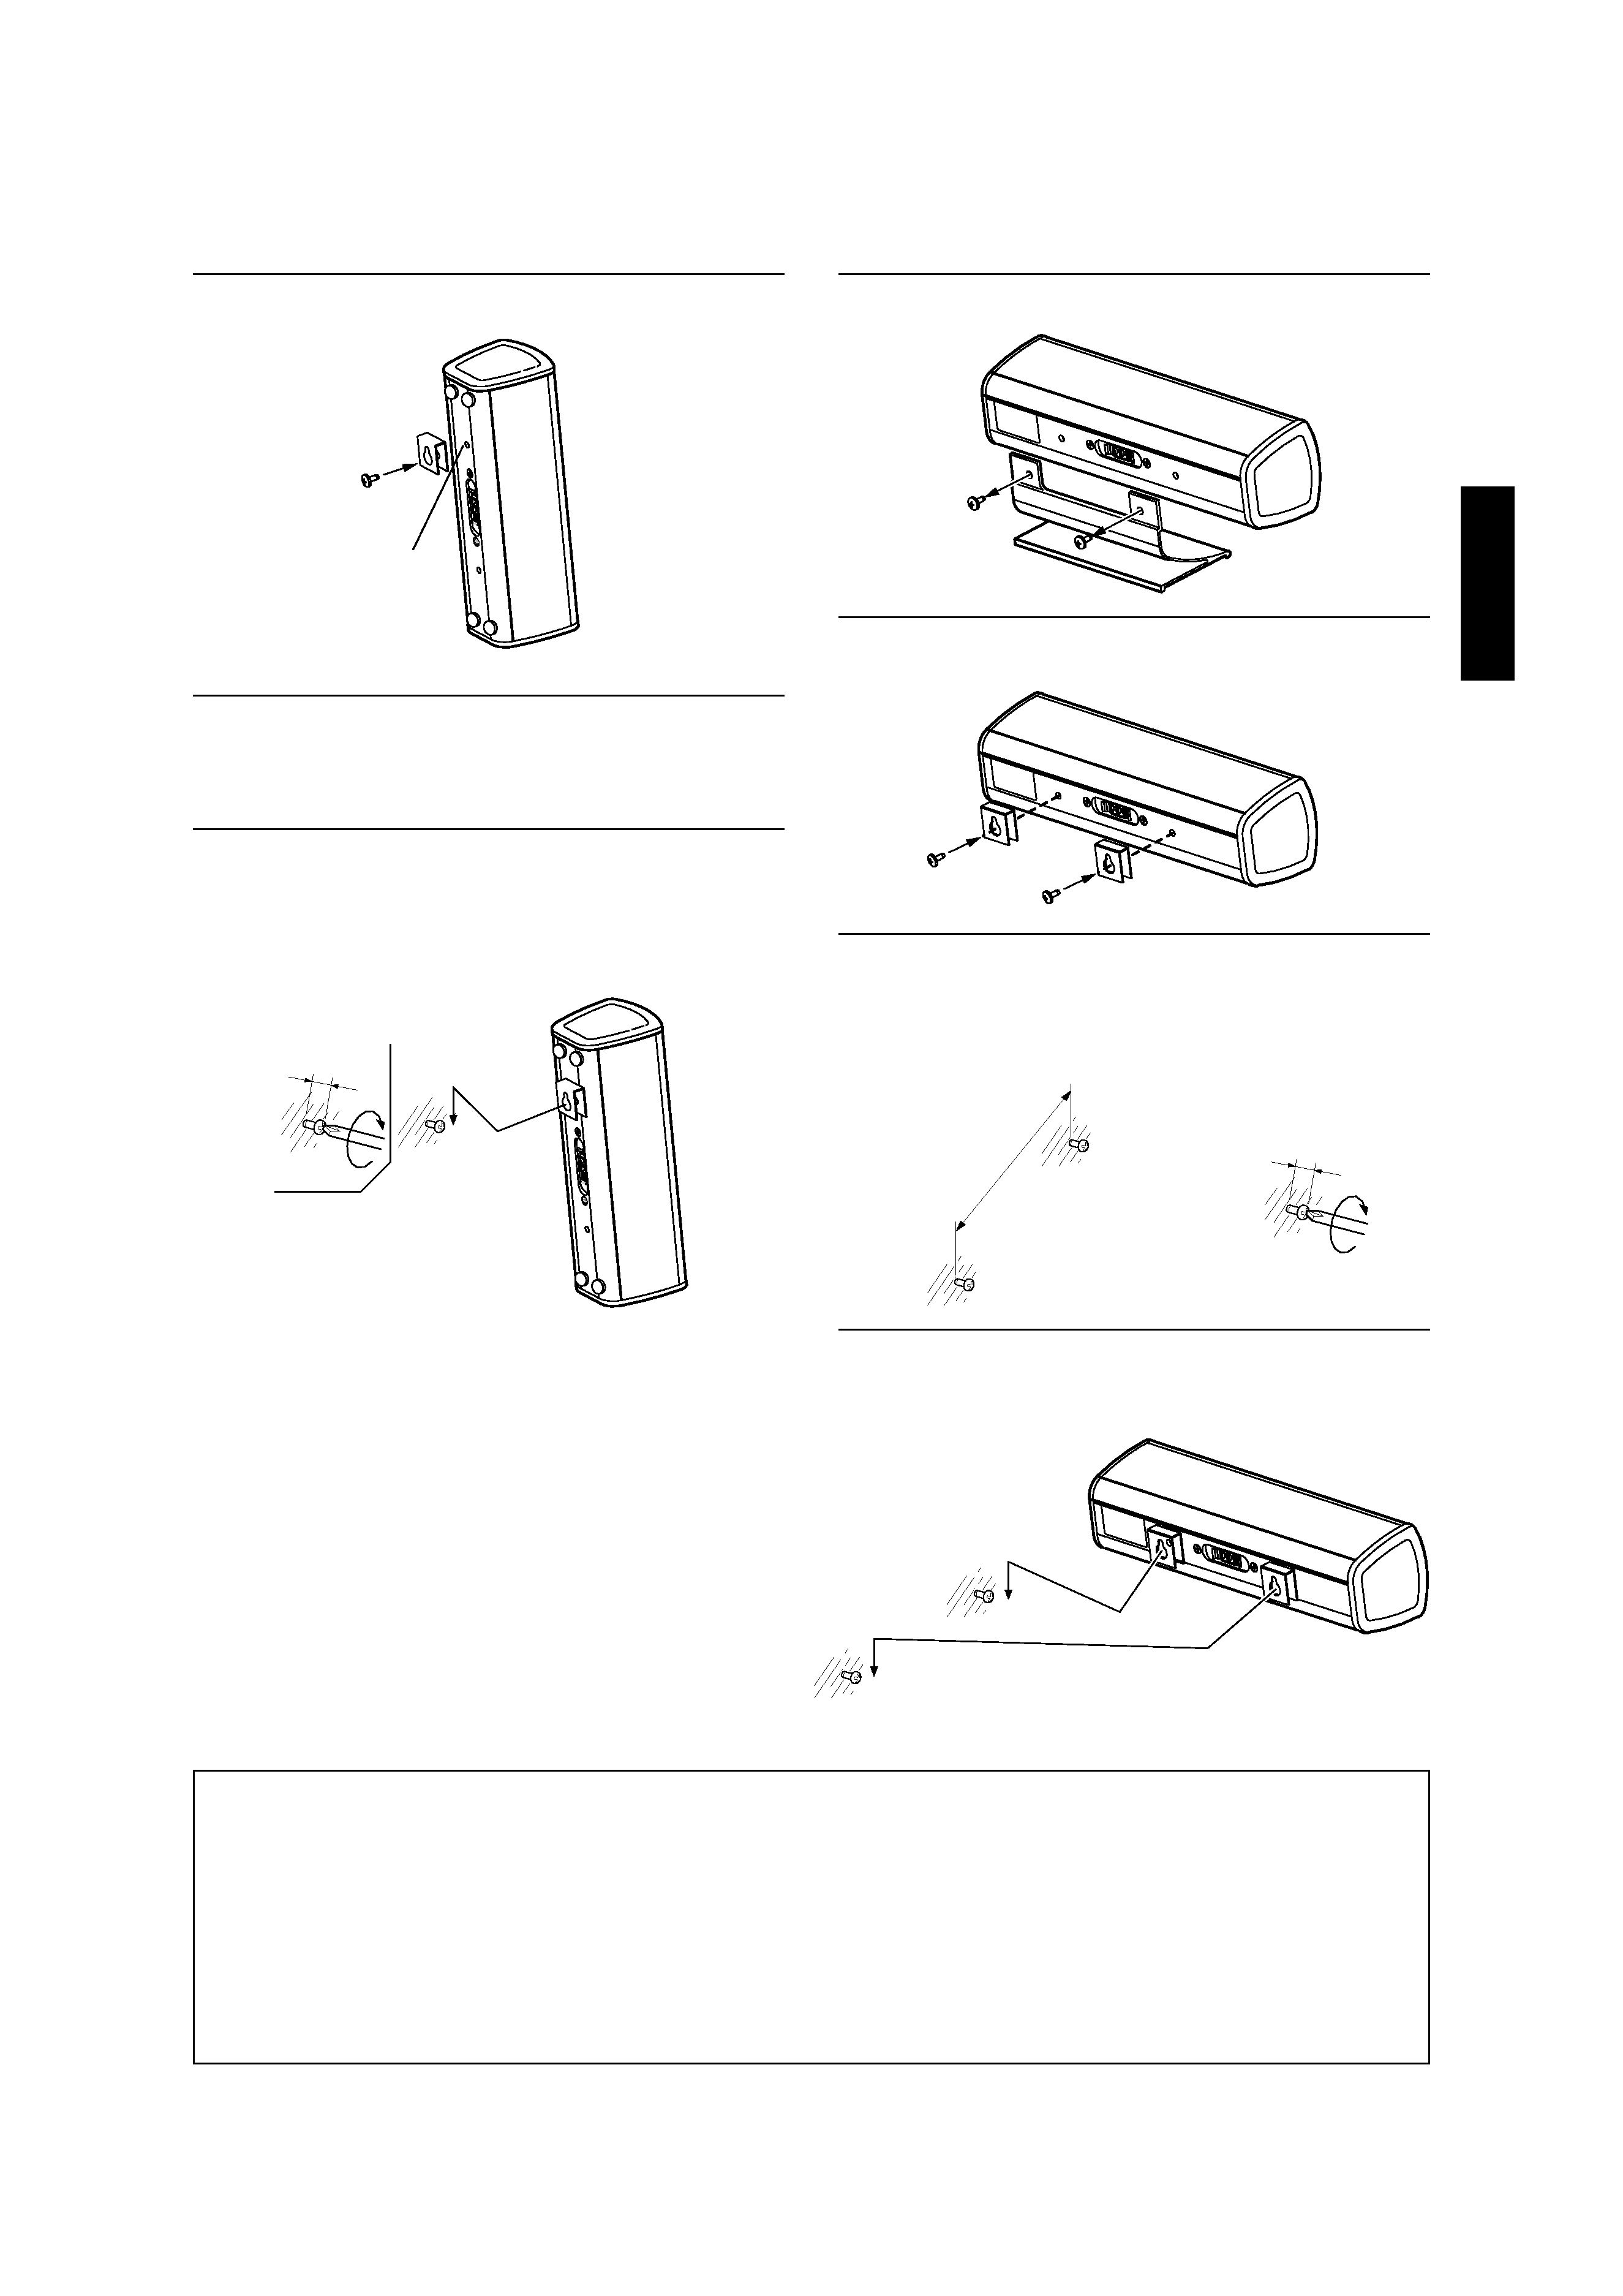
On the Wall
The center and surround speakers include mount holes for wall mounting. You can hang the surround speakers on the wall
vertically, and the center speaker horizontally.
For vertical mount, you use only one screw and hang the speaker from its upper mount hole only. For horizontal mount, you
need to set two screws into the wall at the appropriate distance so that you can hang the speaker from both mount holes.
Continued on next page.