KENWOOD KRF-V4550D Owner's Manual

Cover page of KENWOOD KRF-V4550D Owner's Manual

Owner's Manual for KENWOOD KRF-V4550D, downloadable as a PDF file.

We also have service manual to this model.

Manual details

  • Immediate download after payment.
  • Delivered as a PDF file.
  • The manual has 32 pages
  • File size: 1.08 MB
  • Available language versions: English
  • Different language versions may vary sligthly in file size and page count.

We guarantee that...

  • our manuals are complete,
  • our manuals are checked with antivirus,
  • We'll issue refund if the manual is damaged, incomplete or unreadable (our refund policy)

Sample pages

Thumbnail of page 1Thumbnail of page 2Thumbnail of page 3Thumbnail of page 4
Thumbnail of page 5Thumbnail of page 6Thumbnail of page 7Thumbnail of page 8
Thumbnail of page 9
background image
Operations
Preparation
Additional
Information
AUDIO VIDEO SURROUND RECEIVER
KRF-V4550D
INSTRUCTION MANUAL
KENWOOD CORPORATION
B60-4967-10 01 MA (E2)
0009
*4967/01-/EN
3/19/01, 6:33 PM
1
background image
Operations
Preparation
Additional
Information
AUDIO VIDEO SURROUND RECEIVER
KRF-V4550D
INSTRUCTION MANUAL
KENWOOD CORPORATION
B60-4967-10 01 MA (E2)
0009
*4967/01-/EN
3/19/01, 6:33 PM
1
background image
2
Preparations
WARNING :
TO PREVENT FIRE OR ELECTRIC SHOCK, DO NOT
EXPOSE THIS APPLIANCE TO RAIN OR MOIS-
TURE.
CAUTION: TO REDUCE THE RISK OF ELECTRIC SHOCK, DO NOT
REMOVE COVER (OR BACK). NO USER-SERVICEABLE PARTS IN-
SIDE, REFER SERVICING TO QUALIFIED SERVICE PERSONNEL.
THE LIGHTNING FLASH WITH ARROWHEAD SYMBOL,
WITHIN AN EQUILATERAL TRIANGLE, IS INTENDED TO
ALERT THE USER TO THE PRESENCE OF UNINSULATED
"DANGEROUS VOLTAGE" WITHIN THE PRODUCT'S EN-
CLOSURE THAT MAY BE OF SUFFICIENT MAGNITUDE TO
CONSTITUTE A RISK OF ELECTRIC SHOCK TO PERSONS.
CAUTION
RISK OF ELECTRIC SHOCK
DO NOT OPEN
Unpack the unit carefully and make sure that all accessories are put
aside so they will not be lost.
Examine the unit for any possibility of shipping damage. If your unit is
damaged or fails to operate, notify your dealer immediately. If your unit
was shipped to you directly, notify the shipping company without delay.
Only the consignee (the person or company receiving the unit) can file
a claim against the carrier for shipping damage.
We recommend that you retain the original carton and packing materi-
als for use should you transport or ship the unit in the future.
Keep this manual handy for future reference.
Before applying the power
Caution : Read this page carefully to ensure safe
operation.
Safety precautions
Unpacking
Accessories
FM indoor antenna (1)
AM loop antenna (1)
THE EXCLAMATION POINT WITHIN AN EQUILATERAL TRI-
ANGLE IS INTENDED TO ALERT THE USER TO THE PRES-
ENCE OF IMPORTANT OPERATING AND MAINTENANCE
(SERVICING) INSTRUCTIONS IN THE LITERATURE ACCOM-
PANYING THE APPLIANCE.
Batteries (R6/AA) (2)
Remote control unit (1)
Units are designed for operation as follows.
U.S.A. and Canada ......................................................... AC 120 V only
Australia .......................................................................... AC 240 V only
Europe and U.K. ............................................................. AC 230 V only
China and Russia ............................................................ AC 220 V only
Other countries ........................................... AC 110 - 120 / 220 - 240 V
switchable*
Microcomputer malfunction
If operation is not possible or an erroneous display appears, even
though all connections have been made properly, reset the micro-
computer referring to "In case of difficulty".
/
*4967/01-/EN
3/19/01, 6:33 PM
2
background image
3
Preparations
Operations
Additional
Informatiion
Before applying the power .............................. 2
Safety precautions ............................................. 2
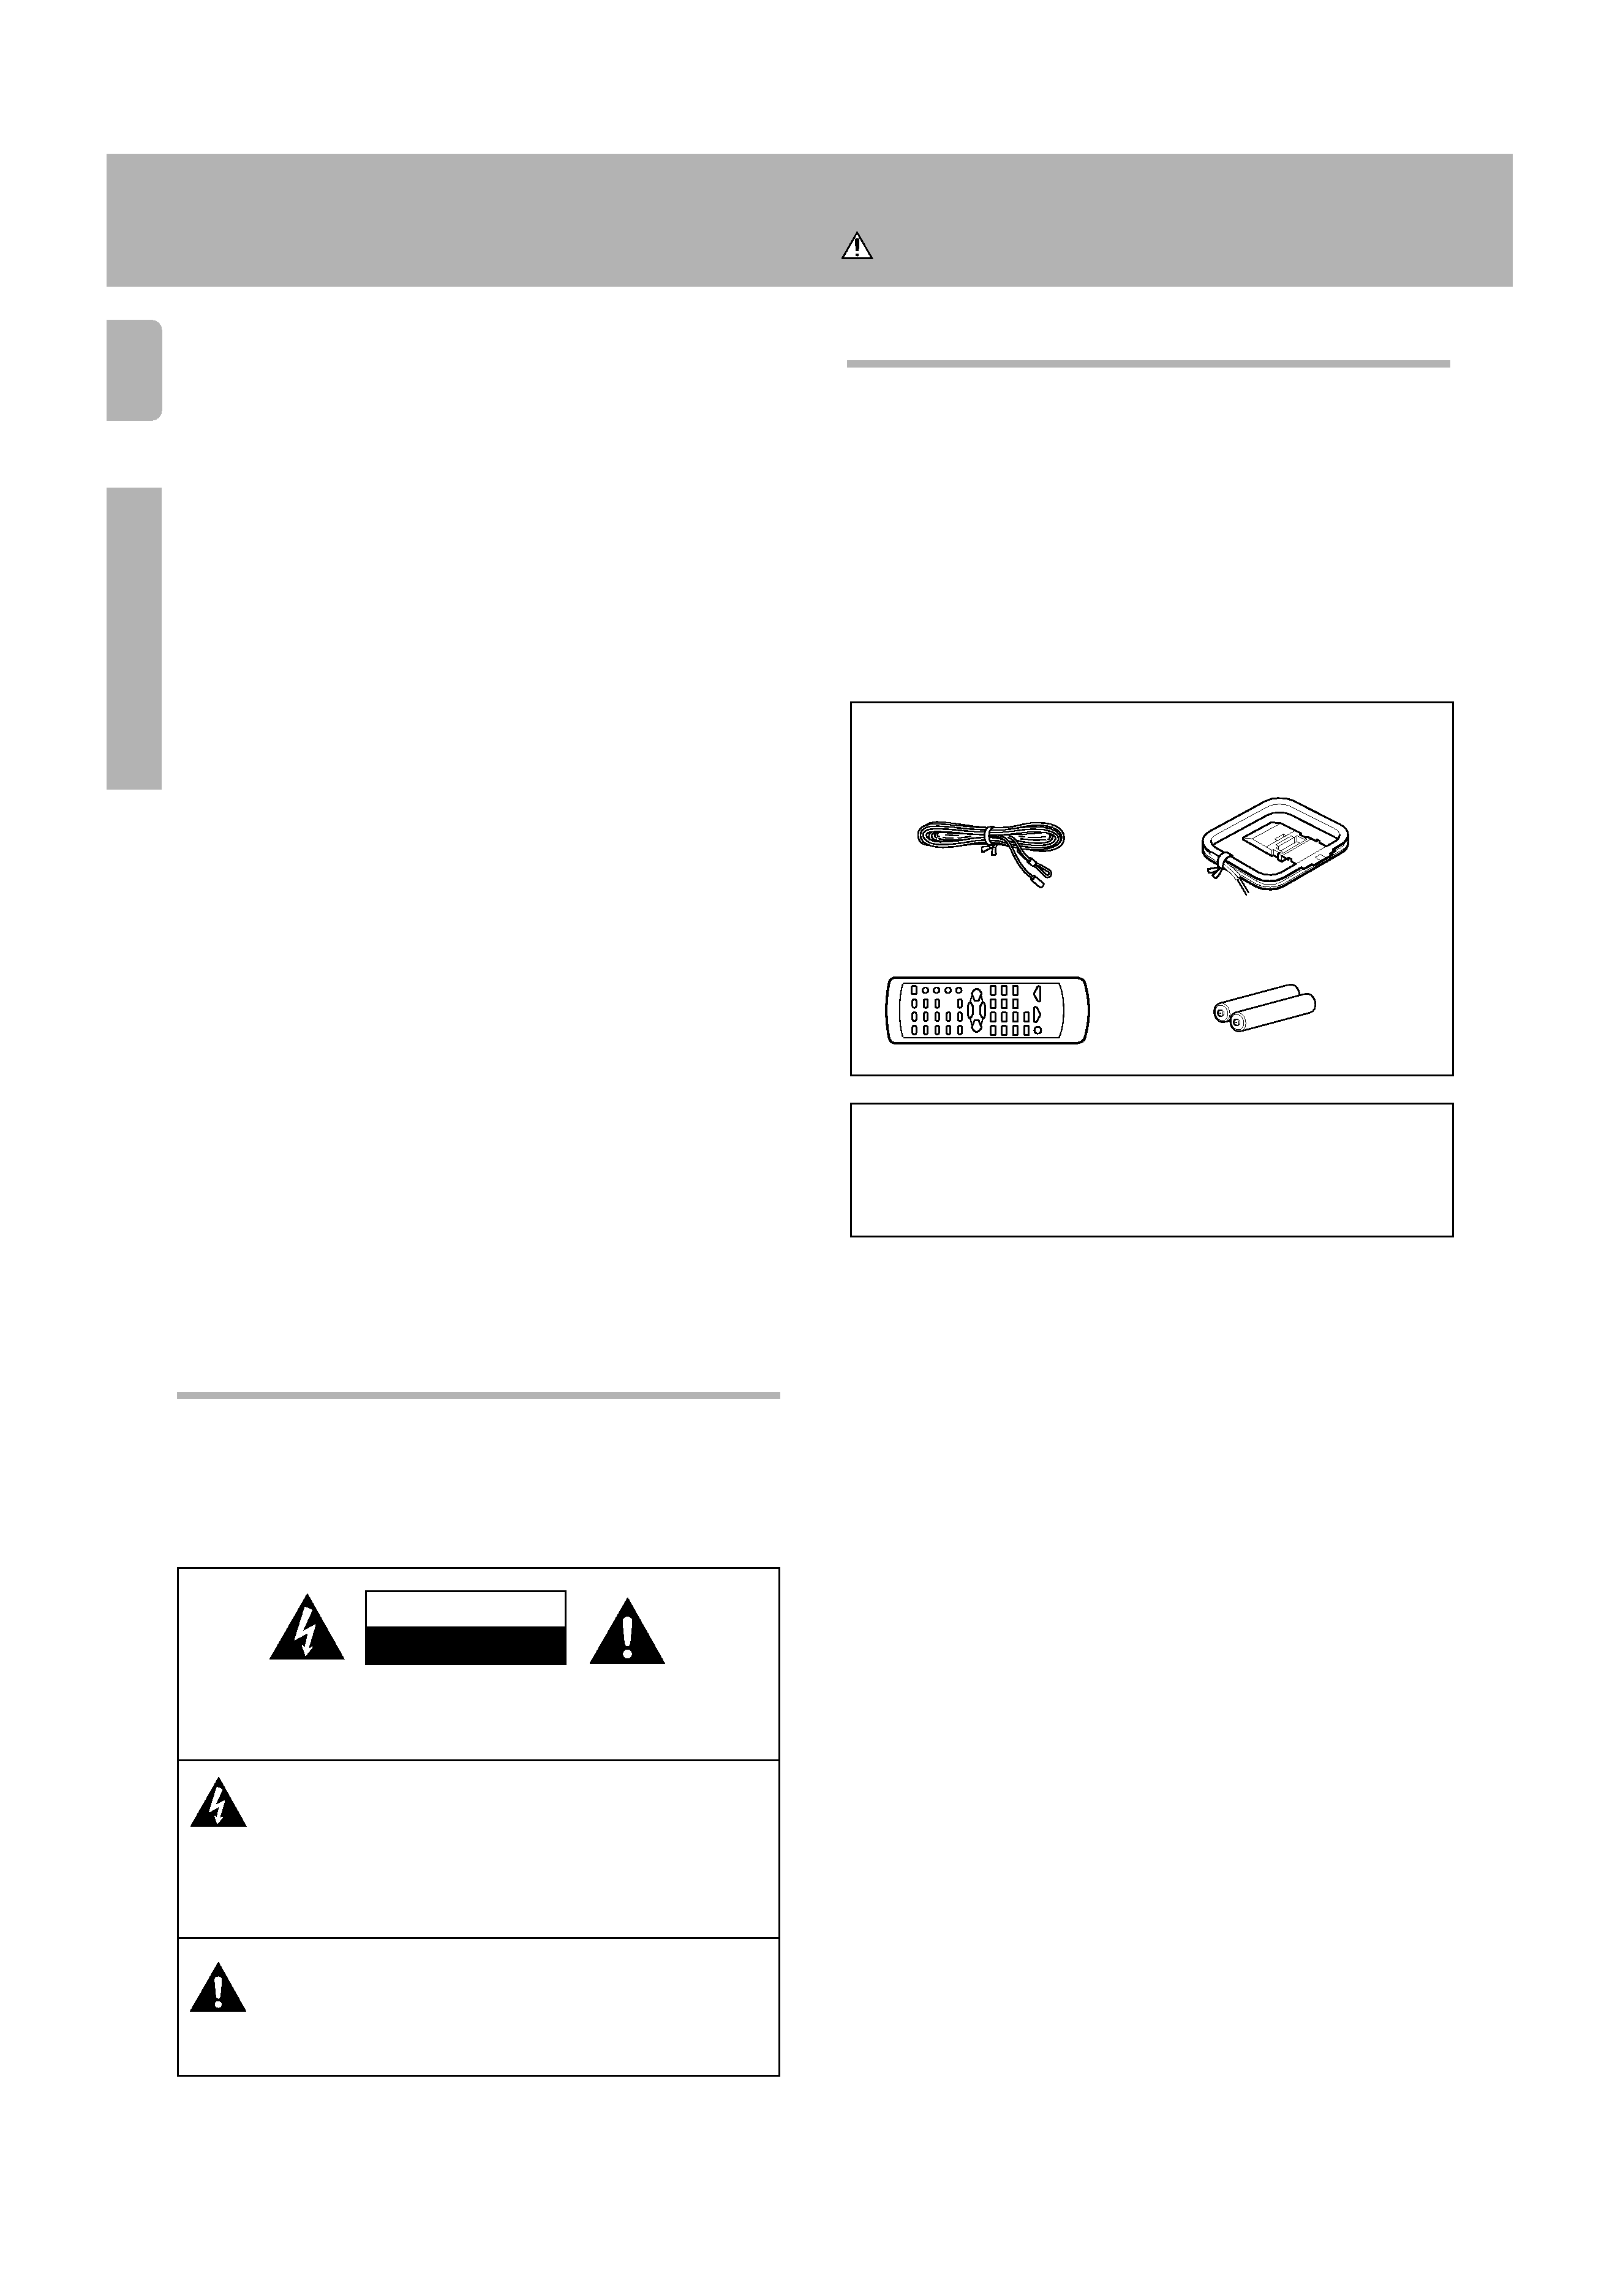
Unpacking .......................................................... 2
How to use this manual ..................................... 4
Special features ................................................. 4
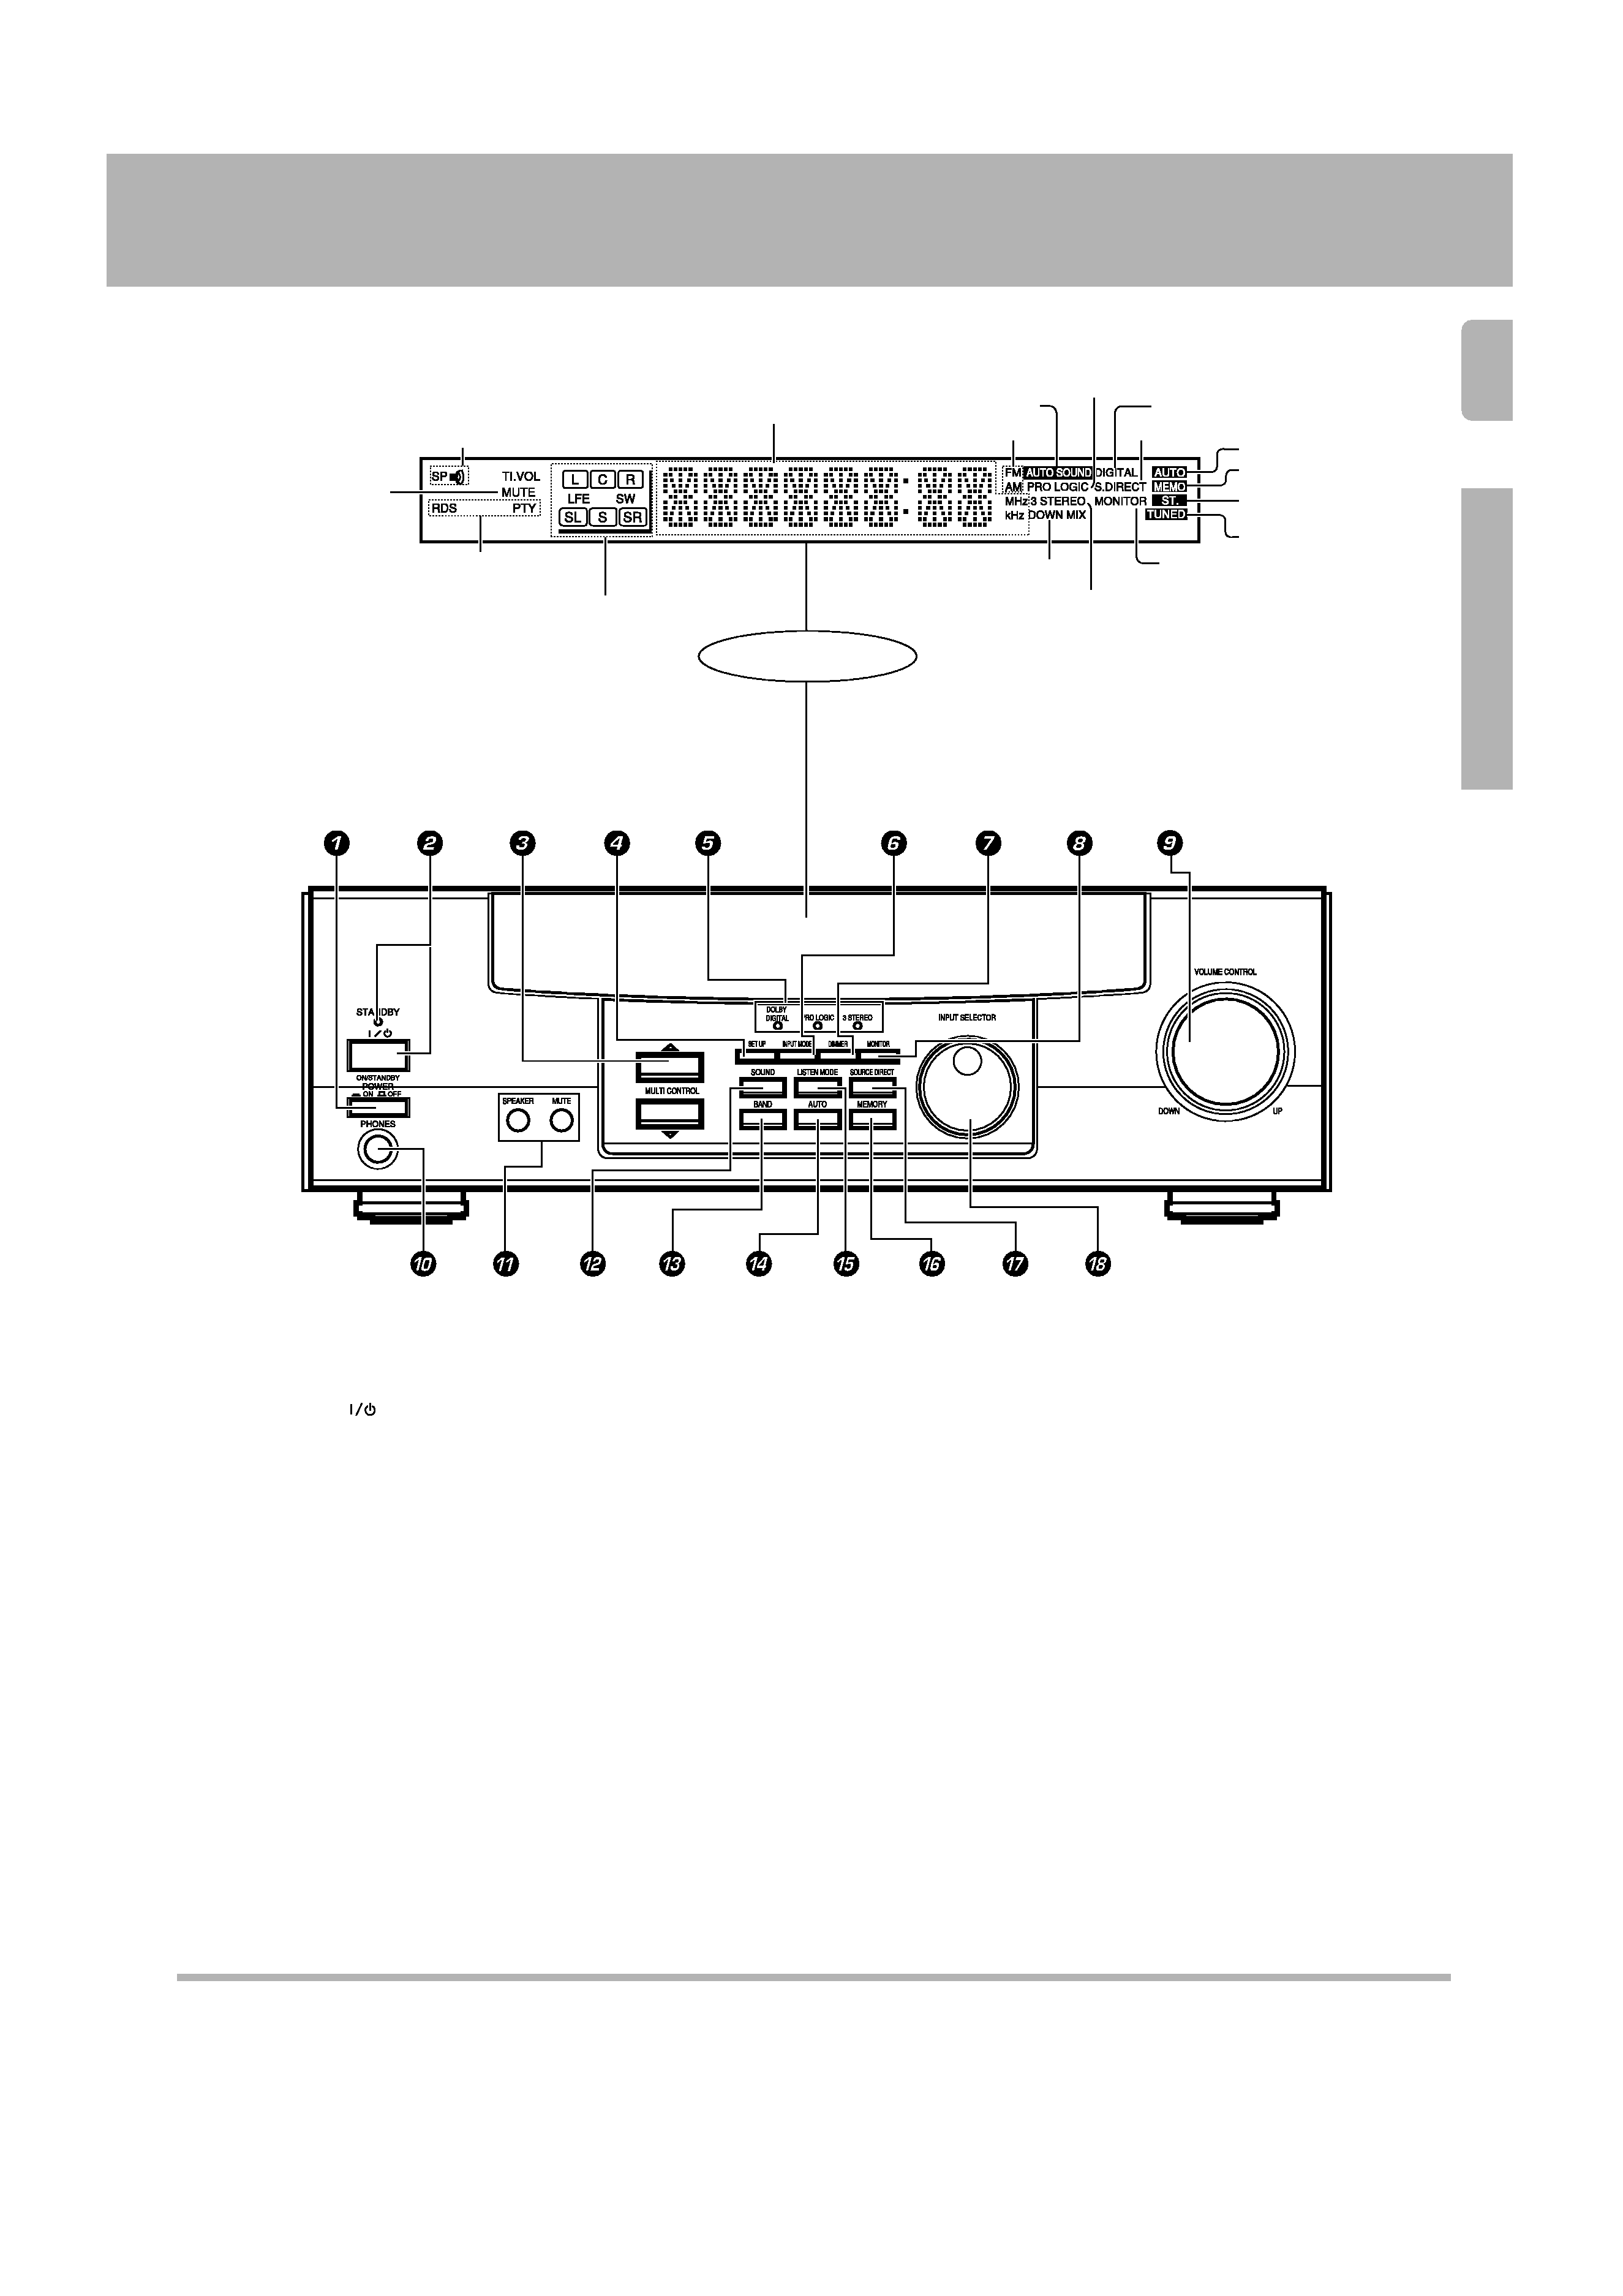
Names and functions of parts ......................... 5
Setting up the system ........................................ 7
Connecting audio components .......................... 8
Connecting video components .......................... 9
Connecting a DVD player (6-channel input) ..... 10
Digital connections .......................................... 11
Connecting the antennas ................................. 12
Connecting the system control ....................... 13
Connecting the speakers ................................. 14
Preparing the remote control .......................... 15
Preparing for surround sound ....................... 16
Speaker settings .............................................. 16
Normal playback .............................................. 17
Preparing for playback ..................................... 17
Listening to a source component .................... 18
Adjusting the sound ......................................... 18
Recording .......................................................... 19
Recording audio (analog sources) ................... 19
Recording video ............................................... 20
Recording audio (digital sources) .................... 20
Listening to radio broadcasts ....................... 21
Tuning (non-RDS) radio stations ...................... 21
Using RDS (Radio Data System) ..................... 21
Using the DISPLAY key ................................... 22
Presetting RDS stations
(RDS AUTO MEMORY) ................................... 22
Presetting radio stations manually .................. 23
Receiving preset stations ................................ 23
Receiving preset stations in order (P.CALL) ... 23
Tuning by program type (PTY search) ............. 24
Ambience effects ............................................. 25
Surround modes .............................................. 25
Surround play ................................................... 26
DVD 6-channel playback .................................. 27
Convenient functions ....................................... 27
Basic remote control operation for other
components ....................................................... 29
DVD player operations ..................................... 29
CASSETTE deck, CD player & MD recorder
operations ........................................................ 30
In case of difficulty .......................................... 31
Specifications .................................................. 32
Before applying the power
Contents
Operations
Preparations
Caution : Read the pages marked
carefully to ensure
safe operation.
Maintenance of the unit
When the front panel or case becomes dirty, wipe with a soft, dry
cloth. Do not use thinner, benzine, alcohol, etc. for these agents may
cause discoloration.
In regard to contact cleaner
Do not use contact cleaners because it could cause a malfunction.
Be specially careful not to use contact cleaners containing oil, for
they may deform the plastic component.
Additional
Information
*4967/01-/EN
3/19/01, 6:33 PM
3
background image
4
Preparations
Special features
How to use this manual
This manual is divided into three sections, Preparations, Operations,
and Additional Information.
Preparations
Shows you how to connect your audio and video components to the
receiver and prepare the surround processor.
We will guide you to make setting up your system as easy as possible.
However, since this receiver works with all of your audio and video
components, connecting the system can be fairly complex.
Operations
Shows you how to operate the various functions available from the
receiver.
Additional Information
Shows you additional information such as "In case of difficulty" (trouble-
shooting) and "Specifications".
Before applying the power
Memory back up function
Please note that the following items will be deleted from the unit's
memory if the power cord is disconnected from the AC outlet for
approximately 3 days.
· Power mode.
· Input selector settings.
· Device preset.
· Picture output.
· Speaker ON/OFF
· Volume level.
· BASS, TREBLE, INPUT
level.
· Subwoofer ON/OFF.
· Dimmer level.
· Monitor ON/OFF.
· MD/TAPE settings.
· 6ch/2ch input setting.
· Listen mode setting.
· Speaker settings.
· Input mode setting.
· Midnight mode setting.
· Broadcast band.
· Frequency setting.
· Preset stations.
· Tuning mode.
True home theater sound
This receiver incorporates a wide variety of surround modes to bring
you maximum enjoyment from your video software. Select a surround
mode according to your equipment or the software you are going to
play and enjoy!
Dolby Pro Logic & Dolby 3 Stereo
This surround system reproduces theater-like surround sound from
video software marked
.
The PRO LOGIC mode uses the built-in adaptive matrix circuit to
steer the Left, Center, Right and Surround channel audio signals.
The 3 STEREO mode will redirect the Surround signal to the front left
and right speakers when only the front and center speakers are used.
Dolby Digital
The DOLBY DIGITAL mode lets you enjoy full digital surround from
software processed in the Dolby Digital format. Dolby Digital provides
up to 5.1 channels of independent digital audio for better sound
quality and more powerful presence than conventional Dolby
Surround.
DVD 6-channel input
If you own a DVD player equipped with 6-channel output, this
receiver allows you to obtain the full surround sound impact of DVD
source material featuring multi-channel encoding. Since the source
signals are digital and each channel is input independently, the
resulting ambience is far superior to what can be achieved with
conventional surround sound systems.
RDS (Radio Data System) tuner
The receiver is equipped with an RDS tuner that provides several
convenient tuning functions: RDS Auto Memory, to automatically
preset up to 40 RDS stations broadcasting different programs; station
name display, to show you the name of the current broadcast station;
and PTY search to let you tune stations by program type.
PTY (Program TYpe) search
Tune the stations by specifying the type of program you want to hear.
*4967/01-/EN
3/19/01, 6:33 PM
4
background image
5
Preparations
Display
Speaker selection indicators
Input channel indicators
Output channel indicators
Band indicators
AUTO indicator
MEMO. indicator
ST. indicator
TUNED indicator
3 STEREO indicator
STEREO indicator
Names and functions of parts
Frequency display,
Input display,
Preset channel display,
Surround mode display
Speakers' indicator
PRO LOGIC
indicator
S.DIRECT indicator
MONITOR indicator
MUTE indicator
AUTO SOUND indicator
DIGITAL indicator
Standby mode
While standby indicator is lit, this receiver is in standby mode and consumes a small amount of current for back-up. This system can be switched ON by using the remote
control.
1 POWER key
^
Use to switch the main power ON/OFF.
2 ON/STANDBY (
) key
^
Use to switch the power ON/STANDBY when
the POWER is turned ON.
STANDBY indicator
3 MULTI CONTROL key
^
Use to control a variety of settings.
4 SET UP key
^
Use to select speakers' settings etc.
5 Surround indicators
DOLBY DIGITAL indicator
§
Lights when the receiver is in the Dolby
Digital mode.
PRO LOGIC indicator
§
Lights when the receiver is in the PRO LOGIC
mode.
3 STEREO indicator
§
Lights when the receiver is in the 3 STEREO
mode.
6 INPUT MODE key
7
Use to switch between the digital and analog
inputs.
7 DIMMER key
Use to adjust the brightness of the display.
Use to select the REC MODE.
8 MONITOR key
(
Use to monitor the source that is connected
to the VIDEO2/MONITOR jack.
9 VOLUME CONTROL knob
*
0 PHONES jack
(
Use for headphone listening.
! SPEAKER key
&
Use to turn the speaker ON/OFF.
MUTE key
(
Use to temporarily mute the sound.
@ SOUND key
Use to adjust the sound quality and ambience
effects.
# BAND key
¡
Use to select the broadcast band.
$ AUTO key
¡
Use to select the auto tuning mode.
% LISTEN MODE key
§
Use to select the listening mode.
^ MEMORY key
TM
Use to store radio stations in the preset
memory.
& SOURCE DIRECT key
(
Use to pass the source material direct to the
amplifier.
* INPUT SELECTOR knob
*
Use to select the input sources.
RDS indicators
DOWN MIX indicator
*4967/01-/EN
3/19/01, 6:33 PM
5

Reviews

There are no reviews of this manual yet.