KENWOOD HM-383MD Owner's Manual

Cover page of KENWOOD HM-383MD Owner's Manual

Owner's Manual for KENWOOD HM-383MD, downloadable as a PDF file.

Manual details

  • Immediate download after payment.
  • Delivered as a PDF file.
  • The manual has 84 pages
  • File size: 1.51 MB
  • Available language versions: English
  • Different language versions may vary sligthly in file size and page count.

We guarantee that...

  • our manuals are complete,
  • our manuals are checked with antivirus,
  • We'll issue refund if the manual is damaged, incomplete or unreadable (our refund policy)

Sample pages

Thumbnail of page 1Thumbnail of page 2Thumbnail of page 3Thumbnail of page 4
Thumbnail of page 5Thumbnail of page 6Thumbnail of page 7Thumbnail of page 8
Thumbnail of page 9
background image
MICRO HI-FI COMPONENT SYSTEM
INSTRUCTION MANUAL
KENWOOD CORPORATION
B60-4931-10 02 MA (M, I, X, T)
0011
HM-383MD
DIGITAL AUDIO
DIGITAL AUDIO
COMPACT
COMPACT
TEXT
background image
MICRO HI-FI COMPONENT SYSTEM
INSTRUCTION MANUAL
KENWOOD CORPORATION
B60-4931-10 02 MA (M, I, X, T)
0011
HM-383MD
DIGITAL AUDIO
DIGITAL AUDIO
COMPACT
COMPACT
TEXT
background image
2
Before applying power
Preparation
section
Caution : Read this page carefully to ensure safe operation.
Units are designed for operation as follows.
Europe and U.K. ............................... AC 230 V only
Australia ........................................... AC 240 V only
The marking is located on the rear panel and says this prod-
uct has been classified as Class 1. It means that there is no
danger of hazardous radiation outside the product
CLASS 1
LASER PRODUCT
The marking of products using lasers (Except for some areas)
For the United Kingdom
Factory fitted moulded mains plug
1. The mains plug contains a fuse. For replacement, use
only a 13-Amp ASTA-approved (BS1362) fuse.
2. The fuse cover must be refitted when replacing the
fuse in the moulded plug.
3. Do not cut off the mains plug from this equipment. If
the plug fitted is not suitable for the power points in
your home or the cable is too short to reach a power
point, then obtain an appropriate safety approved ex-
tension lead or adapter, or consult your dealer.
If nonetheless the mains plug is cut off, remove the
fuse and dispose of the plug immediately, to avoid a
possible shock hazard by inadvertent connection to
the mains supply.
IMPORTANT : The wires in the mains lead are coloured in
accordance with the following code:
Blue
: Neutral
Brown : Live
Do not connect those leads to the earth terminal of a three-
pin plug.
Other countries ....................................... AC 230 V
Safety precautions
WARNING : TO PREVENT FIRE OR ELECTRIC SHOCK, DO NOT
EXPOSE THIS APPLIANCE TO RAIN OR MOISTURE.
CAUTION: TO REDUCE THE RISK OF ELECTRIC SHOCK, DO NOT
REMOVE COVER (OR BACK). NO USER-SERVICEABLE PARTS IN-
SIDE. REFER SERVICING TO QUALIFIED SERVICE PERSONNEL.
RISK OF ELECTRIC SHOCK
DO NOT OPEN
THE LIGHTNING FLASH WITH ARROWHEAD SYMBOL, WITHIN AN EQUILATERAL TRI-
ANGLE, IS INTENDED TO ALERT THE USER TO THE PRESENCE OF UNINSULATED
"DANGEROUS VOLTAGE" WITHIN THE PRODUCT'S ENCLOSURE THAT MAY BE OF
SUFFICIENT MAGNITUDE TO CONSTITUTE A RISK OF ELECTRIC SHOCK TO PERSONS.
THE EXCLAMATION POINT WITHIN AN EQUILATERAL TRIANGLE IS INTENDED TO
ALERT THE USER TO THE PRESENCE OF IMPORTANT OPERATING AND MAIN-
TENANCE (SERVICING) INSTRUCTIONS IN THE LITERATURE ACCOMPANYING THE
APPLIANCE.
CAUTION
Before applying power
Inside this laser product, a laser diode(s) exceeding Class 1
laser radiation is/are contained as alerted by the internal
caution label shown above. To avoid exposure to laser
beams, do not open the cover.
CAUTION
INVISIBLE LASER RADIATION
WHEN OPEN. AVOID EXPOSURE
TO BEAM.
background image
3
Before applying power
Preparation
section
CD
= MD high-speed dubbing
This convenient feature enables simple, quick dubbing from a CD to an MD (either single track or all
tracks in a CD).
MD Long Play modes
With the long-hour recording/playback modes (LP2, LP4) based on ATRAC3 (MDLP), digital long-hour re-
cording/playback for twice (about 160 minutes*) or 4 times (about 320 minutes*) the normal recording/
playback time is now available. (* Data using a 80-minute disc.)
Versatile timer features
÷ O.T.T. (Operate easy To use Timer) :
This timer setting is executed only for an hour (and for once) when the set start time comes.
÷ Timer playback, timer recording :
Two timer programs (PROG.1, PROG.2) are available for timer playback (AI timer playback) or timer recording.
(With the AI timer playback, the playback volume increases gradually after the start of timer playback.)
÷ Sleep timer :
This timer turns the unit off automatically when the set time has elapsed. It is convenient for example for
falling asleep while listening to music in the night time, etc.
This unit is equipped with a demonstration function (only display). The demonstration consists of se-
quential change of display and indicators showing the operations, but the audio itself does not change.
The demonstration function can be cancelled as follows.
÷ This operates automatically when a power failure
has occurred or the plug of the power cable has
been pulled while the power was ON.
In regard to demonstration
"DEMO ON" (To execute demonstration):
After turning power ON, press and hold the set/
demo key (for more than 2 seconds).
"DEMO OFF" (To cancel demonstration):
Press the set/demo key during demonstration.
Convenient recording features
Versatile recording features are provided, allowing the user to select desired one for each purpose.
÷ One-touch recording :
Pressing a single key starts recording of all tracks or a single track in a CD.
÷ TWIN recording :
Simultaneous recording of CD playback onto both MD and tape.
÷ Program recording :
Your favorite tracks can be recorded in any desired order.
set / demo
Special features
background image
4
Before applying power
Preparation
section
FM indoor antenna (1)
Accessories
AM loop antenna (1)
Remote control unit (1)
Batteries (R6/AA) (2)
Unpacking
Unpack the unit carefully and make sure that all the accessories are present.
If any accessories are missing, or if the unit is damaged or fails to operate, notify your dealer immediately. If the unit was
shipped to you directly, notify your shipper immediately. Kenwood recommends that you retain the original carton and
packing materials in case you need to move or ship the unit in the future.
Keep this manual handy for future reference.
Please confirm that the following accessories are present.
background image
5
Before applying power
Preparation
section
Before applying power .......................................2
Safety precautions ........................................................ 2
Special features .................................................................... 3
System connection .................................................... 6
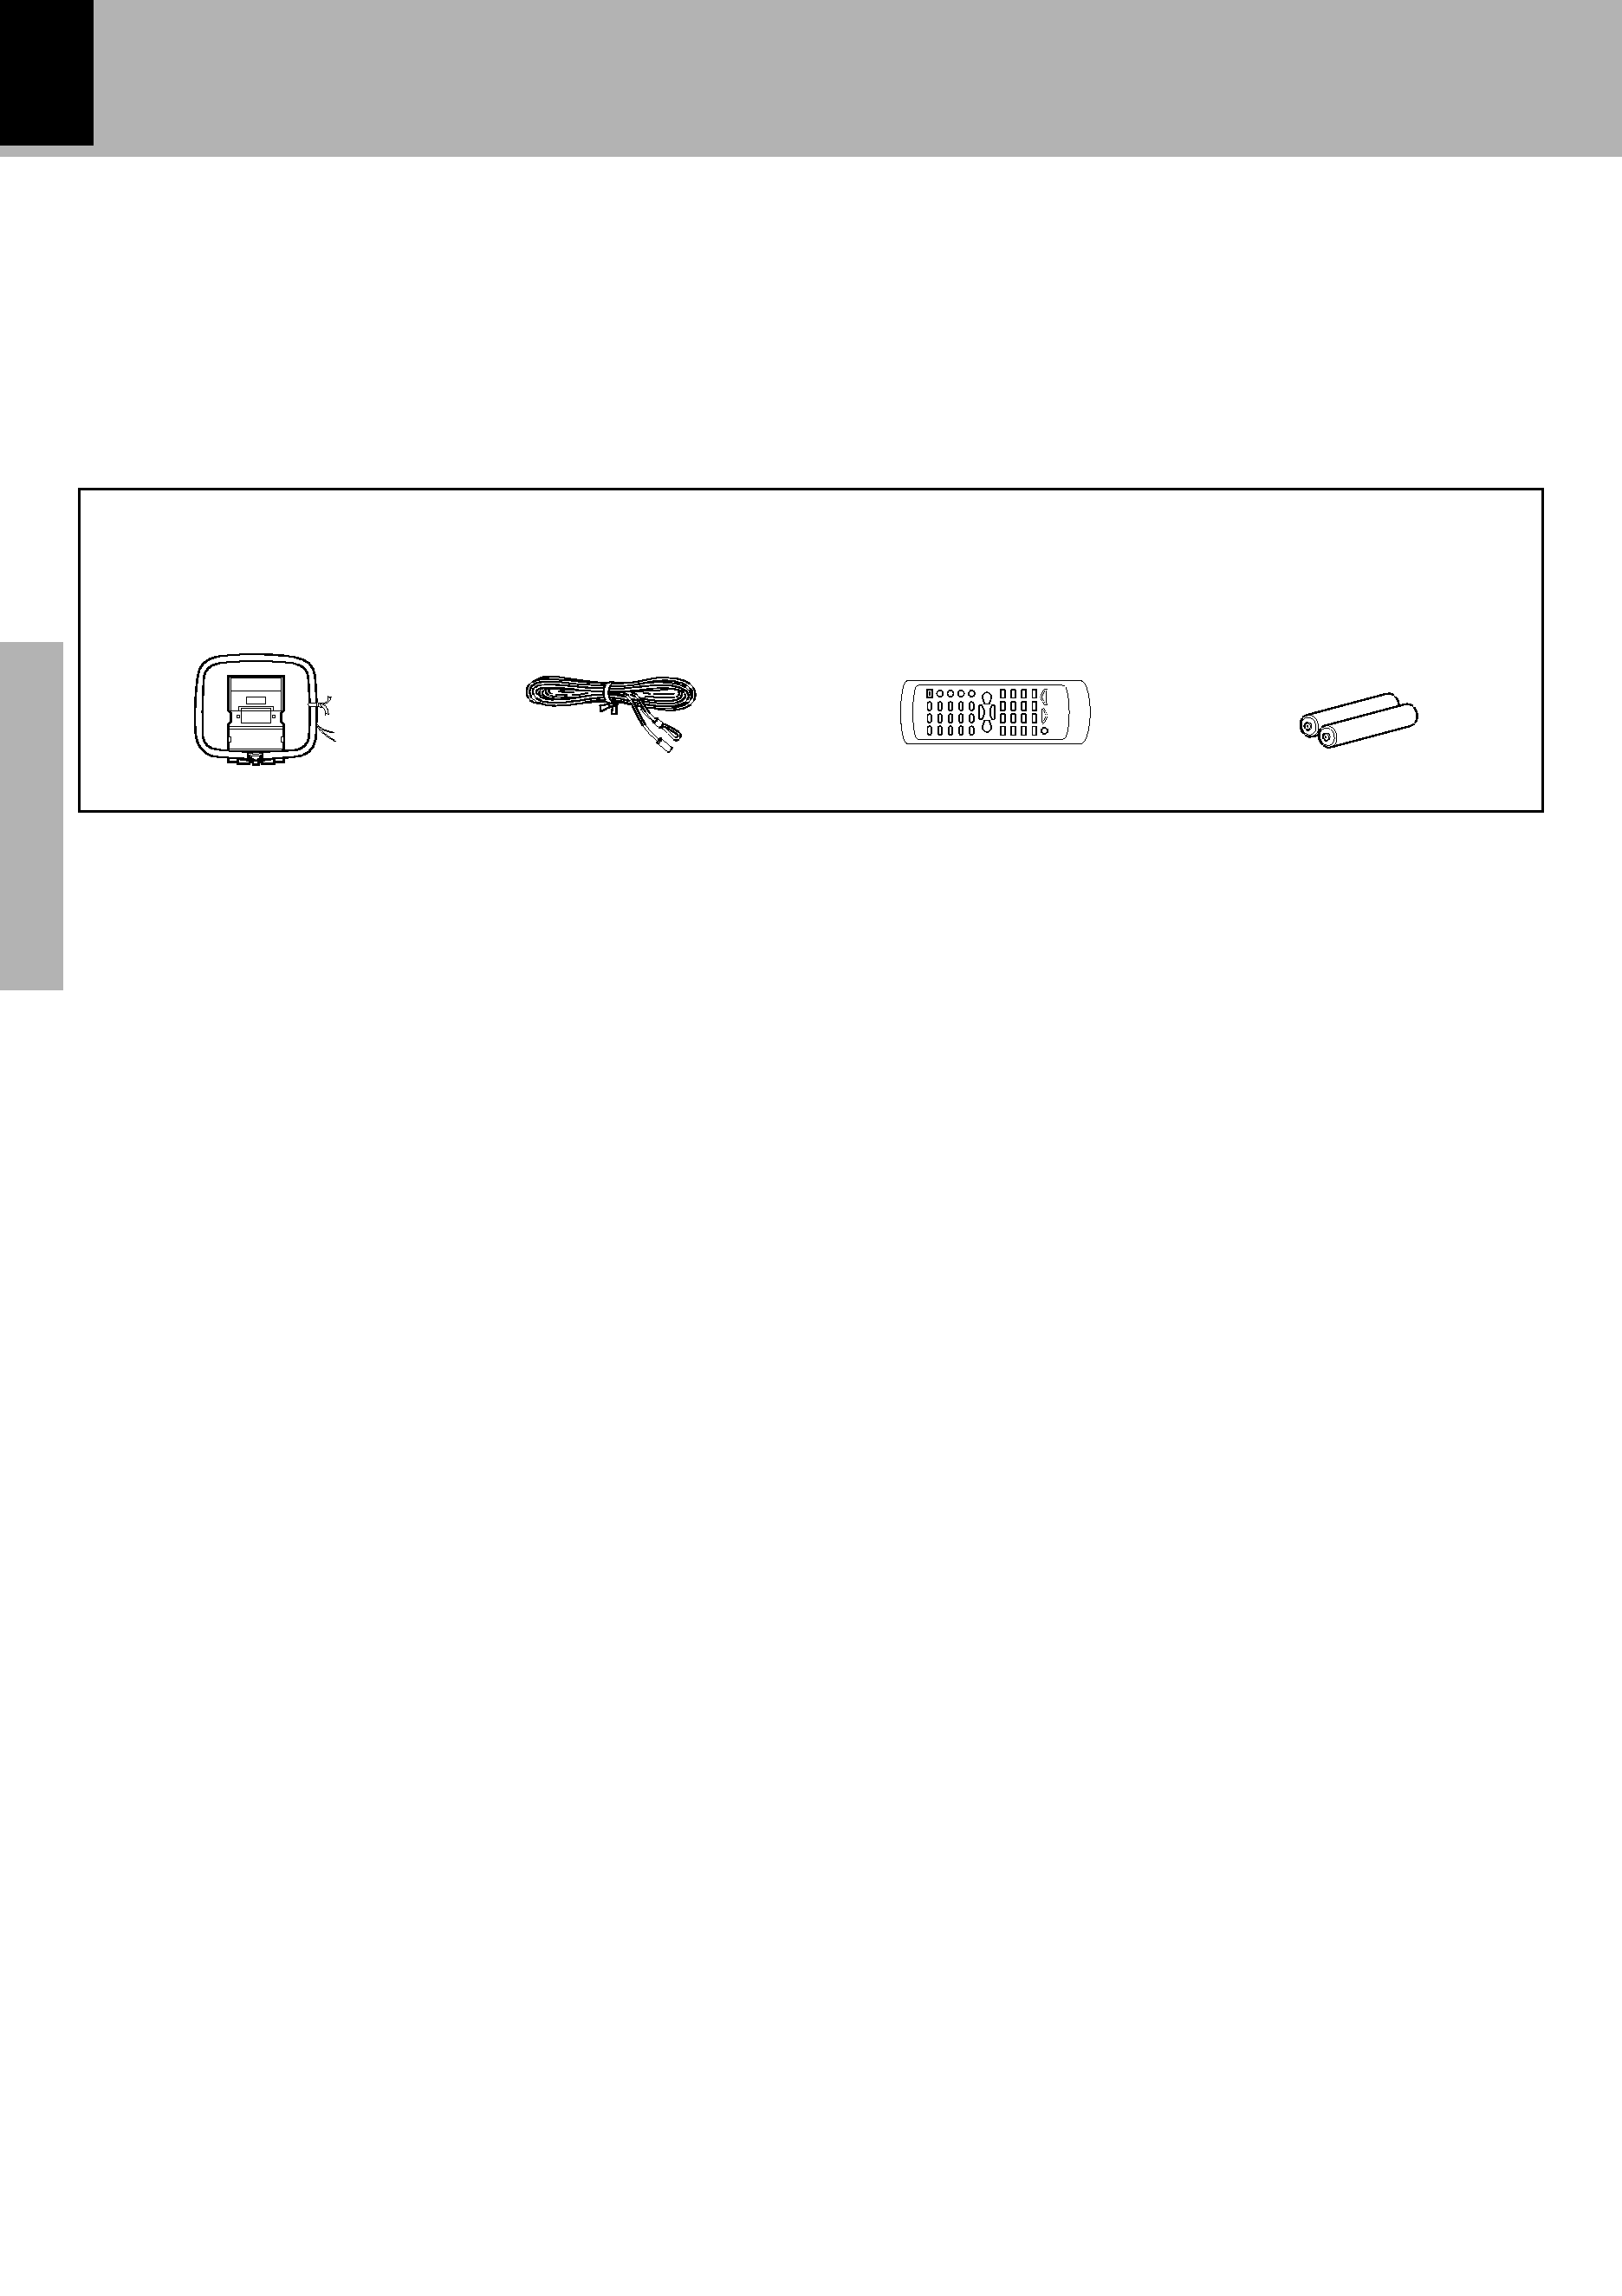
Connection of the System Accessories ............................ 6
Connection of Other Accessories
(Commercially Available Parts) ..................................... 8
Controls and indicators .............................................9
Display ..................................................................................... 9
Main unit ............................................................................... 10
Operation of remote control unit ...................................... 12
Basic use method ..................................................... 14
Playback of CD ......................................................... 16
Playback of Mini Disc ............................................. 19
Playback of tape ....................................................... 22
Receiving broadcast station .................................. 24
Collective presetting of stations ...................................... 25
Channel space setting ........................................................ 25
Tuning a non-preset radio station
(Auto tuning, Manual tuning) ....................................... 26
One-by-one presetting
(Manual preset) ............................................................... 26
R.D.S. (Radio Data System) ..................................... 27
Searching for a desired program type
(PTY search) ..................................................................... 28
Recording on MD ..................................................... 30
Stereo long play recording/playback of MD ................. 33
Recording on TAPE .................................................. 34
Various CD/MD playback features ....................... 37
Listening to the desired sequence
(program playback) ........................................................ 37
Repeated playback ............................................................. 39
Playing tracks in a random order
(random playback) .......................................................... 40
Caution : Read this pages marked
carefully to ensure safe operation.
Convenient recording methods ............................. 41
High-speed recording (CD
=MD) ..................................42
One-touch edit recording
(CD
=MD/ CD =TAPE) .................................................44
Twin recording onto MD and tape
(TWIN REC) ....................................................................... 46
Program recording
(CD
=MD / CD =TAPE / TWIN REC)..........................48
Program recording (MD
=TAPE) ....................................50
MD Edit Functions .................................................... 51
Moving multiple tracks (QUICK MOVE) .......................... 52
Moving a single track (MOVE) .......................................... 54
Erasing multiple tracks (QUICK ERASE) or erasing all
tracks in disc (ALL ERASE) ................................................ 56
Erasing a single track (ERASE) ........................................ 58
Combining two tracks (COMBINE) .................................. 59
Dividing a track (DIVIDE) ................................................... 60
Assigning a title to a disc or track .................................. 62
Entering characters in Title Memo (TITLE MEMO) ...... 66
Copying a title (TITLE COPY) ............................................. 67
To delete the edited contents (EDIT CANCEL) ............... 68
Listening to an AUX input source .......................... 69
Clock adjustment ..................................................... 70
Timer operation ........................................................ 71
Sleep timer (SLEEP) ............................................................ 71
Setting the O.T.T. timer ....................................................... 72
Setting an everyday timer program
(PROG. TIMER) ................................................................. 74
Important Items ......................................................... 77
Maintenance ........................................................................ 77
Reference .............................................................................. 77
In case of difficulty .................................................. 80
Specifications ........................................................... 84
Preparation section
Basic section
Knowledge sections
Contents
Application section
Application
section
Basic
section
Knowledge
sections

Reviews

There are no reviews of this manual yet.